Tag Archives: terrain

Quick Fantasy Scenery

We had our first game of Frostgrave last night, for which I used a few of my 17th C/ECW figures, because why not? As usual, I managed not to get a single photograph during the game.

I’ve decided to go with a “Greengrave/Forestgrave” theme instead of the default Frost- part of Frostgrave, so that we can keep using our current scenery rather than starting from scratch with winter stuff.

fantasy bits
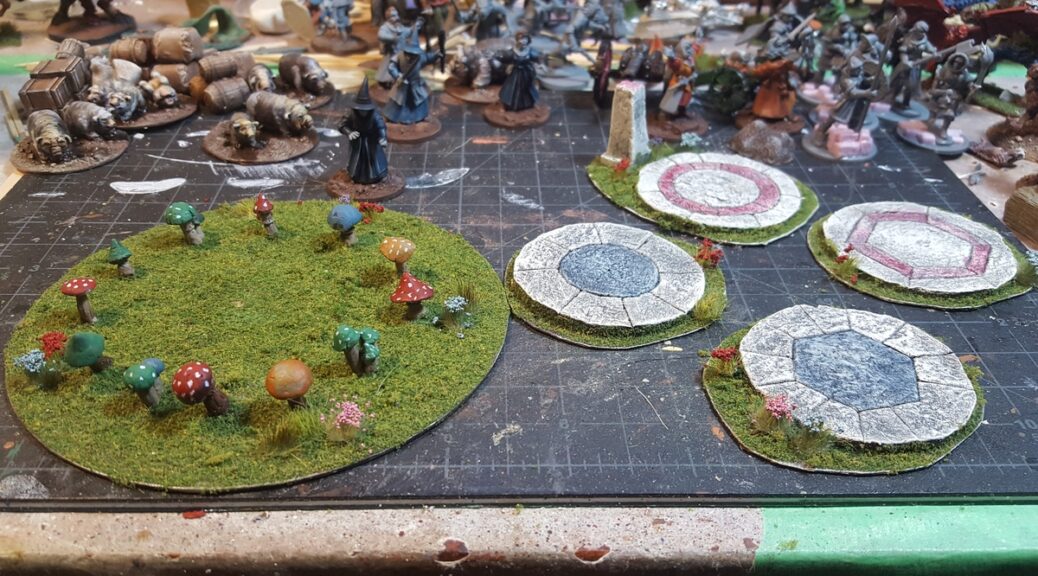
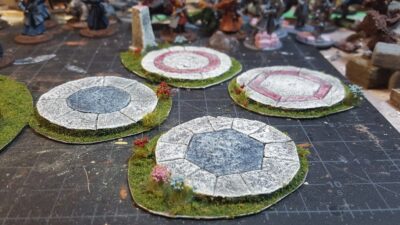
Four “teleportation discs” and a really gnarly looking fairy ring, today’s work. Click for larger.

One of the FG scenarios calls for a quartet of 2″ teleportation discs set up around the board, so I decided to whip those up today. The discs themselves are pink styrofoam, based on scraps of plastic card. Quick and easy scenery, a few hours from start to the current state shown here. They could well serve all sorts of purposes aside from just teleportation discs, and I’m sure they will.

fantasy bits 2
Four pieces of fantasy scatter, closer up. Click for larger.

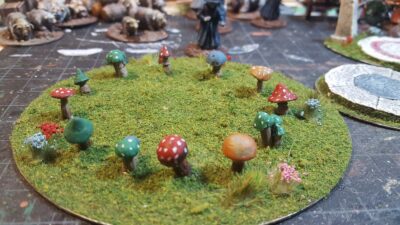
The other piece I created today started with the resin mushrooms from Bad Squiddo games I got a few weeks ago. I’ve been painting them up whenever I have leftover paint, got them finished today while waiting for the discs above to dry, and decided to put together a really, really gnarly fairy ring that, even more so than most others, you really do not want to enter. That’s a 28mm Frostgrave witch on a 25mm base behind the fairy ring; most of the mushrooms/toadstools are at least waist high on a human.

muschroom ring
Any fairy that comes out of this particular fairy ring is probably not one of the good fairies. At all. Click for larger.

This might feature as some sort of marker in a game eventually, but for now it’s just some colourful scatter terrain to fill in a blank spot on the table and possibly worry players!

We enjoyed our single game of Frostgrave so far, and I’ll try to get a couple of photos tomorrow while we also try to get fewer rules wrong on our second outing!

Loot From Bad Squiddo

Ordered a few things from the excellent and varied ranges of Bad Squiddo Games back in March; things took longer to get from the UK to here than I’m used to, almost like some major world event is disrupting trans-Atlantic flights or something. However, everything was dispatched from the UK in good time and I am certainly not going to blame Anne of Bad Squiddo or the various postal services involved for a lack of air mail capacity…

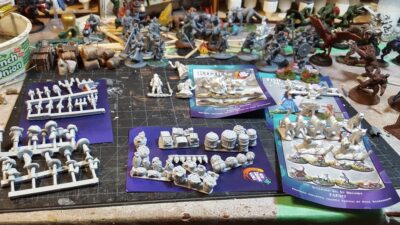
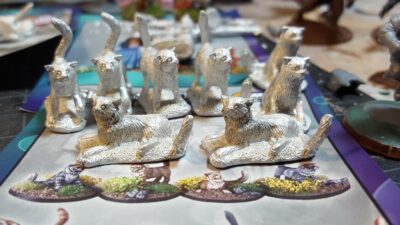
I got a fairly mixed bag of stuff. A few ladies that will probably show up mostly as players or civilians in my English Civil War/Weird ECW games, a fine herd of pigs and some farm scenery, a bunch of cats, and some small scenery to add detail here and there, including a whole lot of mushrooms and toadstools for suitably creepy weird fantasy/horror forest bits.

Bad Squiddo haul
Most of the Bad Squiddo haul all laid out. Clockwise from lower left: mushrooms/toadstools, candles, several female characters, cats, fish seller w/ cats, skoggskattar, and finally in front centre a batch of food. Click for larger.

Skoggskattar
Skoggskattar – giant Scandinavian cats. Compare to the 28mm Warlord guy jogging past them on the right right there. Click for larger.

Everything is really cleanly cast and beautifully sculpted. The scenics are mostly by the very talented Ristul and in an interesting slightly flexible grey resin; the white metal sculpts are by a variety of sculptors and all really well done.

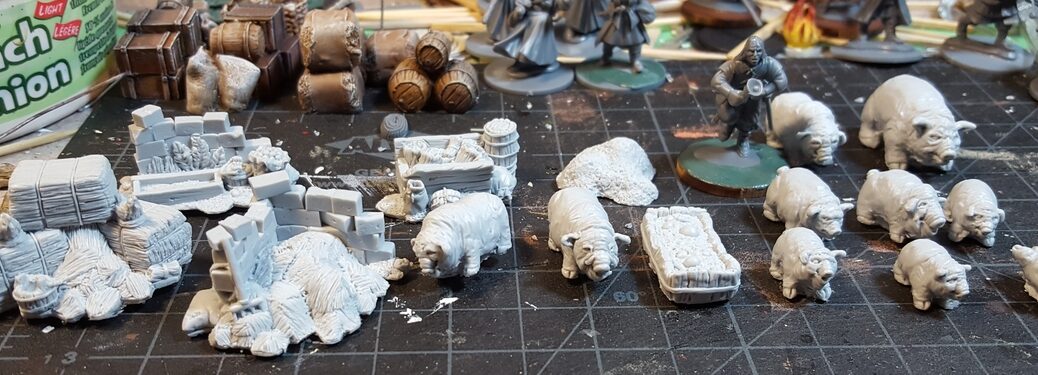
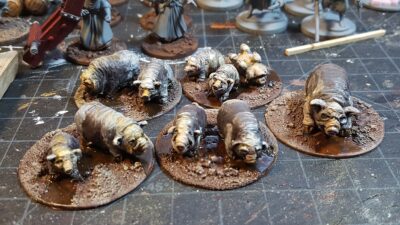
Not pictured above is the pigs, my favourite single part of this purchase. I indulged in the Pigtopia bundle deal which got me ten pigs and six bits of pigsty/farm scenery. I’ve already painted the pigs up, basing them in small groups on 40mm bases.

pigs!
Bad Squiddo pigs! Ten pigs, six pieces of pig-related scenery. Click for larger.

I painted the pigs up to vaguely resemble one of the oldest heritage breeds of pig in the UK, a black-and-white breed that I now can’t find or remember the name of. Anyway, they painted up nicely and I look forward to watching them chase players around the table or be part of someone’s provisions on the hoof in a scenario.

painted pigs
Pigs all painted up, all on 40mm bases. Just a bit of greenery to add and they’re all done. Click for larger.

That’ll do, pig, that’ll do.

Links of Interest, 27 January 2020

First links of interest of the new year – and the new decade, come to that!

Dana Howl has a fairly new YouTube channel that I discovered via Twitter. She’s a great antidote to the shouty beardy death metal school of YT videos, being soft spoken and very, very dry humoured. Her favourite video of mine so far is her introduction to using glazing & glaze medium on miniatures, which is a new technique to me. I’ve picked up a small bottle of glaze medium from my local art supply store and while I’ve not used it much yet, it’s another very useful tool in anyone’s painting toolbox. I think it’ll be especially useful on large monsters. I’ve got a huge Reaper Bones dragon that I got in one of their Bones Kickstarters that I should start painting one of these years…

Another recent (to me) find of small scale scenery is over at League of Augsburg, where Jim is building whole chunks of coastal England to sail 1:2400 scale Anglo-Dutch War ships upon. He’s actually using the same Brigade Models small scale buildings I am, and they work just fine in a scale half the size of the one I’m using them in.

I’m currently attempting to paint impossibly tiny 1:1200 coastal warfare boats without going mad or blind, and Mal Wright’s excellent little handbook on Royal Navy WW2 paint jobs British and Commonwealth Warship Camouflage of WW II – Vol I has been incredibly useful. It’s available in ePub (the linked version) and traditional dead-tree from Pen & Sword in the UK; I went for the ePub because I didn’t feel like coughing up for S&H for one book, but I might actual also buy the “real” book at some point. Mr. Wright is apparently currently working on a similar volume for the Americans and Japanese in the WW2 Pacific theatre, which is awesome, and has apparently also done some work toward a German Kreigsmarine counterpart to his Royal Naval series.

More soon, including photos of those impossibly tiny coastal warfare boats!

Coastline Complete

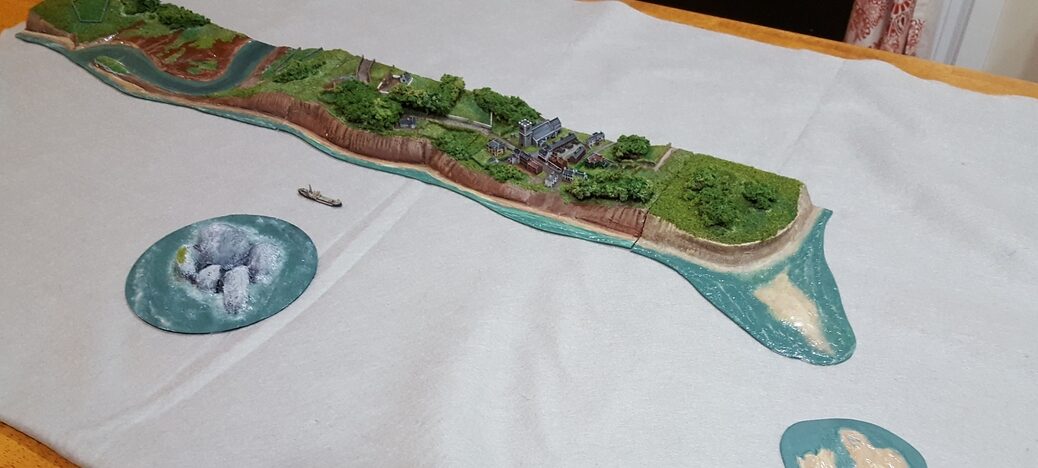
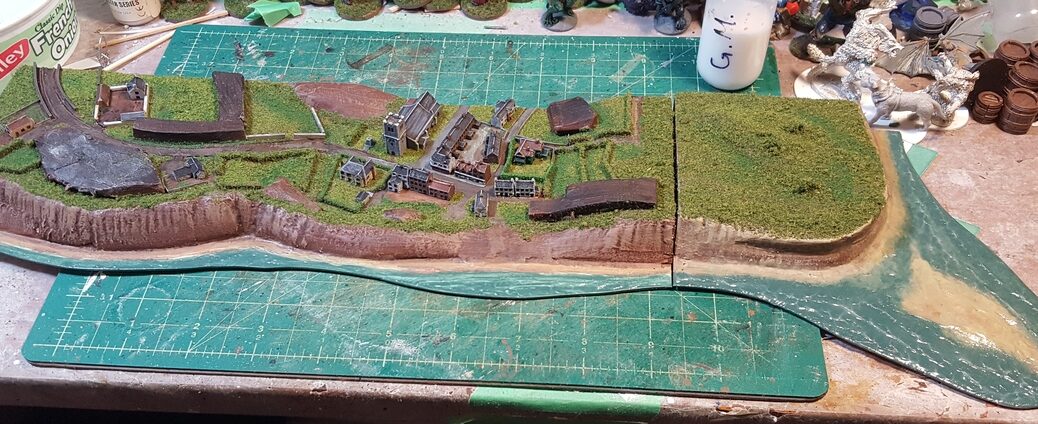
The first coastline segments are done, barring a tiny amount of touchup here and there.

coastline overview
Overview of the coastline and other bits. Click for larger.

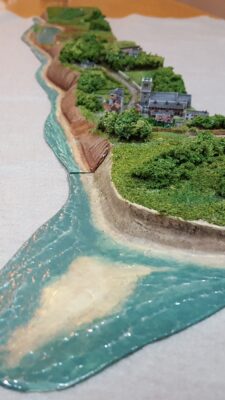
The sandbank off the headland still needs some paint and the waves done, and I need to do a bit of drybrushing along all the cliff segments to get a better colour match along the whole thing.

headland
Low level view of the coastline, starting from the headland. Click for larger.
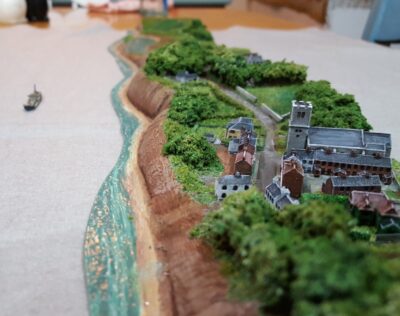
village
Low over the coastline, approaching the village. Click for larger.
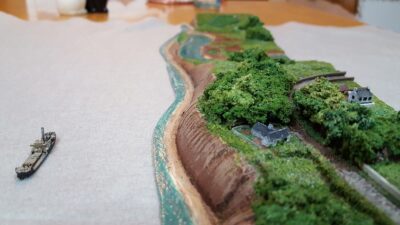
farmland
Over the village and looking at the farms and countryside beyond. Click for larger.
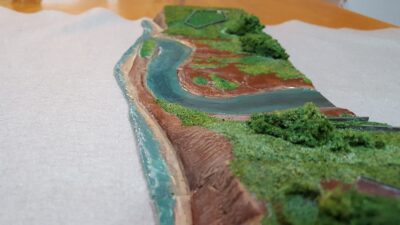
river
The last part of the finished coastline features a lazy tidal river and mudflats.

I’m planning on running this 1/1200 naval game and a big 28mm Pulp Alley game at Trumpeter Salute 2020 in April (the 17th through 19th) so I doubt I’ll do more coastal segments until after that, but in the future I do want to do several more segments, enough eventually to have one side of a table as solid coastline, so six or more feet.

Now on to the tiny ships!

A Headland for Tiny Ships

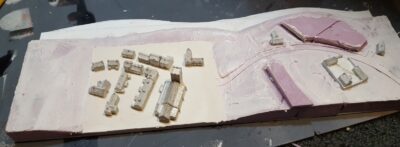
Cranked out a headland for my coastal terrain, so we can have the coastline end on-table without looking super-weird. It’s designed to go on either end of the modules, so that constrained the design considerably, but I like how it worked out.

headland in bare plaster
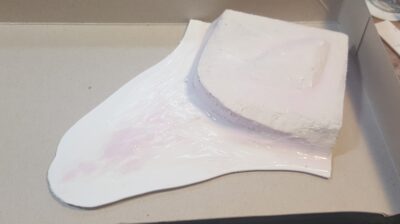
Basic headland before painting. See text for details, click for larger.


As with the larger coastal sections, the base is 1mm (.040″) plastic card cut down and sanded, with a chunk of half-inch styrofoam insulation for the land. I used a couple of different grades of sandpaper to shape the landform, including the slightly undercut eroding cliff faces, which I really like the look of.

After that I covered the whole thing with a 1:1 mix of premixed drywall plaster (the pink stuff) and white glue, smoothing and shaping it with my fingers to cover the styrofoam, smooth out the sanding marks on the cliffs, and shape the sandbank in front of the point.

painted finished point
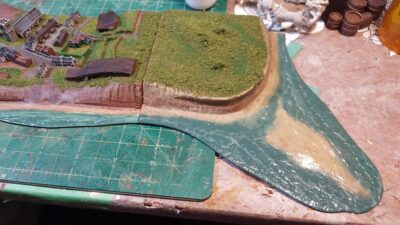
The headland basically finished. Click for larger.

Painting and gloss gel for wave effects went fairly quickly, with a dose of my usual flock mixes on the land side. Because this headland section has to connect to any end of the other coastal sections, and I (deliberately) didn’t run roads off the ends that limited what I could realistically put on this piece. So it’s just scrub, cliffs, and ocean.

headland in context with village
The headland next to the village module. Click for larger.

Finally, a quick shot of the new headland next to the village module, which is still awaiting woodland sections. I can see I need to do a little bit more drybrushing on all the cliff sections together to match them up, but otherwise everything looks good together. The gap between the modules is less obvious when they’re properly in place; here the headland is tipping off the edge of my cutting mat and making the gap look giant!

I’ve had a bit of setback with the river section – glue accident while putting flock down – so it’s back to finishing that off in the next few days then I need to actually do the wood canopy sections to call this round of tiny naval terrain finished!

I have to admit to being straight-up intimidated to start painting the 1:1200 Last Square coastal naval boats. They’re tinier than anything I’ve painted in years and incredibly detailed. I’m not kidding when I say I own 28mm figures with cruder details than these tiny, tiny ships, most of which can balance on a fingertip.

Small Buildings & Tiny Ships, Part Three

A green and miniature land! The first two coastal modules are finished, except that I’m still mucking about with forest canopy solutions, so those aren’t done yet either. There is also the chance of me being (more) obsessive and going back to add even more details – cars on the roads and sheep in the fields, maybe?

Imaging that the odd brown-black blocks in the following photos are solid woodland canopy, please.

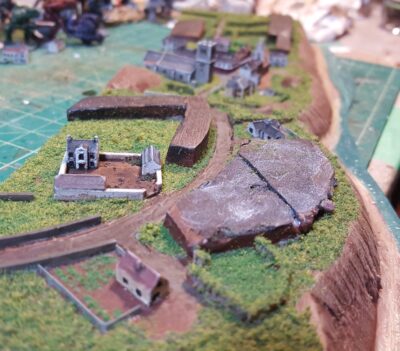
tiny village 1
The farms outside the village. Note vegetable garden in the nearest farm. Click for larger.
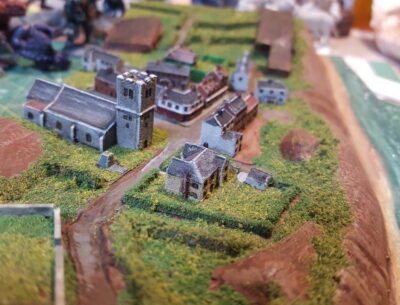
village 2 closeup
The village up close, looking down the slope. Note war memorial for the Great War next to the church. Click for larger.
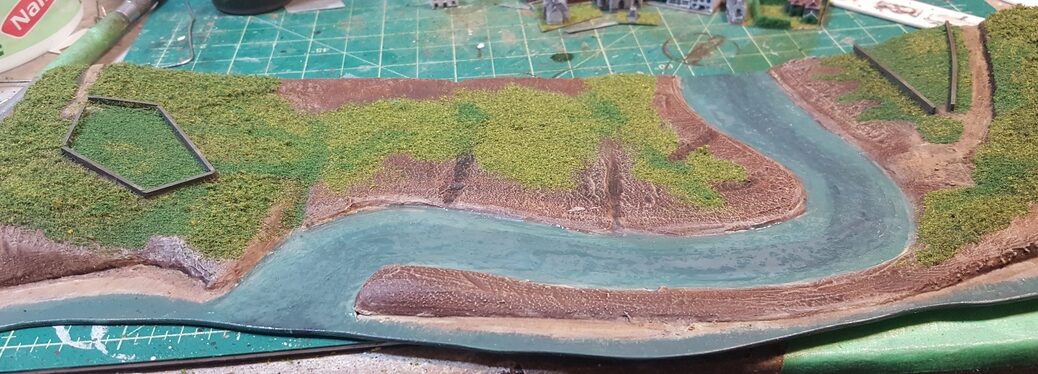
river module
The river module finished except for trees, as with the village, and some more gloss varnish over the river itself. Click for larger.

Incidentally, for some other high-detail microterrain work that covers whole tabletops, not just slivers of coastline, go feast your eyes on the Münsterland Wargaming English blog’s 2mm archive. The towns are all amazing, and the autumn coloured table (for an early winter Franco-Prussian war battle) is gorgeous.

I’ve got a headland module underway now; no photo because it’s currently a slightly glossly white blob under plaster and glue. These three will let me end the coastline on-table sensibly, and the headland is designed to fit at either end of the coast. I’ve got definite plans for at least two more full size coastal sections, but first I’m going to paint boats!

Small Buildings & Tiny Ships, Part Two

Painting up the Brigade Models tiny English buildings turned out to be ridiculously fun. They’ve got all sorts of great detail and really reward a little bit of extra effort beyond a basecoat and drybrush, although you could turn out perfectly usable buildings that way too.

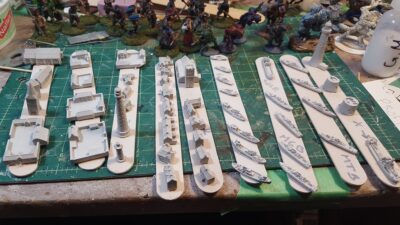
1/1200 ships and buildings all primed
Buildings and boats all primed and ready to be painted. Click for larger.

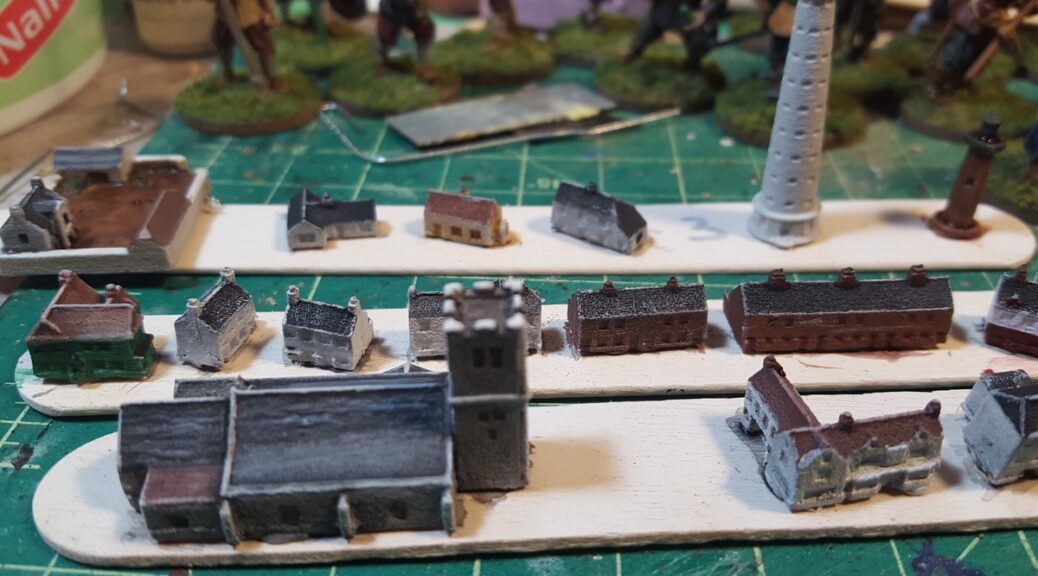
Above is everything I primed in this batch, including a number of buildings I don’t intend to use right way and all of the British 1/1200 boats and the two coastal merchant vessels I bought from Last Square in December for this project. Everything is mounted on tongue depressors (craft sticks) that are 6″ long and about 3/4″ wide, just for scale. Small buildings and tiny ships, indeed!

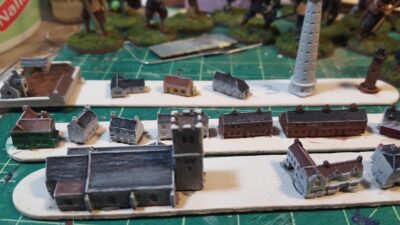
tiny buildings in progress
Painting buildings in progress. Click for larger.

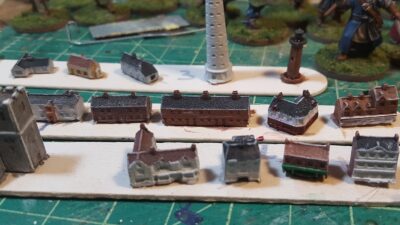
more tiny buildings in progress
More buildings in progress. Click for larger.

The only thing left to do on most of the buildings now is to go in with black and darken all the windows, and then some cleanup here and there. I’m going to be mounting some of the buildings on thin plastic card to make it easier to add garden walls and similar details, and then we’ll get onto flocking and detailing the actual coastal pieces last seen mostly painted in the previous post.

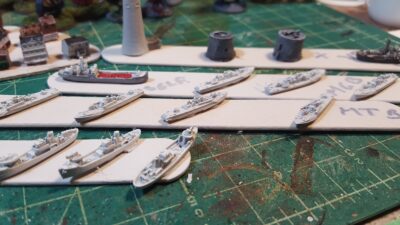
British WW2 coastal combatants
Some of the British coastal combatants & merchants from Last Square. Click for larger.

Finally, because this is supposed to be a naval wargaming project, here’s a look at some of the Royal Navy ships & boats from Last Square, along with two coastal merchant ships. In the foreground are three anti-submarine or minesweeping trawlers, then four Fairmile D Motor Torpedo Boats. The third stick back has Fairmile D Motor Gun Boats and (with the red hatch covers) a coastal merchant vessel. In the background right is the stern of another, larger coastal tanker, as well as two Martello towers from Brigade Models.

Small Buildings & Tiny Ships

Progress on my naval project, last seen in November’s A Naval Diversion post. My buildings from Brigade Model’s Small Scale Scenics range and British & German ships from Last Square’s Figurehead 1/1200 Coastal Forces line all showed up before Christmas, but aside from doing some quick and basic cleanup of most of the castings I didn’t do anything with them until after Christmas.

The scenery plan for this project is fairly simple, a set of modular coastal strips. After some experimenting with the Brigade buildings I decided on 4″ wide by 12″ long modules, with roughly 3.5″ of land and half an inch of sea/beach. The base is 1mm (.040″) sheet styrene, which I buy in big 4’x3′ sheets from our local plastics shop, and then half-inch styrofoam insulation for the land on top.

coastal scenery planning
Quick graphic done up in Inkscape to explore options for coastal modules. The left-hand trio were 3″ deep, the right-hand set 4″. Click for slightly larger.

Because I’d never done any scenery this small before, I grabbed a scrap of MDF and did up a quick test piece. A lot of flock and foam foliage is too coarse for 1/1200 scale stuff, where 1mm equals 4 feet, so an average human is under 1.5mm tall! I wound up picking up a couple of extra colours of fine foam flock, and I really like the look I got on my little 3″x3″ test piece.

tiny scenery test
A 3″x3″ scrap of MDF plus various foliage materials and such for a test piece of 1/1200 scale terrain. Click for larger.

So far I’ve done just two modules, but I want to do at least one more full-size module and a headland/corner module of some sort so the coast can end on the table without looking weird. The first module has a looping tidal river and not much else; the second one has a village at a low break in the coastal cliffs and farms outside the village.

village planning
Brigade’s tiny English buildings laid out on one of my coastal modules. Click for larger.


The village has a fair-size church, a small commercial area/High Street, some row houses, and a few other buildings that might be the village school or similar.

village module
The village module, mostly painted. Click for larger.


The river module will be mostly river, mud flats, scrubland, and fields, but there will be a small lifeboat station in the outer edge of the big curve. Just one or two buildings and a short dock.

river module
The river module. There will be a small lifeboat station on the right, where the road comes down to meet the river. Click for larger.

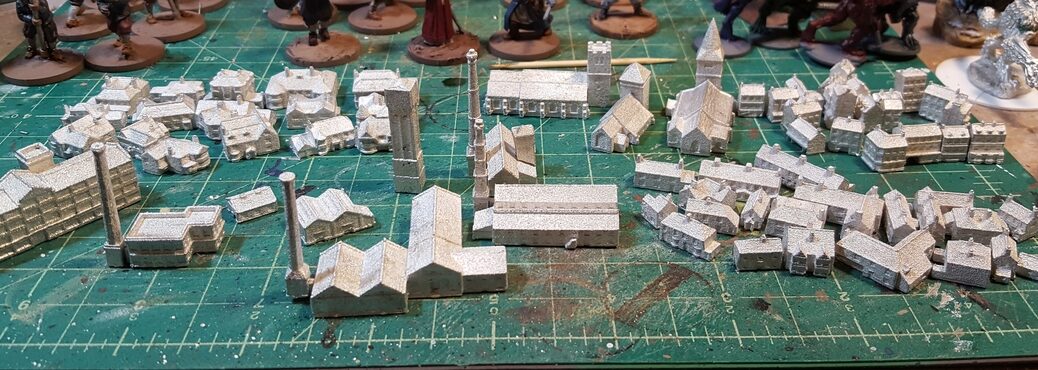
Finally (for now!) here’s a photo of all the Brigade Models buildings I bought. The group of large buildings in the left foreground is SSS-8010 Industrial Buildings, then going clockwise from there we have all of SSS-8037 English Detached Houses, SSS-8007 English Churches (three of those), SSS-8022 English Town Shops in the back corner, and finally SSS-8006 English Village Houses in the right foreground. They’re amazingly detailed little buildings, and should be awesome to paint up.

Brigade Small Scale Scenics group shot
All my current Brigade Models Small Scale Scenics English buildings all together. Click for larger.

More soon as I get into painting buildings and ships!

Links of Interest, 12 December 2019

If you’re interested in terrain building but not sure where to start, or you already craft terrain but want to step your game up, there’s a bunch of great YouTube tutorials out there these days. I’ve linked to Mel the Terrain Tutor before, but Black Magic Craft (YouTube homepage, website) is one I just recently discovered, and on his website he’s got a fantastic list of Essential Equipment with discussion of what he uses each tool or thing for and links to the various incarnations of Amazon to buy the things. Very useful regardless of your experience level.

By way of example, here’s one of Black Magic Craft’s videos on Better Stone Painting with some good stuff on getting your stone to be something other than flat grey, which is a thing I still struggle with after years (decades, gah!) of making terrain! (direct link to video, if the embed decides not to work)

Terrain is the third army, so why is it so neglected? was posted a couple of years ago (2017 sometime) but remains true and is a useful short rant on the importance of what might be my favourite part of this hobby!

Blinky blinky lights! Aircraft-style strobes on models with really simple electronic components, via Instructables. I still want to do some sort of shuttle or dropship for sci-fi gaming, might need to bump it up a notch and add lights now! Hmm, maybe a live lighthouse on the 1/1200 naval terrain I’m doing?
In the “It’s insane, I kind of want one, but storage would be a nightmare” category, Things From The Basement has a 20th Century Train Station that is 45″ (yes, forty-five inches, almost four feet) across! Some other neat stuff too including a batch of Russian buildings and scenery. There’s a fantastic fully painted and decorated version of the train station with lots of photos over on The Demo Gamers. You could run an entire pulp game just in and immediately around this thing…
Finally, from the recent (Nov 2019) Burrows & Badgers Kickstarter, a post with a trio of really nice painting tutorials all in one shot. One on tartan, one for worn leather, and one for leaf-patterned cloaks.

More on the naval gaming front soon, although expect a bit of a blogging break over the Christmas & New Years holidays as I shall mostly be out of town. On the off chance that I don’t actually blog again before leaving town, I hope my readers have excellent holidays. Happy Holidays, Merry Christmas, and so on and so forth!

Improving Old Terrain

TerranScapes has a good video on using gloss gel for water, and I also found a video on using gloss gel medium for ship wakes, so naturally I had to pick a tub of the stuff up from my awesome local art supply store, Island Blue. (shop local, folks. Local stores are always cooler, and the staff far more likely to know their stuff!)

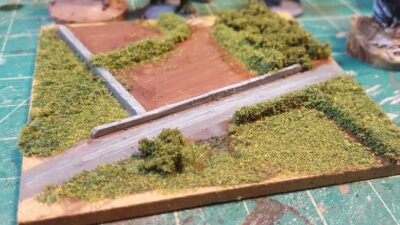
Anyway, I pulled out two of the shoreline/river bank modules I made over a decade ago (Part One, Part Two). For pieces started in June 2010 from matt board they’ve held up remarkably well, and they made ideal test subjects for learning how gloss gel medium works.

two shoreline segments w new waves
Gloss gel waves applied to two of my shoreline or river bank segments. Click for larger.

Gloss gel medium works beautifully for waves, and the main thing I learned is not to be afraid to put more on than you might think is wise, because it shrinks a fair bit when drying. It also doesn’t dry perfectly clear when it’s thick, which is fine for waves. That might be a function of humidity, according to the TerranScapes video. He talked about putting terrain pieces in a box with desiccating (silica) pellets to get everything perfectly cured and clear…

I’ve got another two or three of these modules around here somewhere, so they’ll get spruced up with gloss gel now too, eventually. I’ll also redo the foliage along the banks, and probably have to repaint the undersides to take some of the warp out of the cardboard again. Not bad for terrain that’s over a decade old!