The long-overdue fifth installment of my Build Something Contest blog posts! This one takes us from the end of Part Four, where we had the start of detail panels, no wings yet, and the cargo bay just primed.
Per BSC rules I can’t share WIP or finished painted photos yet, so there’s still going to be gaps in this build log. I have a bunch of WIP paint photos taken and will share them when the contest has begun.
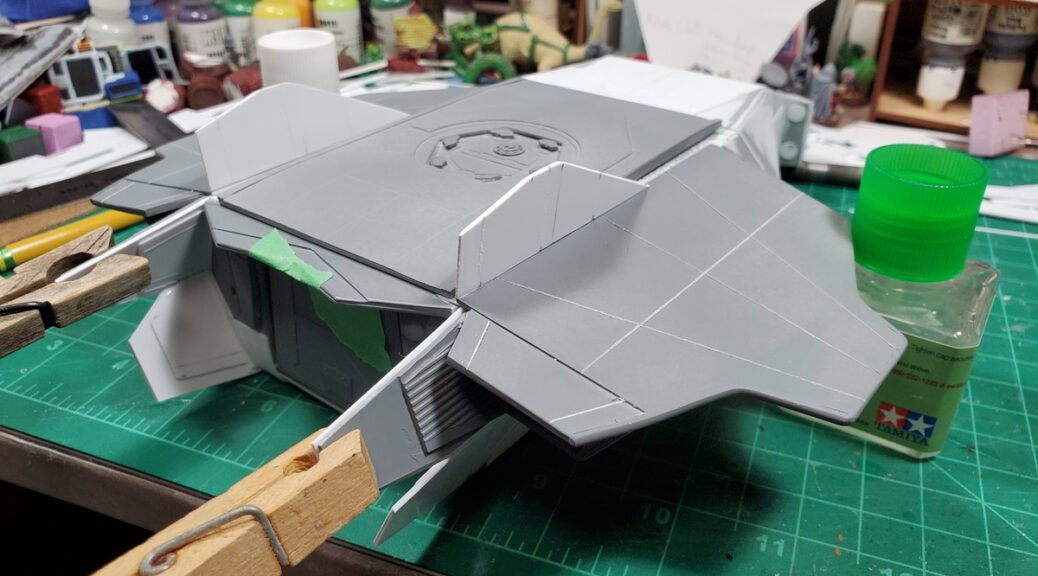
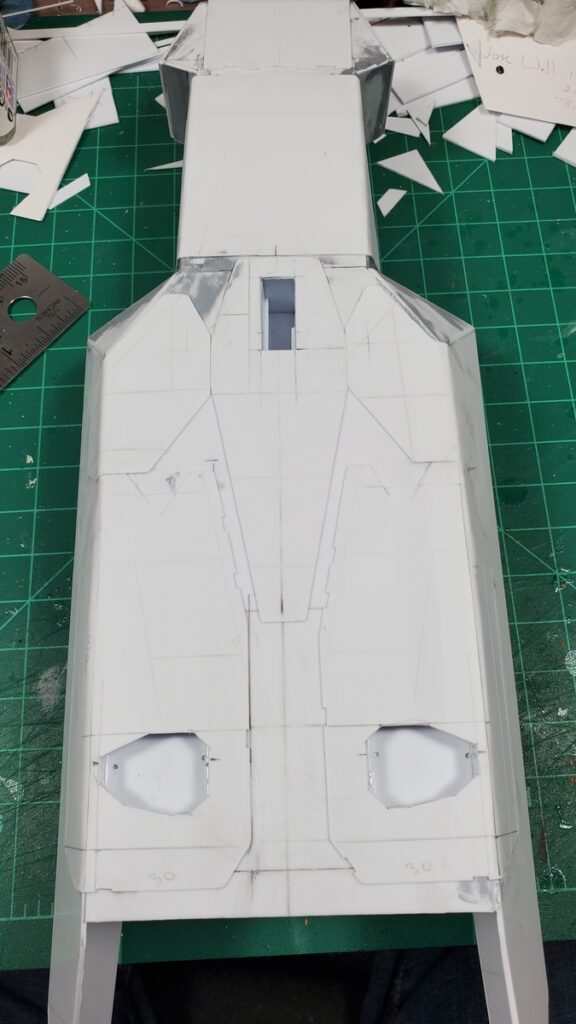
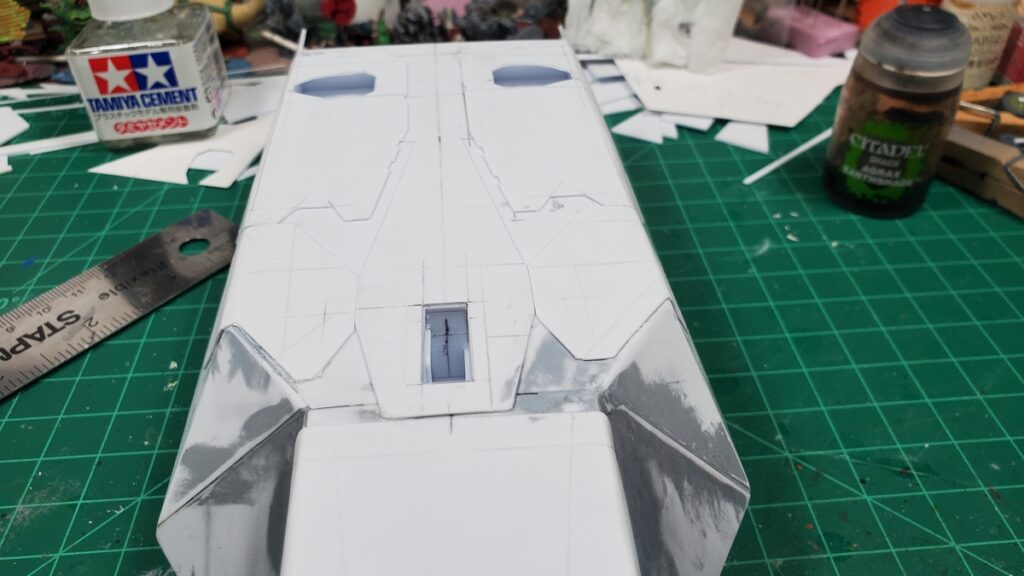
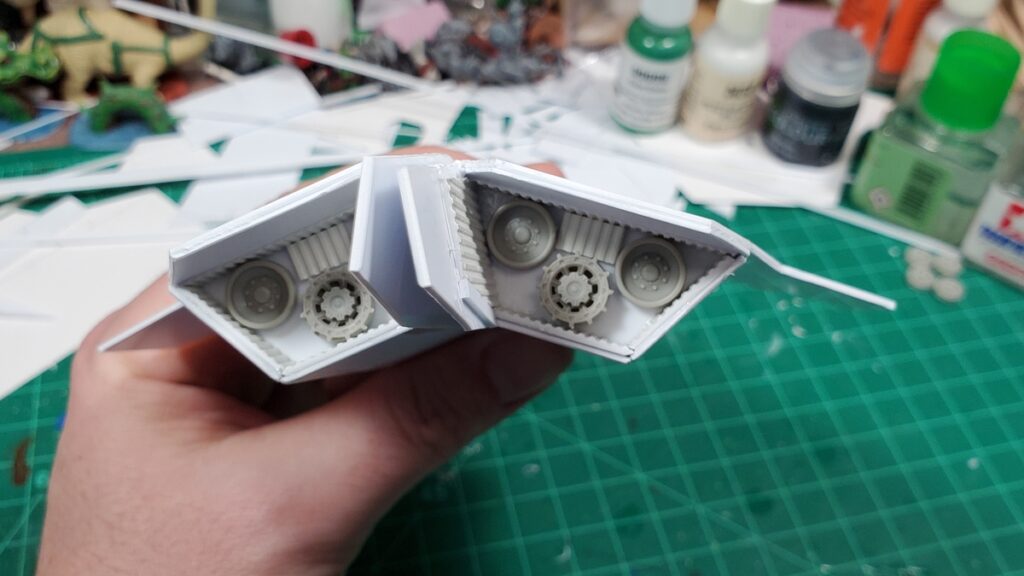
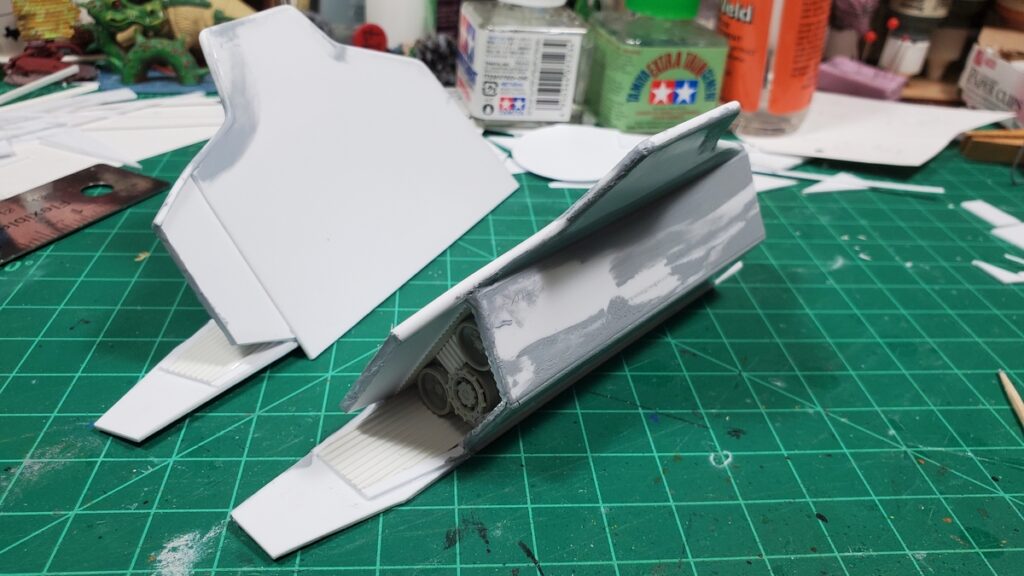
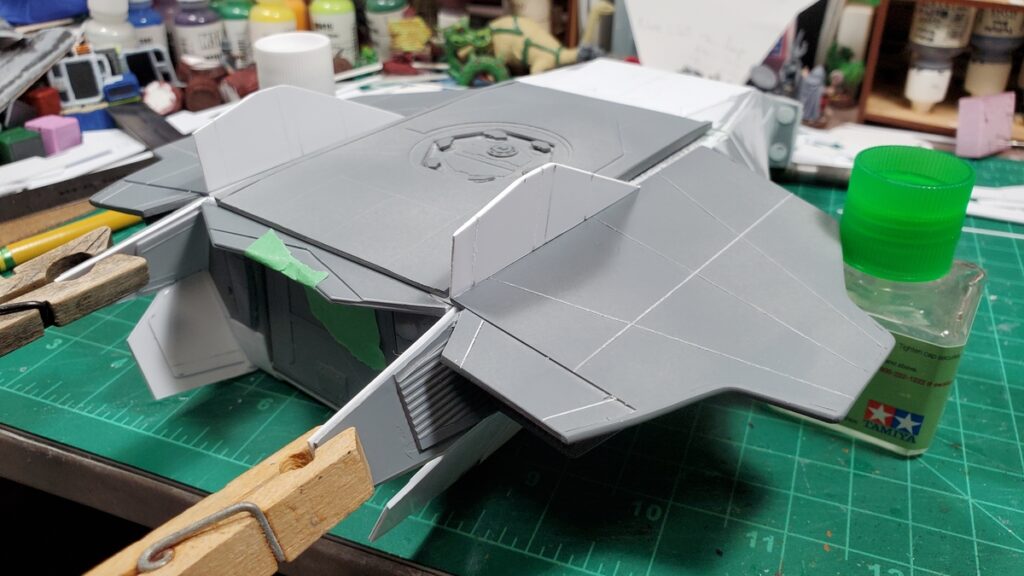
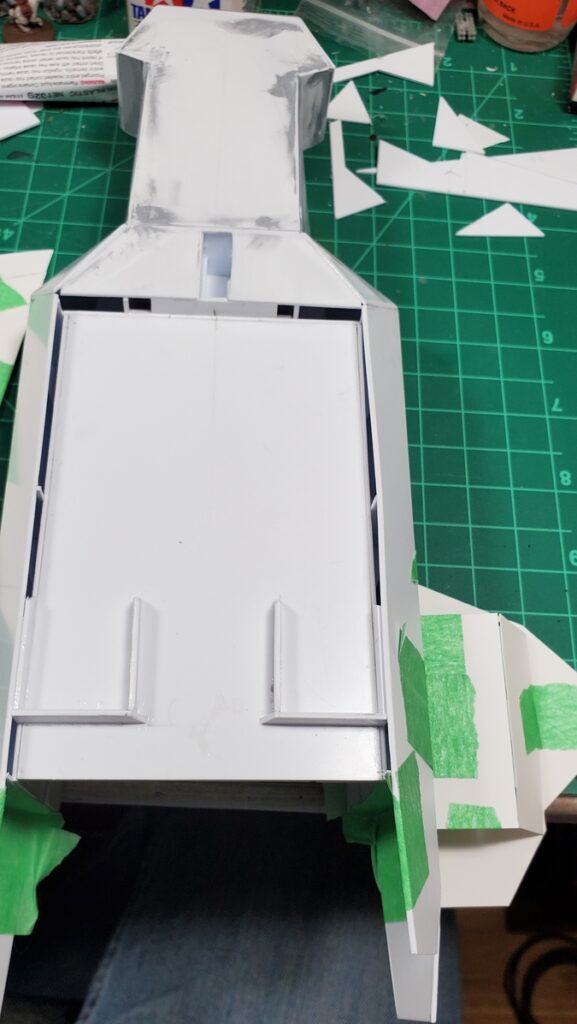
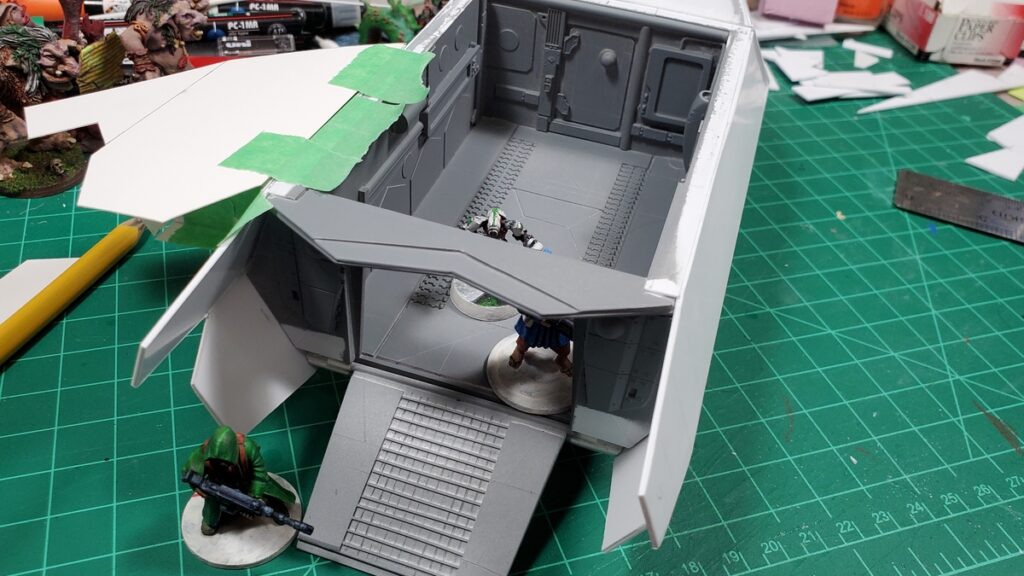
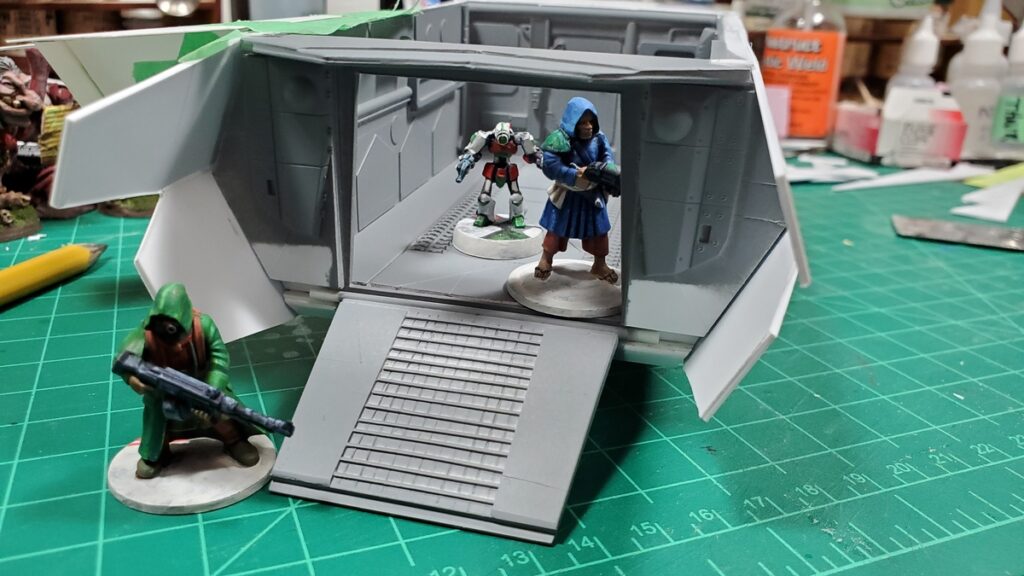
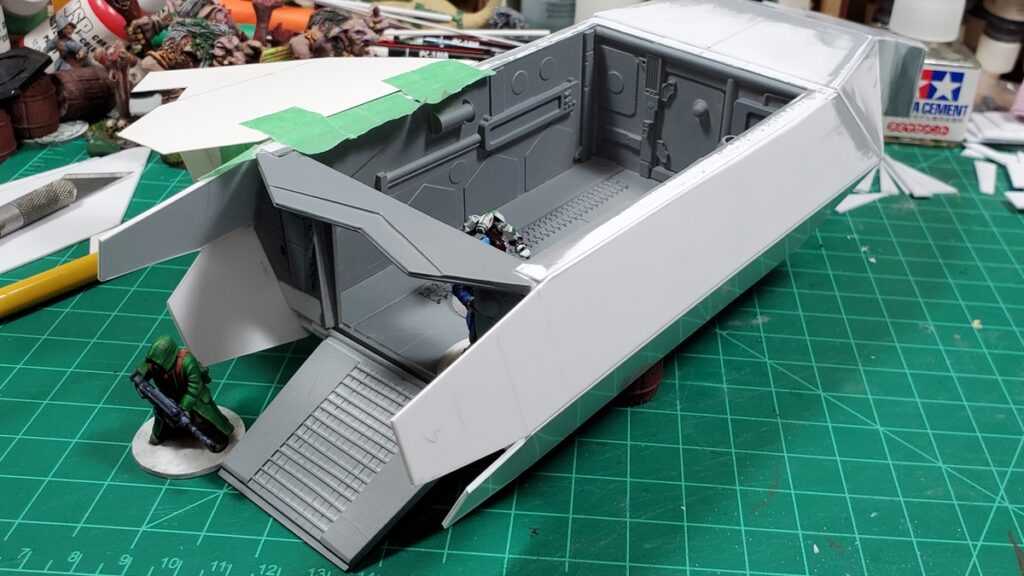
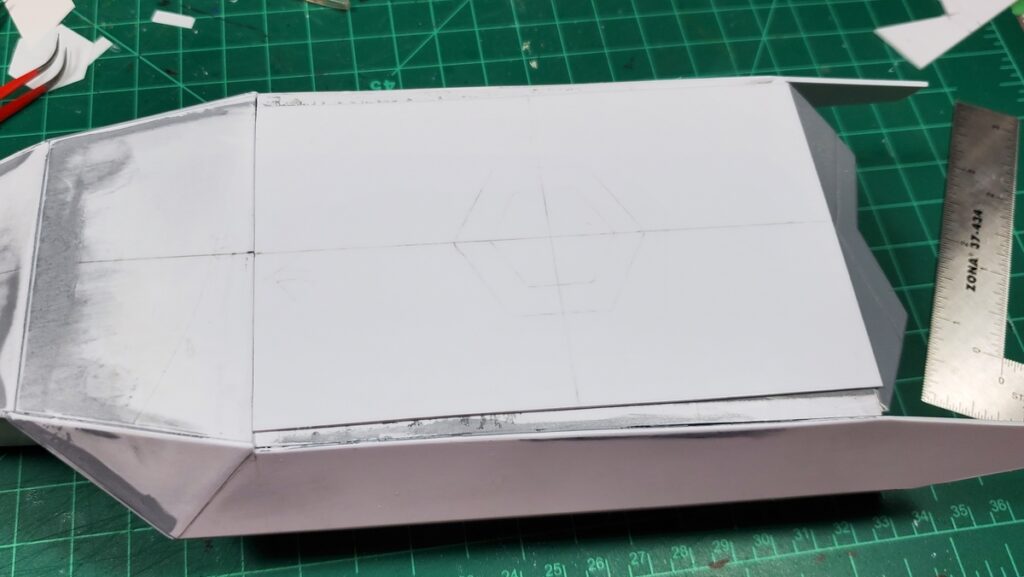
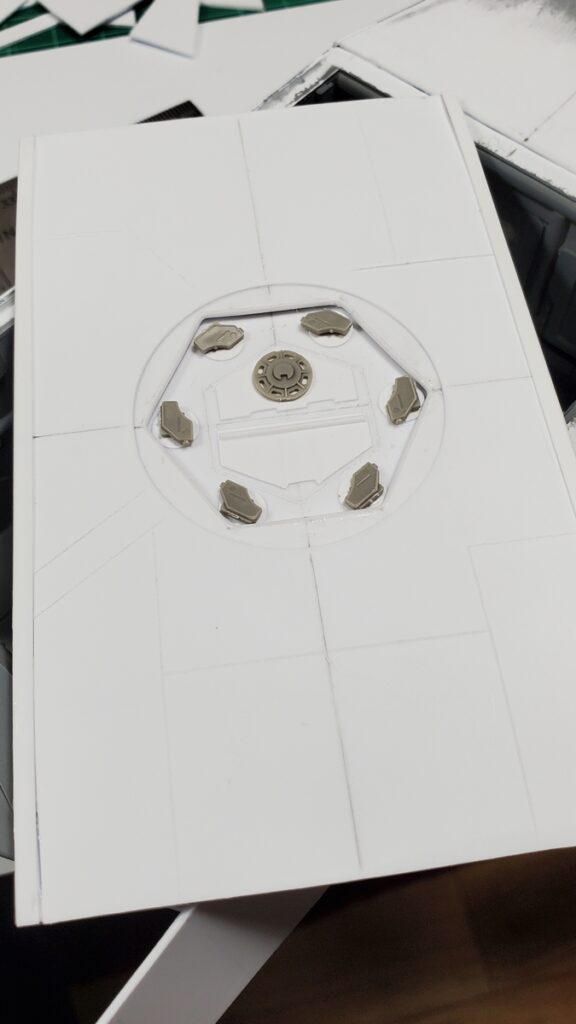
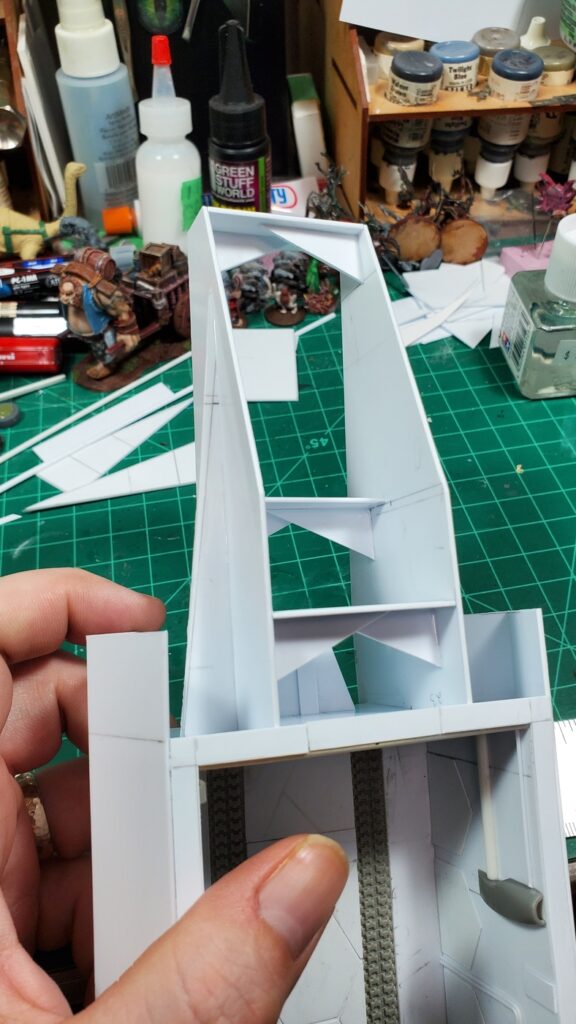
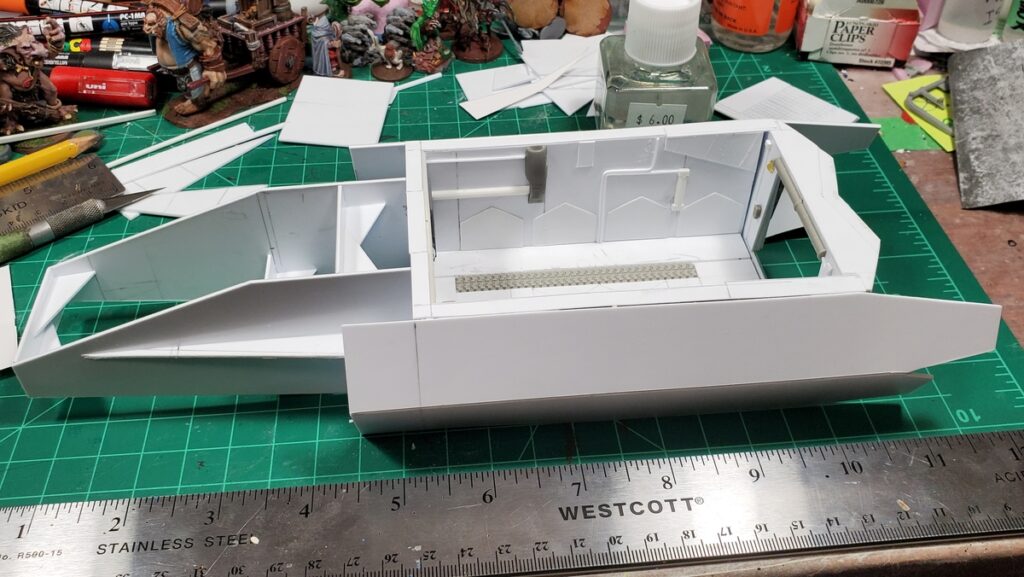
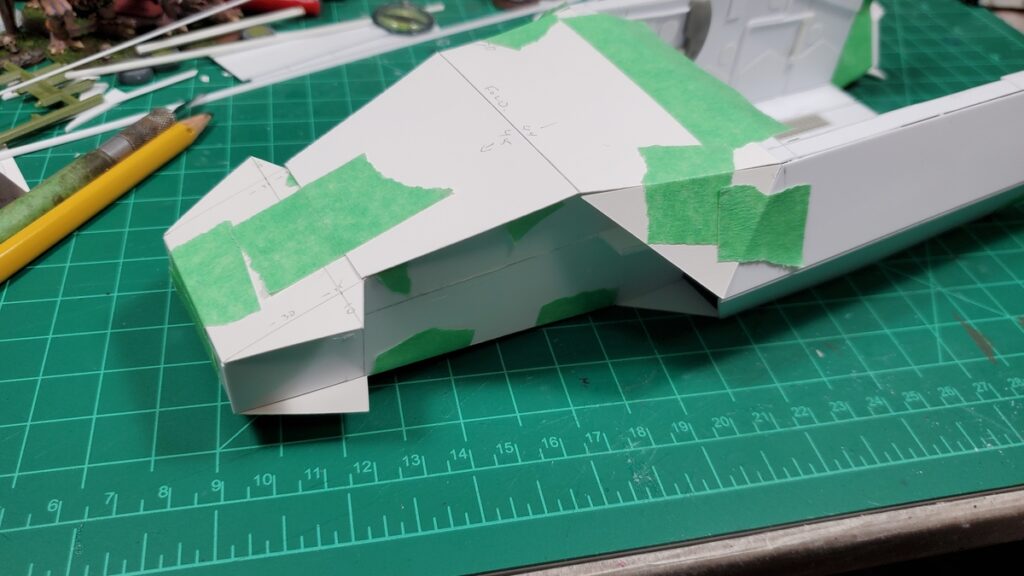
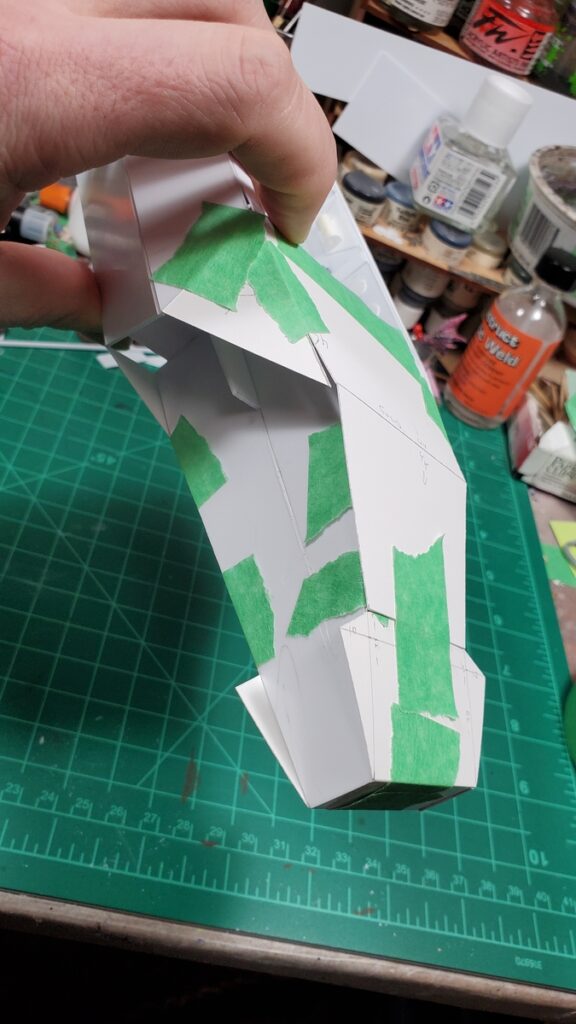
Feb 22 – the underside gets detail panels.Feb 22 – underside detail panels, looking aft.22 Feb – the engine pod assembly begins.22 Feb – layout of the two wings on 1mm styrene sheet.22 Feb – engine and wing subassembly taped in place on the fuselage.22 Feb – wings taped to fuselage.22 Feb – wings temporarily mounted to fuselage, overhead view.24 Feb – wings and engine pod details.. Front view, showing the intake grilles.24 Feb – wing and engine subassembly, rear view with jet/rocket nozzles.24 Feb – another view of the rear of the engine pods.2 March – putty work on the engines and wings.3 March – putty and test fit of roof and wings on the fuselage.3 March – decal sheets assembled. There are almost three dozen decals in the cargo bay and another twenty or so on the outside of the finished shuttle.9 March – final test fit of the wing/engine subassemblies9 March – the wings get the vertical stabilizers added.9 March – rear ramp view with detail panels on the insides of the rear fuselage extensions.9 March – the wings finally get glued on! Major construction is finished, on to priming and painting!
Along the way while finishing the shuttle, I built a 12″x12″ landing pad as a photo prop and gaming scenery, a small ‘drone’ using some of the LeClerc MBT parts that hadn’t be used in the shuttle build, and a 6″ tall sensor tower that used up a bunch of the offcut styrene from the shuttle that was too interesting to just throw away. I’ll share photos of them in another post.
Another photo dump of the last ten days or so progress on my Build Something Contest 2025 entry. My LAF project thread is getting much more regular updates (new photos every other day or so at this point) if you want to follow along!
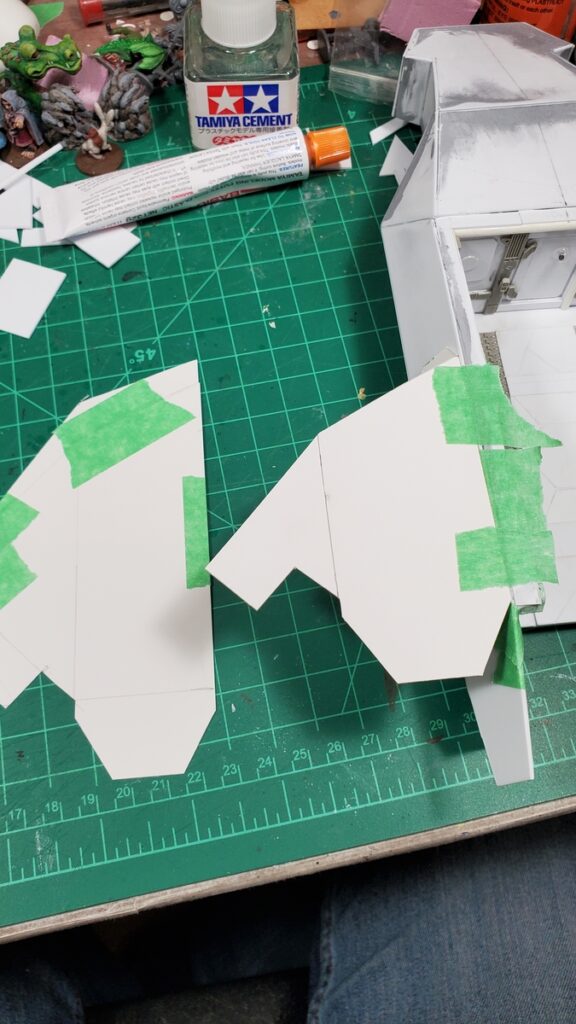
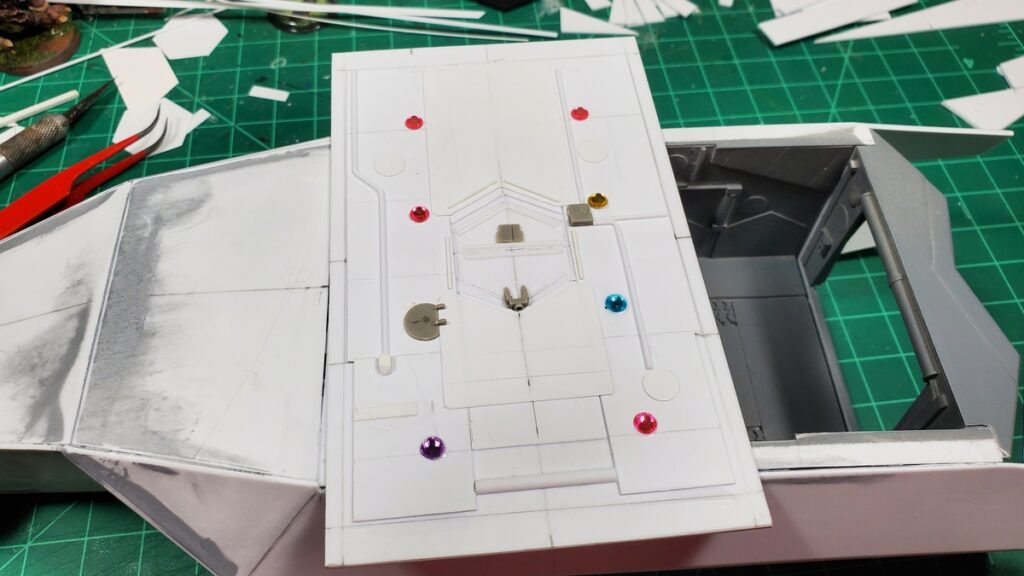
As of the last blog post the nose had been skinned but not much else. Since then I’ve tried several designs for the wings, disliked every single one of them, built and detailed the removable roof for the cargo bay, and started doing detail panels on the nose.
Check the captions of the photos below for more details.
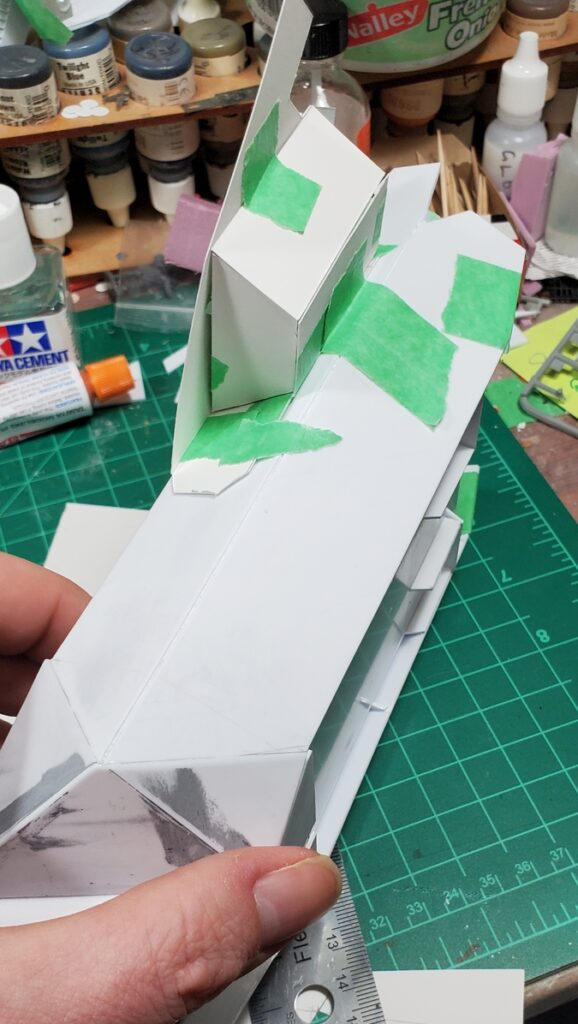
Engine/wing mockup in cardstock. This is the second, smaller, angular wing.Second wing in place, with the first bigger slab-like wing on the cutting mat. Still not happy with either design, so I left the wings alone to do other stuff for a bit!One of the wing mockups taped in place alongside the open cargo bay.The underside, showing the three landing gear bays and the un-skinned belly.Primer! I’m going to be painting the cargo bay before gluing the rear bulkhead & ramp in place, so it got primed.Rear ramp deployed, couple of 28mm figures hanging out for scale.Wider view of the rear bulkhead & ramp with the whole shuttle propped up to about the height it’ll sit on it’s landing gear.The ceiling of the cargo bay all detailed.Roof! The start of the removable roof of the cargo bay.The top of the roof, with the docking port/escape hatch detailed. It’s recessed into the roof.The roof in place, looking foward toward the nose of the shuttle.Detail panels in 0.5mm styrene being installed. When installing across a bend like this, much easier to glue one side down, let the solvent glue cure, then do the other side across the bend!Second detail panel installation, side view.
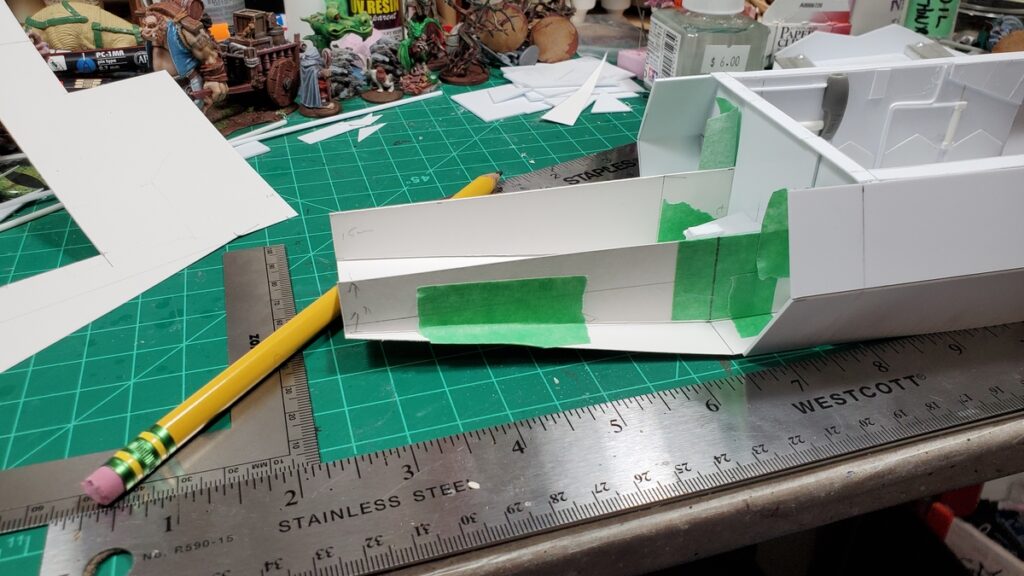
The belly skin will be installed today, and then I’ll be able to carry the detail panels aft from the nose, down the belly, and around the landing gear bays.
I’ve also (finally) started building the actual landing gear, because I need to set the height of that before I can make some detailing decisions for the underside of the beast.
Then it’ll be back to the engine & wing subassemblies, where I have a third wing planoform I want to try out that I think will work better than attempts 1 and 2!
Decided to go with the nose next instead of the wings and engines, and as predicted in my last post, it required a lot of mockup work, in two stages.
First, I did an internal frame to establish the basic proportions of the nose and give me a nice solid frame to hang the skin from.
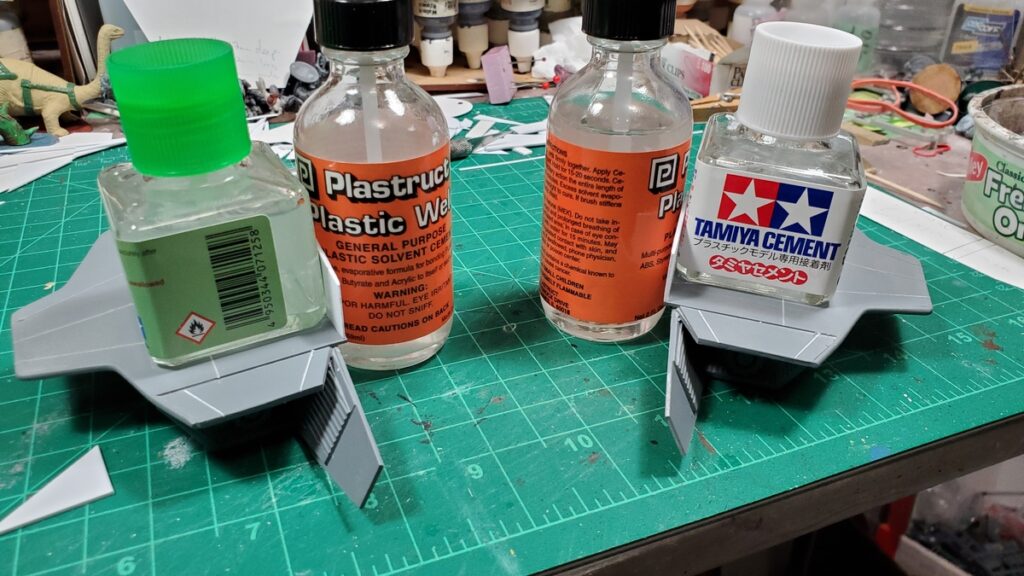
I redid parts of the skin mockup three times, including scrapping round three for part of the sides and going back to round two’s ideas. The advantage of all of the fiddling with cardstock and masking tape, of course, is that I knew what I was doing (mostly) when I switched to 1mm sheet styrene and started the real thing.
I also cut back the outer (top/bottom) corners of the sides where they extended forward, and that was the right call, it made integrating the nose and sides easier.
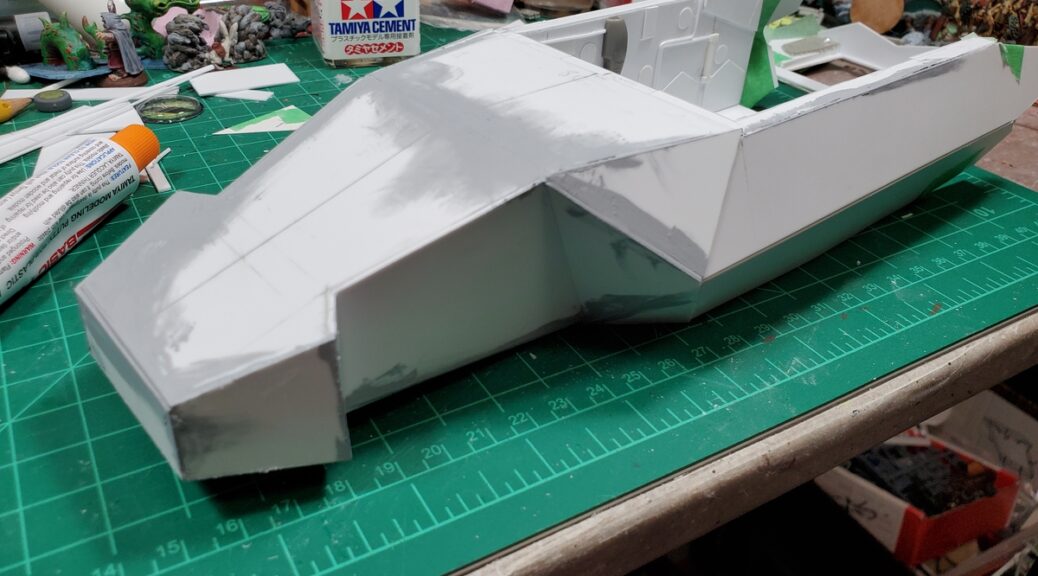
The hammerhead nose was a spur of the moment idea while planning the first mockup piece and I really like how it’s come together; the hammerhead let me play with the angles and bulk of the nose area more than a more straightforward taper would have.
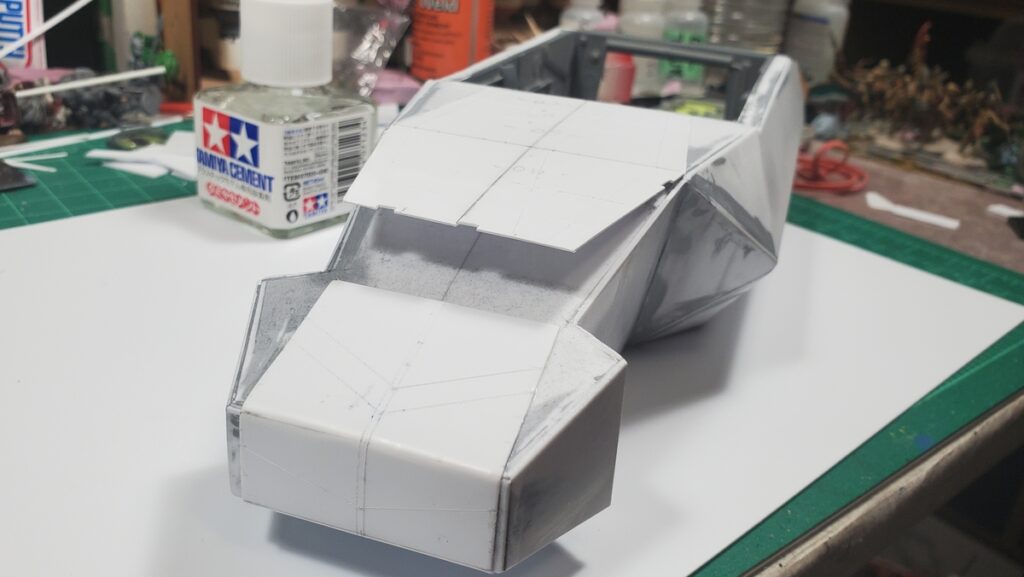
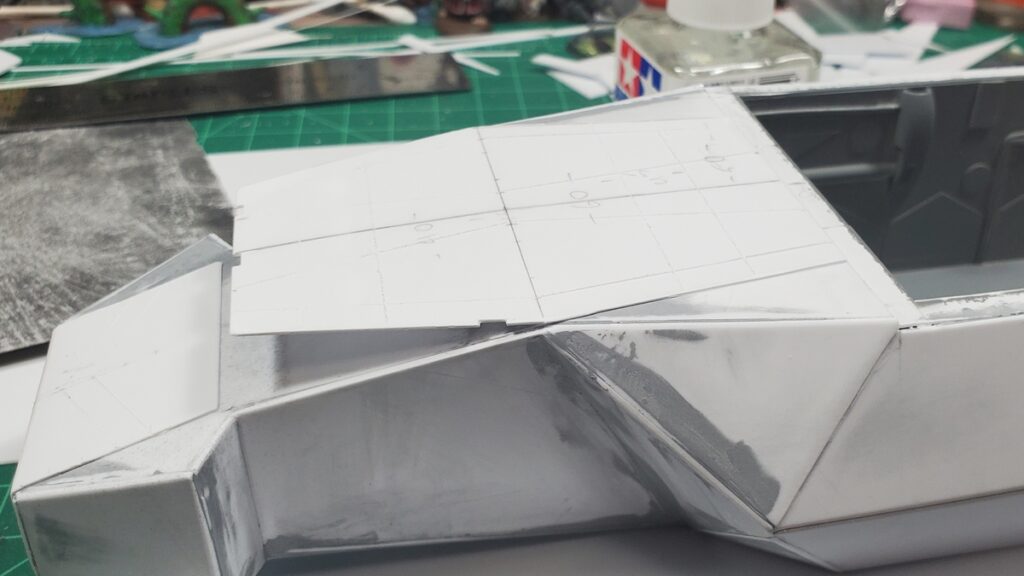
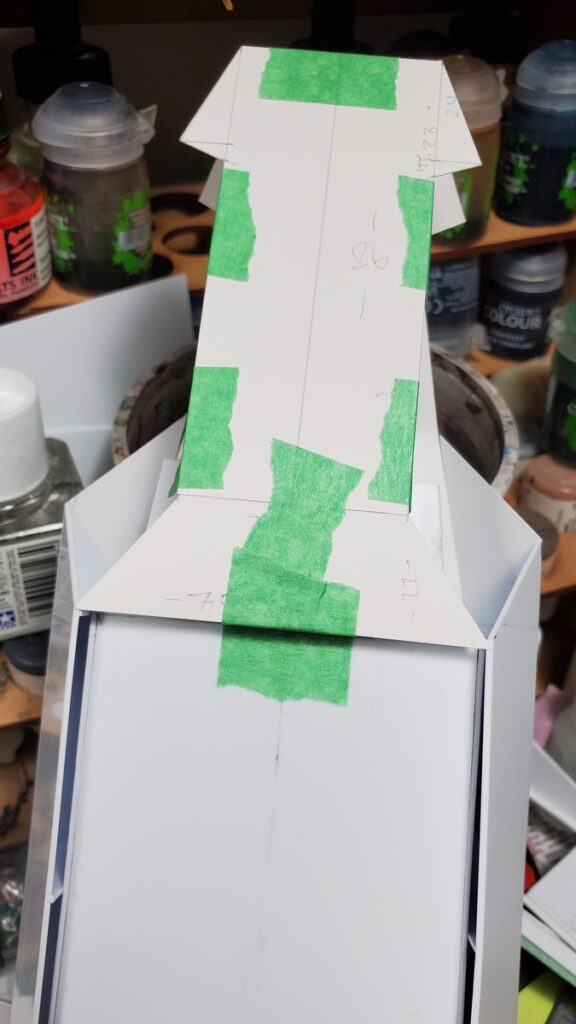
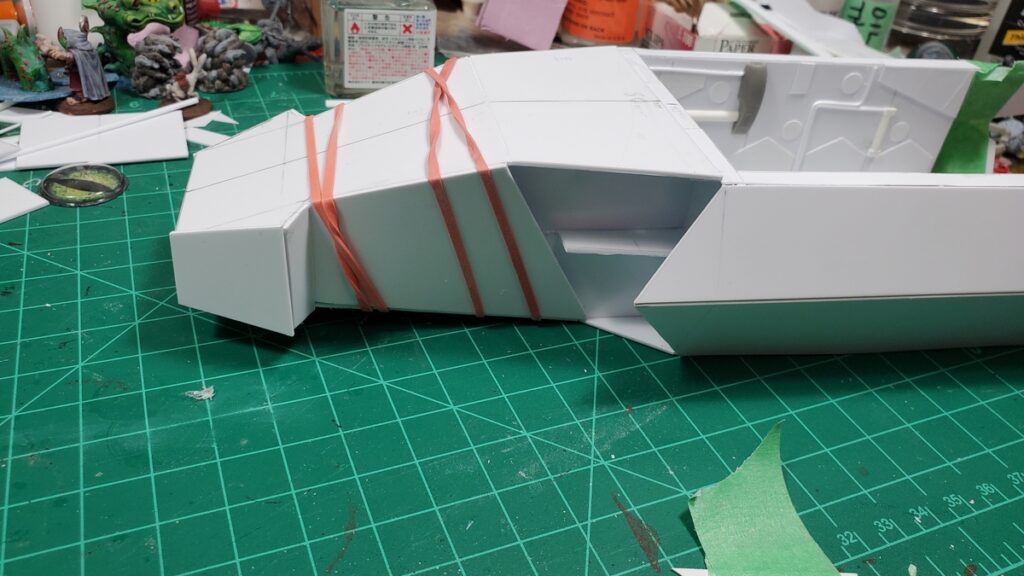
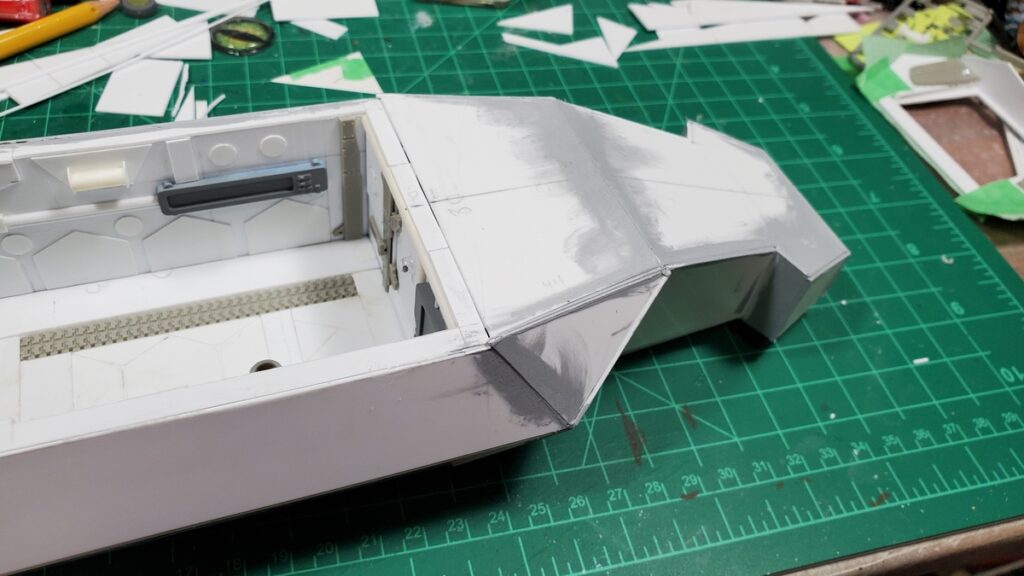
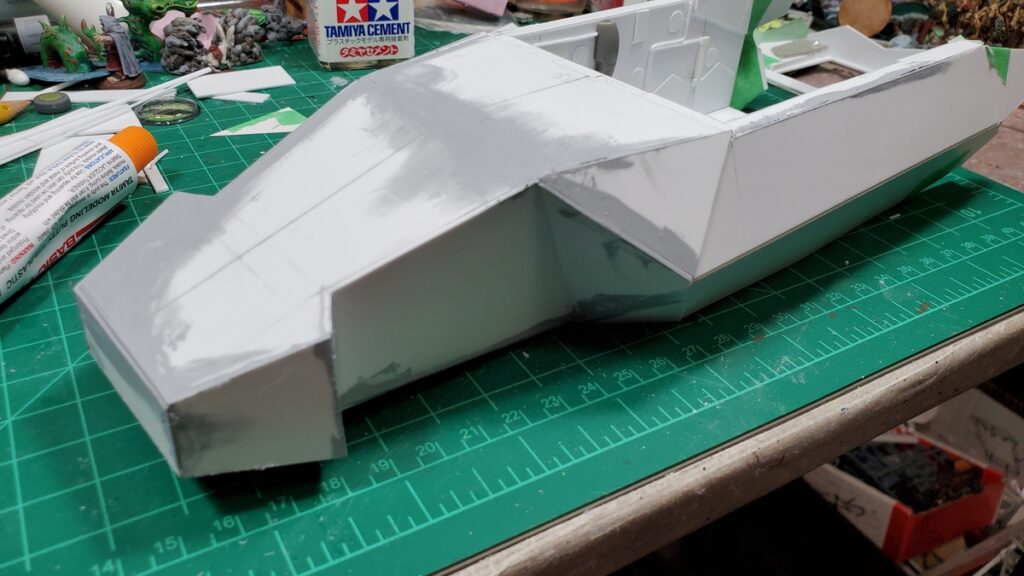
Mockup for the nose frame.Nose frame finished in 1mm styrene. I wound up cutting most of the long thin brace on the outer side off, but all the internal bracing gave me a nice solid, trouble-free start to doing the skin.Finished nose frame. The whole beast is just under 11 inches long, nose to back end, which is perfect.Closeup of the top left with skin mockups in progress.Nose skin mockup in progress, figuring out what to do between the hammerheads and the start of the body/sides.The underside of the nose, mockups in progress.Finally cutting styrene! The big panel behind the hammerheads has a twist to it, so it got anchored down with elastic bands and left for the plastic cement to cure for a bit.Styrene skin in place, sanding and puttying cleanup started. There is going to be a LOT of sanding.Current state of the nose, with putty smeared around a lot of the seams and sanding in progress.
I really like how the whole thing is shaping up, it has a good bulky angular look to it. There’s going to be a round of detail panels over this initial skin, after the endless sanding and puttying is done – some of the seams didn’t come out quite as well fitted as I’d like, so there’s going to be some remediation before detailing can start!
Still to do, in rough order of size/complexity of the subassembly: the engine pods and wings; the roof for the cargo bay; landing gear and landing gear bay doors; skin on the belly.
I’m away this coming long weekend and have some things to get organized before we go away for the long weekend, and as mentioned, the next while is likely to be mostly sanding, so it might be ten days or so before there’s another blog-worthy update to this project!
My Build Something Contest 2025 thread on LAF is here; the rest of the contest has some very cool entries – there’s another couple of shuttles or dropships, some neat magical walking constructs, and a bunch of other cool concepts among the other contestants! Entries just closed on February 8th so everyone who’s in for this year is in!
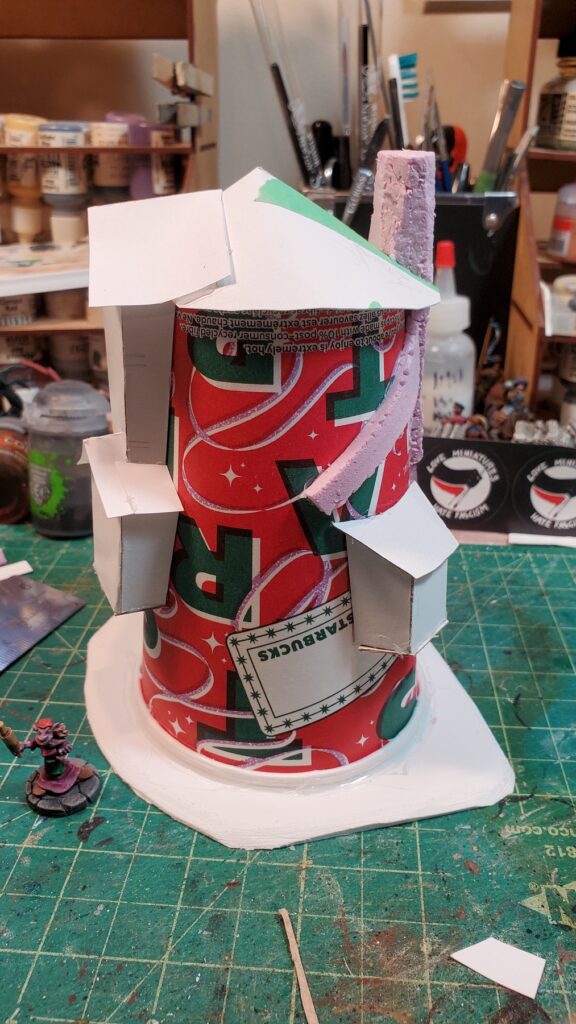
A few days into January I had a fall that destroyed my glasses and injured my shoulder, both of which combined to cut down the amount of time I was able to spend on the computer. The upside of this, as I still needed something to do, was that I started a random construction project and completed it in about three weeks. (glasses have been replaced and shoulder is nicely on the mend, too)
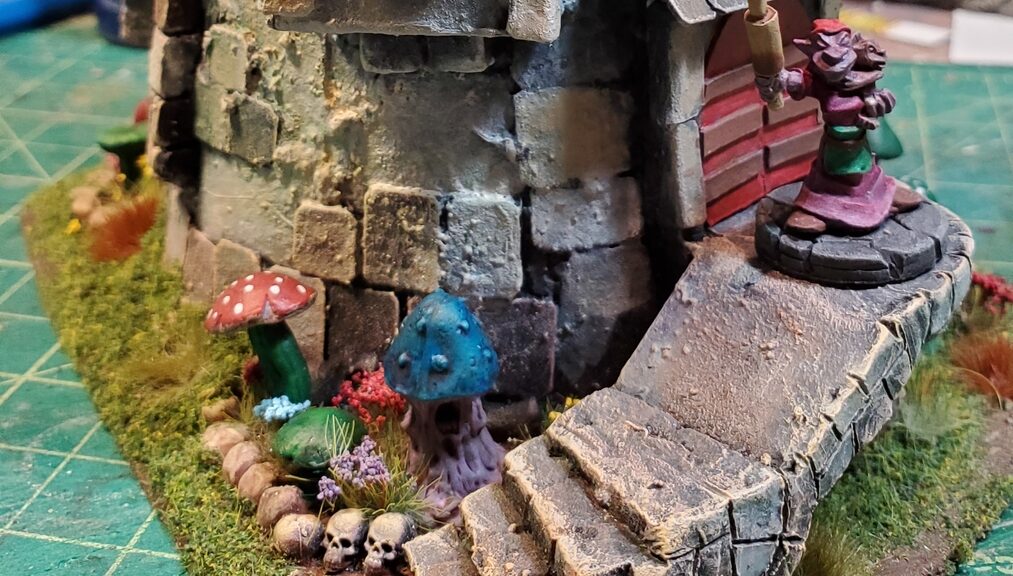
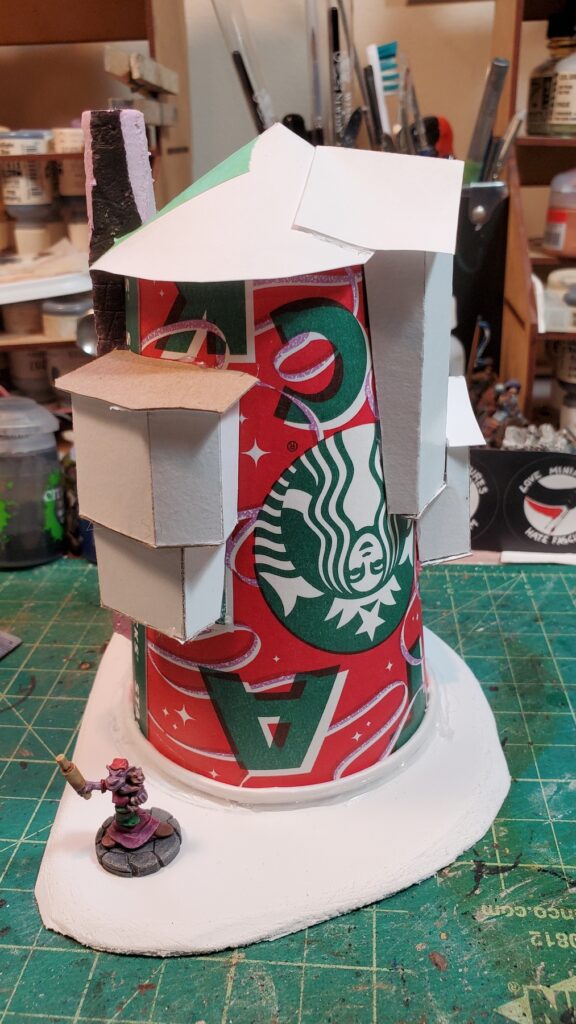
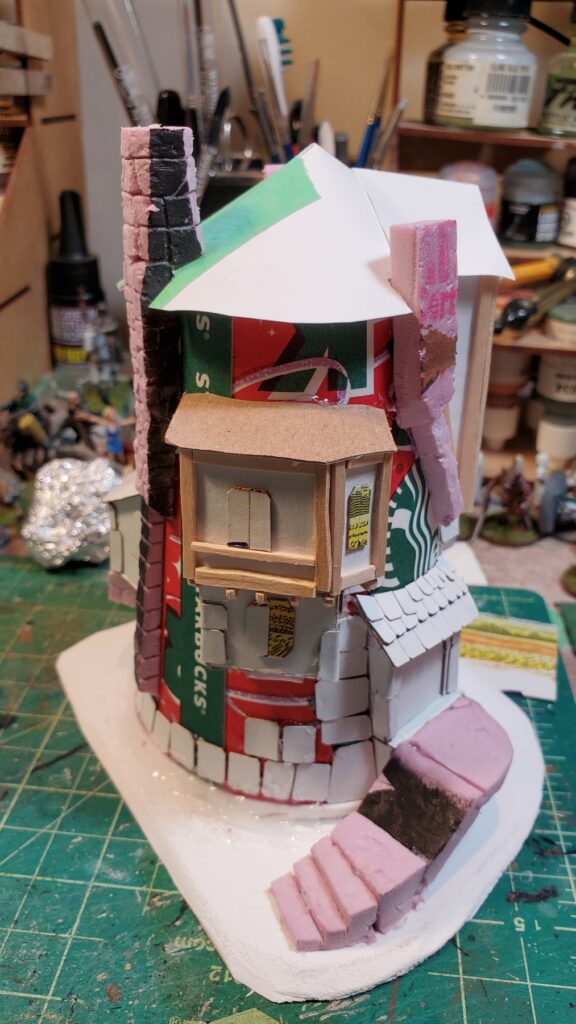
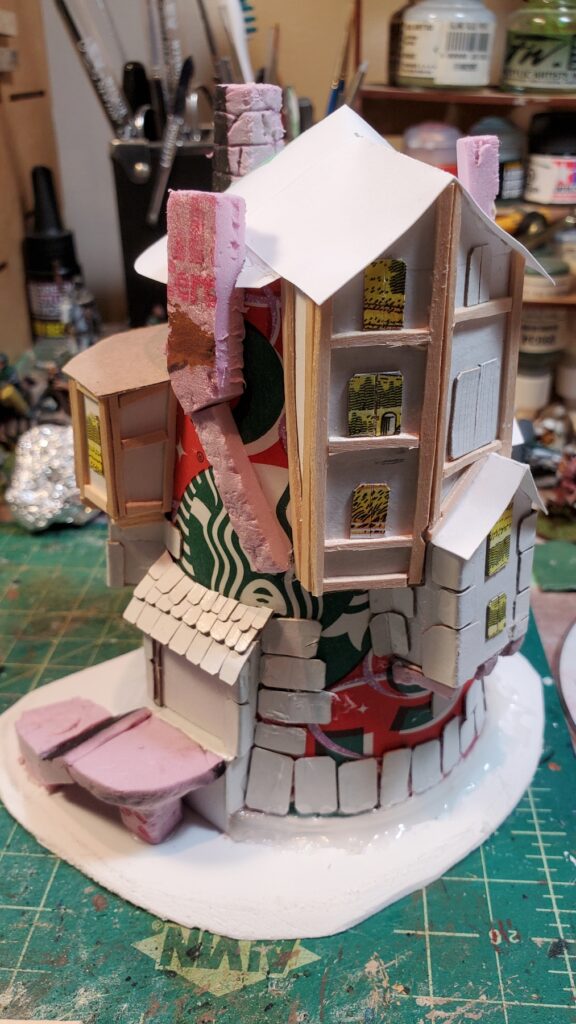
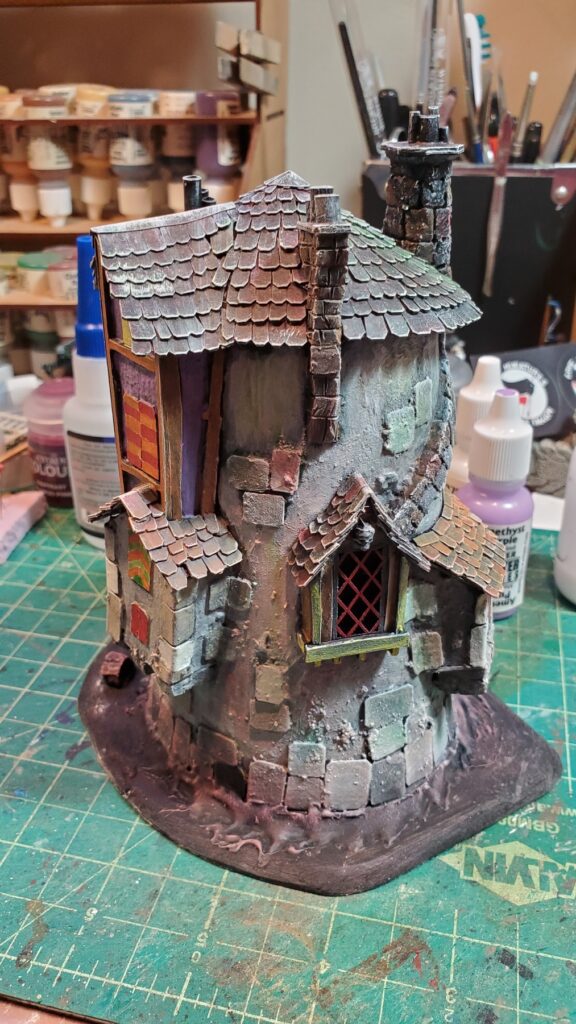
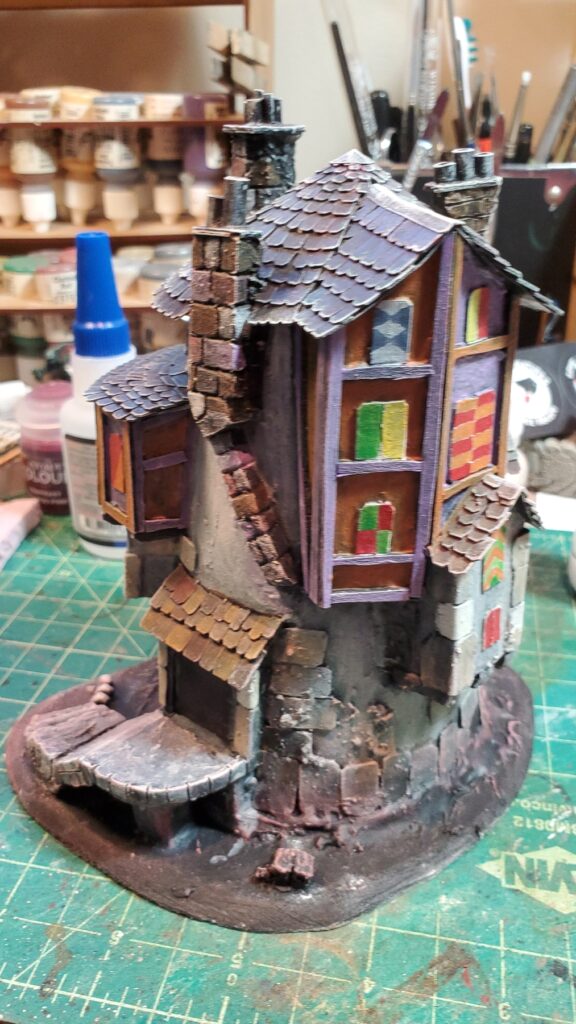
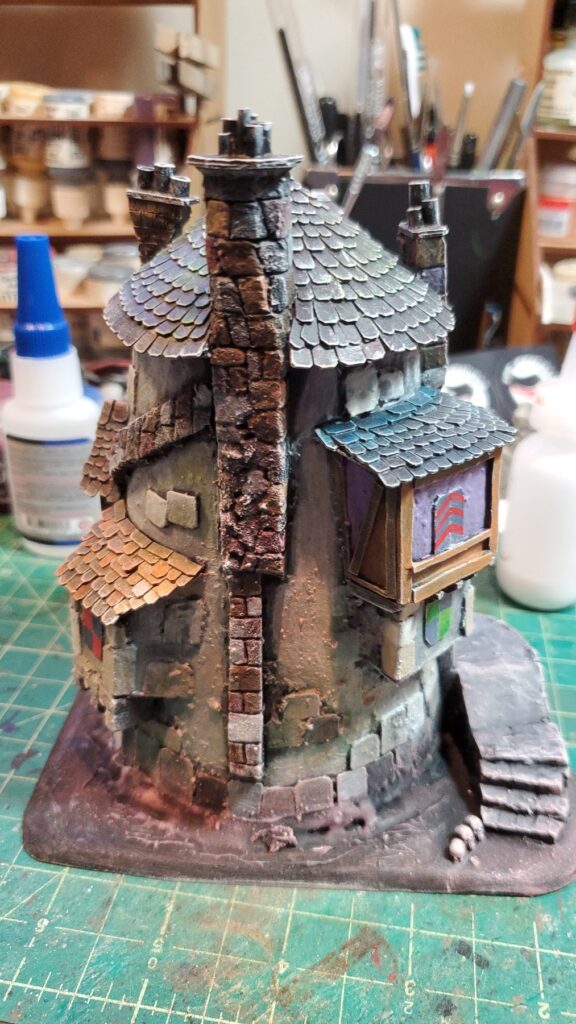
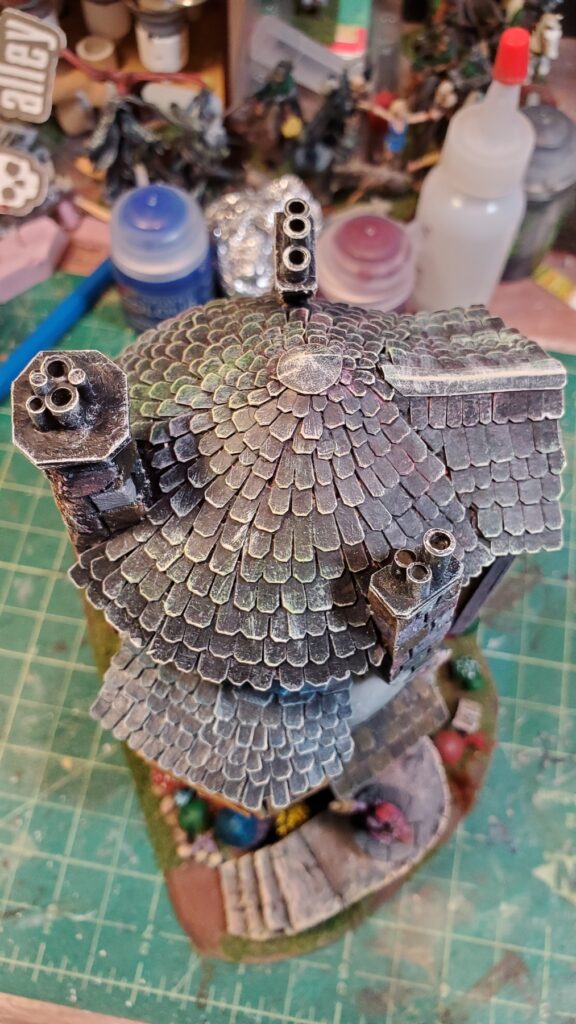
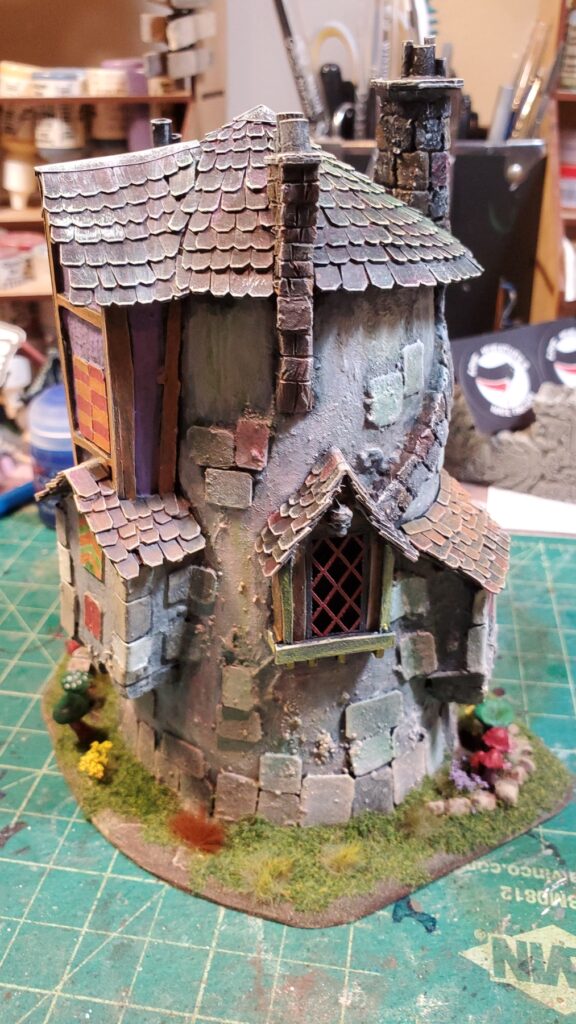
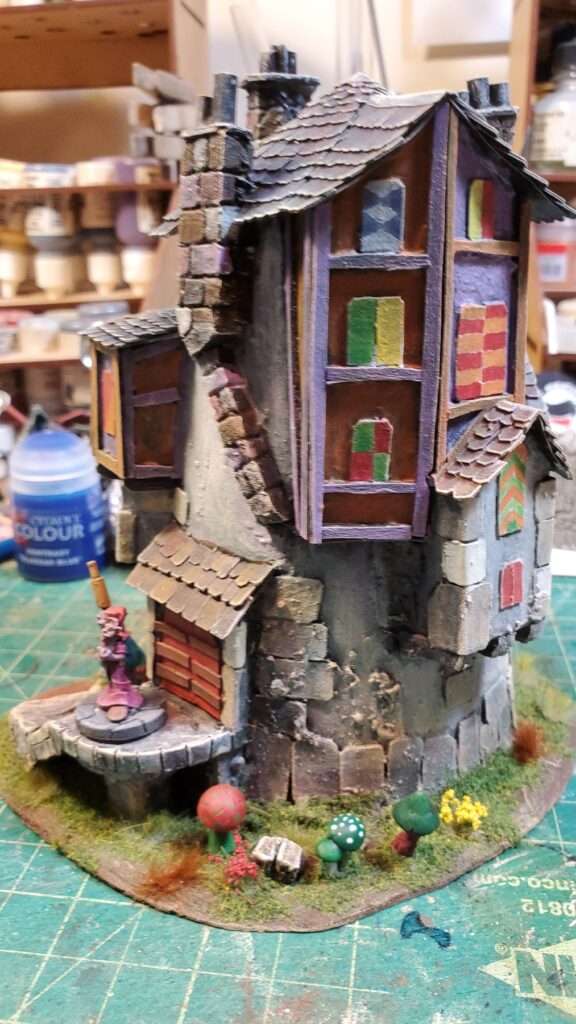
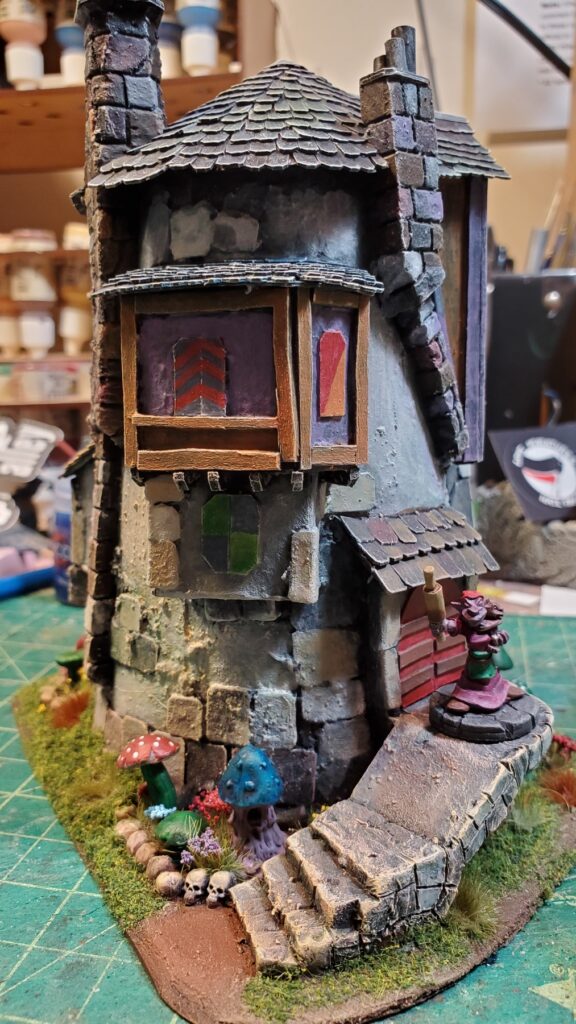
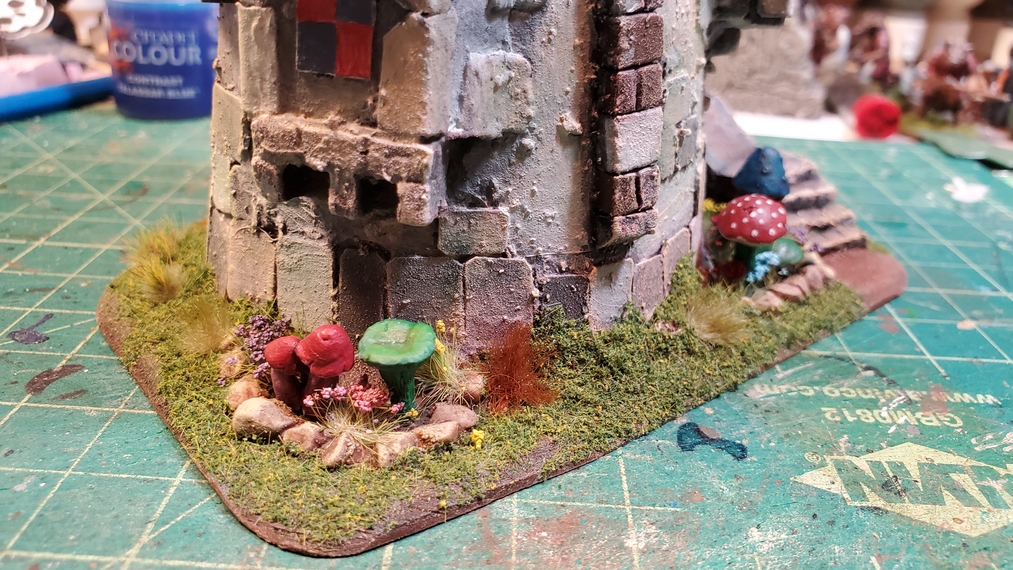
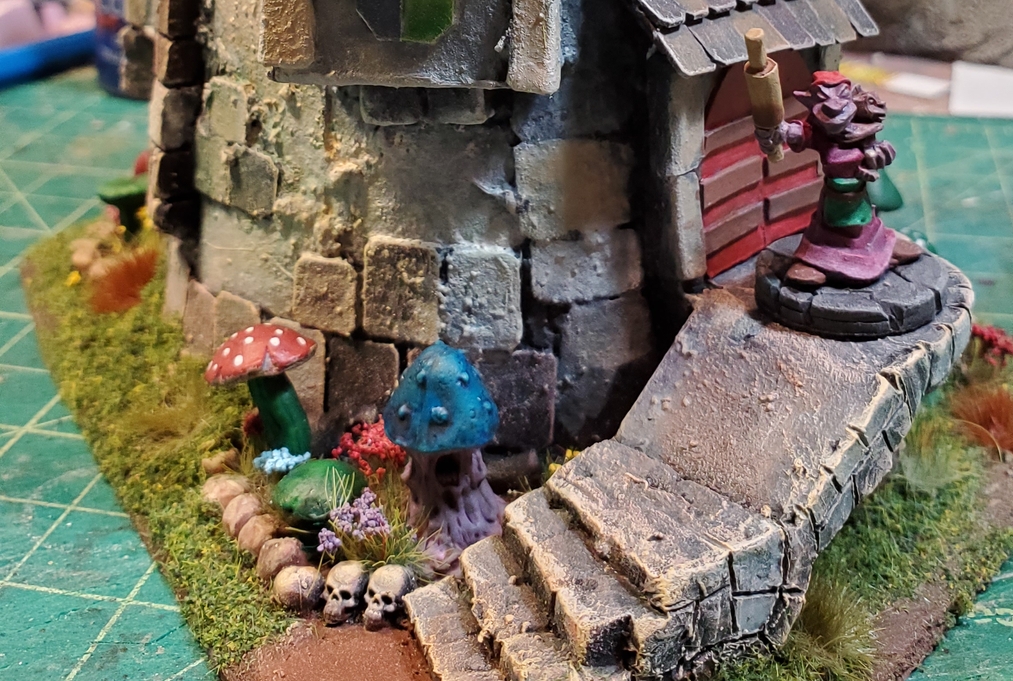
Over the Christmas holidays I had painted up an entire village of really cool Toadstool Brownies from Fenris Games (they’ll get their own post soon) so I decided to trash bash a multi-story tower for them to cause trouble from, a sort of weird fantasy cross between a fortified tower house and a tenement apartment building.
I started with a medium size paper coffee cup from a widely available but deeply mediocre coffee chain, glued that to a scrap of 1/8th PVC sheet a bit bigger than my hand, then started adding details with scrap cardstock, wood coffee stir sticks, bits of styrofoam, paper, and Milliput.
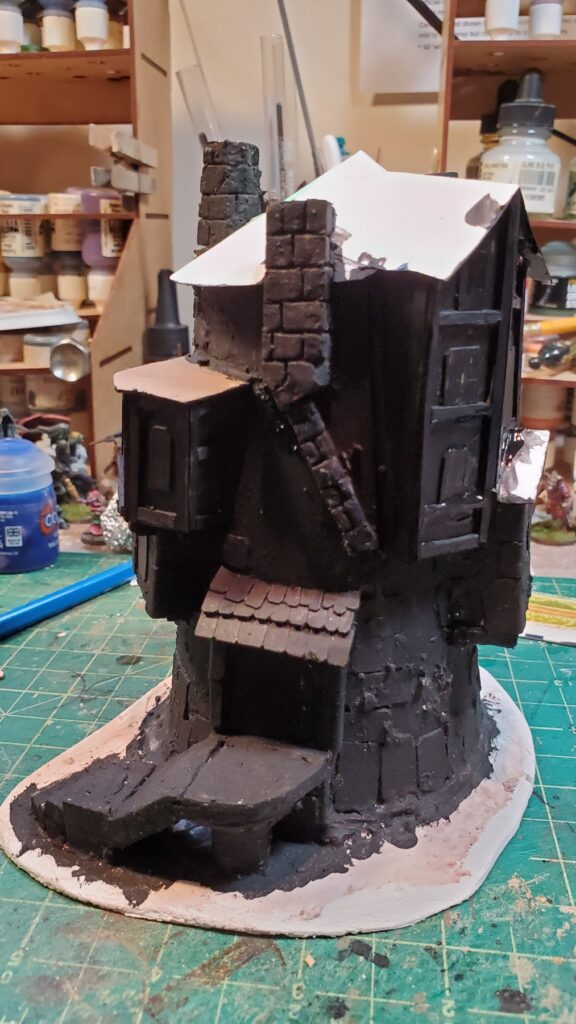
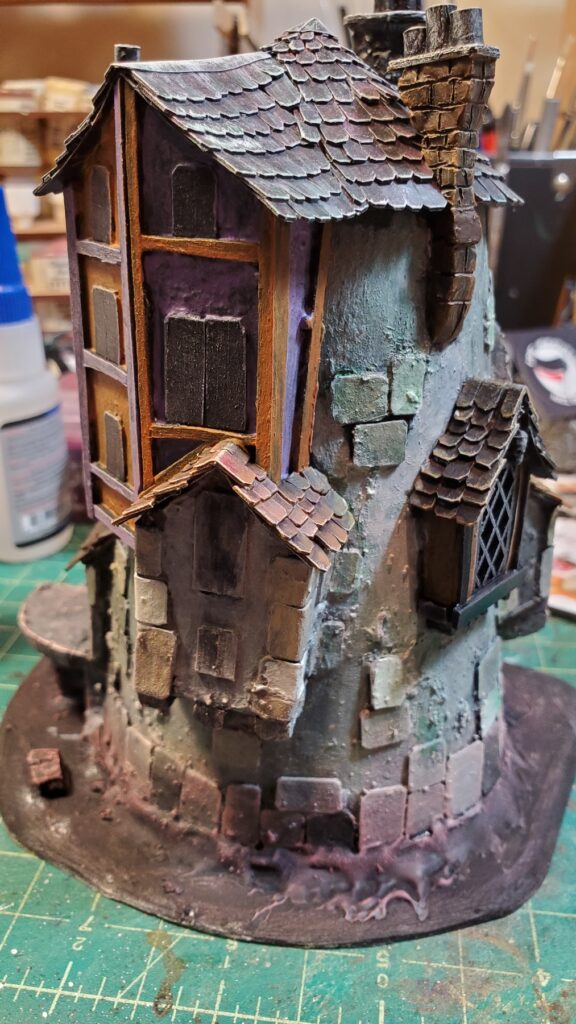
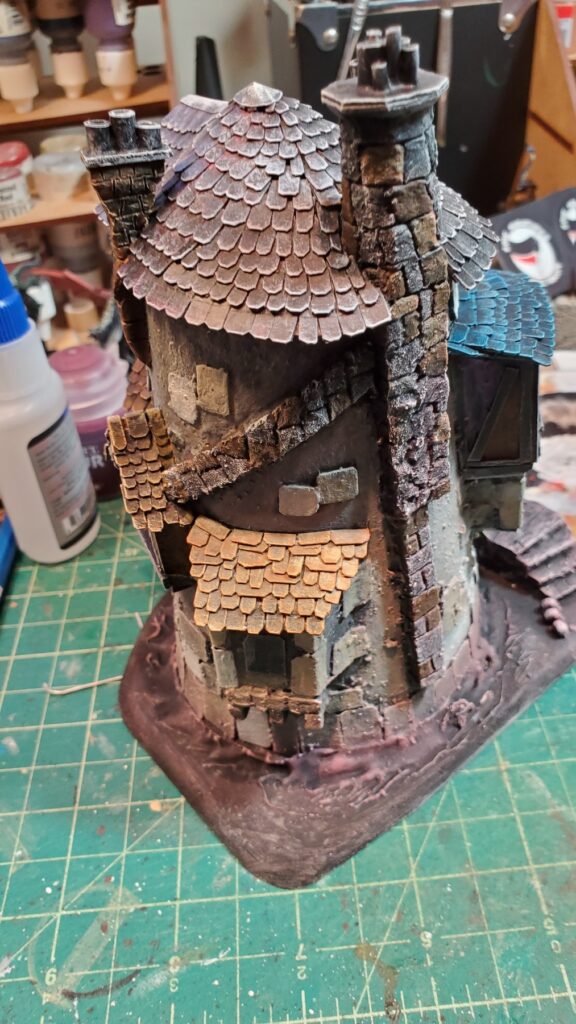
Very early in construction.Very early construction, with Toadstool Brownie on 20mm wide base for scale.Details going on.Shutters in place.Textured with thin plaster and priming started.Paint started, roofs and chimney details done.The skinny chimney on the left is Milliput around a toothpick core, for strength. Nicely gamer-proof, I hope!More paint. I used all sorts of random washes and drybrushing to add texture and character.More paint. Lasercut window and plastic skull above it.Paint on the shutters.The big chimney.Finished tower, view of the main roof.Finished tower, skull window side/back.Finished tower to the right of the door and ramp.Finished tower, door, ramp, and garden.The “back garden”.The front garden, and yes those are skulls…The Toadstool Brownie Tower, construction and finished photos!
This hasn’t actually graced a table yet, but I’m sure it will soon, and I want to write up stats for the Toadstool Brownies as either playable characters or random on-table nuisances for the games we play!
I haven’t done a pure stratchbuild like this in a while, but really want to do more, and weird fantasy builds are SO much fun!