Tag Archives: scenery

Gates for Gaslands Racing, Part One

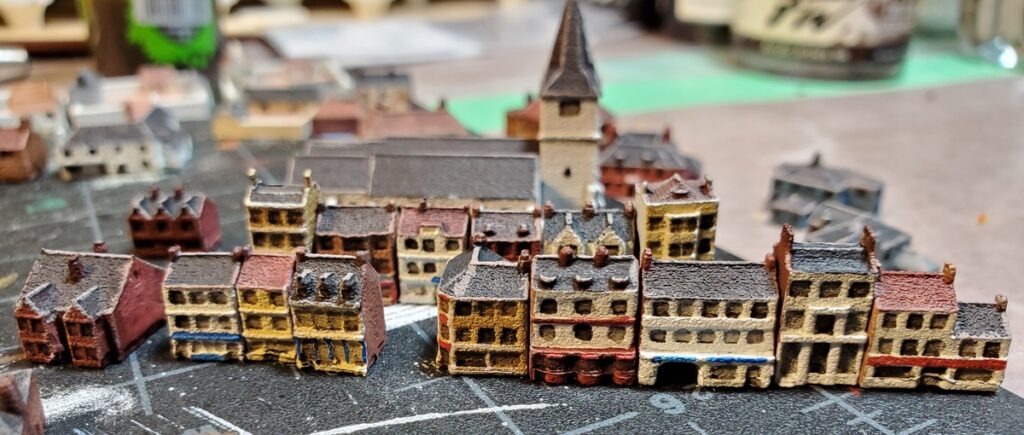
The Death Race scenario for Gaslands calls for at least three or four gates, for start/finish line (which might not be the same gate) and a couple along the course. We’ve been using various random scenery bits, which works fine, but proper gates have been a obvious piece of scenery I wanted to make.

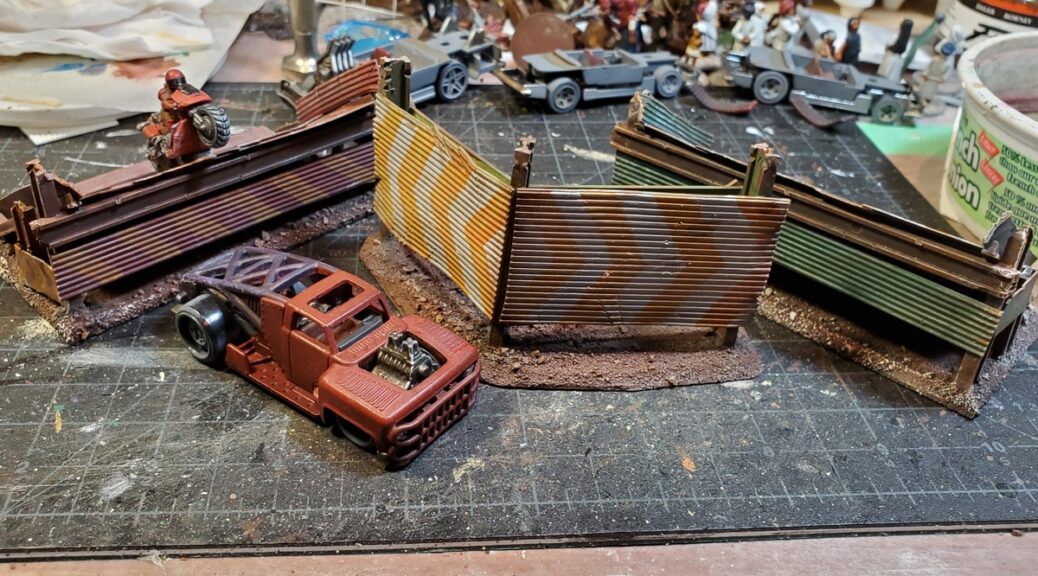
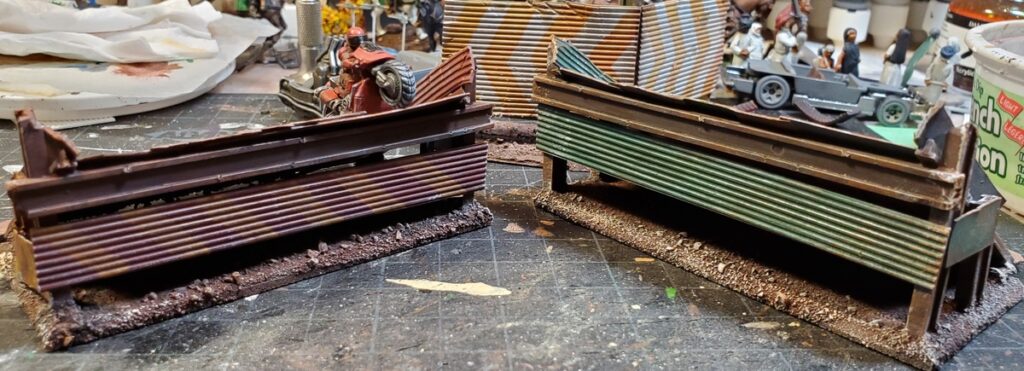
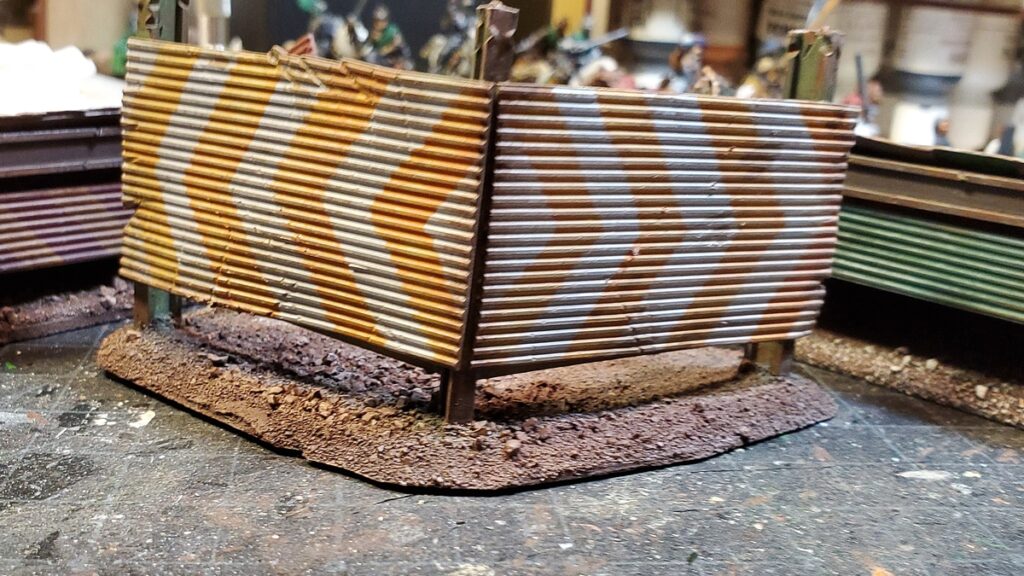
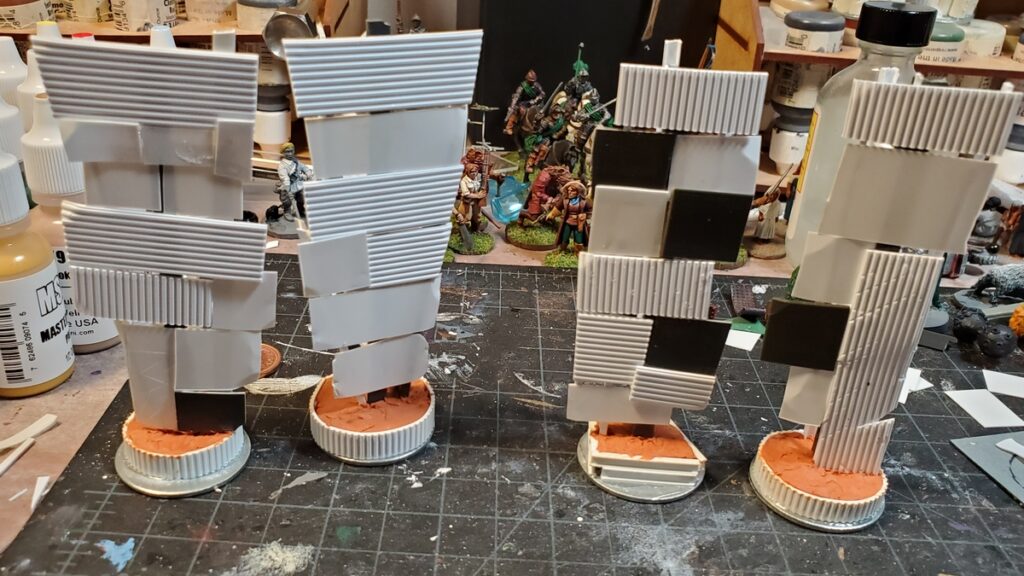
The scrap metal look worked well for the jumps I made last year, so it was the asthetic I followed for the gates as well. I decided to do freestanding gate pillars, essentially, with no permanent overhead horizontal pieces but with the vertical construction to allow modular overhead gantries to slot in if desired.

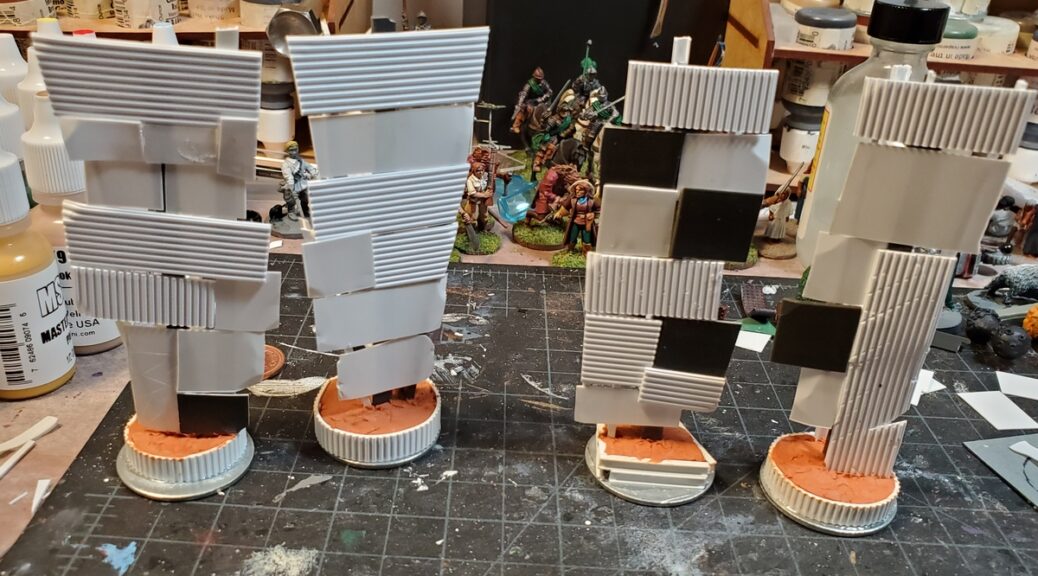
To keep the tall gate posts ballasted I started with solid 1 1/4″ washers from the stash, then sank the main vertical beams for each into a footing of styrene plastic filled with Milliput epoxy putty, which dries rock hard. Because it’s a fast technique and super cheap, I filled the lower levels of the foundation footings with crumpled tinfoil tacked in place with superglue, then put a layer of Milliput over that.

Early in construction, tinfoil filler visible in the footings. The three course gates are on the left, and rightmost is the start line, which is more substantial. Click for larger.

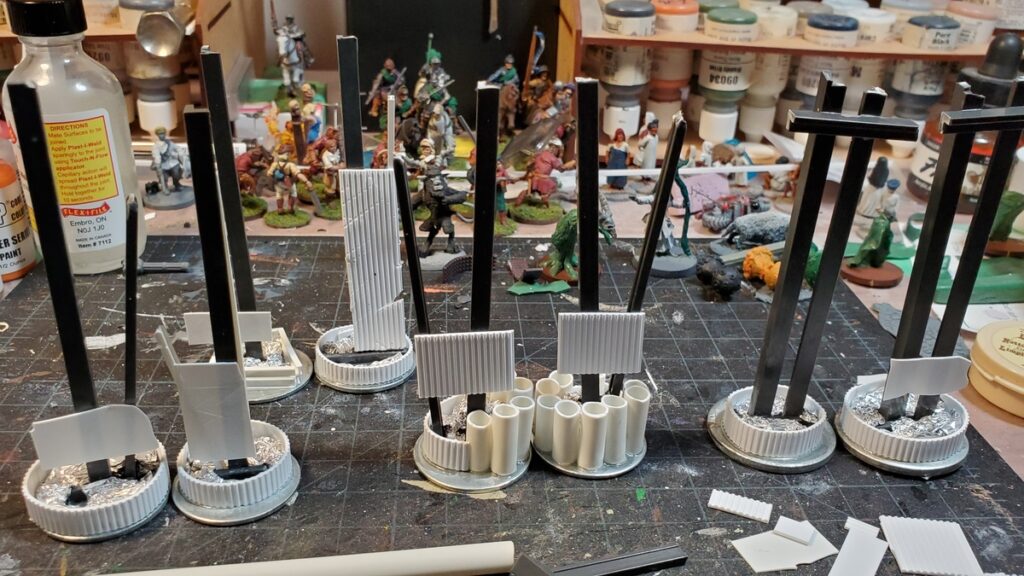
I used a couple of different methods to construct the footings; roughly circular lengths of corrugated sheet styrene were fast and easy but I really like how the vertically-embedded heavy pipe (styrene tube) came out.

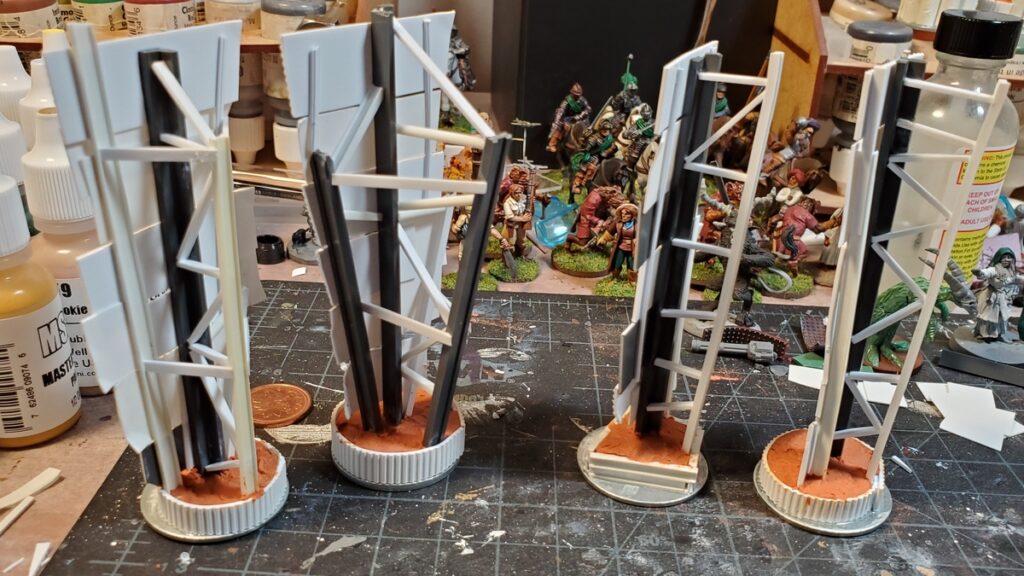
This entire project was done from the Ancient Stash of Doom; I’m pretty sure some of these random girder pieces date back to the family model railroad we had in the early 1990s when I was in junior high. The dark grey plastic is all Plastruct; all the white plastic is Evergreen Plastics. There’s three or four sizes and styles of girder, a couple sizes of tube, and sheet styrene in at least four thicknesses and styles.

Beyond making sure all the main vertical beams were roughly the same length (about 4 inches) I did very little planning ahead. Each pair of gate pieces is in roughly the same style… more or less. After making sure the main vertical beams were solidly anchored to the washers, I filled in the rest of the structure from whatever sheet and beam bits were handy and looked the part.

Left, the Start Gates, with an elevated box for race officials, announcers, media, etc. I’ve decided that the “pipe” gates are Gate One, for no particular reason. Click for larger.
Gates Two and Three, basically finished and awaiting primer. Click for larger.
The backs of Gates Two and Three. The scrap-built girder structures are actually fairly solid now! Click for larger.
The backs/sides of the Start Line Gate and Gate One. Gate One has by far the simplest struture, but I really like how it turned out and if we need more gates will definitely be copying the basic design. Click for larger.

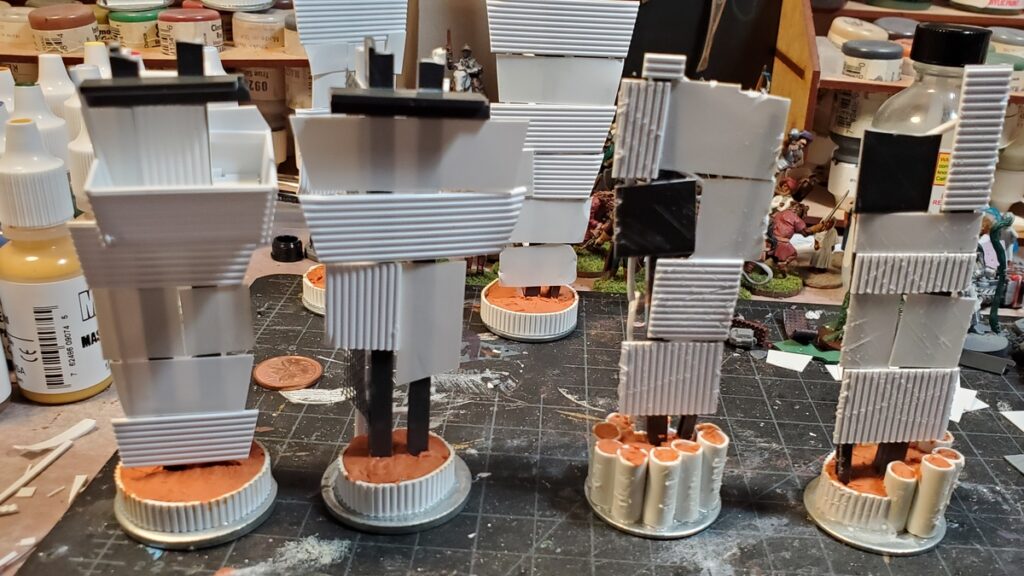
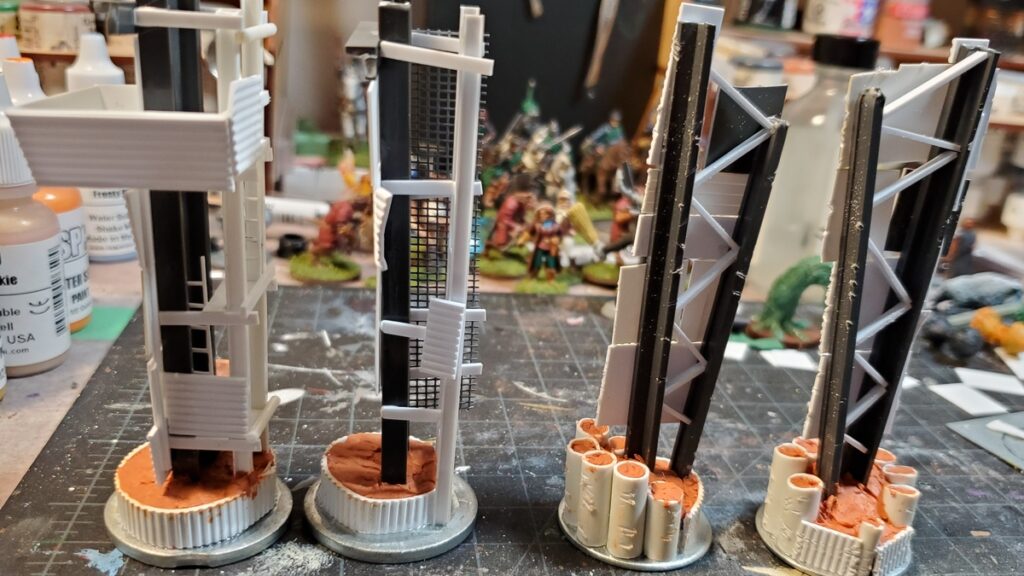
Gates One, Two, and Three are basically done, structurally, although I might yet put more details (floodlights, maybe loudspeakers) on them, and the plan for all three is to get Corey to 3d print lettering for “GATE” and then add the gate number in sheet styrene like they were cut out of sheet metal.

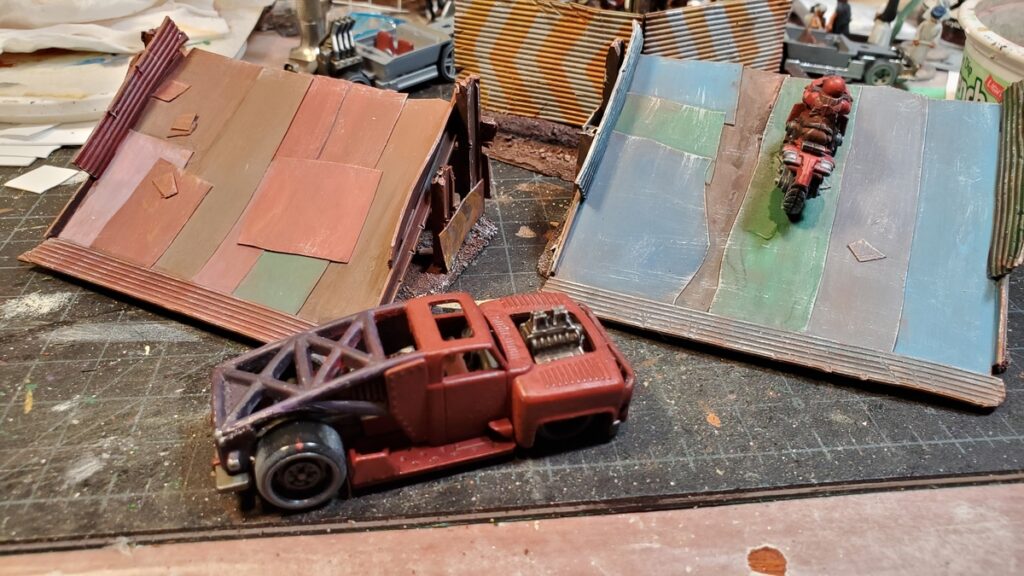
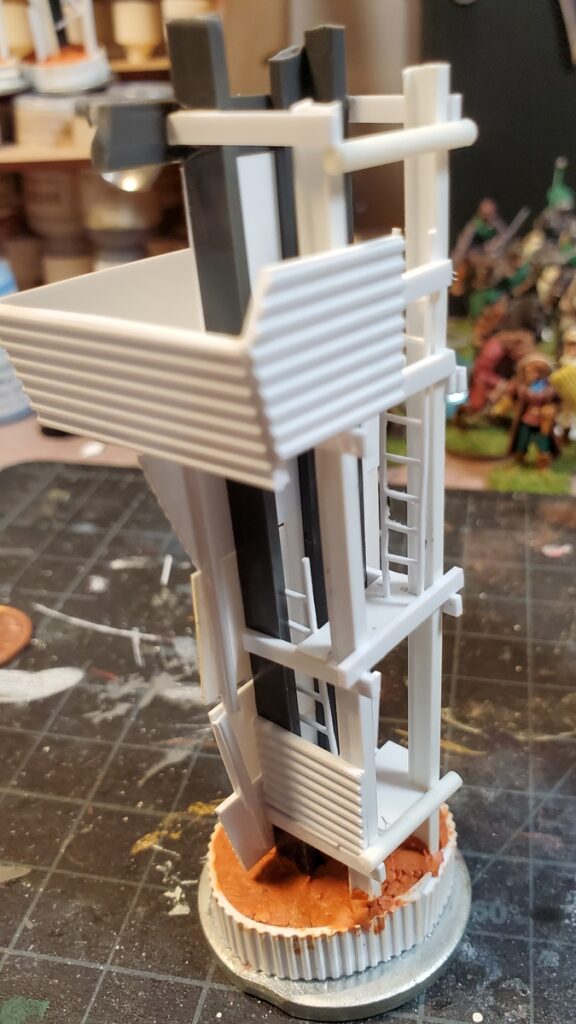
The Start Line Gate is still undergoing detailing. There’s ladders to get the crew up into the announcer’s cab, and I’ll be covering the sides and back with some solid metal sheet and a bunch of mesh – you can see the first piece of that on the offside Start Gate pillar, second from left above. The ladders are scratchbuilt from very thin strips of styrene; I’d have used HO scale plastic ladders but my awesome local hobby shop was out of stock.

The Start Gate is also going to get a fairly substantial horizontal gantry spanning the course between the two pillars. It’ll have floodlights, speakers, and a 3d printed “Esquimalt Thunderdome” sign on it, or will when Corey coaxes his 3d printer back to life. I’ve got some very cool openwork styrene girders to form the main central part of that gantry.

The main vertical part of the Start Line Gate, with partially constructed announcer’s cab. This photo was mostly taken to show off the scratchbuilt ladders, which came out really well. Click for larger.

More on these gates soon, and in the meantime stay safe, everyone.

Resin Bases and Bits from Rain City Hobbies

I’ve talked up Rain City Hobbies on this blog before, but only for their very nice grass and flower tufts. They also do a huge range of resin bases, but because I rarely use elaborate complex bases they’ve not interested me much.

I do own a few of their resin bases, however, picked up from the “production seconds by weight” bin sold by Rain City at gaming conventions. (remember gaming conventions from the Before Times? I miss them…)

Needing a distraction from current events I decided to paint up the biggest of these, an elaborate ruined temple base nearly the size of a CD, their Huge Ruined Sanctuary insert. 120mm (~4 and a quarter inches, roughly) across, the production second one I have has nearly perfect molding of all the details, but it warped before the resin had fully cured so won’t lie flat.

The ruined sanctuary base all painted up. Click for larger.

I tried out a bunch of different stone painting techniques on this base and I’m really pleased with how it turned out. The three big chunks of shattered statue were based in light tan, then progressively highlighted with whiter and whiter paints well diluted with glaze medium, which really got a translucent polished stone effect going.

The green arc and big green fragment were basecoated fairly dark green, then given marble-like veins with brighter greens, again well mixed with glaze medium. They got a good coat of gloss varnish, and then some highlighting with almost pure white.

The flagstones got basecoated with four or five off-white/tan shades, washed with GW Sepia and Earthshade washes, then highlighted with light tan and off-white. The tree roots are various shades of reddish brown.

The big base from the other side. Click for larger.

Because of the warp across the width, I’ll probably base this onto a larger piece of thin plastic, then use putty and then foliage to merge the lifted corners back into the base, making this look like a fragment that has been largely swallowed by forest or jungle.

I’ve also got a few more random bases I might finish up, and those three tan pieces to the right in both photos above are the Large Broken Statuary Base Accessories that I will be using either together with the big base or on their own as scenery elements. More on them in some future post when I get them finished.

Stay safe, stay home, try to get something creative done, mask up when required out in public, and better days (actual gaming conventions!) shall come again.

Gaslands Jump Ramps

Reading through the rules, I realized that Gaslands Refuelled has rules for jump ramps and jumping, so naturally I had to scratchbuild a pair of ramps to make a dangerous lunatic game even more dangerous and lunatic!

Scrap plastic and bits for a couple of pieces of Gaslands scenery. Click for larger.

The two ramps are about 4 inches wide. They’re based on scraps of 1/8th plastic board and mostly made of random bits of styrene plastic. The big beams are from Plastruct and I’m pretty sure they’re leftover from the model railroad we had when I was in junior high in the first half of the 1990s… that’s more than long enough to have something in your Bin Of Interesting Parts before using them!

The other side of the ramps. The left hand one is actually reddish but came out looking very purple in this photo from some reason. Click for larger.

The great thing about the mostly-post-apocalyptic Gaslands setting is that nothing has to be really cleanly constructed or painted, so I just layered sheets of styrene up until it looked right, and used pliers and a knife to attack various bits, warp them, and chew the corners off.

Crash barrier thing, with random hazard stripes because why not?

The billboard/crash barrier piece started as a way to use up the leftover stub of heavy I-beam I had left over after the ramps were done; it’s based on more scrap 1/8th plastic board and roughed up the same way. It got orange and white hazard stripes on the fronts, because, well, why not?

All the scenery together, plus one of my in-progress cars. The motorcycle is from the North Star Gaslands accessories sprue. More in-progress cars can be glimpsed in the background!

I’ve got four cars and a motorbike in progress; the first coat of primer on several of the cars didn’t take so they’re in paint stripper to get reset back to bare metal. I’ll probably fish them out this weekend to scrub them down and reprime.

We’re back in lockdown here for at least another ten days and realistically probably longer, because the second wave of COVID is well and truly here. Stay well, stay safe, ignore the goddamn idiot ratlicking anti-mask morons, and when we’re able to game in person again, hopefully there won’t be any gaps around the gaming table.

Oh, and happy American Thanksgiving to any American readers!

Mad Mushroom Jungles

From the excellent people running Dark Fantastic Mills I purchased this Doomcap Shrooms Bundle earlier in the year. If you want to run fantasy games, you should, I think, have fantasy scenery. If you want to fight amongst perfectly ordinary trees, run a historical game, those are fun too.

Unpainted Doomcap Shroom bundle, photo from the Dark Fantastic Mills website. I believe that figure is on a 32mm base. Big fungus!

These mushrooms are all 3d printed in FMD; you can see some layering here and there, especially across the broad flat tops of some of the bigger mushrooms, but other than that they’re wonderfully sculpted and beautifully detailed pieces of scenery. And BIG – check out that roughly human sized figure in the Dark Fantastic Mills shop photo above!

With “fantasy scenery should look fantastic” in mind, I cut loose and did up this lovely batch of 3d-printed giant ‘shrooms (and their smaller brethern) in gloriously weird colours. Reds and purples and vivid blues and greens, all the colours I usually use sparingly here and there came out in force.

I started with a dark grey spray primer coat, then did a rough drybrush of pure white. All of the colours after that got cut at least 1:1 if not more with glaze medium, so the original drybrushing mostly showed through and the various colours layered and blended fairly smoothly. I’ve posted this link before, but go watch Dana Howl’s 24 minute intro to glaze medium on YouTube, it really has changed the way I paint and these giant mushrooms would have looked much less interesting without her influence.

Three of the DFM ‘shrooms and the smaller of the two scenic bases that come as part of the bundle. Click for larger.
The larger of the two scenic bases, and three more of the big DFM shrooms. Click for larger.
DFM shrooms on the left, as well as their mini-shrooms on the three mushroom thickets in the background. The foreground fairy ring features mushrooms from Bad Squiddo. Click for larger.
The largest single piece in the DFM bundle is that huge multi-trunked shroom off to the left, which I still need to finish the base of. Largest scenic base in the foreground. Click for larger.

Some of the DFM shrooms still need another round of highlighting or glazing to finish them off, and the biggest one, the massive slope-topped multi-trunked one in the last photo, still needs it’s base finished, flocked and detailed.

I’m really pleased with these Dark Fantastic Mills ‘shrooms. The bundle isn’t cheap, but you get huge dramatic pieces of scenery for your money that really stand out on the table! Go check Dark Fantastic Mills out, they’ve really harnessed 3d printing to make scenery that couldn’t easily be made in other materials and their designs really are fantastic.

More Weird Fantasy Terrain

Back in June, roughly 20,000 years ago in the Early COVID Summer Era, I built a stone portal/archway/summoning gate thing, showed off photos of it all unpainted and pink, and then never got another photo of it up on the blog! The paintjob was pretty similar to the standing stone I’d done a week or so prior, in any case.

This week I pulled both those pieces out and finally did the base detailing so they fit better with the rest of my fantasy terrain, which has a wild, fecund, lush Summer Realm feel to it, even before you start noticing the giant mushrooms!

Weird stone arch all painted up. Click for larger.

I’ve just ordered a top up of flowers and grasses from Rain City Hobbies over in Vancouver; they do a bunch of different grasses and flower tufts in a nice variety of colours and I always like having a relatively-local source for this stuff! One of these days I might need to put an order in for some of the really weird alien grass colours Bad Squiddo stocks to add that extra touch of strange to my fantasy table!

As for the stuff in the background of the photo above, stay tuned, I have more weird fantasy terrain posts coming soon!

Weird Fantasy Terrain

If you’re going to do fantasy battles, why restrict yourself to normal-looking trees and such? If you want to fight a battle in a pine forest, go do Romans vs Germanics or WW2 Ardennes or something. For fantasy, we should have properly fantastical terrain!

To that end I recommend Dark Fantastic Mills terrain (but more of them in a longer future post!) and the Fantastic Rocks & Plants STL Kickstarter which concluded back in September and which now appears to be available for purchase (or late pledges? I can’t tell) over on MyMiniFactory.

I don’t have a 3d printer but Corey does, so I pay him in beer and snark and (when his tempermental 3d printer cooperates) get 3d printed nifty things back from him.

Using a couple of junk CDs (best scenery bases ever!) I put together this trio of fungal thickets to add proper fantastical flavour to our fantasty skirmish games.

All three mushroom thicket bases together, plus nine Reaper tree-kin to lurk in the thickets! Click for larger.

These thickets use half a dozen big 3d printed mushrooms from the FR&P KS and a bunch of resin and 3d printed smaller mushrooms from Dark Fantastic. Scraps of cork board about 1/4″ thick add some height here and there, and sand, flock, and lots and lots of flower tufts finish them off.

More mushroom madness. The tree-critters in the foreground are Reaper Miniatures saporlings. Click for larger.

The tree-dudes are Reaper Saporlings, available in a batch of nine, as a single, or in Bones plastic. They’re about human sized and great figures. They’re going to star as zombie stand-ins in a fantasy pulp game sometime soon, and will no doubt find other roles to play in future games.

More Saporlings, and two of the mushroom thicket bases. Click for larger.

I have the Doomcap Deeps bundle from Dark Fantastic all painted up in the same bright colour blending scheme as these mushrooms, and I’ll get some decent photos of them soon for that longer review post I hinted at at the start of this post.

Stay well in our second wave of COVID world, stay safe, and try to get some gaming in if you are able. If we isolate now, it is so that there isn’t a gap on the other side of the gaming table when we do gather again in safety.

Links of Interest, 4 Sept 2020

Quiet around here for the last couple weeks on account of me being busy getting married and going off on a short honeymoon, as well as various wedding planning/bachelor party type stuff before the actual wedding!

Back now, working on various things that I’ll show off here in due course.

Firepower Gaming is a new UK website & webstore that is publishing some great terrain articles. They started with a fantastic set of Normandy farm buildings, starting from simple MDF kits and really, really making them shine and have since published scratchbuilding a stone dovecote to accompany the other Normandy buildings. I built an English-style dovecote a few years ago and they’re great wargaming scenery, small footprint but visually interesting. No idea how common they were outside of England and France, mind you.

I’ve also just received my first ever order from Shapeways of a mix of stuff, including a bunch of incredibly detailed 1/1200 or 1/1250 detail items for our naval games. That Shapeways link above goes to my public lists, so you can see some of what I ordered. I’ll do up a review of those sometime soon too.

More Small Scale Scenery Inspiration

There aren’t a lot of small scale scenery tutorials out there, either as videos or traditional blog post writeups. Viv on RubbishInRubbishOut, though, did some YouTube videos of Dystopian Wars scenery a few years ago, and it turns out that DW is in something approximating 1/1200 scale, more or less.

Table intro, part one of four.

Dystopian Wars table intro, painting & finishing the table, islands part one, and finally islands part two.

Also, Dispatches from the Front has been working on some fantasy naval scenery for Man’O’War using the Brigade Models buildings and it looks fantastic. Fantasy microscale terrain has a definite appeal, you can get grandiose epic terrain on the table that wouldn’t work at all in any larger scale!

Fifty (or so) Tiny Buildings

I’ve finished painting the last buildings of my first Brigade Models Small Scale Scenics order, before I start in on painting the buildings and scenic bits I got in my second Brigade order. This batch has the British town, village, and suburban buildings I didn’t use previously, a bunch of industrial buildings, and a couple of lighthouses.

The cutting mat in all of these photos is a one inch/half inch grid, for scale. The largest of these buildings is less than two inches long, and the smokestacks are all between an inch and an inch and a quarter tall.

In progress industrial buildings, in various shades of grubby brick. Click for larger.
Walled farmyards and various houses and such behind. Click for larger.
Everything all finished and off the painting sticks. Industrial buildings over on the left, two churches and a variety of detached houses centre, various town/village buildings on the right. Farms in the background. Click for larger.
The industrial buildings, churches, and a variety of houses. Click for larger.
Town and village buildings, and some more large detached houses on the right. Click for larger.
The farmyards, still with some work to do on the actual yards but the buildings complete at least. Click for larger.
Lighthouses and Martello towers. Click for larger.
A streetscape of sorts, most of the village/town buildings pushed together roughly with the larger church behind. Keep in mind most of these buildings are about 1/4 inch wide! Click for larger.

Now that these are all done they’re getting varnished and then put back into storage for now, so that I can move on and finish some more partially finished projects before I come back to building more coastal modules and starting on the buildings from my second Brigade order.

Links of Interest, 1 July 2020

For this Canada Day in a time of pestilence abroad in the land, the usual mix of individual links and items that don’t quite warrant an entire freestanding post, as is an irregular feature of this blog.

Curt of the always-awsome Analogue Hobbies blog has been doing 2mm Napoleonics at a really high standard, including gorgeously painted tiny renditions of the various buildings made famous by the Battle of Waterloo. He’s previously posted about his 2mm Nap armies, as well.

I am getting more and more tempted to do either Russian Civil War or 17th C English Civil War in 2mm… to which end I recently bought the Forward March 2mm Library and might need to get some things 3d printed for me. I quite like the thought of a single print bed of bases being an entire army, and I’ve always liked the “miles of battlefield all at once” look of small scale gaming even though I’ve done nothing smaller than 15mm (and far more 28mm than anything else) for many years now.

Rather nice little tutorial on doing bog or fen areas easily with patterned clear plastic sheet over on Lead Legionaries. This is a terrain type I’ve been meaning to do for several years now but it’s still somewhere on the endless to-do list.

On the WW2 naval gaming side, which I want to get back to sometime soon, I recently discovered the nicely laid out german-navy.de which has good short articles and illustrations of nearly everything the WW2 Kreigsmarine built or planned to build, from the workaday utility boats like the well known R-boote to the insane jet-powered hydrofoil they were dreaming of far too late in the war to actually matter. (German military designers spent the entire war hopped up on the Very Best Drugs, you can’t convince me that isn’t true!) If you have found a similar resource for other WW2 navies (especially the Royal Navy) I’d love to know about it.

Happy Canada Day if you happen to be Canadian, Happy (upcoming) Independence Day if you’re American, and hope July is good to you regardless of where you’re reading this from!