Tag Archives: fantasy

Dead Animal Bits (in hard plastic)

Back at the very end of 2023 I happened to find a Kickstarter for a sprue of dead animal bits to make kitbashing and such easier, and I wrote it up in December 2023 here on the blog. It was run by Pete the Wargamer in partnership with Wargames Atlantic, who would do the actual production of the hard plastic sprue.

The campaign funded (just!) which was cool, and I put in for 3 sprues. Molding up an injection molded plastic production run takes time and it was late October 2024 before I got my loot, but communication from Pete was good the whole time.

So what do you get? The sprue is roughly 6″ by 8.5″ and well-supplied with everything from shark jaws to antlers to femurs to hacked-off hands on spikes or hooks! I was mostly interested in the antlers and goat horns, but there’s lots of other neat stuff to accessorize scratchbuilding or kitbashing with!
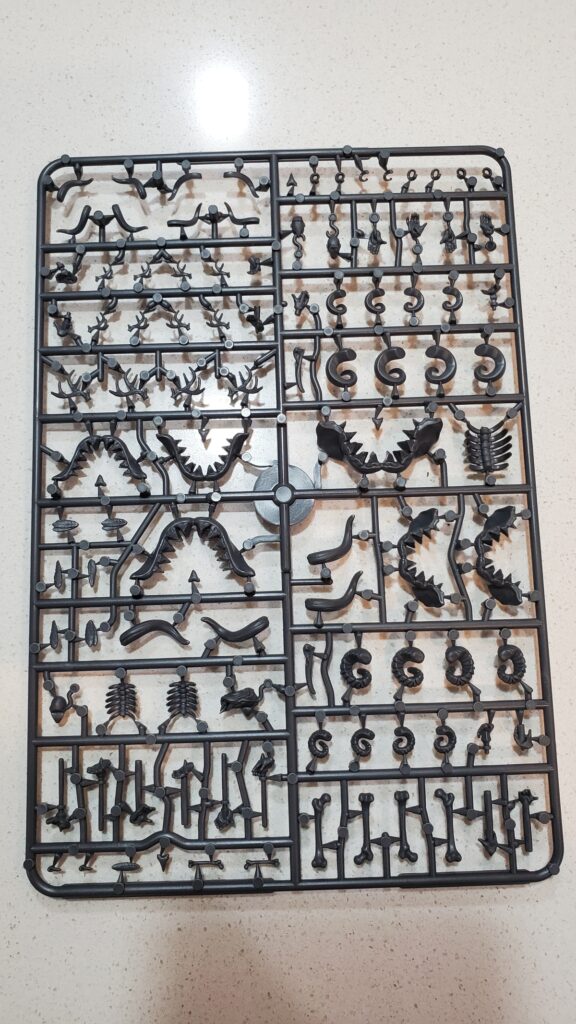
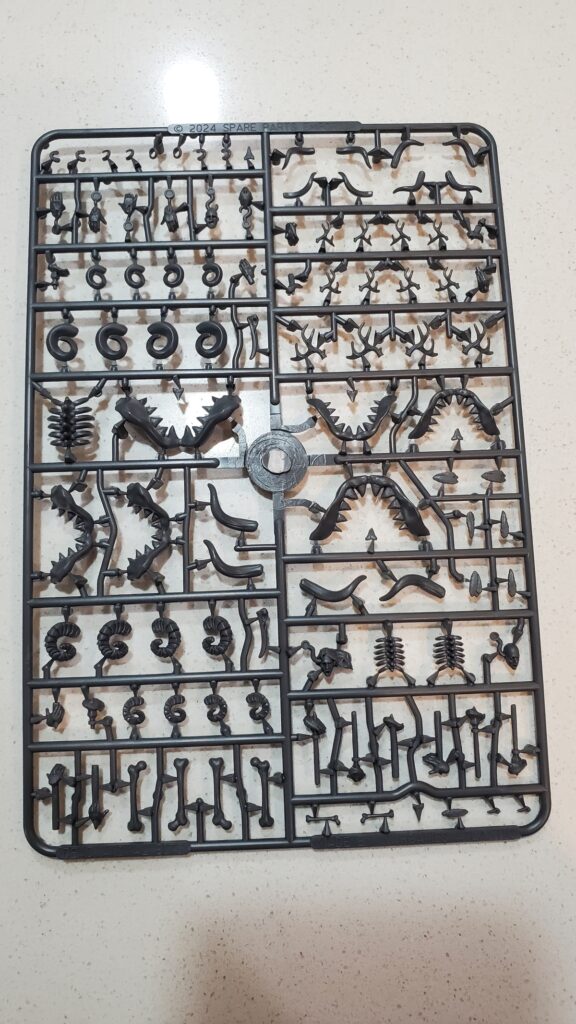
Right in the centre of the sprue there’s half a dozen big shark jaws; the top of the sprue has two different style of goat/sheep (demon?) horn each in several sizes, and deer/elk antlers in three sizes. Below the shark’s jaws there’s some feathers (the small things off to the left of the front view), some rib cages, a bunch of severed hands on spikes or hooks, another style of curled goat horn in two different sizes, a few individual shark teeth, and finally a batch of femur-looking bones, again in several sizes.
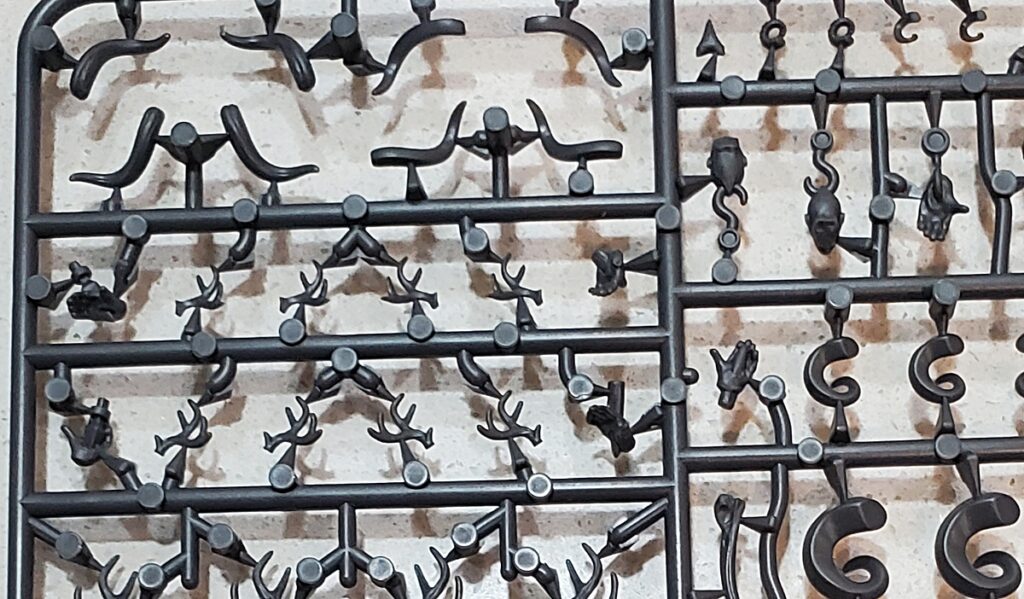
A closeup – this is the top left of the front of the sprue. Horns, antlers, hands and heads on hooks, and shark teeth here.

If you want to do whole units of antlered or horned troops you’ll likely burn through a bunch of sprues, but if you just want to add general weirdness here and there a set of these sprues should keep you happily adding weirdness for a good long while.

I’ll be adding horns and antlers to a batch of undead infantry I have in progress, and they’ll definitely be showing up in some of the stranger plans for my slow-burn 17th C pike and shot fantasy project, and in the best tradition of being inspired by random stuff that’s now in your Pile of Opportunity, I’m sure they’ll be showing up elsewhere too…

Wargames Atlantic now has the Dead Animal Bits on retail as a box set of three sprues, so if you missed the KS you’re in luck! (they also have some nice detailed photos, too)

Definitely a cool addition to the hard plastic wargaming items available, and I’m glad I was able to help make them happen via the KS.

The Workbench This Week, 27 Dec 2022

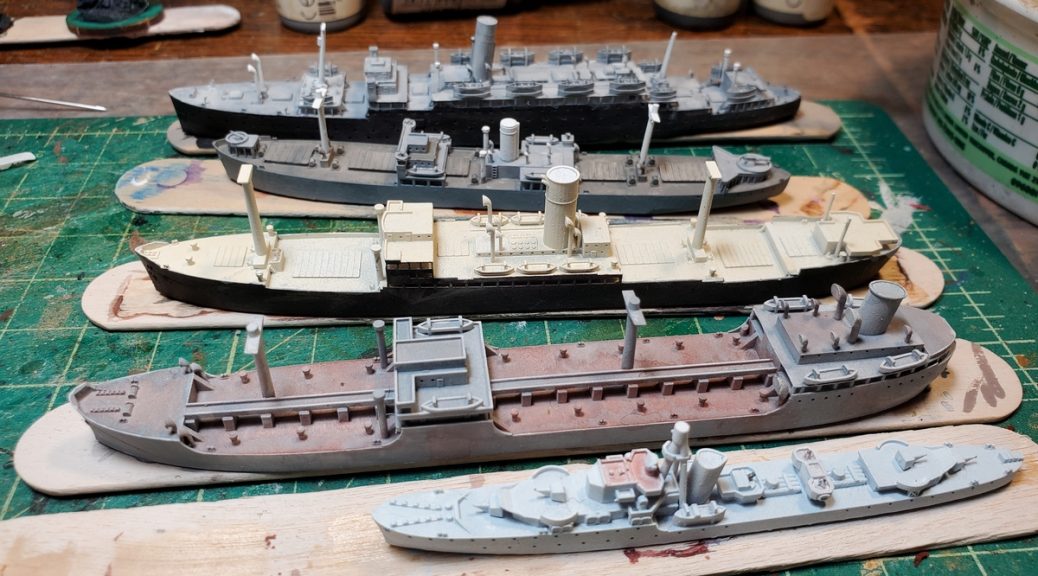
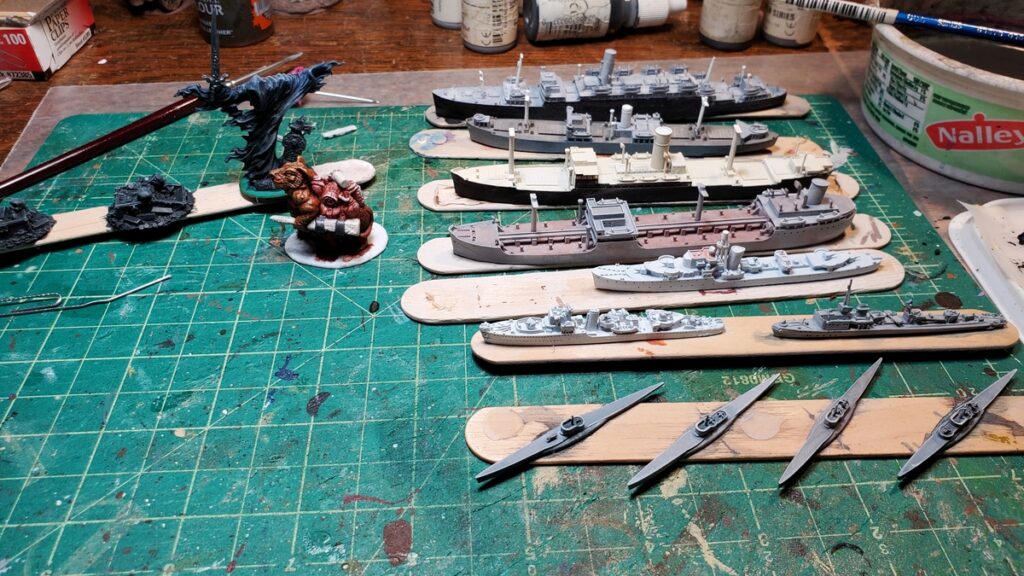
I’ve got the week between Christmas and New Years off entirely this year, so there’s been a bit of painting going on. Mostly I’ve been working on the 3d printed WW2 ships from Antics, as well as a few fantasy bits just for fun.
The workbench this holiday week. Naval stuff on the right, random Reaper fantasy stuff on the left!

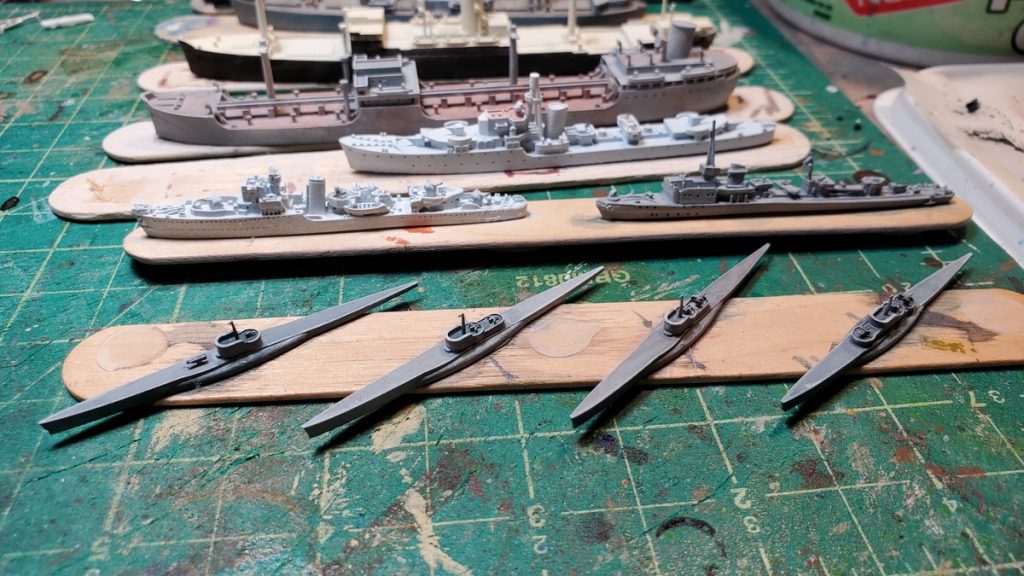
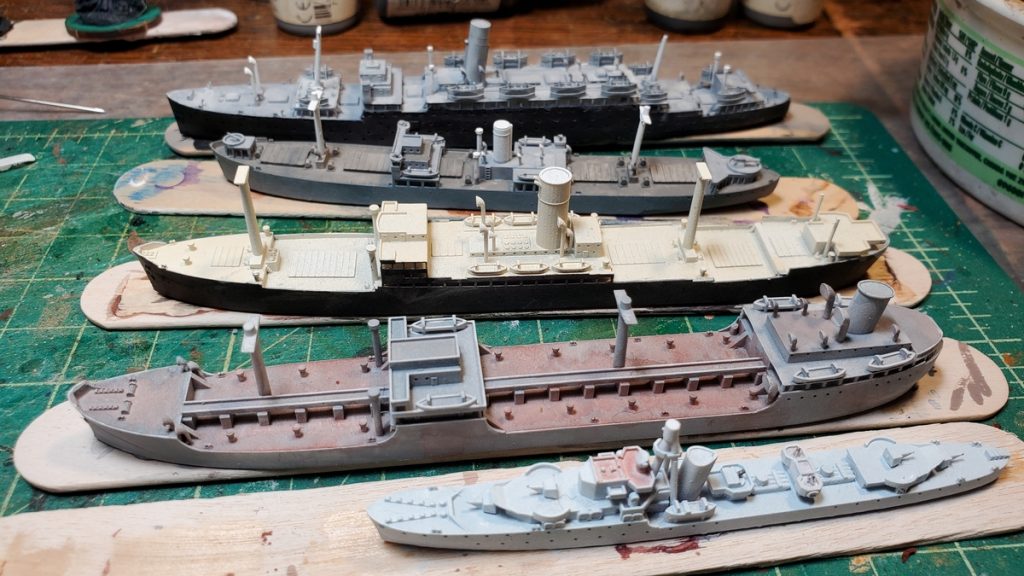
The ships are coming along nicely, although the larger ones are slow going – so many details to paint around! The four U-boats in the foreground are basically done, unless I decide to do a bit of pin washes to pop the few details a bit more.

The larger vessels are all at least basecoated, although several are going to need a second pass as I realize I missed bits on the first pass. The two Royal Naval vessels (a Hunt DE foreground and “O” Class Destroyer behind) will get some sort of camo paint and the German KM T13-class torpedoboat might also get some, although it’s unclear to me if the Kreigsmarine ever actually did anything other than plain grey on most of their torpedoboats and destroyers.

From the front, U-boats times four, the RN Hunt DE and KM T13 torpedoboat, “O” Class RN destroyer, T2 tanker.
The back half of the naval dockyard. O Class DE forward, T2 tanker again, Ehrenfals freighter, Lake class freighter (armed), and finally the Athenia passenger liner at the back.

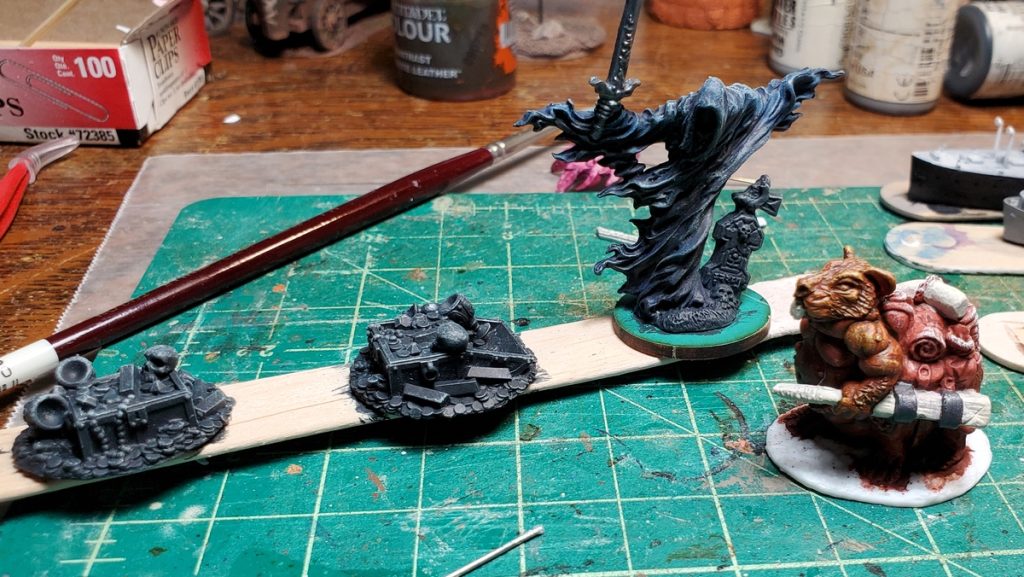
On the non-naval side, I’ve got little group of Reaper fantasy figures. An armed ghast/ghost/haunt, a pack rat, and a pair of treasure markers. Not much to see here yet, but for those of you not into ships, here you go!

Various Reaper figures, very early stages yet. Two treasure markers, a ghast/ghost/haunt thing, and a pack rat who’s both a travelling merchant and his own pack animal. Reaper has a gloriously broad range of fantasy figures, if you’re not familiar with their offerings!

Happy Holidays, everyone, and hope the tail end of 2022 and the start of 2023 are good to you and yours.

Folk Horror Miniatures

I tripped over this little Kickstarter earlier in 2022 for a dozen figures inspired by European folklore, Folk Horrors by Ana Polanšćak. They’re very much “things that go bump in the night” weird horror miniatures and I decided to grab them while the KS was still running.

twelve folk horror miniatures - image snagged from Kickstarter
Image snagged from Kickstarter – the twelve miniatures included, all assembled and painted.

Some of them might be humans in costumes (might be!) and some of them really definitely… aren’t. I think I’ll be using these as plot point markers or similar for Pulp Alley-powered weird horror games, either in the not-quite-17th-C gunpowder homebrew setting I’ve been gradually putting together or more conventional early-20th-C pulp horror games. A good creepy alternative to the Cthuloid fishmen and such I already have!

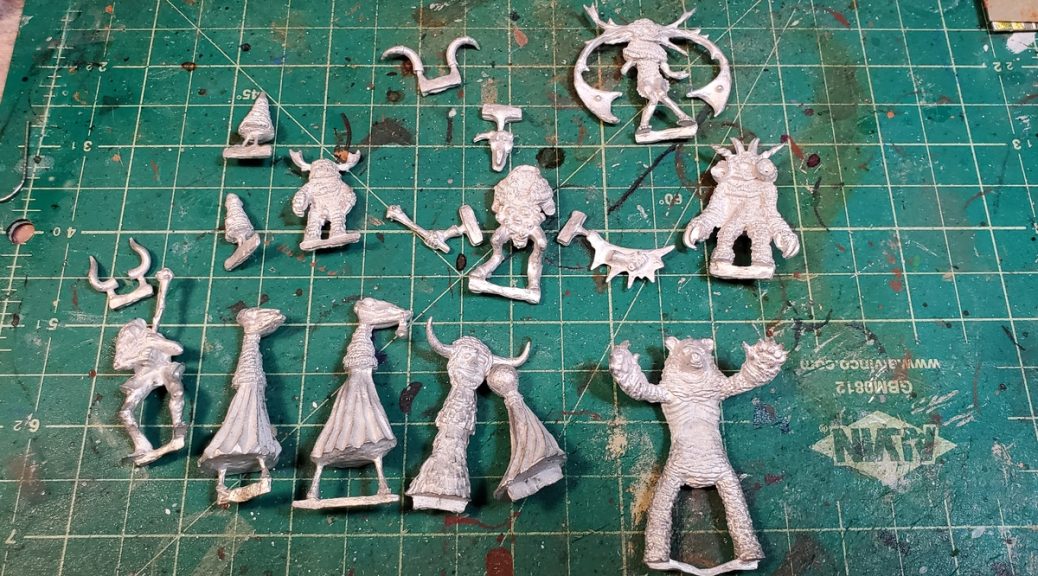
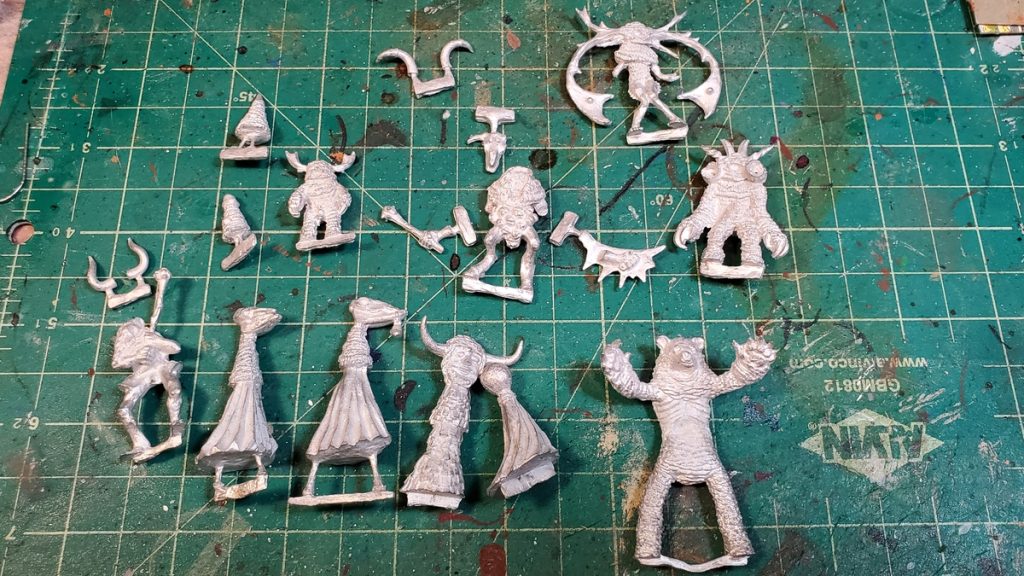
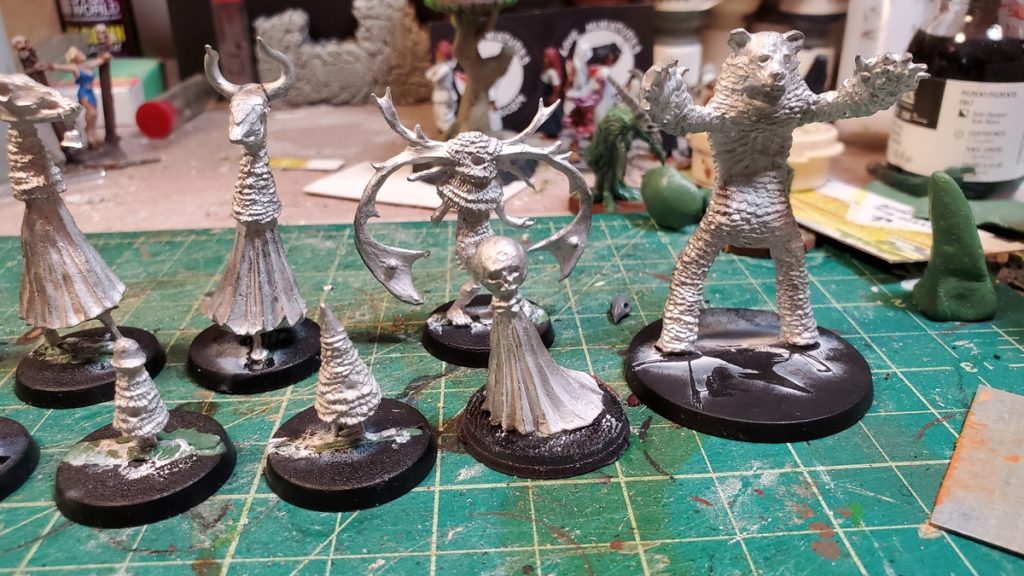
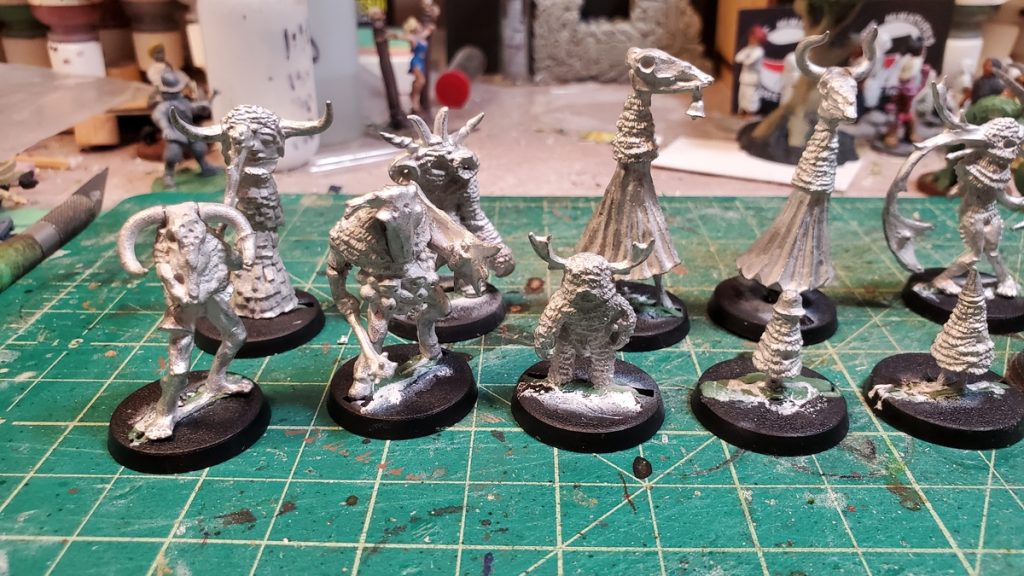
the twelve miniatures all in actual pewter, laid out on a cutting mat for scale.
All twelve figures laid out. The cutting mat is 1 inch/quarter-inch grid squares, for scale.

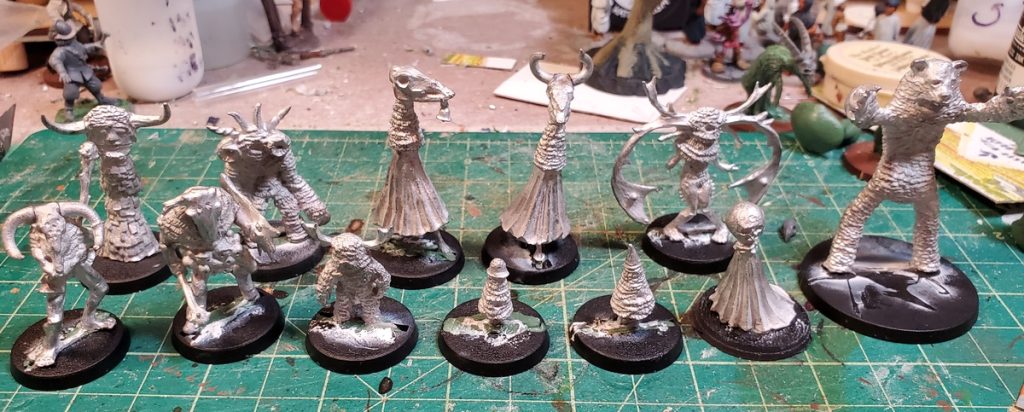
I’ll get this lot assembled, based, and primed over the next few weeks; painting should be pretty short and sweet if I follow the KS paint scheme!

The figures themselves are nice and clean, minimal mold lines and flash. I have some concerns about attaching the horns on some of the figures and the arms on the one “Bellman”, but thick gel superglue and tiny bit of greenstuff should work OK to keep everything in place!

Unfortunately with the KS closed I have no idea where you might go to buy yourself these figures. Meridian Miniatures appears not to have their own website, just a fairly inactive Facebook page. Andrew May has a Patreon page and has run a bunch of other Kickstarters, but again, no info about post-KS ordering. Slightly odd – if anyone has links please let me know in comments!

Bring Out Your Dead

These dead might be able to take themselves out, actually.

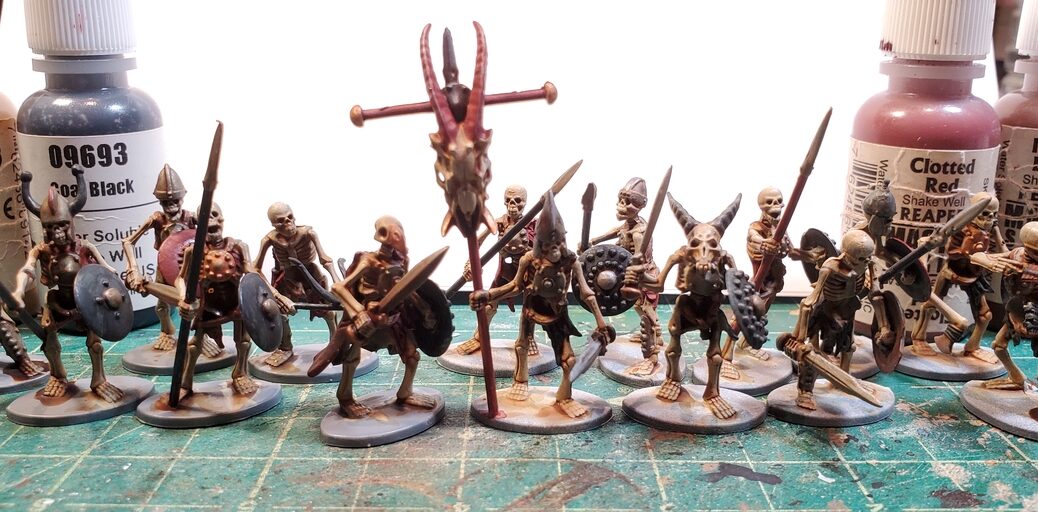
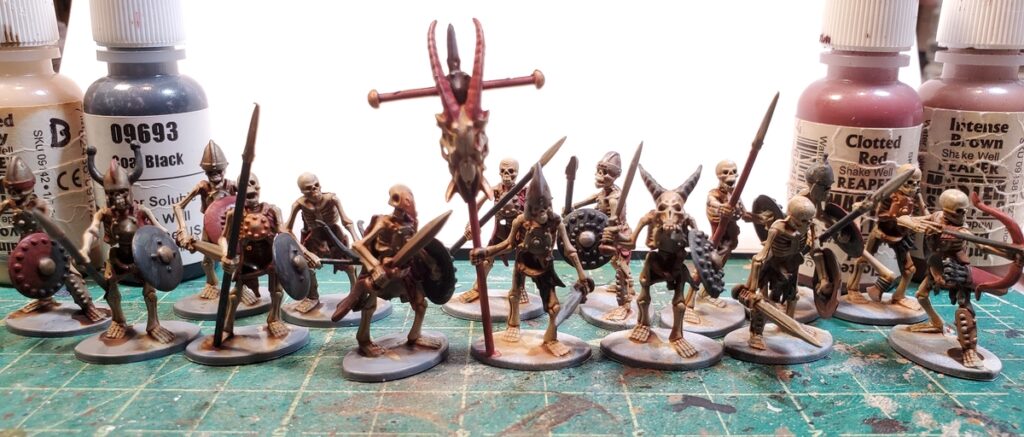
Basing still to be determined but painting finished on my first fifteen figures of 2022. These are North Star’s Oathmark skeletons; the other half of the pack is in Corey’s hands for painting and part of the reason the basing is unfinished is I’m waiting to see if we’re going to coordinate basing or just do our own thing individually.

Fifteen Oathmark skeletons, with some additions from other companies. Click for larger.

The big skull on their unit banner, and the bird and goat-ish skulls on two of the skeletons, are from GW’s Skulls pack, which is probably the most purely GW product GW has ever, it its long and illustrious history, produced. It’s also damn useful for kitbashing and scenery building and to date, the only GW product I’ve ever bought retail that wasn’t paint!

The painting was deliberately quick and simple. Grey primer with a white zenithal overspray, Reaper Stained Ivory mixed 1:1 with glaze medium for the base coat, Coal Black and Clotted Red for all the cloth and equipment, Intense Brown for leather strapping, Tarnished Steel or GW Dwarf Bronze for metal bits. After that was all dry, a fairly heavy coat of GW Seraphim Sepia over the whole figure, and then a quick highlight of the bone bits with Stained Ivory again.

This gave me a good looking hoard of dead folk to throw onto the table when we next face a necromancer in Sellswords or other games, and I have some good skeleton bits to throw into the kitbashing bits bin!

Deer God? Dear God!

I’ve been on a kick of assembling and basing figures in batches the last little while, and also (as you can tell) not been doing much of the ol’ blogging this year… Anyway, right in the middle of assembling a couple of dozen Toadstool Brownies from the big Fenris Miniatures Toadstool Kickstarter earlier this year, the loot from the Fenris KS after that, the Wyrdworld one with all sorts of cool anthropomorphized animal figures showed up!

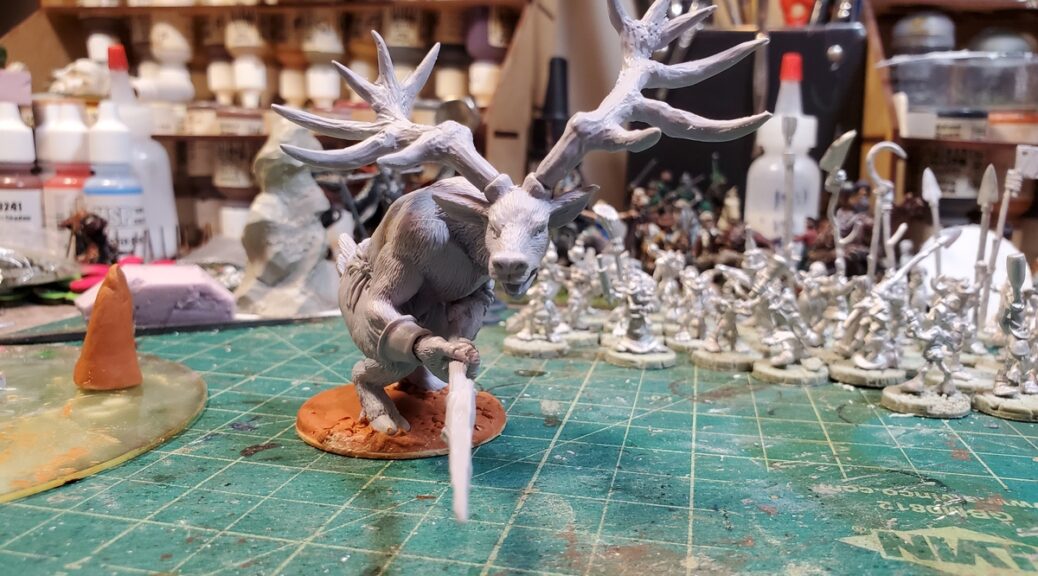
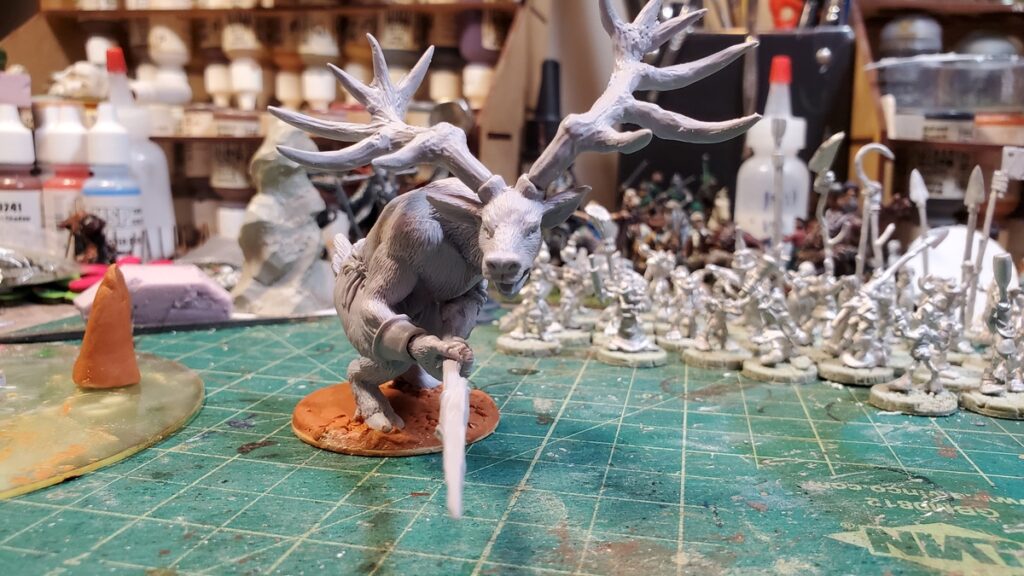
I decided that I needed to base and assemble Brutolph, the Giant Elk right away, because it is a truly spectacular figure.

Brutolph’s business end. Click for larger.

That’s a 40mm circular base our big deer is on, with his arms, spear and antlers just dry fitted for now until all the Milliput on his base is properly cured.

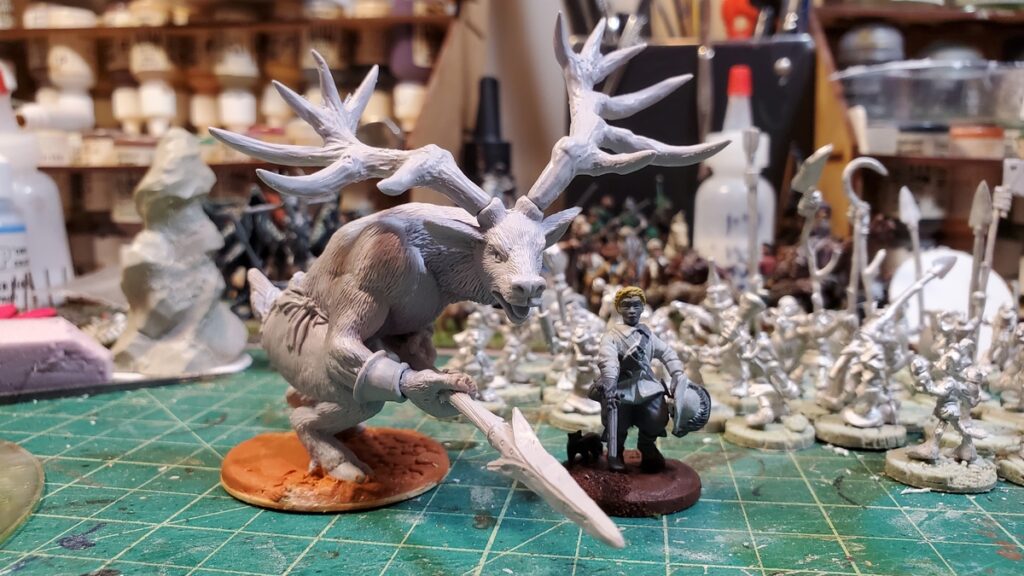
Brutolph alongside a 28mm Warlord ECW figure on a 25mm base. Click for larger.

To the top of his antlers he’s just shy of 3″ tall, and that spear is longer than that!

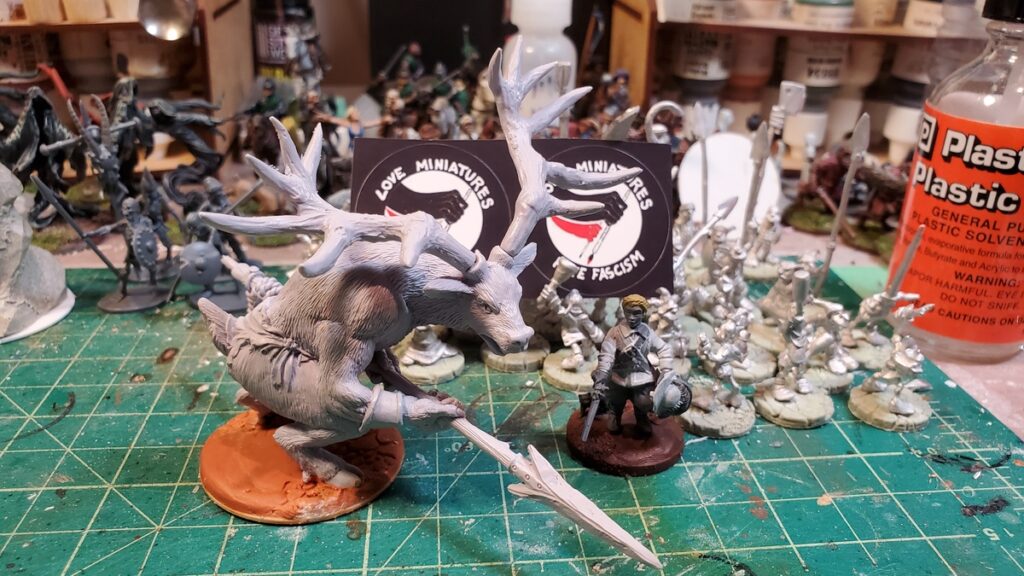
Brutolph from overhead, with Fenris Toadstool Brownies in the background holding up the awesome “Love Miniatures, Hate Fascism” stickers, also from Fenris. Click, as usual, for larger.

I’ll get Brutolph’s arms and antlers properly installed over the next few days and then he and the whole village of Toadstool Brownies will be off for priming. I’m not actually sure how I’ll be painting him up, but might go slightly weird as I intend to use the figure as a forest god/spirit of the deep forest type!

More Weird Fantasy Terrain

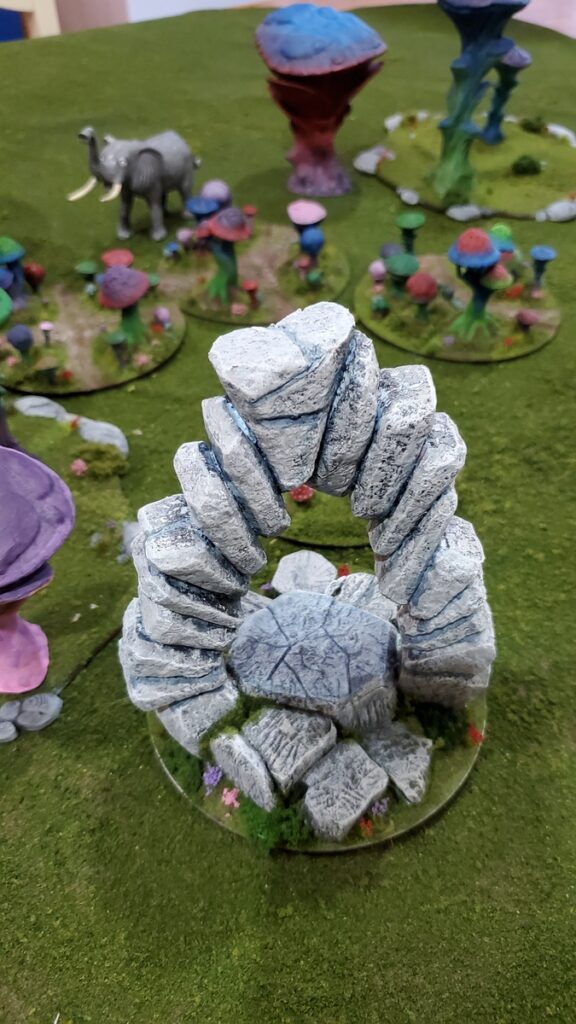
Back in June, roughly 20,000 years ago in the Early COVID Summer Era, I built a stone portal/archway/summoning gate thing, showed off photos of it all unpainted and pink, and then never got another photo of it up on the blog! The paintjob was pretty similar to the standing stone I’d done a week or so prior, in any case.

This week I pulled both those pieces out and finally did the base detailing so they fit better with the rest of my fantasy terrain, which has a wild, fecund, lush Summer Realm feel to it, even before you start noticing the giant mushrooms!

Weird stone arch all painted up. Click for larger.

I’ve just ordered a top up of flowers and grasses from Rain City Hobbies over in Vancouver; they do a bunch of different grasses and flower tufts in a nice variety of colours and I always like having a relatively-local source for this stuff! One of these days I might need to put an order in for some of the really weird alien grass colours Bad Squiddo stocks to add that extra touch of strange to my fantasy table!

As for the stuff in the background of the photo above, stay tuned, I have more weird fantasy terrain posts coming soon!

Weird Fantasy Terrain

If you’re going to do fantasy battles, why restrict yourself to normal-looking trees and such? If you want to fight a battle in a pine forest, go do Romans vs Germanics or WW2 Ardennes or something. For fantasy, we should have properly fantastical terrain!

To that end I recommend Dark Fantastic Mills terrain (but more of them in a longer future post!) and the Fantastic Rocks & Plants STL Kickstarter which concluded back in September and which now appears to be available for purchase (or late pledges? I can’t tell) over on MyMiniFactory.

I don’t have a 3d printer but Corey does, so I pay him in beer and snark and (when his tempermental 3d printer cooperates) get 3d printed nifty things back from him.

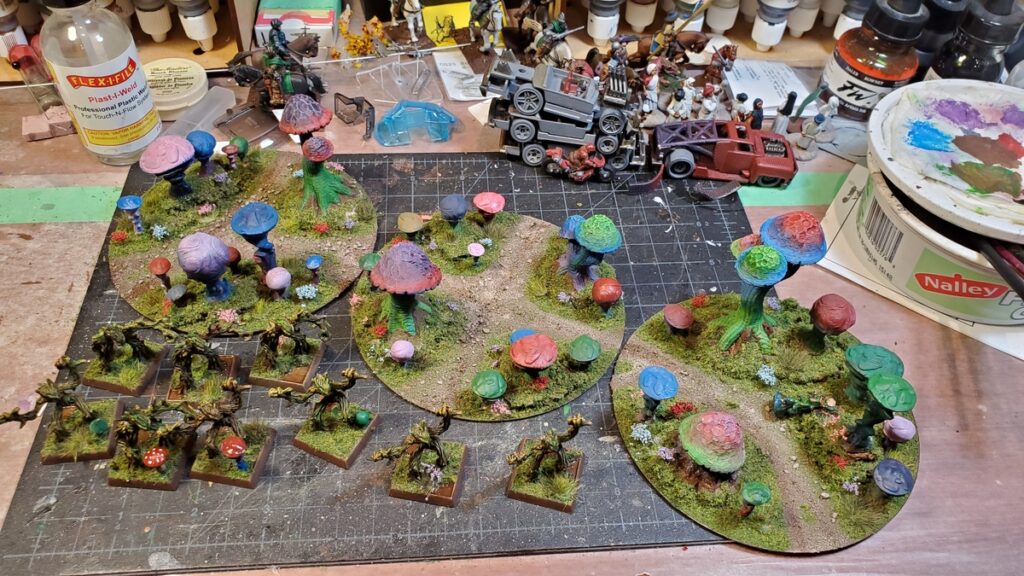
Using a couple of junk CDs (best scenery bases ever!) I put together this trio of fungal thickets to add proper fantastical flavour to our fantasty skirmish games.

All three mushroom thicket bases together, plus nine Reaper tree-kin to lurk in the thickets! Click for larger.

These thickets use half a dozen big 3d printed mushrooms from the FR&P KS and a bunch of resin and 3d printed smaller mushrooms from Dark Fantastic. Scraps of cork board about 1/4″ thick add some height here and there, and sand, flock, and lots and lots of flower tufts finish them off.

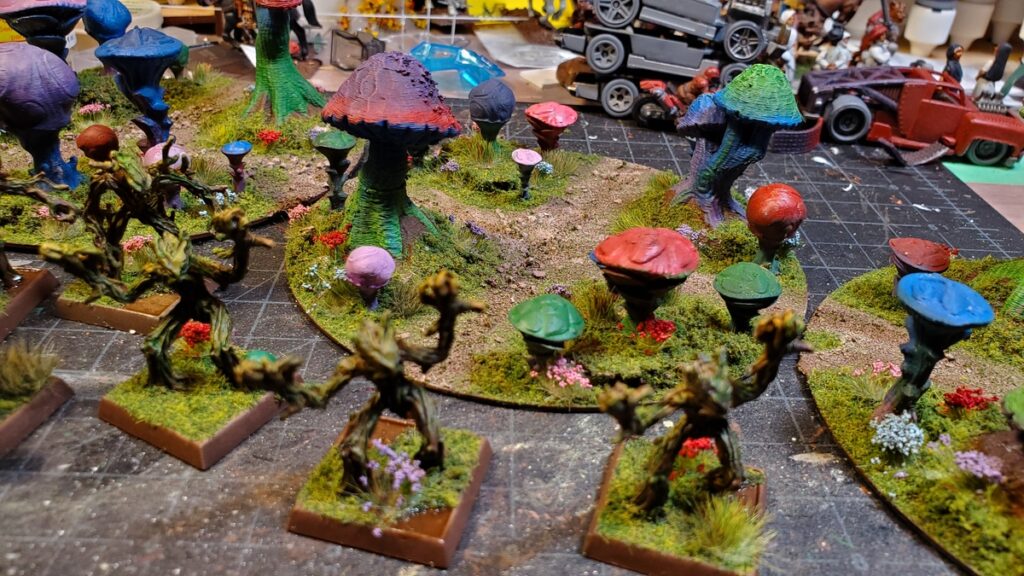
More mushroom madness. The tree-critters in the foreground are Reaper Miniatures saporlings. Click for larger.

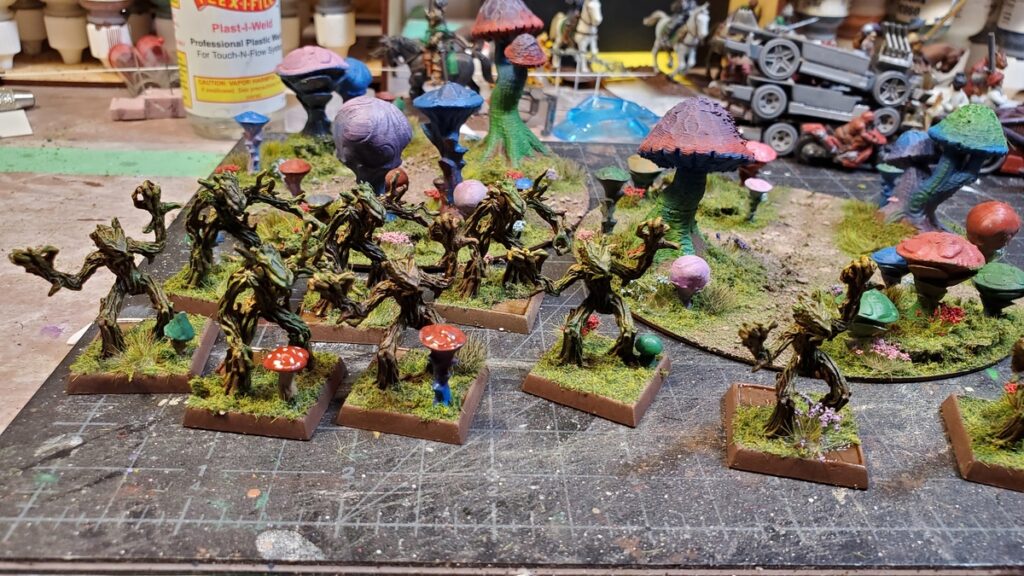
The tree-dudes are Reaper Saporlings, available in a batch of nine, as a single, or in Bones plastic. They’re about human sized and great figures. They’re going to star as zombie stand-ins in a fantasy pulp game sometime soon, and will no doubt find other roles to play in future games.

More Saporlings, and two of the mushroom thicket bases. Click for larger.

I have the Doomcap Deeps bundle from Dark Fantastic all painted up in the same bright colour blending scheme as these mushrooms, and I’ll get some decent photos of them soon for that longer review post I hinted at at the start of this post.

Stay well in our second wave of COVID world, stay safe, and try to get some gaming in if you are able. If we isolate now, it is so that there isn’t a gap on the other side of the gaming table when we do gather again in safety.

The Workbench This week, 30 October 2020

No posts for a month? Sorry! The irony is that I’ve been gaming more regularly than ever, as our little COVID-compliant pod of gamers are now meeting every Monday daytime (all three of us are on reduced work hours, again due to COVID…) and on Thursday evenings due to my lovely wife’s heartfelt desire to kick me out of the house every so often.

We have gotten into Gaslands, and been running through the Perilous Island campaign for Pulp Alley with a fantasy flavour to it instead of the classic early 20th C pulp we’ve done in the past.

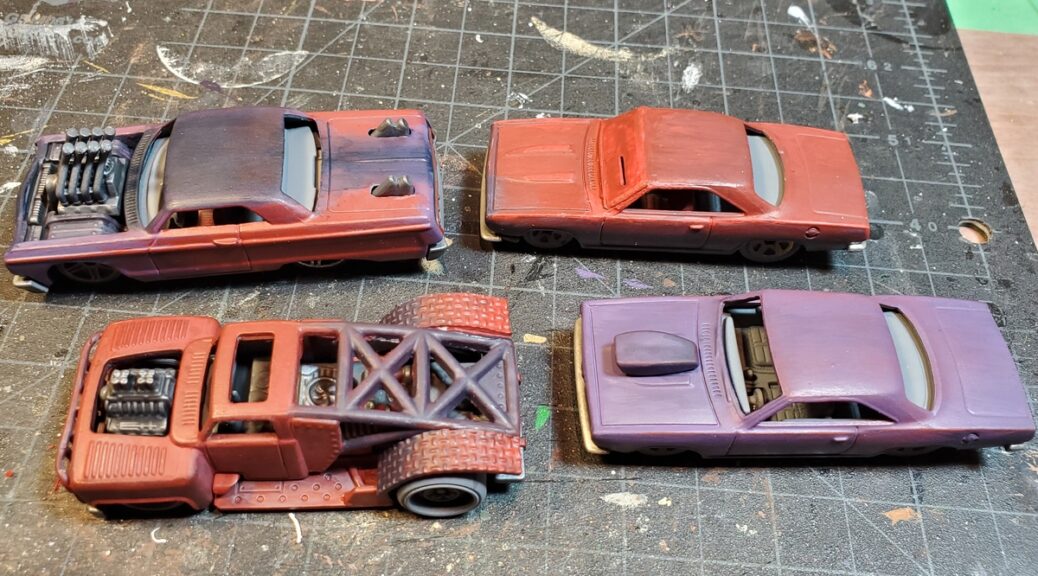
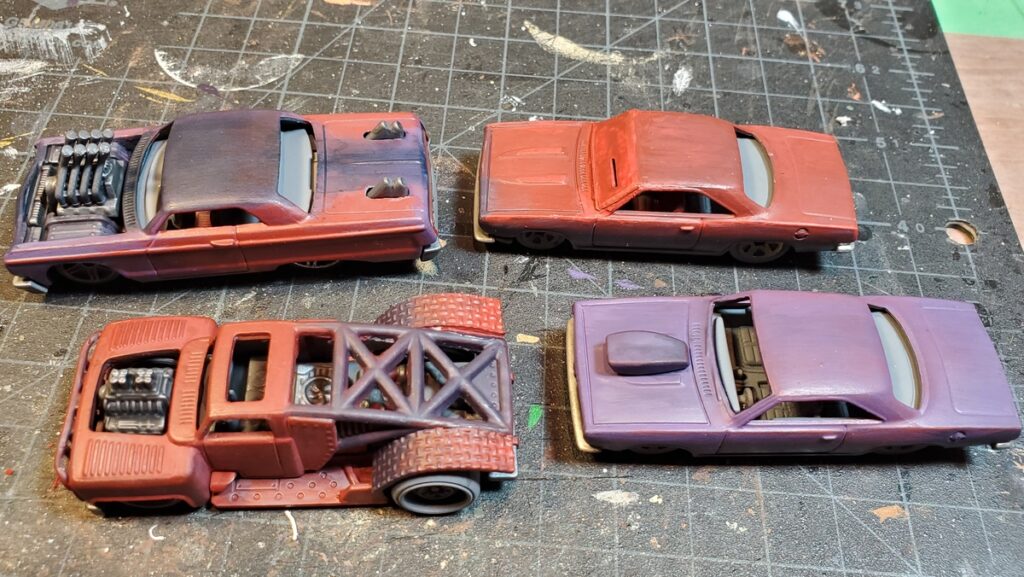
Gaslands cars in progress. Mostly stock and no weapons for now. Click for larger.
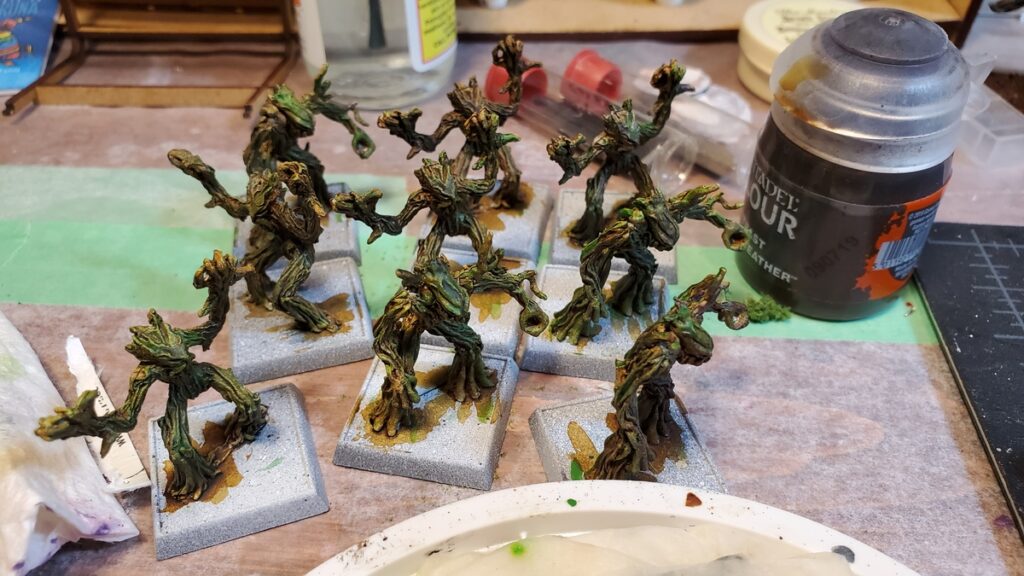
28mm Saproling from Reaper Minatures. Really neat figures, roughly human sized. Click for larger.
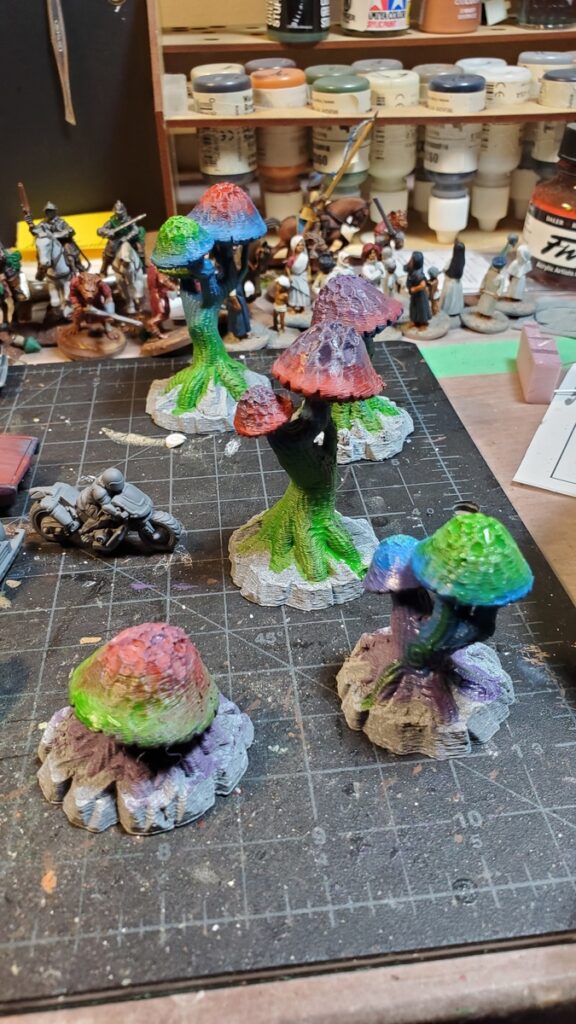
Giant weird mushrooms for fantasy scenery. From a recent Kickstarter. I’ll do a review of that KS sometime soon, I promise. Click for larger.

Anyway, I’m going to try to get back to August’s regular blogging schedule, or something like it. I spent September and most of October gaming but hardly doing any painting or scenery building, and have now painted or built more stuff in the past week than in the previous two months!

A Fantasy Portal, Part One

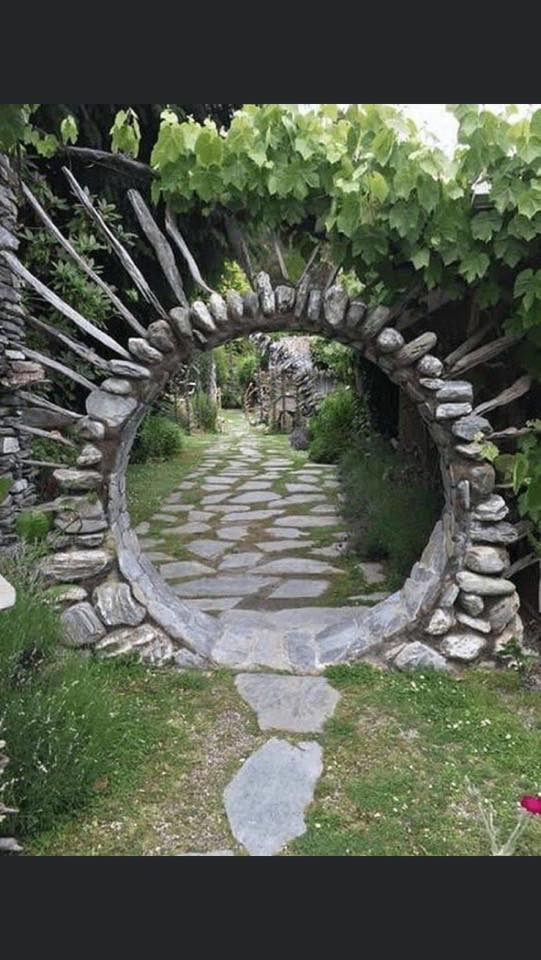
Decided to crank out another piece of fantasy terrain this weekend. I’d been thinking of gateways, portals, and fantastic archways off and on for a while, after someone shared this rather cool garden gate on one of the Facebook terrain groups.

No idea where this is from originally; it’s been shared around so much reverse image search is a cluttered mess. The general idea seems to be called a “moon gate”, though, and there’s lots of other neat images around the web.

I decided on a CD-sized base, because why break good habits, and wanted the portal gate to be solid enough to block line of sight, with a raised platform that can hold several 25mm based figures or one monster on a 40mm base.

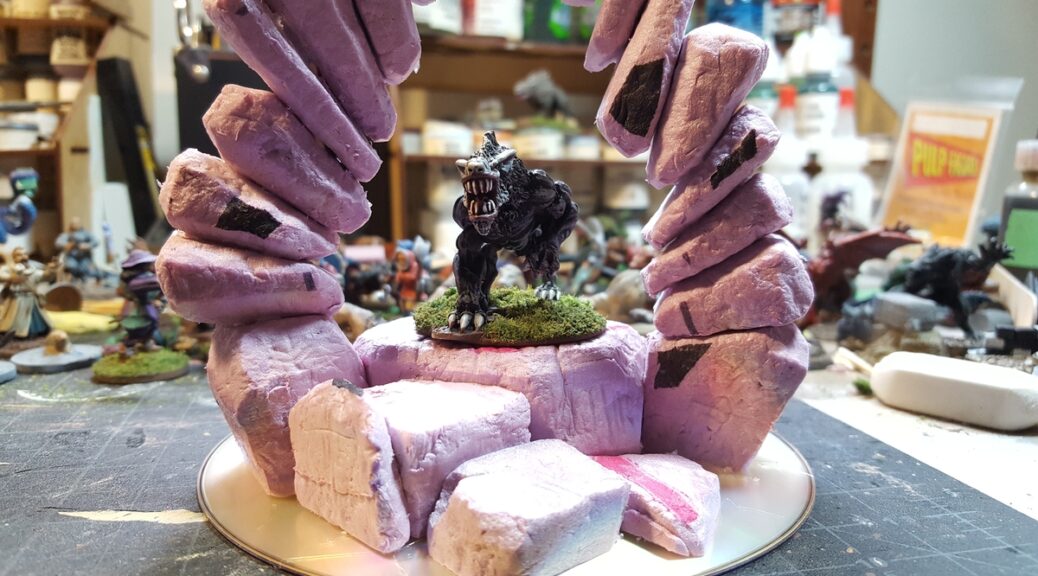
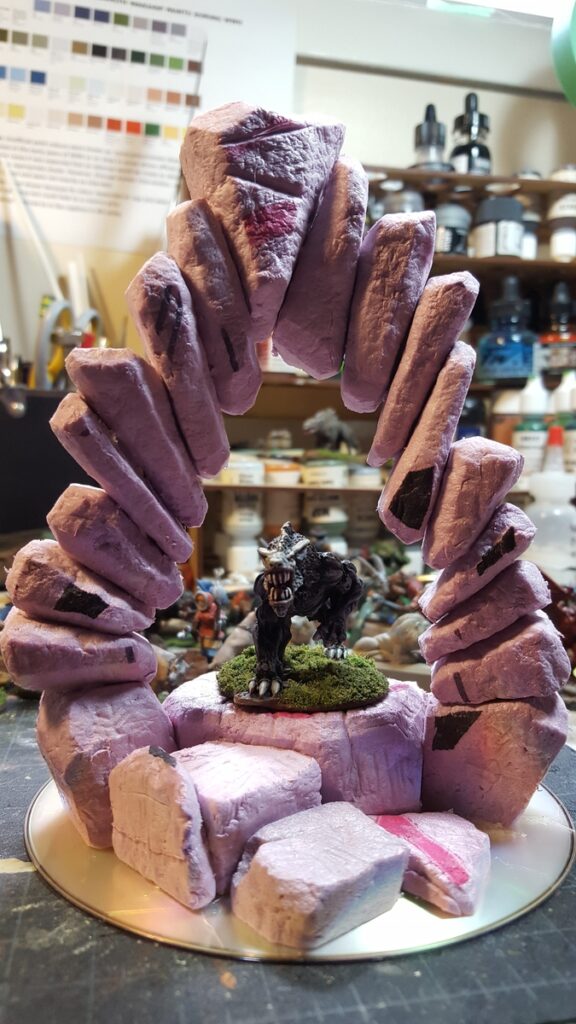
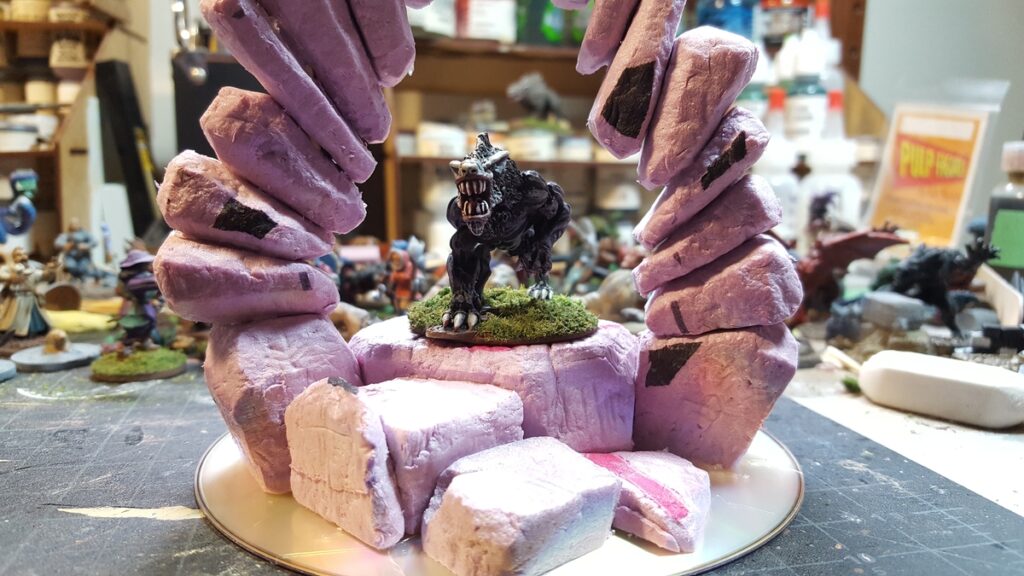
Test fitting a Reaper demon dog on a 40mm wide base. I wound up cutting the topmost stone on the left off and replacing it to improve the fit. Click for larger.

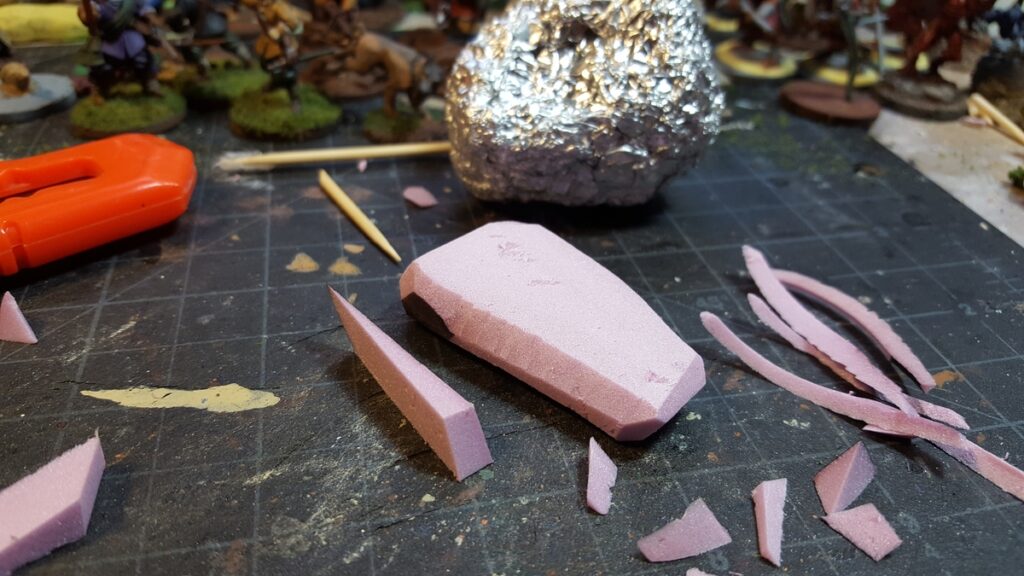
The whole thing is made up of dense pink insulation styrofoam, cut with a knife and textured with a ball of crumpled tinfoil. There wasn’t a lot of planning, just repeated test fittings with various figures like the Reaper demon hound above to make sure figures (and fingers) would fit.

One of the stones in progress, cut and shaped but not textured. Chunk of hard styrofoam, sharp knife, tinfoil ball for textures, toothpicks for strength. Not shown, hot glue gun for fast assembly. Click for larger.

Assembling the arch took a few hours, most of it working fairly casually with a beer to one side of my workbench. I used hot glue for speed, and there’s a partial toothpick holding each stone to the one below it so the whole thing is solid and should be gamer-proof. The top of the arch is about 6″ above table height and flat enough to put a 25mm base on, just for fun.

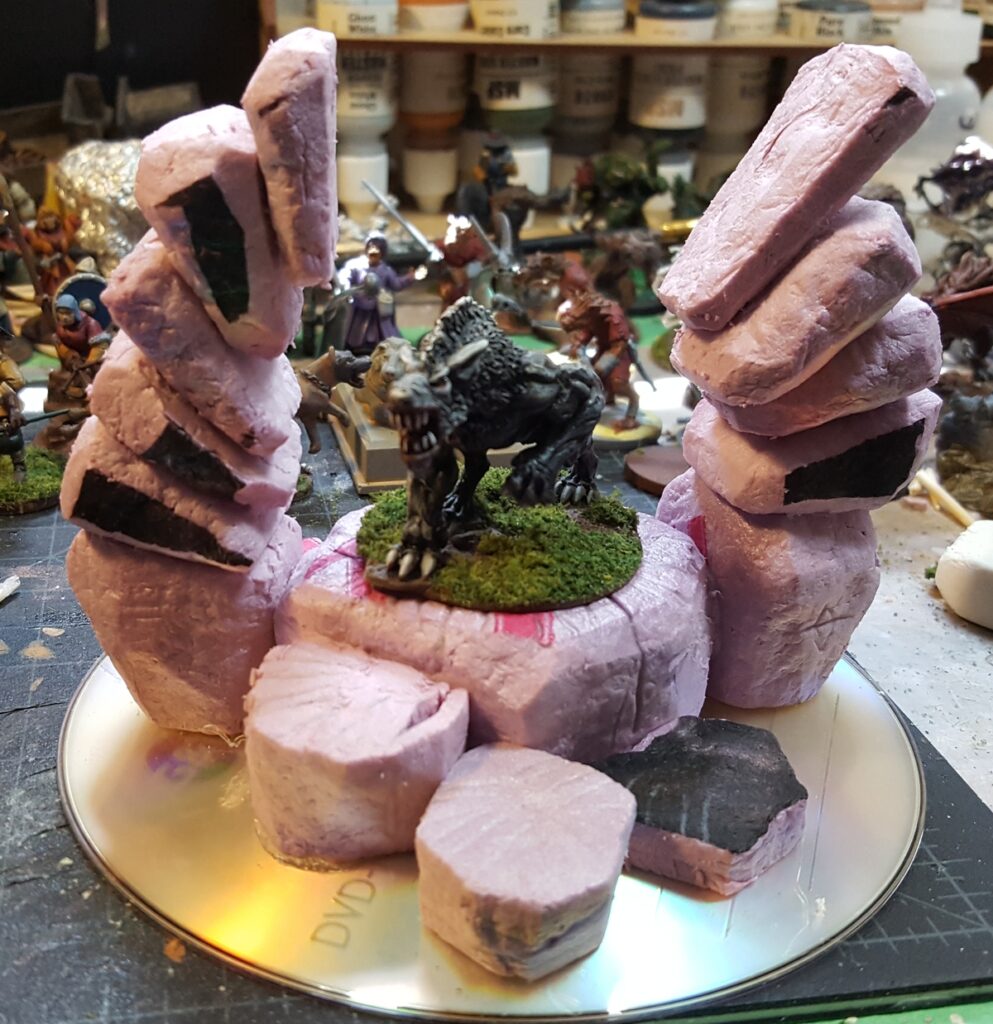
Complete portal, with demon dog. Click for larger.
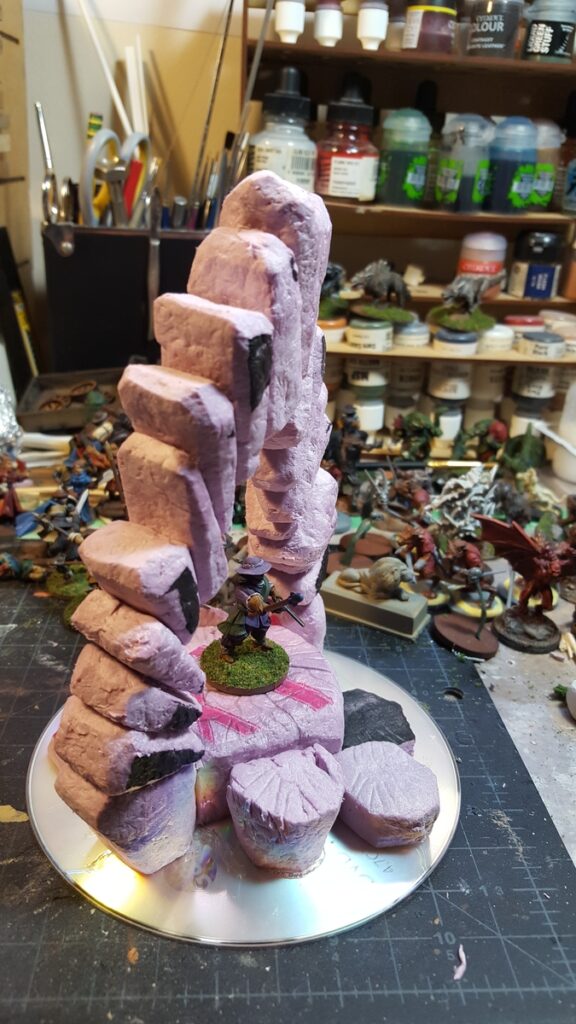
Side view. The arch has a twist to it as it rises. 28mm Warlord figure (kitbashed) on 25mm base for scale. Click for larger.

Except for checking clearance on the demon dog and a couple of bigger figures as the arch went up I didn’t do a lot more planning or measuring, just cut and shaped stones that looked like they’d fit.

The big keystone at the top of the arch started as a random roughly triangular foam offcut and I shaped and textured it early, then fit the last few stones at the top of the arch to make the keystone sit where I wanted it.

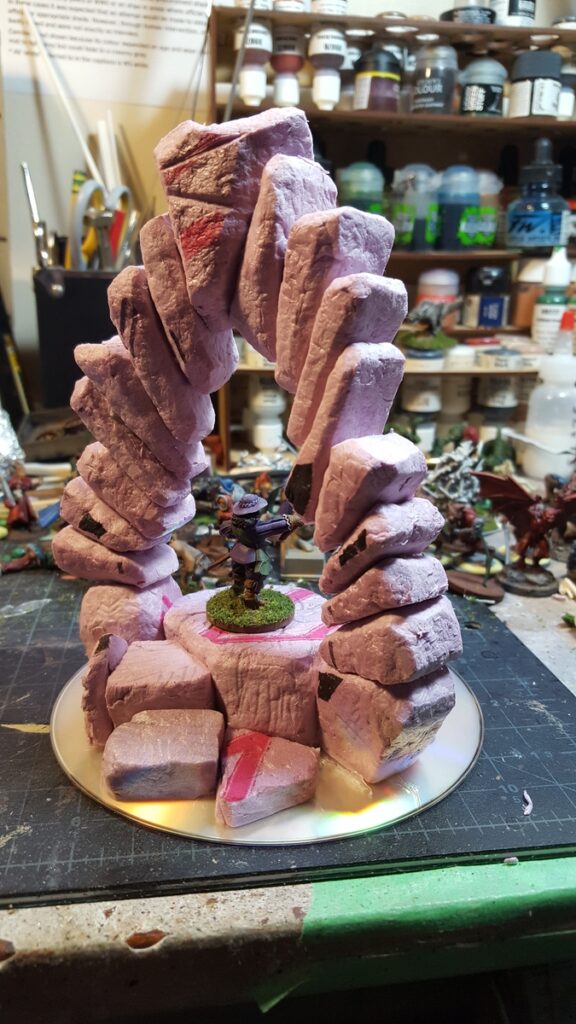
Other side of the structure, same figure as previous image. The whole arch has a twist to it as it rises. Click for larger.

I think for painting I’ll basecoat the archway in white instead of my usual black, then start painting the stones with a heavy drybrush of black so the deep grooves between the stones stay white, possibly with a blue or green wash over them to make it look like magical energy is flowing through this thing, holding it together and powering whatever arcane process the archway contains. The base will probably get the normal black basecoat and then the same drybrushing up for texture.

Reaper Moor Hound bounding through a portal from whatever dread fae realm such horrors belong in. Click for larger.

Painting in the next few days, anyway, as we’re doing a stat holiday game this coming Wednesday (not like there’s going to be any big Canada Day celebrations to go to, right?) and I’d like to get this one the table then. Stay well, stay safe, and stay sane.

A Standing Stone

Nice simple bit of terrain I recently cranked out. I realized that the mushroom ring I built recently was nowhere near gamer-proof; it started shedding mushrooms as soon as it left my workbench so I popped the mushrooms off to rebuild the whole thing in such a way as to let me pin the mushrooms to the base with wire. More on that later, but this left me with a flocked and decorated CD base with nothing on it and it seemed a shame to waste it.

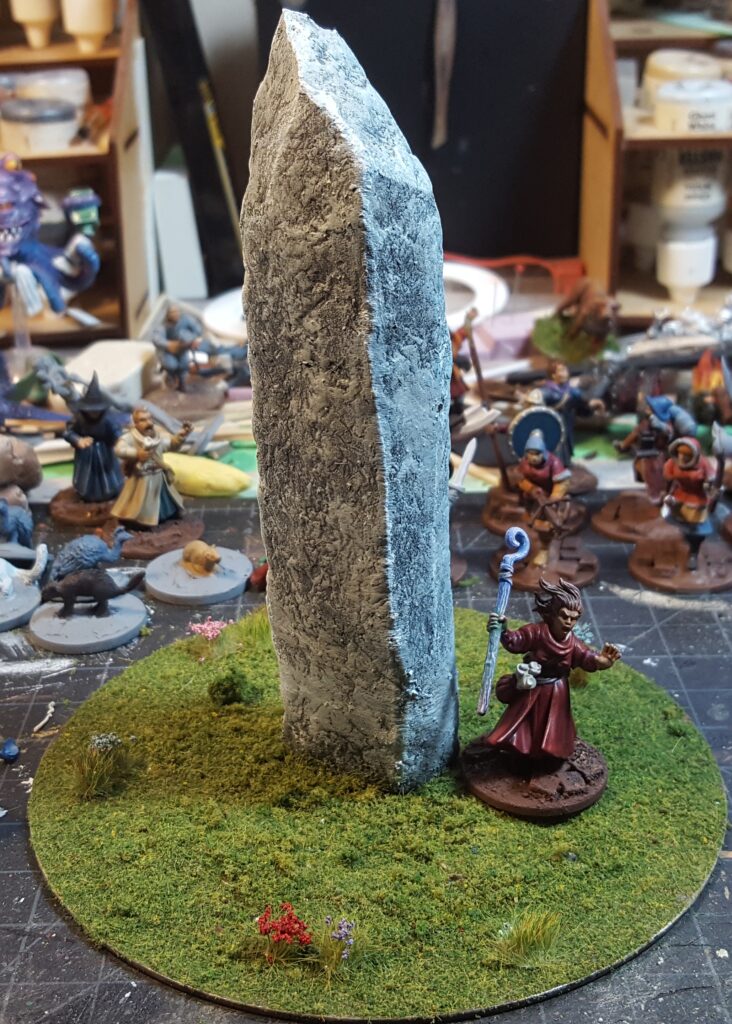
I took a scrap of 2″ thick pink styrofoam insulation, sliced off a piece about two inches wide, and craved bits off until it looks about right for a tall thin standing stone or monolith. Then I took a ball of tinfoil and rolled it all over the piece, which gives a really nice random stone texture. I put a few cracks and lines in with a pencil then rolled the tinfoil over those marks again, then glued the monolith into the centre of the CD with a healthy blob of hot glue.

Unfortunately I didn’t get a single photo of this piece during assembly or basecoating, but it got my usual mix of black paint and white glue as a basecoat, then once that was dry (overnight) it got drybrushed up with dark grey, pale grey, tan, light blue, more lighter grey, and finally white. The pale blue is subtle but makes the piece really pop, and I’ll definitely be using that on more stonework in the future.

Finally, I highlighted all the edges with pure white. It doesn’t show up all that well in the photos I’ve gotten so far, but in person that final step really makes the edges pop and makes the piece look bigger. After that it was just a bit of extra flock around the base of the stone and to cover the spots where mushrooms had originally been glued down.

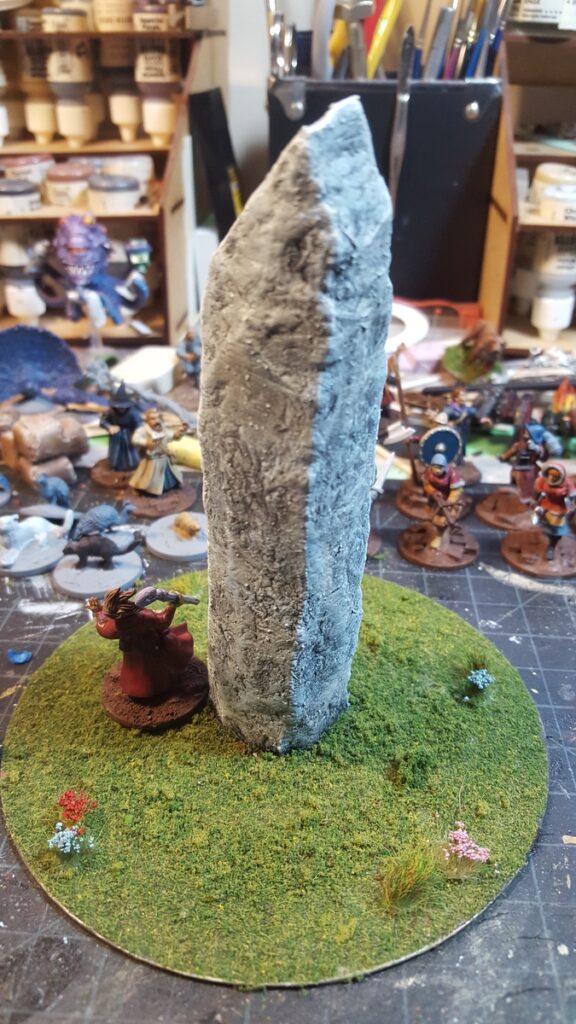
monolith front view
Monolith with 28mm Frostgrave wizard for scale on a 25mm base. Click for larger.
monolith rear view
Monolith from the other side (back? sure…) Click for larger.

The Rebuilt Mushroom Ring

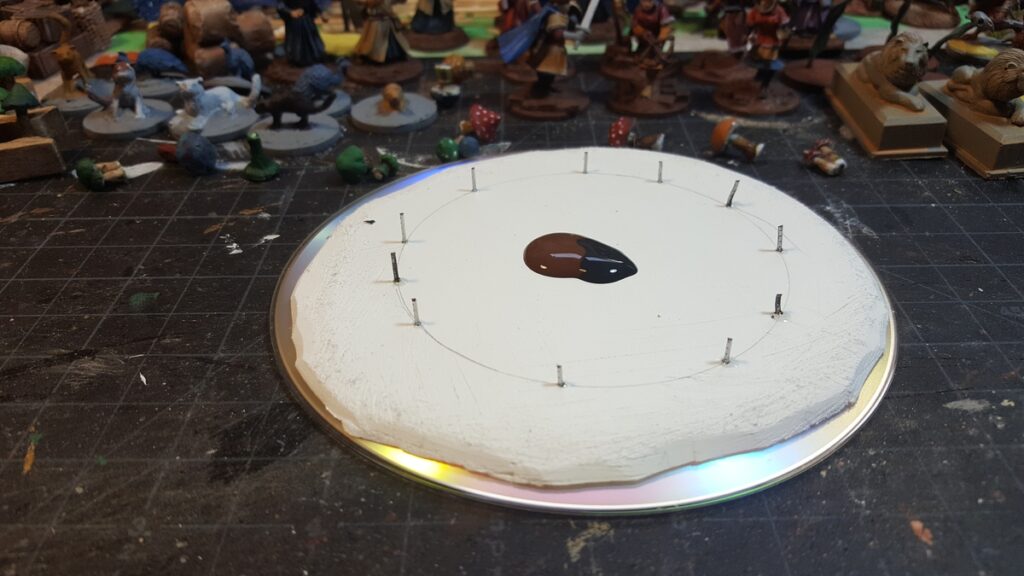
As for the mushrooms, I took a scrap of 3mm plastic board, carved and sanded it so it fit onto a new CD, hot glued it down solidly, then marked out a circle and drilled a bunch of holes with a tiny drill bit. Those got overlength pieces of paperclip wire stuck into them with superglue. The wire was trimmed short after the glue had cured, and then mushrooms with holes drilled into the bottoms of their stems were superglued on.

New mushroom ring base with wire mounts superglued in place, getting a coat of dark brown paint as a basecoat before mushrooms get glued down onto the wires. Click for larger.

The lovely Bad Squiddo mushrooms got glued down (some got repainted beforehand, because I’ve just gotten some new shades of green paint, so why not?) and then the whole thing got my usual turf mix and will eventually get some flowers and other tufts to finish decorating it.

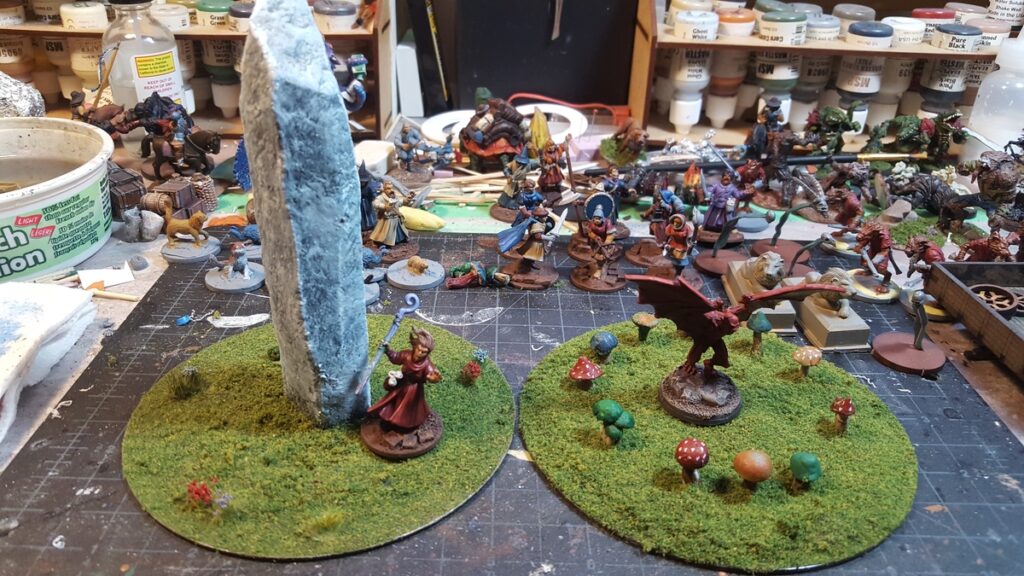
Both “new” pieces together. Reaper 28mm demon in the middle of the rebuilt mushroom ring, which still needs flower tufts to finish it off. Click for larger.

My Turf Mix

I had someone over on Lead Adventure Forum ask about my turf mix. It’s not an exact mix and has been changing gently over the years, but the base is Woodland Scenics mixed fine turf, with WS dark and medium green fine and coarse turf, some Games Workshop summer grass flock, and at least a couple random brands and colours I’m forgetting about in there.

That mix lives in a big 1 litre margarine tub that’s large enough to comfortably put an entire CD-sized terrain base in. For these pieces with fairly wild heavy turf on them I’ll leave the entire base in the turf mix for at least an hour or so before removing it and shaking excess back into the tub, to give a nice heavy scruffy layer of grass. For more manicured lawn-like grass, I’ll take the piece out of the tub right away and shake it off back into the tub, leaving a much shallower layer of turf.