Over on the excellent Lead Adventure Forum, the Build Something Contest 2022 is accepting entries and already some some great discussions and ideas being posted. Highly recommended, the BSC always has some fun and gorgeously executed projects coming out of it. I don’t think I’ll be participating this year, but I’ll be watching the whole thing closely!
Well, “a few weeks” in my last update apparently turned into two months of radio silence here. Oops.
Build Something Contest 2021 over on LAF had the end date pushed back by two weeks due to the organizer having an attack of Real Life, but it’s wrapped up and voting should start this week over on Lead Adventure!
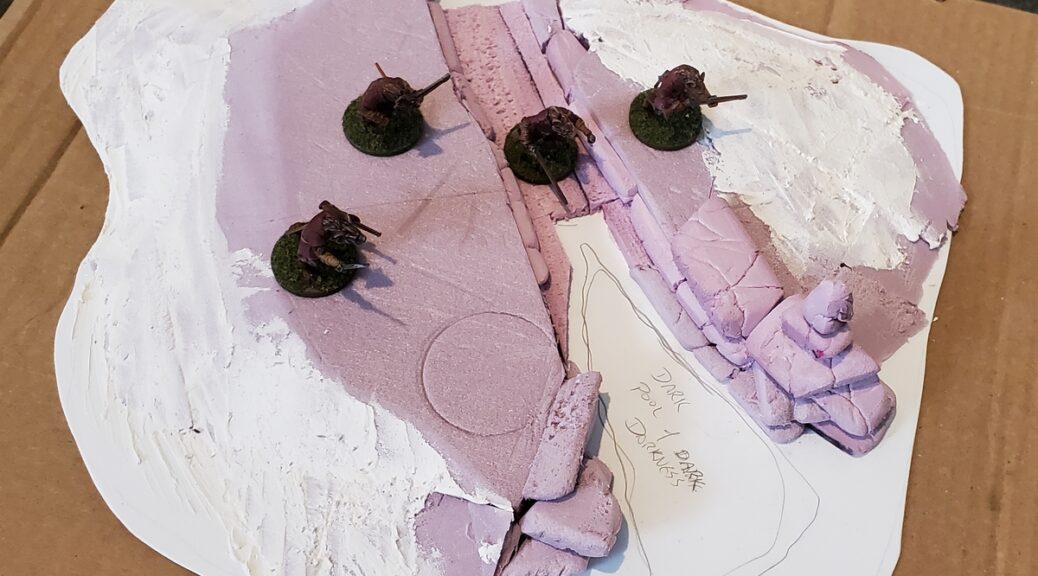
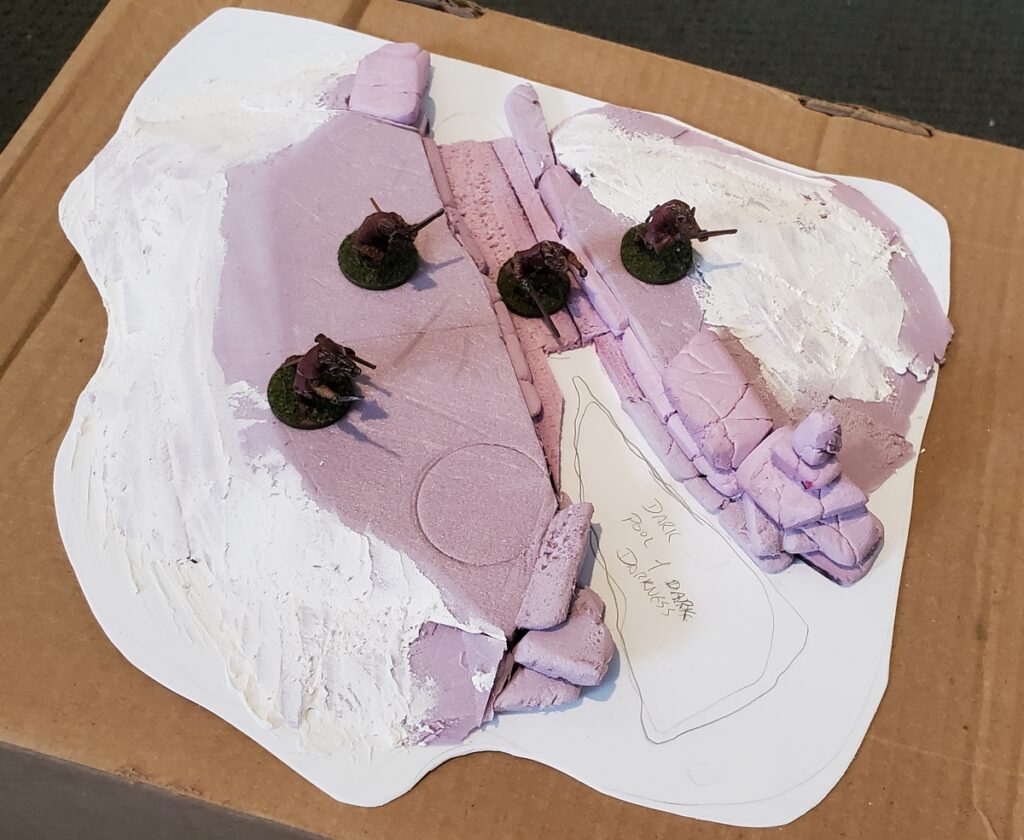
I’ll get a full gallery of all my build shots up after voting begins, but in the meantime here’s a teaser from early in construction of my entry, which wound up named the “Dark Pool of Dark Darkness”…
The piece with most of the basic groundwork laid down and the rock formations just started. 28mm gnolls on 25mm bases for scale; the whole thing is about 10″ long by 9″ wide or so. Click for larger, as usual.
Quiet here the last week or so because I’ve been thoroughly distracted by Lead Adventure Forum’s Build Something Contest 2021!
Lots of cool entries in progress over on the BSC subforum of LAF. Posting WIP photos elsewhere is discouraged but I’ve taken lots of photos so far of the rocky moor piece I’m doing and I’ll be sharing them here in a month or so when the contest is concluded.
I do have some other stuff I’ll be showing off, including some scatter pieces I just finished that I’m quite happy with, so it won’t be totally dead here but go check out the BSC and look for my updates there!
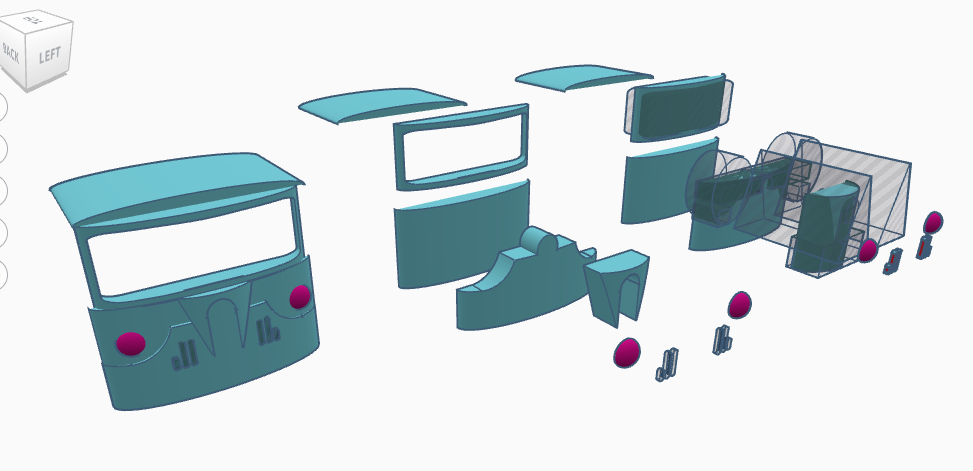
As I am fairly new to 3D printing, I am learning a tonne about what not to do. One of the biggest issues I have discovered is that things that look good in CAD can look absolutely terrible once printed, given the resolution of the printing or the limitations of FDM 3D printing. Today I wanted to talk about three different, but similar errors I made: making a part too thin to print correctly.
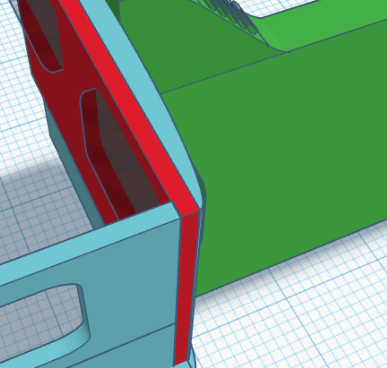
Back corner of the cab
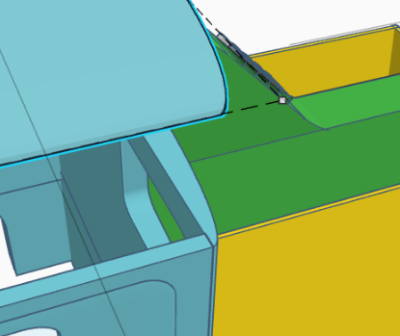
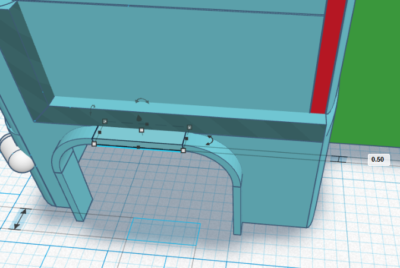
First up – the back corner of the cab. As the backside of the cab is curved, it thins quite a bit at the very back corners.
Back corner of cab in blue. See the thin joint at the very end
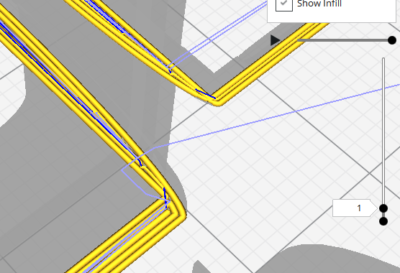
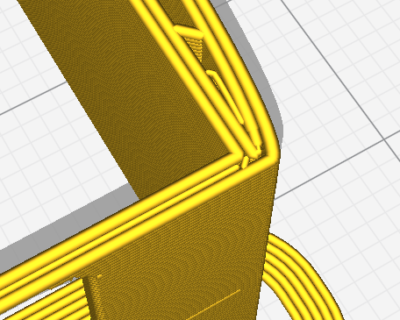
When you bring this into Cura to slice it for printing, the problem becomes obvious.
Back corner of the cab, showig that when printed, it will only be two layers thick (~0.8mm)
The solution to this is to thicken the back wall of the cab, which I did by adding a flat piece to it:
Back corner corrected with additional piece (in red)
Once you bring that into Cura, you see that the narrowest part is now at least 1mm thick, so the piece shouldn’t be so weak.
Thicker corner sliced in Cura
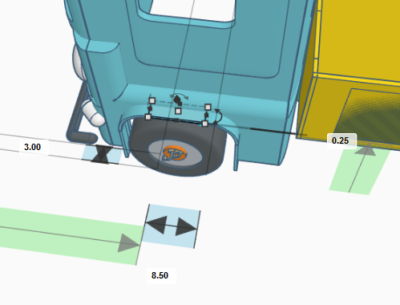
Fenders
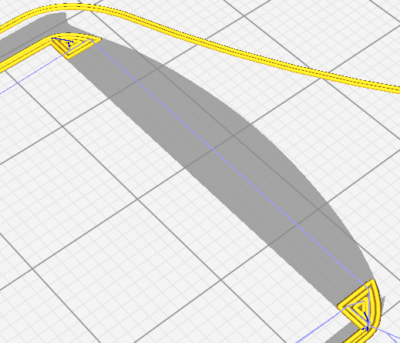
The next piece I tackled was the fenders. They were originally 0.25mm thick, which means that they were just over one layer thick when printed at 0.2mm and only two layers thick at 0.1mm. This meant they basically didn’t print at all.
Fender dimensions
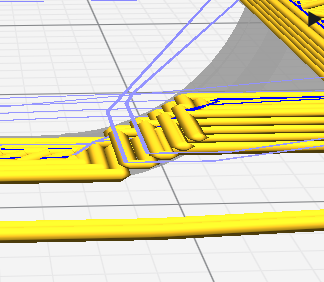
Fender sliced, showing no overlap
The solution to this problem is two-fold: thicken the fender up to 0.5mm and also only print at 0.1mm (considered Fine quality).
New fender, now 100% thicker!
New sliced fender, showing overlap
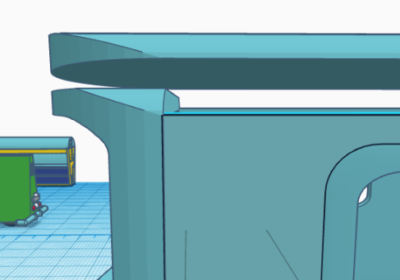
Top of the windshield
This is actually entirely my error. I made the windscreen and frame around it taller than the sides or back of the cab. This meant when I cut up the model to slice, the top of the windscreen disappeared. Oops.
Top of the windscreen, showing the height difference
Top of the cab when sliced. That grey area is supposed to have yellow lines for printing
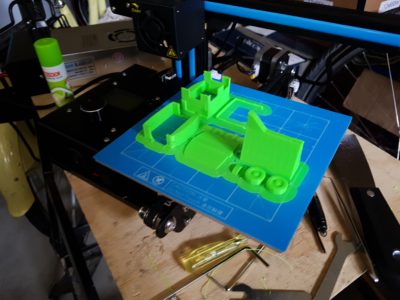
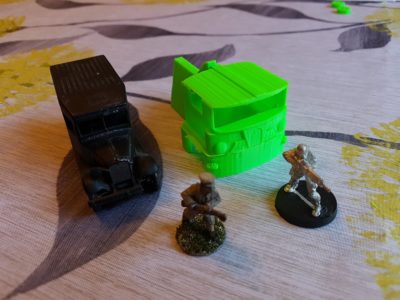
The new printer board for my 3D printer finally showed up, so I got to printing the first print of my 1956 PANG. It was less than a full success. As you can see in the pictures below, I have a bunch of work to do.
Printed truck on build plate. Printed without the side compartments. Excuse my messy garage
As can be seen on the build plate, a bunch of details didn’t come out right – the biggest of which was the top of the cab for some reason completely failed to print correctly. I also accidentally selected brim intead of skirt, so I had lots of cleanign to do.
Front & side view. Lledo Model A, Copplestone Chinese and Infinity Ariadna for scale
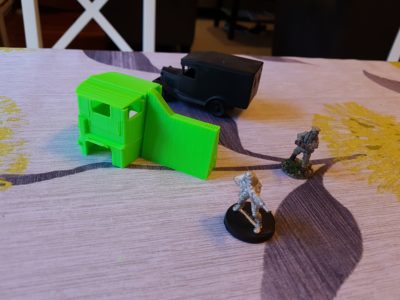
The sides of the truck aren’t very smooth, and a bunch of the finer details simply didn’t print.
Side rear view of the truck with Lledo Model A, Infinity Ariadna and Copplestone Chinese for scale
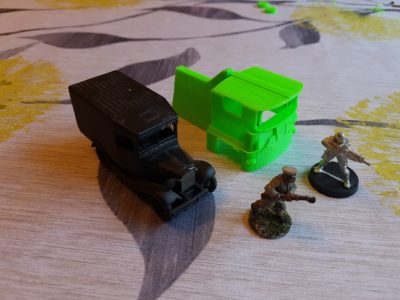
Front and side view of the truck
So what next? First of all,my printer needs some upgrades:
A part cooling fan (the Ender 2 lacks it by default)
Belt tighteners (and the belts replaced with metal-core of some kind)
A more modern Marlin (the firmware that runs the printer)
A lot more tuning
On the truck, the first thing I am going to do is shrink it by 25 to 30%. It is too large for what I want. Then I need to some work on the model itself
Thicken some of the walls so that they print, especially the fenders, which didn’t print at all
Clean up some of the smaller details, possibly removing them for now
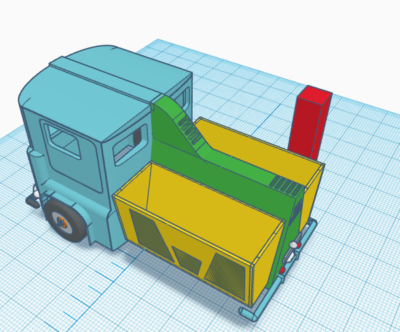
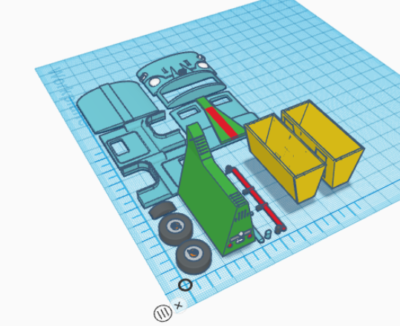
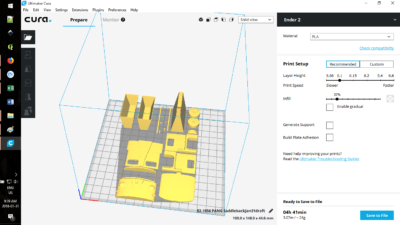
I finally got around to laying out the 1956 PANG for the first printing. As you can see from the pictures below, I am trying to remove the need for supports which will mark the surface of the final print.
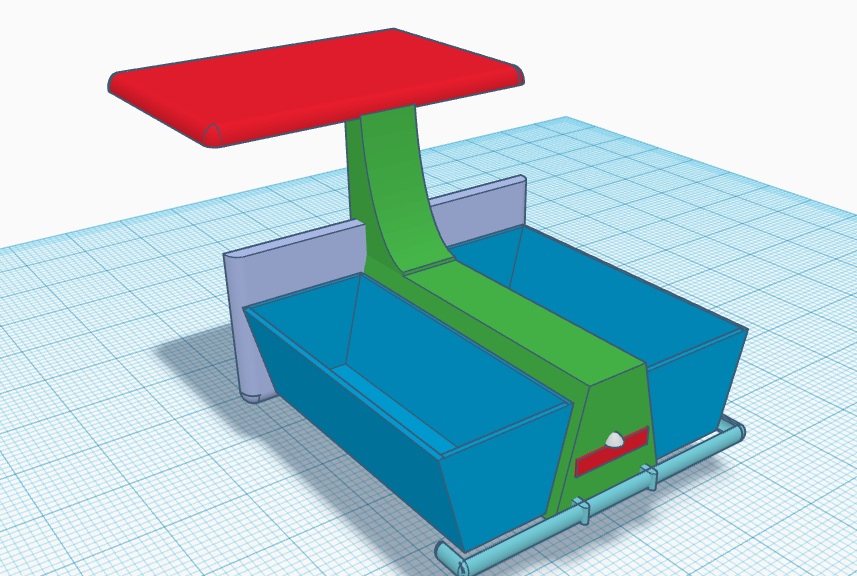
Final draft for reference
Laid out in TinkerCAD for printing
I chose not to break out the rear section or the bins for initial printing. I likely will in the final version, as it will speed up print time and make it cleaner.
Cura layout, with approx. print time. Note that my printer (Ender 2) has a fairly small print bed, so this will fit on it
One final note: I am certain that there will be tweaks needs to be this and I am missing things, namely an interior and side mirrors to start.
Well, Build Something 2018 is well underway at Lead Adventure. You can follow all the entries, including at least two other 3D printed things, over on the subforum.
And what of our 1956 PANG tricycle truck? Yesterday saw a lot of work on the back end. As of two days ago it looked like this:
I really didn’t like the aspect ratio of the truck – height, etc. So I completely rebuilt the back end so it was taller and thus looked narrower:
Early work on 1956 Pang
Today I started working on the front end, which is a lot harder. It has a lot of curves with curves, so it going to be a real challenge to do well. I am not overly happy with the look (too wide and squat) so might rebuild the front. Here it is in exploded view.
Front end of 1956 PANG, exploded view on right
What I love about modelling this way is that if you don’t like something, it is trivial to rebuild it. Play with the ratio, etc.
Progress on my Lead Adventure Forum Build Something 2017 entry, the goblin-crewed Bloodyear Blomp!
I’d said previously I was going to finish covering the blimp envelope in fabric before moving on to the gondola, but in standard wargamer fashion I’ve been distracted into working on the gondola first.
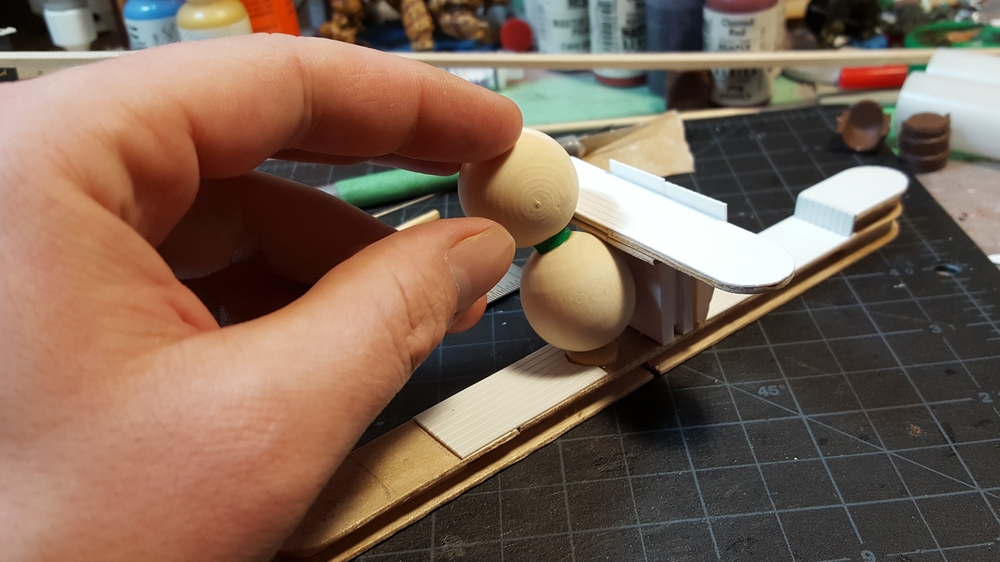
The basic skeleton of the gondola is a couple of big hardwood craft sticks, cut and butted together with more scrap wood between them. The flying bridge is more craft sticks cut and jointed together, and the support structure under it is random scrap foamed PVC board.
Blomp hull basic assembly, with Reaper Bones goblin crew for scale. Click for larger.
The crew are going to be converted from Reaper Bones goblins; I’ve got a whole bunch leftover from my BB Goblin team conversion project and they’ll fit right in!
First part of the Improved Non-Exploding Flautulating Engine. Finest goblin engineering! Click for larger.
The midships portion of the gondola, behind the flying bridge, is going to be filled with the lift and propulsion machinery. Pipes will lead from here up into the balloons of the envelope, with solid wire cores to provide the structural connection between the gondola and the envelope.
Every year or so over on Lead Adventure Forum they hold a friendly Build Something competition. There’s a theme that imposes some restrictions; one year it was “your scenery must be based on a CD”; we had “marine/watercraft” once, and this year the theme is “flight”.
I’ve been a LAF member for years and it’s an awesome forum, but I’ve been fairly inactive over there for the last year or so. Joining the Build Something 2017 Contest was a good way to nudge me back into being an active member of this awesome online community.
The theme being “flight” I thought of doing a cargo shuttle of some sort for Infinity, but with only a six week timespan to complete the entire contest entry in, from start to finish, I shelved that tempting idea in favour of an entertainingly silly piece of Blood Bowl sideline terrain: the goblin-crewed Bloodyear Blomp, which carries magical cameras and announcers over Blood Bowl fields all over the known world!
To give it some actual in-game purpose, I’ll put a pair of Reroll counters on the base of the thing, to go along with the goblin scoreboard I made a while back.
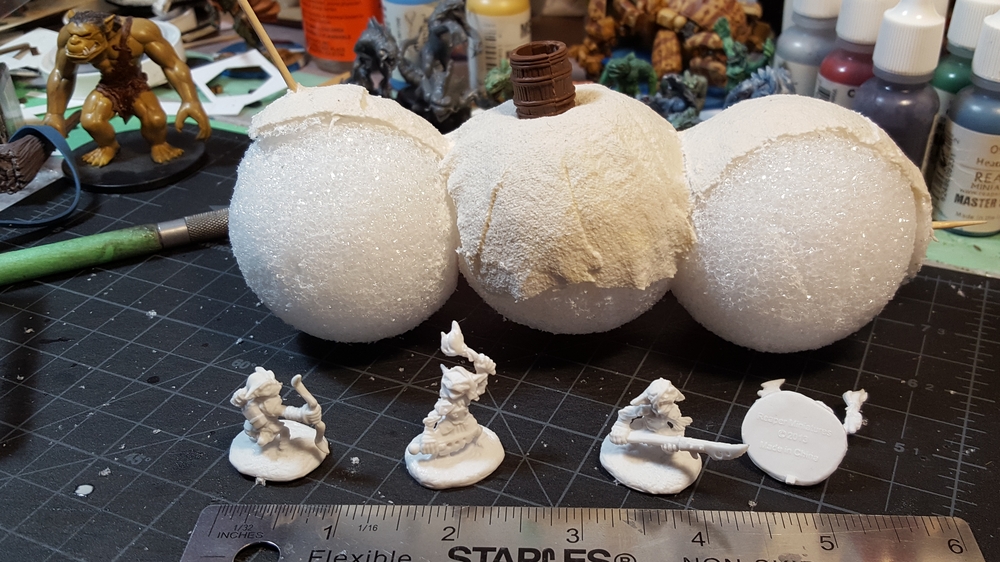
Being goblin-engineered (to push the term “engineered” very near it’s breaking point!) the Blomp can be a bit ramshackle, so I just started building! I picked up a pack of craft foam spheres as the balloon/envelope structure of the Blomp and started jamming them together and then covering them with bits of scrap fabric.
Here’s the first building session’s progress.
Blomp! First construction of the blimp envelope, and a few of the goblins who will eventually crew the thing! Click for larger.
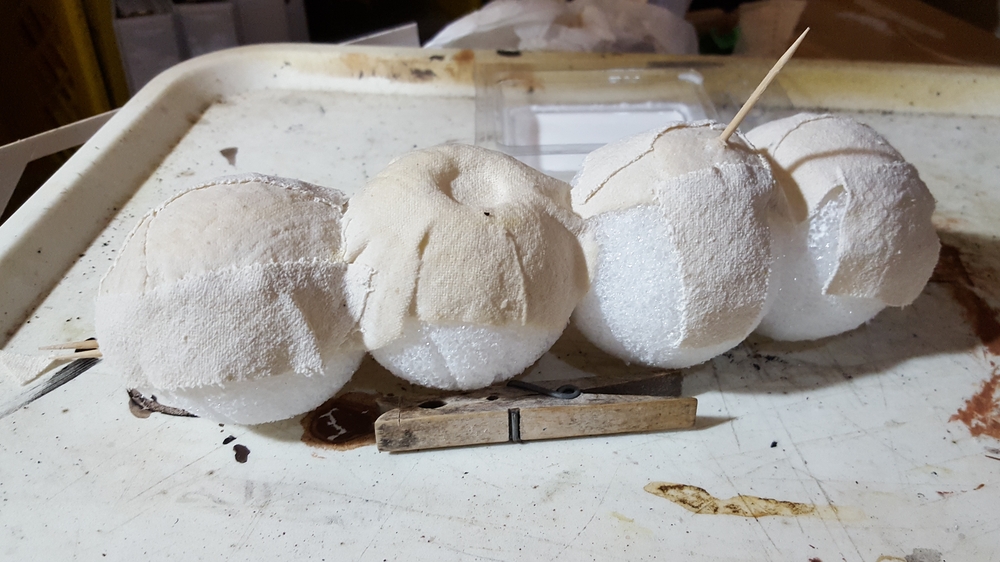
Since then I’ve added a fourth sphere to the tail end and done some more fabric.
More Blomp! Fourth envelope sphere in place and more fabric. Click for larger.
I’ve got a build thread over on LAF that will generally be updated faster and more frequently than I’ll do blog posts on the Blomp, in keeping with the spirit of the contest. I still need to figure out the gondola design and a bunch of other details, but it’s been a fun build so far!
Finally have the Sarissa CityBlock 28mm lasercut MDF buildings to a table-ready state, including another hand-painted advertising sign on the side of one of them.
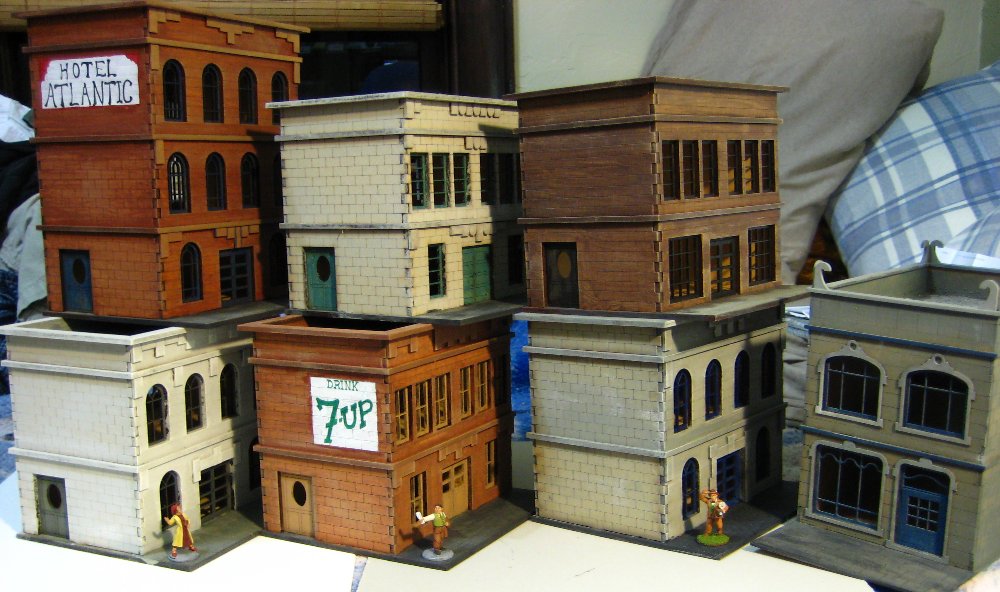
Here’s all seven buildings (six CityBlock plus one Narrow Townhouse from the Gaslamp Alley range) stacked up somewhat awkwardly:
All seven MDF buildings, ready for the tabletop. Scale provide by three 28mm Pulp Figures reporters. Click for larger.
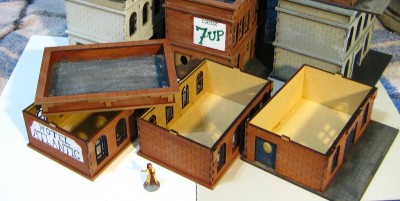
In one of my earlier posts, Chris had asked in comments about how these buildings came apart, so here’s the Hotel Atlantic spread open:
The Atlantic Hotel spread into it’s constituent parts; three floors and a roof. Click for larger, as usual.
You can see I haven’t (yet) done anything with the insides of any of these buildings; beyond possibly splashing a coat of plain paint in, I’m not sure how much I’ll do inside them.
So, having built seven of the things but not actually written a full review, what did I think? First off, I like them, and will definitely be ordering more of Sarissa Precision’s buildings at some point. They’re solidly built, well designed, have enough detail to look good right out of the box, and are also easy to add extra detail to. Everything fits together very well, the laser-cutting is crisp and precise, and the CityBlock & Gaslamp Alley buildings are good generic city filler buildings, similar to thousands of real-world buildings all over the world, pretty much anywhere Europeans influenced architecture. Use them as-is, you could be nearly anywhere in North America, the UK or much of Europe; add a few “local” touches (different street furniture, a few different buildings for flavour, etc) and you could be in Shanghai, Cairo or Singapore just as easily!
I’ll do a couple of things differently on the next batch of MDF buildings I build, though. First of all, painting MDF is like painting a sponge. The stuff absorbs paint and water like crazy, and is actually quite hard to paint as a result. You go through a surprising amount of paint to get decent coverage; and because of the absorbency you can get streaky or blotchy paint coverage very easily. A couple of my buildings required a second coat of their base colour, and painting details like windowframes and the signs was harder than it should have been because you needed thin, wet paints and a well-loaded brush to get good coverage. So I’ll be doing as much painting as possible before assembly next time, instead of rushing assembly this time just for the joy of having complete buildings sitting around!
Spray cans or an airbrush might actually work better than brushes for basecoats on MDF, if you have access to an airbrush or a better selection of spraypaint colours than I do currently.
I’ve got a whole pile of small scenery detail bits that have been building up on the edges of my painting desk recently, so with these buildings out of the way it’s on to them to get them done and into play, then onto more figures! We’re having a Pulp Alley game tomorrow that should feature all my new buildings, so look for photos of that soon too.