Personally and hobbywise, it’s not been a terrible year, although it’s been a bit low on the number of blog posts, overall. But for the rest… yeesh. Good bye and good riddance, 2021!
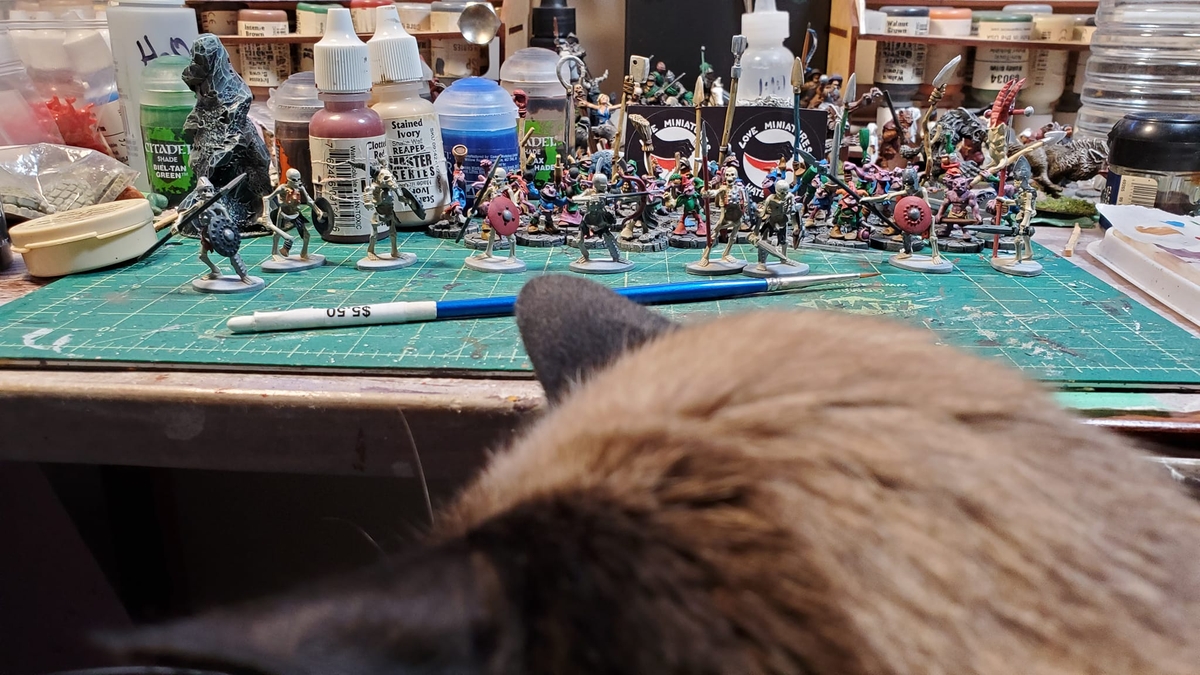
A bit of year end figure painting, with the faithful feline assistant in the foreground making things warmer but more awkward! Wargames Atlantic plastic skeletons for our fantasy skirmish stuff, whenever current circumstances allow us to resume in person gaming! Click, as usual, for larger.
With the surge in Omicron cases locally we’ve stopped in-person gaming again, out of an abundance of caution. We will probably resume sometime in January, but it’ll be back to webcam Gaslands for a bit in the first couple weeks of 2022.
A quick count shows 22 blog entries here in 2021, far more in the first half of the year than as the year wore on. Not bad, but I would like to get a bit more momentum going through 2022!
To that end, I’ve joined the PaintSlam community and their Discord channel; like a lot of wargaming social media it’s heavily GW-focussed but by no means exclusive to GW in any way. I’m “Vemundr” on most Discord channels, due to having started on Discord for Society for Creative Anachronism reasons, so if you’re on the PaintSlam Discord discussion group feel free to say hi!
Here’s to an improved 2022 for everyone over 2021! Stay safe, get your booster when you can, and try to get some gaming in!
I’ve been on a kick of assembling and basing figures in batches the last little while, and also (as you can tell) not been doing much of the ol’ blogging this year… Anyway, right in the middle of assembling a couple of dozen Toadstool Brownies from the big Fenris Miniatures Toadstool Kickstarter earlier this year, the loot from the Fenris KS after that, the Wyrdworld one with all sorts of cool anthropomorphized animal figures showed up!
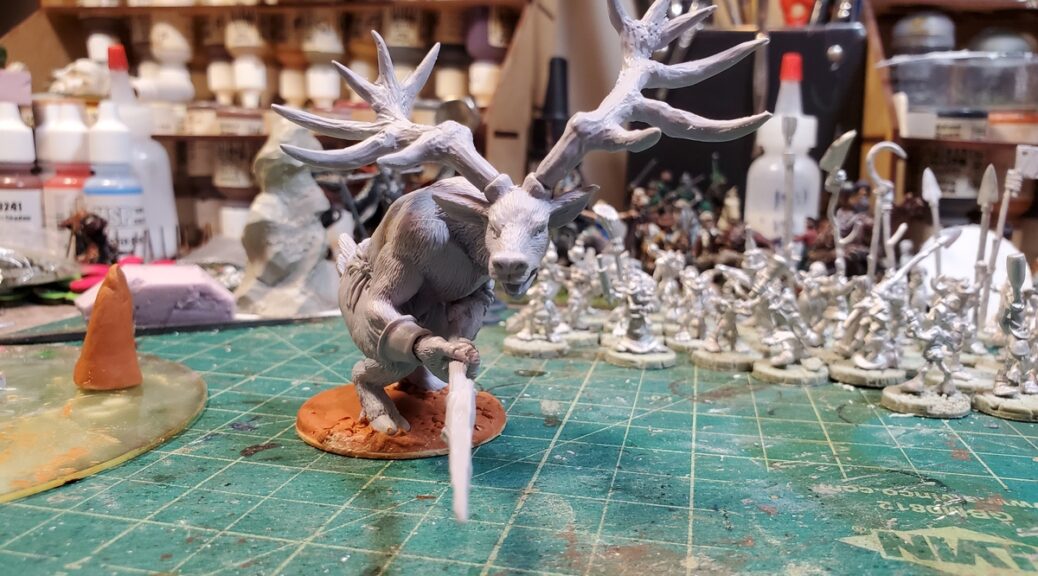
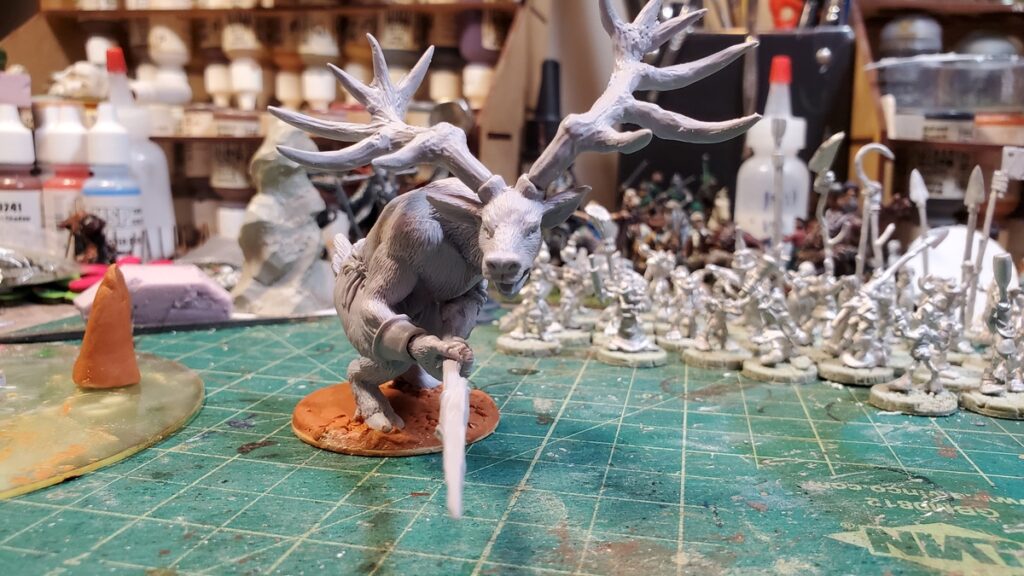
I decided that I needed to base and assemble Brutolph, the Giant Elk right away, because it is a truly spectacular figure.
Brutolph’s business end. Click for larger.
That’s a 40mm circular base our big deer is on, with his arms, spear and antlers just dry fitted for now until all the Milliput on his base is properly cured.
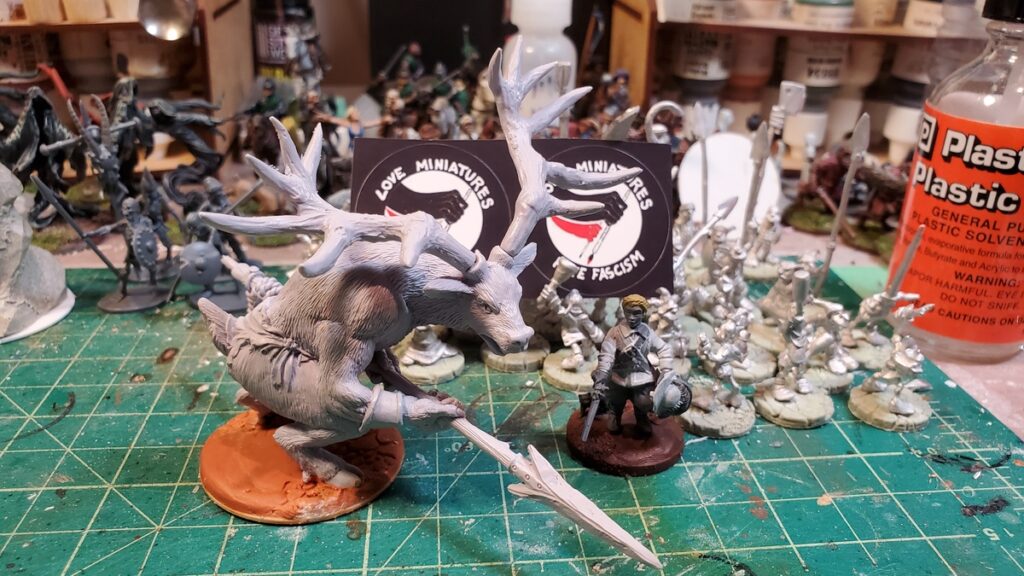
Brutolph alongside a 28mm Warlord ECW figure on a 25mm base. Click for larger.
To the top of his antlers he’s just shy of 3″ tall, and that spear is longer than that!
Brutolph from overhead, with Fenris Toadstool Brownies in the background holding up the awesome “Love Miniatures, Hate Fascism” stickers, also from Fenris. Click, as usual, for larger.
I’ll get Brutolph’s arms and antlers properly installed over the next few days and then he and the whole village of Toadstool Brownies will be off for priming. I’m not actually sure how I’ll be painting him up, but might go slightly weird as I intend to use the figure as a forest god/spirit of the deep forest type!
We’ve been playing a fair amount of Sellswords and Spellslingers, a fairly light coop fantasy skirmish game. I picked it up on a lark, as I wanted something different it looked fun. Years ago Brian and I played a fair amount of Song of Blades & Heroes by the same author, which is a competitive, fast-play fantasy skirmish ruleset. You can read about one of our games many years ago here:
We recently we played through the Necromancer in the Tower scenario, something we’ve tried and failed before. Be warned, SS&SS can be a brutal game and losing your entire team is not unknown.
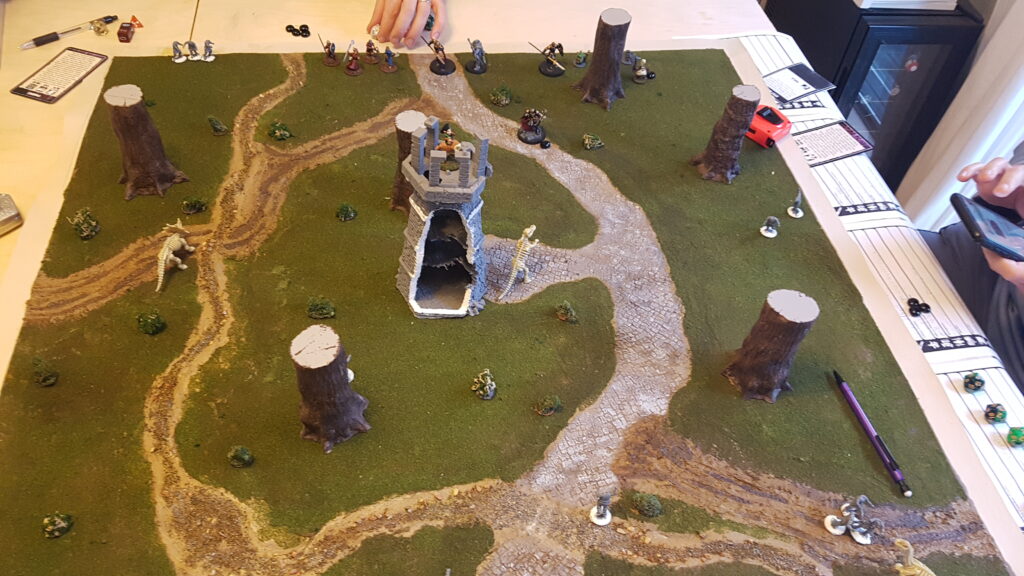
This scenario is pretty simple – fight your way through to the necromancer in the tower, kill them and then fight your way out. Like all SS&SS games, the game begins with a few foes scattered throughout the map, some deployed as hordes and some individually. To makes things interesting, I pulled out some skeletal dinosaurs I found a few years ago and meant to turn into museum exhibits for pulp but never did.
Opening of the game, with the tower in the middle
The game opened with the three dinosaurs nicely split across the board and us on the road into the tower. Early turns had us pick off the straggler skeletons and make good progress towards the tower. It looked to be going swimmingly, save for Brian rolling a 1 with his wizard, putting him out of magic. Which is where things go wrong.
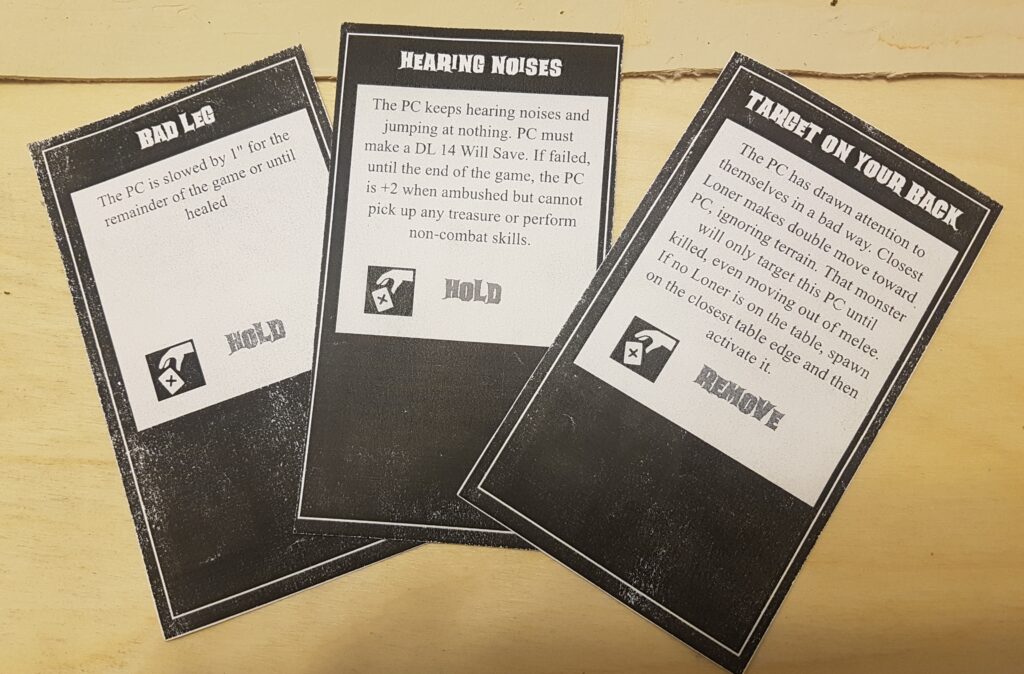
We run a custom event deck, one that takes a few of the monster spawning cards and adds a few new monster moving cards. One of which is Target on your Back. It causes the nearest non-Minion foe to target that PC to the exclusivity of anybody else.
Some of our custom event cards, including the Target on Your Back card
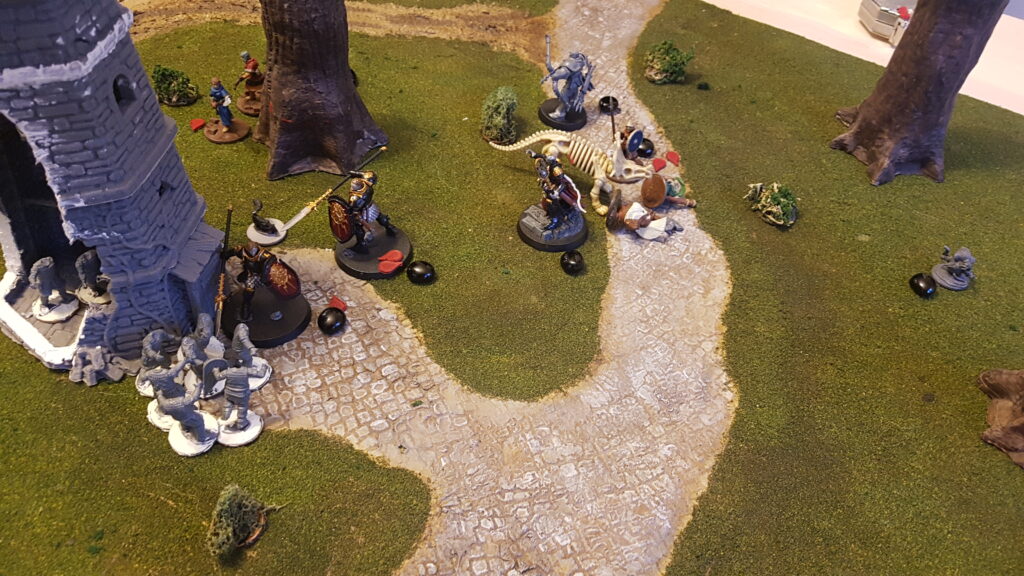
This card has caused chaos in previous games – a bear ran across the table, the PC it was attacking ran off the table, so it promptly killed two other PCs in revenge. In this game, it was no different. In two turns, the ceratops charged pretty much all the way across the map, attacking my main character, the wizard Green Hat. Who promptly went down, followed by my bruiser fighter, Mohawk. And then one of Brian’s figures. Here is where the necromancer’s ability to save their undead came in – the ceratops saved 3 different hits that would have killed it, each by a figure that later died by its horn.
Hordes of skeletons attacking Sean, a skunk keeping Brian at bay and the skeletal ceratops having taken down 2 out of my 3 PCs
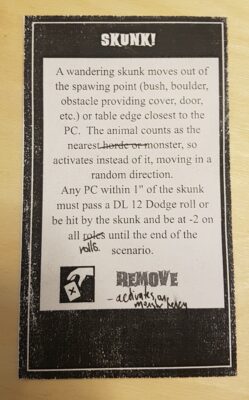
At this tense moment, nobody could really help me, as Sean was battling 12 skeletons in and around the tower, a merging of about 4 hordes of them, some in the tower, some outside. And Brian’s PCs were pinned by the skunk, a wandering monster that while it can’t harm directly, can you make you smell real good.
Thankfully a few targeted ranged attacks took out the necromancer and with it, most of the skeletons evaporated. And then the ceratops finally went down, but not before doing a lot of damage.
All in all, a fun game and while lethal, we actually managed to succeed, unlike a decent number of our games.
Game Details
We were running 80 XP parties, with Sean and Brian each having four figures to my 3. Each of us had a spellcaster and a ranged figure.
Stats for the Dinosaurs
All the dinosaurs were run with the following:
DL 14 HP 4 DMG 2
All had Bony Undead as per the Skeletal Warrior card – which makes them harder to hit by arrows and easier by crushing weapons (which apparently none of us had)
Brachiosaurus
Tail Sweep – everybody with 1″ takes DL 12 attack or falls prone
Trample – everybody in path of moving is attacked
Centrosaurus
Gore – when charging, DL is 16 (as per Greater Minotaur)
Hadrosaur
Trample as per above
The board
The board was pretty simple. The mat itself is a custom SS&SS mat I have been working on for a while now and will write up soon. The necromancer’s tower is a 3D print of the Abandoned Lighthouse by escaroth on Thingiverse, while the trees are from Vegetation B by terrain4print. The bushes are new, adapted from Luke @ Geek Gaming Scenics. Will write those up too soon.
Sometime earlier in the pandemic I ordered a batch of 1/1200 3d printed stuff from Shapeways, who use some sort of resin printing to get incredible detail on their prints. I keep meaning to write up that purchase in a proper review, I took a bunch of photos of everything I bought, but nevermind…
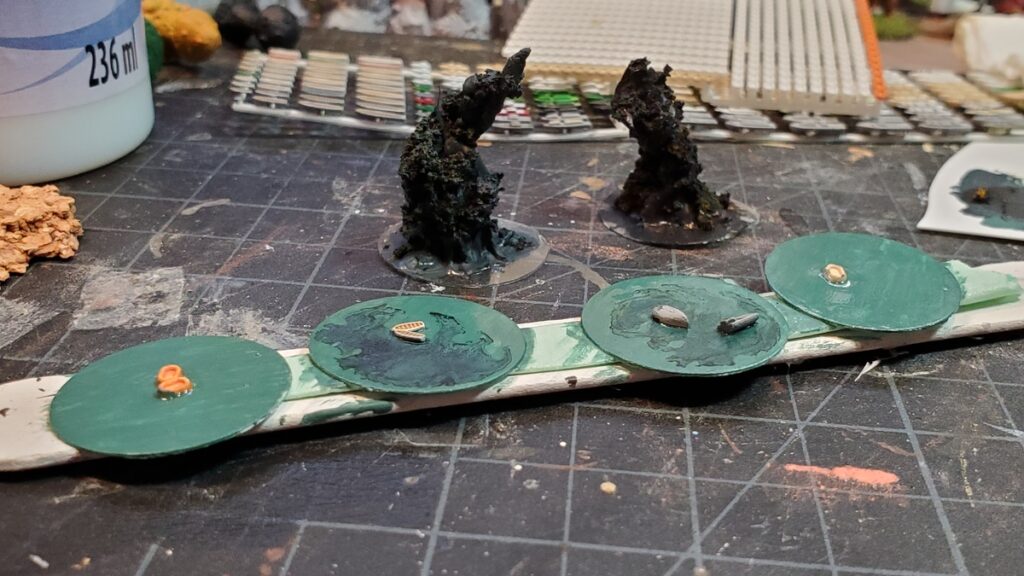
One place I have used a few of the 3d printed bits is in some wreckage markers. I bought a sprue of inflatable liferafts, and the sprue of boats included traditional life boats in several sizes, so I popped a few of those onto 1″ styrene bases as wreckage markers, or possibly as scenario goals – rescue downed aircrew or stranded squadronmates, that sort of thing.
Wreck and rescue markers for naval gaming, and the first two fire/explosion markers behind.
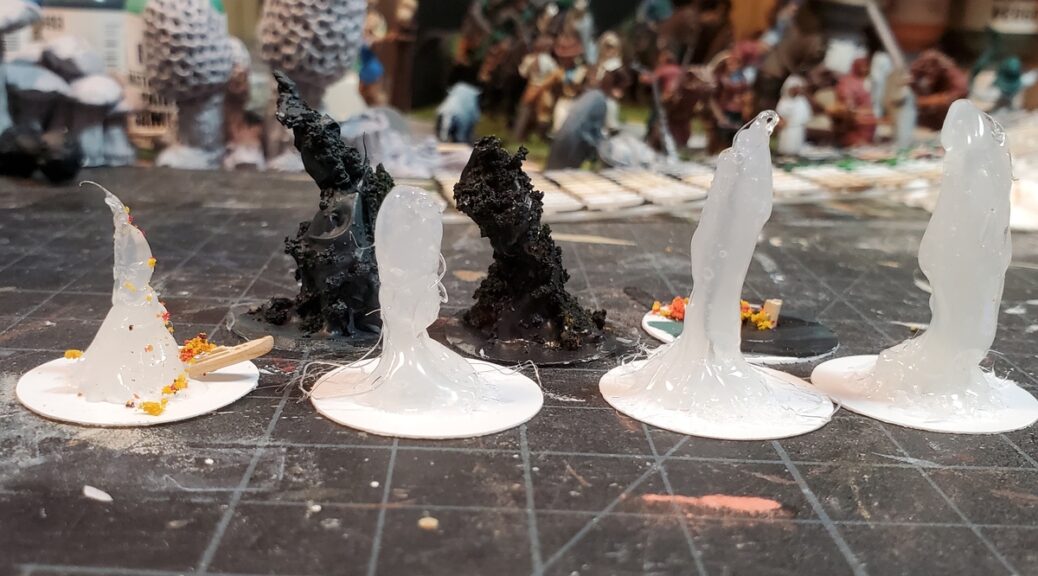
I also did up a batch of fire/explosion markers, also on 1″ bases. These are pretty simple things, made up mostly of hot glue splatted and “sculpted” with the tip of the hot glue gun. Holding the bases upside down and twisting them back and forth as the glue stretched and cooled helped, and for several of them I dunked them into the cool water of my paint rinse pot to help “freeze” the shapes. A few of them have wire centres but the most interesting ones don’t and I won’t bother with that step if I do any more.
Various explosion markers in progress. You can see the wire core in the one second from right, but don’t bother with this step if you do your own like this.
After the glue had cooled and I’d cleaned the thready wisps of glue off that hot glue so often leaves, I glued on a bit of medium flock as extra texture, which works nicely.
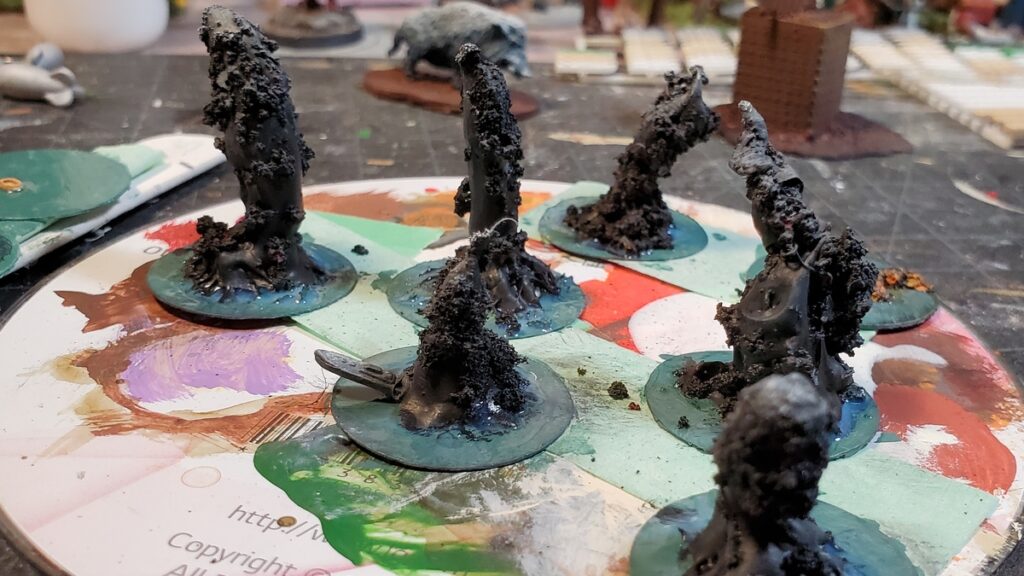
All the explosion markers painted, lightly drybrushed, and the first coat of gloss added to the water.
The explosion markers got a black basecoat. I considered trying to paint actual fire on them, but decided to just do a bit of a grey drybrush, mostly on the very tops, and leave them at that.
The boat sticking out of one base, about to be engulfed in an explosion, is one of the Shapeways 3d printed ones, left a generic grey so it could be from any side of the war. I cut the stern few millimeters off that boat to tuck it into the body of the explosion a bit more, then used that boat piece on the fire marker just visible on the far right of the photo above.
The Shapeways stuff makes for nice extra bits, and the explosion markers are super easy to make. These little pieces should make for some interesting extra colour during our next games of messing about in tiny boats.
Quiet around here as I’m not doing a lot of gaming, painting, or terrain building this summer. Too busy with other things! I did have a couple of fantastic games of WW2 coastal forces earlier in August, and will get those photos up here in the next little while.
I recently got a well-stuffed box of awesome stuff from Fenris Games as part of their Toadstool Brownies Kickstarter, including whole forests full of mushrooms and some really neat tiny brownie and kobold figures. I’ll get some more photos of those and get some sort of review up soon-ish.
On to links… over on Empire of Ghosts we have some rather nice small scale islands in two styles, one tropical for Caribbean/the Med and one more northerly for the North Sea. They’re nominally 6mm or 1/300 to match the Warlord Cruel Seas boats and others, but as designed they’re pretty scale-neutral and the basic ideas will serve for even smaller scales too.
My excellent local game store started carrying UV resin and I picked some up a while ago, intending to try it out for windows in various buildings. Usefully, I just found this tutorial on using UV resin for windows over on the Comm Guild blog, which should prove useful when I finally get around to finishing the MDF church I started a few years ago.
More content here as the summer comes to an end in a month or so, I promise!
Well, “a few weeks” in my last update apparently turned into two months of radio silence here. Oops.
Build Something Contest 2021 over on LAF had the end date pushed back by two weeks due to the organizer having an attack of Real Life, but it’s wrapped up and voting should start this week over on Lead Adventure!
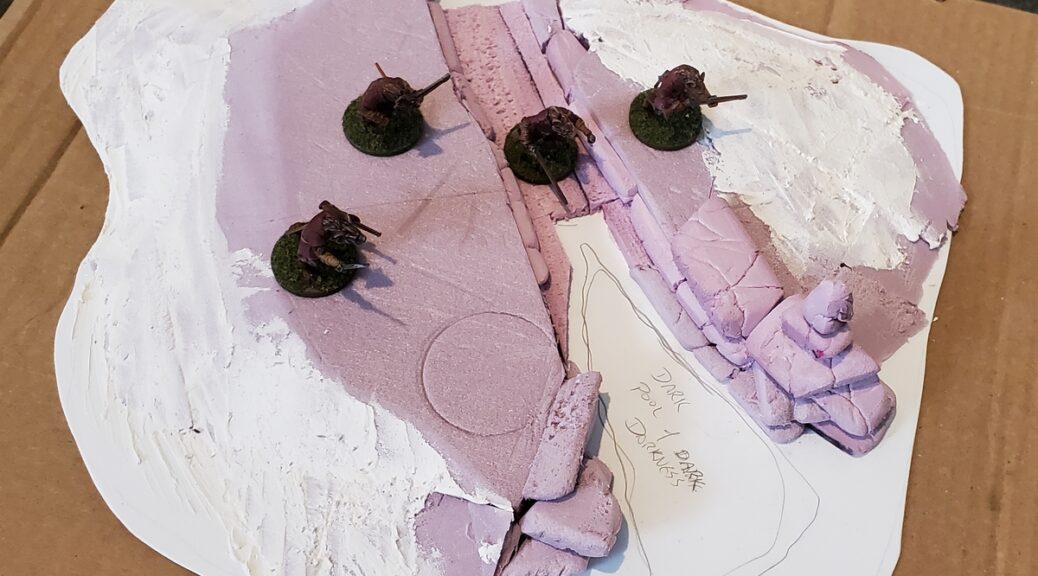
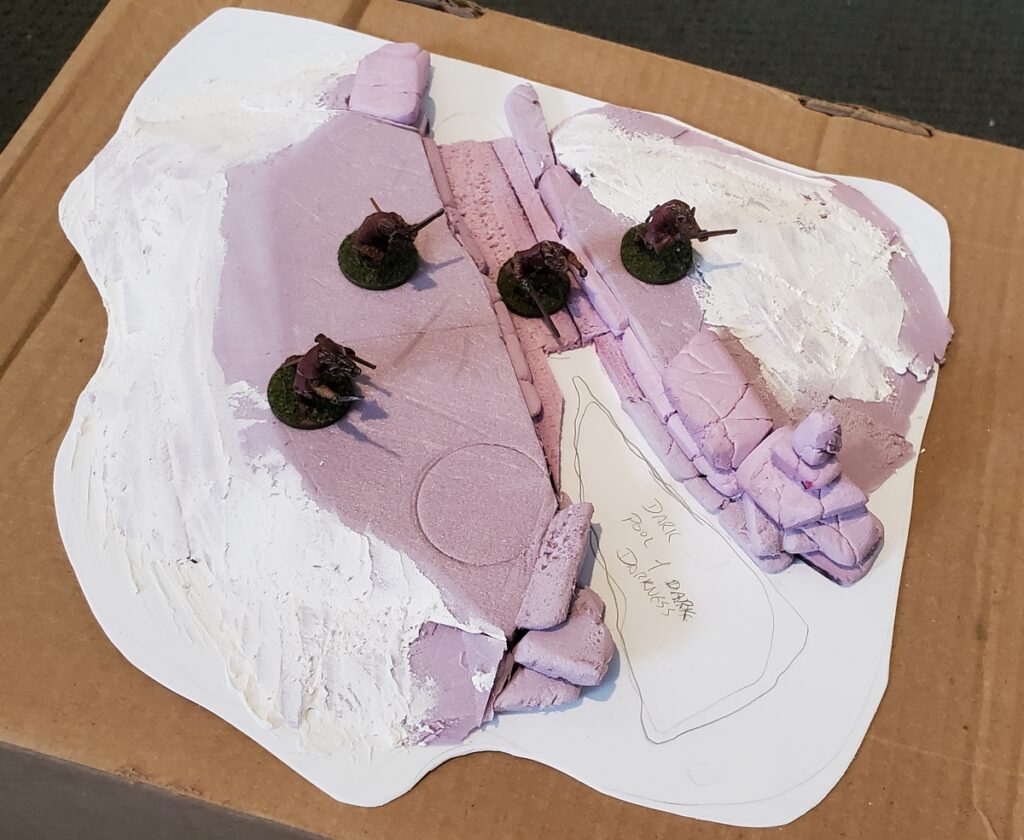
I’ll get a full gallery of all my build shots up after voting begins, but in the meantime here’s a teaser from early in construction of my entry, which wound up named the “Dark Pool of Dark Darkness”…
The piece with most of the basic groundwork laid down and the rock formations just started. 28mm gnolls on 25mm bases for scale; the whole thing is about 10″ long by 9″ wide or so. Click for larger, as usual.
Quiet here the last week or so because I’ve been thoroughly distracted by Lead Adventure Forum’s Build Something Contest 2021!
Lots of cool entries in progress over on the BSC subforum of LAF. Posting WIP photos elsewhere is discouraged but I’ve taken lots of photos so far of the rocky moor piece I’m doing and I’ll be sharing them here in a month or so when the contest is concluded.
I do have some other stuff I’ll be showing off, including some scatter pieces I just finished that I’m quite happy with, so it won’t be totally dead here but go check out the BSC and look for my updates there!
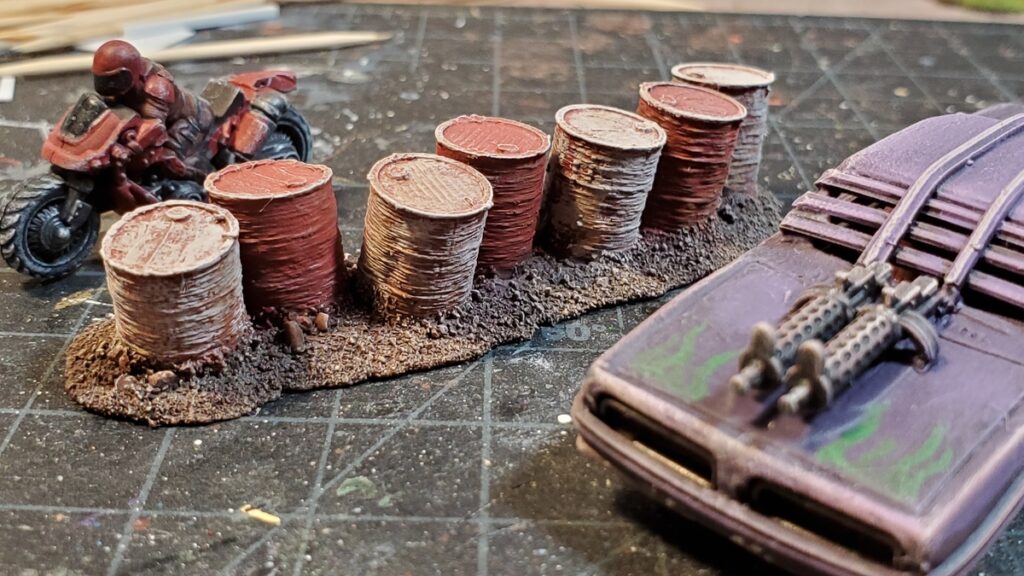
Corey has a 3d printer, as has featured here many times, and a little while ago he cranked out half a dozen barrels in Gaslands-ish scale. His printer was being temperamental, however, and they wound up a bit lumpy and mis-printed. The care and feeding of 3d printers appears to be an entire hobby unto itself, one I’m happy to leave to him…
Waste not, want not, though and on a post-apoc deathtrack battered misshapen barrels seem more likely than pristine clean ones anyway, so I took them, stuck them in a rough line on a base made of a lump of Milliput, and chucked some paint on ’em.
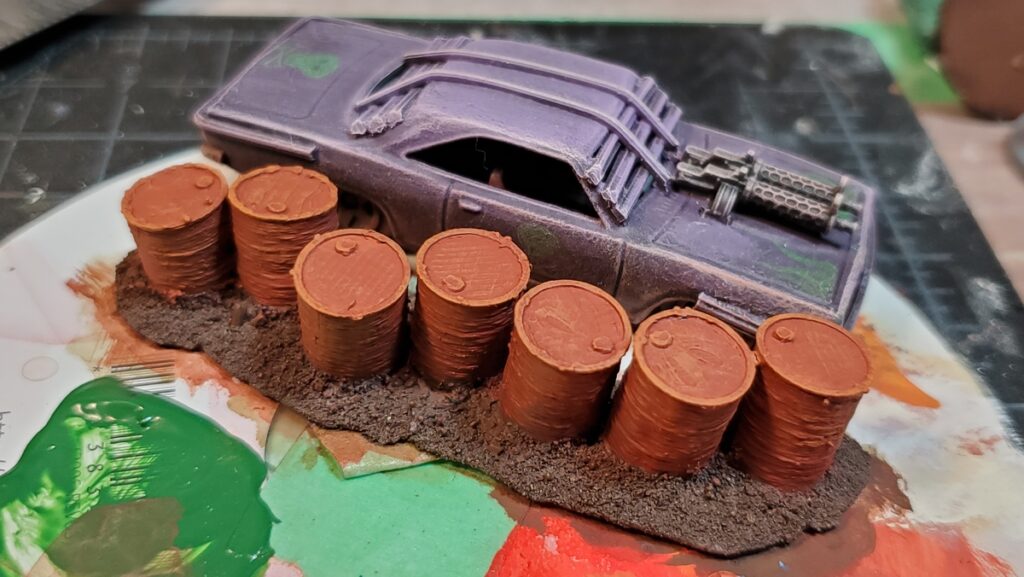
Rust basecoat after priming.
After my usual grey spray primer the barrels got a reddish-orange rust basecoat, then I painted them alternating white and red, to fit with the general colour scheme on our Gaslands arenas.
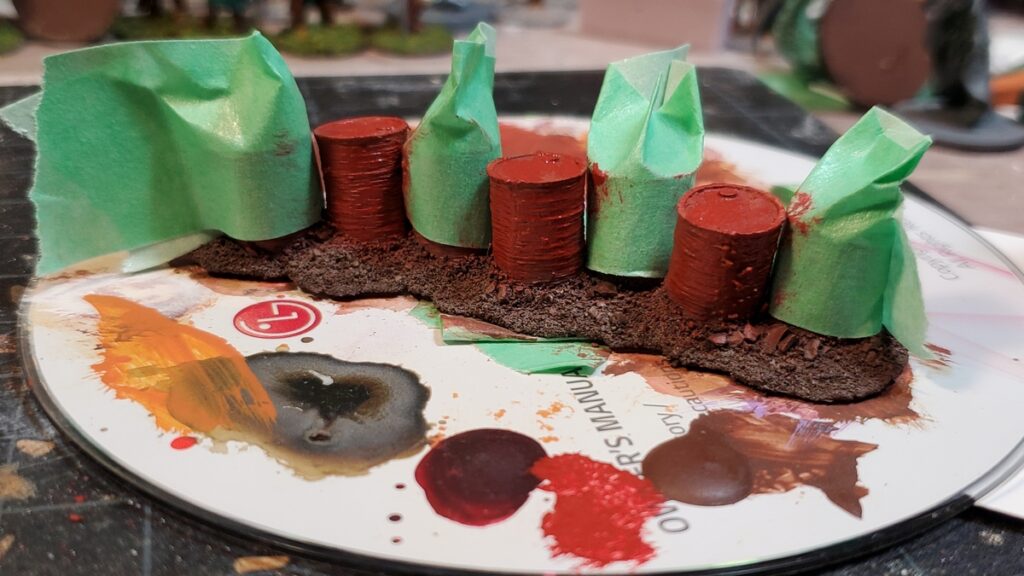
White barrels masked while I paint the red ones.
All the paint was stippled on to be deliberately scruffy and let the rust basecoat show through, and then I drybrushed various shades of rust, dust, and grime back over everything. I think there was a dark brown wash in there too, but can’t actually recall.
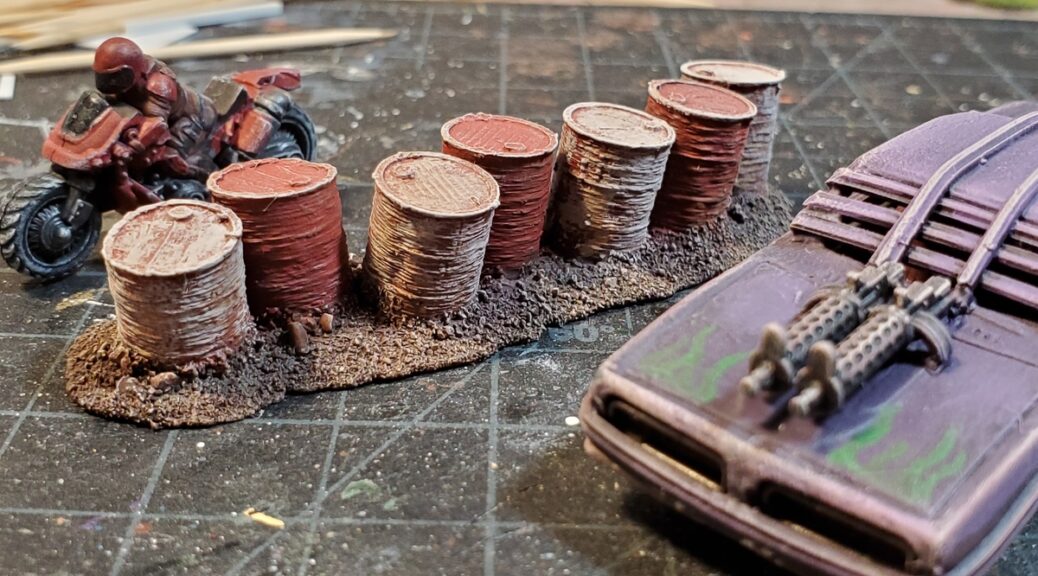
Finished and ready to be put out in the arena to be crashed into!
This was a nice quick little barricade, done over a couple of short sessions, and a good way to reuse slightly misprinted but still basically intact bits!
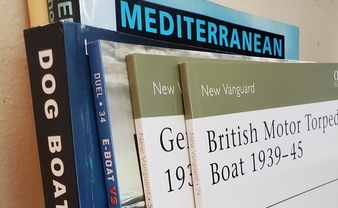
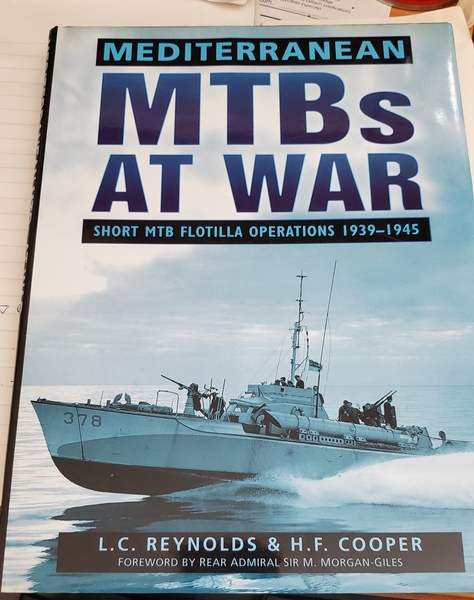
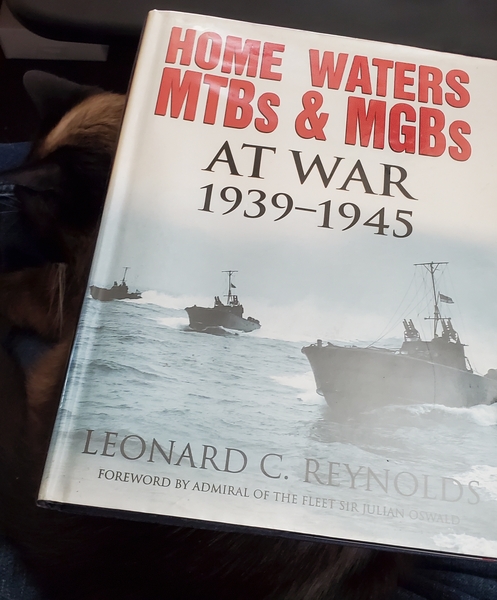
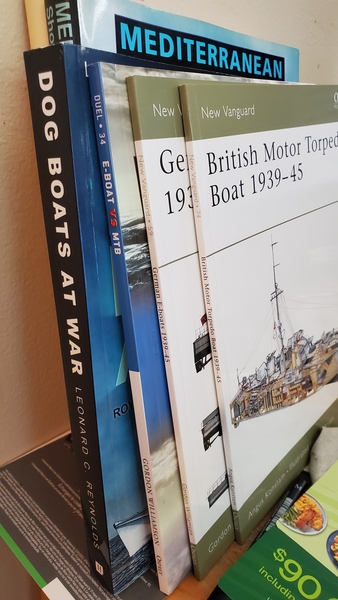
Went on a bit of a book buying spree recently in aid of getting more background material for my WW2 coastal naval gaming; among the classic references in the field are the trilogy of books published in the 1990s by Leonard C. Reynolds, Dog Boats at War, Mediterranean MTBs At War, and Home Waters MTBs & MGBs at War. Except for Dog Boats, they’ve been out of print ever since.
I looked through a few different used book websites and eventually wound up getting all three through different ABE Books sellers, despite my standing desire not to funnel money toward noted sociopath Jeff fuckin’ Bezos.
Gunboats in the Med.
Gunboats at home.
Fairmile D “Dog Boats”, and the three Osprey.
My recent book haul on the subject of WW2 coastal naval gaming.
I also picked up three Osprey books on the same subject, because one of the ABE resellers is also a full-service new book store as well and Ospreys are usually worth it. Those were E-Boat VS MTB, German E-boats 1939-45, and British Motor Torpedo Boat 1939-45.
If you’re looking for reading material on the coastal forces of WW2, I highly recommend the Publications page of Spitfires of the Sea, and the rest of that website while you’re at it. It’s written by Stephen Fisher, an archeologist/historian specializing in 20th C naval matters. He also tweets as @SeaSpitfires and is well worth following there.
Cement Saul is a fairly new YouTube channel that has been doing a bunch of interesting Gaslands-related videos. I especially like the video on Weathering with Coloured Pencils and Pigments. Pigments (pastel chalk dust, or similar) are familiar to me and I’ve used them in the past, but weathering with actual coloured pencils hadn’t occured to me and I’m going to have to try that out! It’s part of a series on painting, stencilling, detailing, and weathering cars that’s well done, approachable, and worth your time.
Light Industries is a Canadian outfit that do various decals including custom work; I always like to find Canadian sources for things when I can!
Misc Minis do various decals as well, including tiny decals suitable for 1/1200 vessels or aircraft. I contacted him back in January 2021 about getting a little sheet of his smallest decals, got it in just a few weeks for much less money than I was expecting, and will do a proper review of them sometime soon!