Smoke & Flame!

Doing some shopping last week, I found a batch of LED tea candles for sale, 6 for $5.95. I’ve been meaning to pick some up to play with them for ages, as I’ve seen some neat stuff done with flickering LEDs on the tabletop!

The first thing I whipped up was a pair of large fire & smoke markers, big ones suitable for a building fire or big bonfire! The LED tea lights are about 1.5″ across, 5/8ths of an inch high at the base, and 1.5″ to the top of the “flame”, which on these ones is just a white bit roughly flame-shaped.

The bases contain the LED, battery and switch and unscrew easily from the upper part of the base, and the flame pops easily out of the upper part. I eventually want to get my soldering iron out and do various sorts of more advanced work with the flickering LEDs, but for now I just used the stock base and setup.

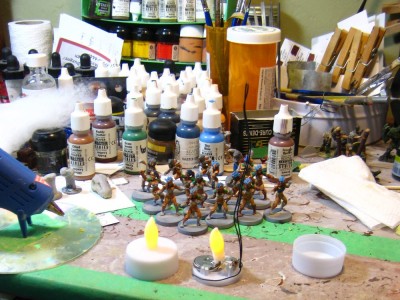
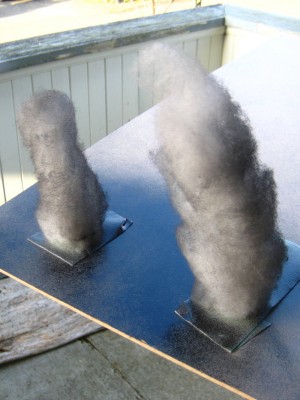
Using hot glue, I glued a doubled-over length of soft iron hobby wire around the rim of the base and up past the flame to support the smoke plume. The smoke plume is just cotton batting I salvaged from a pillow I was throwing away – waste not, etc!

smoke1
Fire & smoke markers in progress, and complete LED tea light to the left. Click for larger, as usual.

I speared the cotton batting on the wire, then used more small beads of hot glue around the LED base to fasten the batting down. I added more hot glue on the wire, then pushed the batting up against the wire to secure it. As I pushed the batting against the wire, I gave the whole piece of batting a twist with my hand, to make the smoke plume more interesting.

smoke2
Spraypainted smoke plumes with LED bases. Click for larger, as usual.

The plumes got grey then black spraypaint, and might get a second coat of spraypaint – I’ll see what they look like after they dry. The LED lights still work (the switches are on the underside) and if I ever need to replace the battery, it’ll be easy to tug the batting aside and then fix things after with a bit of hot glue.

The whole project only took a couple of minutes, and should look good on the tabletop in the ruins of a building or as a bonfire. Here’s a short (11 second long) out-of-focus phone camera vid of the two smoke plumes and one original, unmodified tea light all flickering away.

Blood Bowl Pitch, Part II

Finally got a can of green spraypaint at the local hardware place and laid my fabric BB pitch out to blotch green across it, just to break up the brown fabric. It looks a lot better with green on it now, and the dot grid that lays out the field is still visible.

bb
My 40mm BB pitch, laid out on garbage bags on the porch to spray with green for a turf effect.

I’ve got an Amazon BB team on the painting table right now, as well.

Happy (Belated!) New Year!

Been fairly quiet around here lately – blame all the usual holiday business – but the holiday season was a good one for gaming around here, too.

Early December saw my long-promised Russian Civil War game over in Vancouver at the Trumpeter Club’s gaming night finally happen, about eighteen months after we first discussed doing it. I never did write that battle up here on the Warbard, but it was good to get the Russians out again after a long break, run a long-promised game, and spend a weekend over in Vancouver – even if that weekend was the coldest of the year, with daytime highs around -5 C!

We’ve also had our first two games of Blood Bowl, now that my Sarcos croc team is finished and Sean’s humans are assembled and mostly painted. Unfortunately for him, both games have been fairly resounding wins for my big reptiles, 3:1 and 4:0 respectively. Better luck for the humans in upcoming games!

bbgame
Crocs (Lizardmen) vs Humans Blood Bowl game – Sean tries to figure out how to keep my Skinks from scoring yet again, while a wall of big green crocodiles stomp his humans!

My home-brew Blood Bowl pitch is coming along slowly, although it’s in a playable and usable state now. That’s the fabric field under the figures in the photo above; it needs a lot of work to look good (I want it to look like a muddy, weedy patch of jungle) but is thoroughly usable in it’s current form!

Onward and upward in 2014! I’ve got a mountain of pulp figures to paint, another BB team that’ll get primed this week, and some Russian Civil War bits to fill in on that project! Then there’s always the unexpected new stuff, or the old projects that capture your interest again… it should be a good year, in any case.

Canada’s 1919 Siberian Expedition

Here’s a nice Christmas present for those of us interested in the Russian Civil War, the Great War and related events: siberianexpedition.ca is a huge digital archive of photographs and other material related to the little-known Western intervention in the Russian Civil War, specifically the 4200 Canadian troops sent to Vladivostok after the RCW kicked off.

There’s over 2000 photographs (although some are duplicates) and it’s all fully searchable in English, French and Russian. Some of the photos are actually modern photos from Siberia of some of the locations depicted in the original 1918/1919 images, which is kind of cool. There’s also a brief history of how exactly a bunch of Canadians who’d volunteered to fight in Europe wound up in Vladivostok and Siberia, and some learning materials for teachers at different levels.

This isn’t a completely new site (started in 2012, it looks like) so it’ll be interesting to see how it develops — it looks like they’re trying to do some map-based stuff and a few other developments. Further bonus for me, there’s a local angle here as most of the Canadian Siberian expedition left by ship from Victoria, and it’s our local University of Victoria who are behind this site.

I’ll be mining the photos and other materials on here for inspiration for RCW scenery and such for a long while!

In the meantime, Happy Holidays, Merry Christmas, and such to all readers!

Blood Bowl Crocs, Nearly Finished

Quick late night workbench photo of my Impact Miniatures Sarcos crocodile team for Blood Bowl. They’re 99% done, with only the hook-hands of two and a few other details to finish off.

bbcroc
Sarcos Crocs nearly finished. Click for larger.

I’m quite pleased with how these figures have come together, they’re really nice sculpts and well cast, and it’s been great to get back into painting — these are the first figures I’ve actually gotten paint on since May of this year!

I’m out of town for a while visiting family so it’ll be sometime around Christmas before I can get decent daylight photos of these guys, but I want to get photos of them as soon as I can.

Starting A Blood Bowl Pitch

Being a completist, when I decided to get into Blood Bowl there was no way I’d just leave it at a team or two and nothing else! Besides, although there’s a lot of other players around with BB pitches of various sorts, from the basic card field from the box set to very elaborate homemade ones, I wanted a setup of my own so I’m not dependent on other players to provide everything needed.

For this BB pitch, I had a couple of goals. I wanted a jungle ruins theme overall, to fit with the Lizardman & Amazon teams I’m starting with, and the whole thing had to be transportable, probably in a boot-sized shoebox. I do almost all of my gaming away from home, so portability is key. That meant the actual pitch was going to be fabric, not hard panels of some sort, and the various accessories and decorative elements had to be modular and not really oversized. Light weight would also be nice. I also wanted to incorporate a bunch of BB’s play aids and things like turn & re-roll tracking right into the scenery, to minimize the amount of clutter around and on the table.

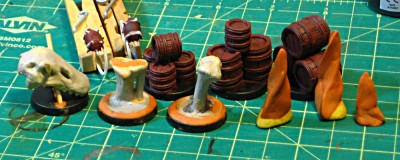
bbstuff
Various Blood Bowl accessories in progress. See text for details, and click for larger.

The photo shows where I’m at after a couple of hours over a couple of evenings. The main construction material is half-inch pink insulation board for all the stonework. Turns out this is 14mm thick, so if you slice 14mm wide strips off then cut those roughly 1 inch long, you get a nicely sized “stone” block. It’s like Hirst Arts plaster blocks, without the weight, fragility or the mess of dozens of casting sessions! The square tiles are 20mm by 20mm cubes cut from the same styrofoam, then sliced into thirds, so each tile is somewhere between 3mm-5mm thick. A hot glue gun was used to glue everything together; the bases are just mattboard, the good quality card used in picture framing.

The two foreground pieces are a pair of Re-Roll & Turn Track markers, one for each team, made to look like some sort of temple plaza/stone-paved roadway setup. You can etch/carve insulation foam with a pencil, so the wide stones on the left have the name of each track (“R-R” for Reroll, “First” and “2nd” for first half/second half turn tracking) and then the numbers 1-8. I used Roman numerals for the 2nd half numbers, just because, although looking at it again, using those for Rerolls to make it different might have been cleverer. Not too late to slice off the name label tiles and put new ones on, I guess.

Top left and top right is a dugout for each team, with the 3 areas in each needed for Reserve/KO/Injured.

Top centre is the base for the scoreboard. I haven’t quite finalized the design for the actual scoreboard, but magnets to hold some sort of placard with the score number on it will be used. The 3×3 square of paving at the front of the scoreboard will be pencil-etched with the BB scatter template for reference, and I might actually extend the front of the paving by another row to put the 3×1 throw-in template there.

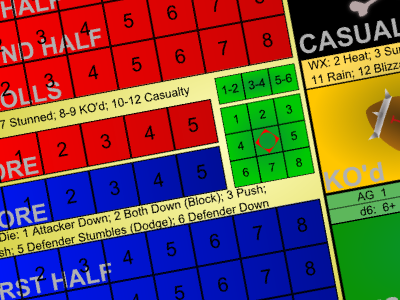
Everything will be painted in stone, then various vegetation, vines and such added to make it look jungle-like without hampering the functionality of the various Blood Bowl game elements being built into the scenery. I’m also wondering what other game elements could be carved into the stonework to add to the utility and bump the decorative level up a bit, too. Given I currently lack proper bash dice, I might put the d6 conversion table for them along the top of the back row of each dugout, one on each of six stones… any other ideas?

I’ve got a piece of brown cotton flannel big enough for a 40mm pitch, which I’ll turn into a muddy jungle field with the aid of fabric dye, ink and a black permanent marker. I might actually put a standard-size 29/30mm pitch on the back, just because, and the offcut should include a piece of fabric big enough to put a BB7 pitch on, possibly in 40mm even. The actual fabric pitch will probably be my Christmas holiday gaming project.

Up next, some last carving and details, then paint! Not sure if I’ll go with basic grey paint, or try for the tan sandstone look so many of the Mayan buildings down in Mexico are made from.

Blood Bowl Crocs, Part Two

Work continues on the Impact Miniatures Sarcos crocodile team for Blood Bowl, and I finally got a photo in daylight before I went off to work this morning.

crocs
Impact Sacros crocodiles, getting painted up for Blood Bowl. Click for larger.

The big Leviathan croc on the extreme right of the photo is closest to done, just a few details like his eyes left. The remaining sixteen, eight Salt Water Crocs (Saurus, in BB terms) and eight Baby Crocs (Skinks in BB) are all in various stages less finished than the big guy, but they’re progressing, at least. I am going to be doing a fair bit of highlighting and such on the base colours, especially on the Salt Water crocs, which are mostly too dark and monochrome right now.

It’s been great to get back into painting, too; this is the most painting I’ve done since early May of this year, which is way too long ago!

I’ve also got some accessories and such for Blood Bowl – team dugouts and other functional field scenery – in progress, and will get a post up about that in the next few days. Friday I’m off to Vancouver, though, to run a Russian Civil War game for friends there. This is a game I first started talking about running nearly two years ago, so it’ll be good to get it run finally!

…And Now for Something Completely… Crocodilian!

This is something I never actually thought would happen in my wargaming life: I’m painting figures for one of GW’s rulesets!

Blood Bowl has been played off and on for years up at the Sunday gaming club I’m involved in, and by other friends, and I’ve finally decided to take the plunge and get into it, after years of saying I might.

Several of us put in a combined order to Impact Miniatures for teams or (for the folks who already play) a few extra figures to round out a team. I decided to get a team of Sarcos crocodiles (who play as Lizardmen in BB) and a team of Amazons, both from the resin-plastic range Impact sells. I have to say I’m really impressed with the Impact miniatures, they’re very nice, both the pewter and resin-plastic ones.

I haven’t started assembling or painting the Amazons yet, but the Sarcos crocs are underway. They’re really neat figures, loads of character and detail. Here’s a fairly bad late night shot of them on the painting bench for you.

crocs
What a Croc! 17 of them, in fact. Resin from Impact, and very nice. Click for full size.

One thing that amuses me about Blood Bowl is that you can, with a bit of ingenuity, play the game without giving Games Workshop a cent. They have the rules PDF available for free download, Impact and other folks make figures and dice, and other accessories are easily made at home. That said, GW is still apparently selling the boxed set and various figures, if you want to go that route!

I’m planning on making a field (pitch, in BB terms!) from fabric fairly soon, possibly over the Christmas break, as well as getting the Amazons ready for play once the crocs are done. I still need a team name for the crocs, too…

A Motor Yacht, Part Four

Just to prove that there really is progress being made around here, despite the relative quiet on the blogging front, here’s a fairly bad late night photo of the motor yacht, with it’s second coat of white paint applied!

boat
Motor yacht, with paint on it! Click for full size.

Because of the board expanses of plain, untextured surfaces on this thing, and the tendency of those broad expanses to show brush strokes really well, I’m using very diluted paint, pretty much just using layers of washes to get colour onto the thing. It means a couple of coats to get a good colour, but also no visible brush strokes!

I’m going to do the bow and rear decks dark, glossy wood, and then pick out the railings and other details either in white or in brass — haven’t decided which yet.

A Motor Yacht, Part Three

Slow but steady progress on the 28mm pulp motor yacht. I hit it with a light coat of grey primer, to better show the seams and bits that needed additional putty and sanding work — that sort of thing shows up so much better under a thin coat of primer than it does in the blindingly-white bare plastic!

I’ve re-done the edge of the bow deck around the curve of the bow, and several areas on the cabin roof and around the flying bridge. Here’s a pair of low-res after dark images showing the boat in it’s current state.

boat1
Easier to take photos of now it’s not blinding white, too. Low quality image, but click for larger.

The cabin roof/flying bridge assembly is still removable, and I glued a 1.25″ washer to the roof then skinned over it with another layer of styrene plastic. With that ballast and reinforcement, the roof is a lot more solid and stays in place much more easily. It also visually makes the boat seem more solid, somehow.

boat2
Stern quarter view. Low quality image but click for slightly larger.

The rear view shows the cabin door and the ladder up to the flying bridge. The three round windows started out with a hand-spun drill bit, then got carefully and slowly reamed out with a sharp Xacto blade. I thought about doing window frames or something around them, but ultimately decided the boat would have to manage without in the interests of my own sanity!

Second, proper coat of primer tonight, then paint later this week. The paint scheme is going to be pretty simple — white hull and walls, glossy wooden decking — so it should be fairly quick to paint up.

Wargaming & Such (formerly Brian's Wargaming Pages)