In the run-up to this weekend’s GottaCon convention, I’ve finally gotten around to finishing the patrol markers I need to properly run Chain of Command-powered Russian Civil War games.
I’d done status markers back in January, and now I’ve got a set of the Patrol and Jump Off Point markers you need for each side in Chain of Command.
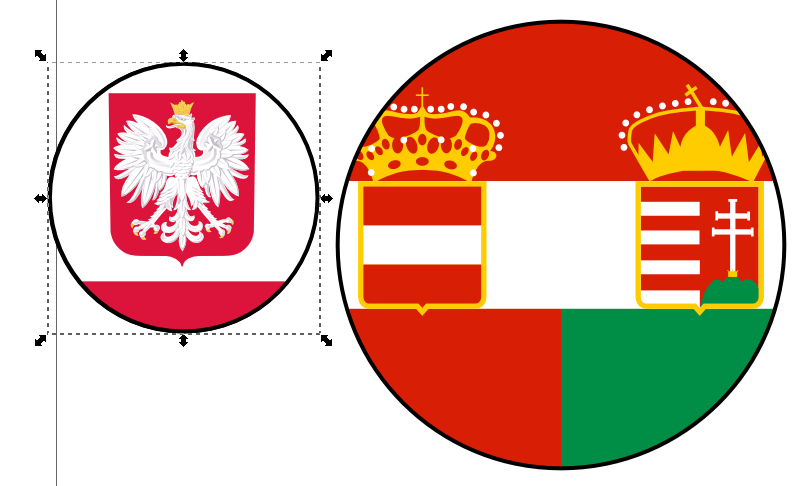
Even better, I’ve done up German and Imperial Russian markers as well as White Russian and Red (Bolshevik) markers, so Eastern Front World War One is covered as well as the RCW. The Russian markers are based on the roundel used by the Imperial Air Force; the White marker is the Russian tricolour defaced with an Orthodox cross; the Reds get a yellow star on red background; and the Germans get the classic cross on a feldgrau background.
Just over a week until our local convention, GottaCon 2015 starts! I’ve got a ticket already, and I’m doing something I’ve never done before, which is enter a tournament – namely the Blood Bowl tourney with my Crocs. The BB Tourney is morning & afternoon both Saturday & Sunday, so I have Friday evening and Saturday evening free from the rigours of having my ambulatory handbags pounded into the pitch by other teams.
Friday evening I’ve put in to run a Pulp Alley pulp adventure skirmish game. We really haven’t been doing much pulp gaming lately but PA is a nice system and easy to introduce people to.
Saturday evening I’ve put in to run a Chain of Command/Mud & Blood Russian Civil War game. This one is going to require the most prep this weekend and over next week, as I need a batch of new Quick Reference cards for CoC/M&B hybrid and some other gaming aids that I’ve been putting off, mostly because I’ve been distracted by Infinity recently.
I’ll run a fairly simple scenario, and my RCW project is at a nice mature point where it doesn’t really need any new scenery or figures to work as a good-looking convention game. That said, I’m thinking of bashing another Russian-flavoured building or two together after GottaCon to show off at Trumpeter Salute 2015 over in Vancouver at the end of March, which is always the high point of my personal gaming calendar each year.
So I’ve been persuaded (OK, it didn’t take much…) to get into Infinity, the fast and lethal science fiction skirmish game from Corvus Belli. I’ve been vaguely interested in Infinity for years, both by the high quality sculpting and because of the background and basic look of the game with it’s obvious influence from awesome sources like Ghost in the Shell, Bladerunner, cyberpunk, and a generally “hard science fiction” future – no skullz, no rusty Gothic goofiness, etc!
I’ve picked up a small Haqqislam force and started painting them up; they’re really neat figures that I’ll show progress pictures of later.
Being the sort of gamer I am, though, I also immediately started producing bits of terrain for the game. Infinity is a fast lethal game that demands a fairly high density of terrain on the table. Most of our terrain is fairly urban, lots of shiny new lasercut MDF buildings owned by the other players, so I decided to do some mixed scatter terrain to go along with that.
Planters seemed like a good choice – straightforward to build, plausible in an urban environment, a good chance to introduce some greenery and colour to an urban board, and a chance to use up some of my stockpile of scrap and offcut mounting board leftover from older, larger projects.
The largest piece is 6″ wide and 3.5″ across, mostly because that’s the size of a scrap of foamcore in my leftovers bin. The four smaller planters are 4″ long and 1″ across at the wide end. The small piece at the end is based on a 3″ circle of mounting board I cut as an experiment — yes, my circle cutter will cut mounting board. But not happily…
I’ll probably do another two or three of the long narrow planters, and then start exploring other shapes.
I did have to get into my uncut stockpile of large mounting board sheets for the end plates on the large raised piece, but basically everything else is from offcuts – total material cost so far about as close to zero as you can get!
I’ll get these painted this weekend, then break out the greenery to fill them in.
Recently we’ve tried out TooFatLardie‘s Chain of Command/Through the Mud & the Blood hybrid rules with my Russian Civil War figures, and found them good, although with a bit of a learning curve.
Chain has a few persistent conditions or stances that can apply to troops for multiple Phases, either voluntarily (Overwatch, the Tactical stance and some others) or involuntarily (Pinned and Broken, mostly). There are Chain markers available for download over on the TFL Yahoo Files site but they’re WW2-specific (Allied vs German) and I also wanted markers with a bit of a period feel that matched a set of status markers I did a while back for M&B games and some of the other graphical stuff I’ve produced over the years.
So I did what I usually do, which is break out Inkscape, pour myself a drink, and spend an hour or two noodling away.
The resulting PDF has a full set of standard markers for Chain games, with or without a WW1-flavoured M&B infusion, and might also be of interest to anyone using Chain for Very British Civil War alternate-1930s games. They’re colourful, large enough to handle, but not large enough (I think, anyway) to really disrupt the game visually.
Both PDFs are single pages and tiny, 9.4Kb each. Permission is granted to copy or print these files for personal use only.
Letter size for those of us used to that size of paper: CoC_markers_letter
A4 for the rest of the world who use rational systems for their paper sizes: CoC_markers_A4
Feedback welcome, as always!
I’m working up a batch of Patrol & Jump-off Point markers for Chain/M&B World War One and Russian Civil War action, planning on a multi-page PDF with markers for all of the major combatants. That should be out soon, hopefully next week.
We had a quick and messy intro to the TooFatLardies’ Chain of Command/Through the Mud and the Blood WW1 hybrid today with my Russian Civil War figures. Chain is originally a WW2 platoon-level set of rules with some of the core rules based on the WW1 Mud & Blood rules we have been playing for several years, and in the December 2014 Christmas Special the Lardies closed the circle and provided an adaptation of Chain for the Great War, pulling rules out of M&B as needed to replace or supplement the basic Chain rules.
Our forces were as follows: One short platoon of Bolshie Reds – four rifle sections of 7-10 men each, two Senior Leaders – who rolled hot for their Force Morale which was at 11 to start!
One short platoon of Whites, two Senior Leaders, three rifle sections of 7-10 men, 1 Maxim MMG with four crew, not as into this whole Civil War thing as the Reds with a Force Morale of only 8.
I hadn’t actually sat down to figure out the exact force balance on this particular force mix (TFL provide tools to do that, though) and we ignored the Support Points rules today and just ran with these basic forces, but it got us a good tight game with lots of back-and-forth until the White’s Force Morale collapsed to 0, so I think I was more or less right. Almost certainly too many Senior Leaders for either side at most stages of the RCW, but for an intro game I’m not fussed.
The first third of the game was all in the White’s favour; their Maxim deployed to fire down the village street and blotted out one Red rifle section single-handed, while two of the White rifle sections shot up, Pinned, and then close assaulted a Red rifle section that had pushed across main street and hunkered down in one of the hamlet’s houses but was isolated from any Red support.
The Whites had a string of dead Junior Leaders which pummelled their force morale, though, and pinned their Senior Leaders down acting as section commanders. The breaking point came when one White rifle section and the platoon Lt. launched a singledhanded close assault through the rear door of a house with a basically unsuppressed Red rifle section in it and got bashed all to hell, killing not a single Red and being thrown out into the open ground where irritated Reds quickly Pinned and then Routed them with close range rifle fire, killing the Lt in the process and routing the Whites with a FM of zero…
I’m absolutely certain we did a couple of things wrong, I know we missed rules and in some cases deliberately ignored them, but it was a good quick game and a great intro to CoC.
The Patrol Phase & Jump-Off Points are great, the Patrol Phase is much tenser and more tactical than the opening few moves of most games are, and JoPs mean less random wandering around the tabletop and more direct action!
The Command Dice mechanic isn’t as flavourful as M&B’s cards, but it’s quick and interesting, and often forces you to make difficult choices as to who to activate when. The actual Chain of Command Dice mechanic is also interesting but we didn’t use it much except to end the Turn and once to avoid a Force Morale check – there are more options for using Command Dice that we didn’t explore in this game.
I really like the fact that Chain has a Force Morale setup; sometimes in M&B it felt like you could feed men endlessly into the storm with just a bit of luck on clearing Suppression until everyone was dead. Not happening in Chain!
The actions/activations setup has been both clarified and expanded in Chain over M&B. Movement and fire, suppressive fire, and overwatch are all improved from M&B. The vehicle rules have had some expansion and clarification as well, especially with regards to Shock and vehicle morale.
For larger games, especially at conventions where I want to have two-four players per side I’ll probably stick with straight M&B, but for smaller games Chain/M&B (should we call it “Chain of Mud”?) is probably going to become my go-to system. I’m looking forward to more games and to getting to know the rules better!
Quiet around here; I was away for a week earlier in December visiting family out of town, caught a rather unpleasant cold right at the end of that trip, then all the Christmas holiday disruptions landed… which means this is my only post for the entire month of December.
I’m still messing around with converting Reaper Bones figures into a Blood Bowl Goblin team. I have ten line-goblins and two trolls in progress, and need to do up the various secret weapon goblins to finish up the basic team soon! We’re doing a mid-winter mini-league starting early in January and I’ve said I’ll play goblins, which puts me on deadline to get them at least basically playable if not finished in about a week!
I’ve picked up TooFatLardies’ Chain of Command platoon-level rules recently. CoC is a WW2 platoon-level ruleset, which isn’t an era I’m interested in, but TFL’s 2014 Christmas Special includes a set of rules for melding their WW1 Mud & Blood rules with Chain of Command, and as a huge fan of M&B I’m looking forward to trying out the M&B/CoC blended rules soon.
Richard of TFL also has a spectacular set of Afghan buildings in progress on his Lard Island blog. He’s building them for the modern conflict in Afghanistan, but the architecture hasn’t changed much in decades if not centuries and the 1919 2nd Anglo-Afghan War and associated interwar Northwest Frontier conflicts are right in the same part of the world and right in my main WW1/Interwar era of interest. Tempting, that, especially as I already have most of a platoon of British in tropical gear appropriate for the NWF.
Hope everyone had a good holiday season, a satisfactory 2014, and a great New Years! Onward to 2015!
I just found out about this very interesting project – The Great War on YouTube. Their plan is to do at least one episode a week all the way through to November 2018, covering the Great War in “real time”, as well as extra episodes for background material and answering questions from viewers.
Each episode is short (five-ten minutes) and focuses on either the week it’s covering or a specific topic.
I’ve got their chronological playlist running (see the first set of links on their Youtube homepage) and it’s good solid stuff, starting with a great attempt to explain the insanely tangled mess that lead to the start of the war. I’ll be subscribing and following this one with interest, especially if they manage to keep running through the entire four-and-a-half run of the war. The host is historian Indiana Neidel (excellent pulpy name, too) who is an interesting and engaging host.
My favourite factoid so far: Franz Ferdinand’s funeral was only 15 minutes long, as very few of the Austro-Hungarian aristocracy liked the guy very much…
A month between posts… I managed more updates that that from a hotel room in far northern Alberta while working 70 hour weeks!
I have been doing modelling and gaming stuff, honest! We had a great game of Mud & Blood-powered Russian Civil War action a couple weeks ago, I’ve had a number of good Blood Bowl games and I’ve got some good projects underway, but since getting back to civilization as I usually understand it I basically haven’t touched the blog.
So what have I been doing?
The two 28mm lasercut brick buildings I bought from Impudent Mortal are ticking along, just the roofs to finish. I promised a proper review post for them and it’s coming, really!
My first 15mm science fiction order in about a decade (!) came in from Ground Zero Games. Very, very nice powered armour infantry, some drones, and a few other bits and pieces. They’re cleaned, assembled and primed and will be the next project on the table after the buildings and goblins are done.
Goblins? What? I’ve got an order of Reaper’s very useful and inexpensive Bones plastic figures in, and am converting a bunch of them for Blood Bowl, principally to start a Goblin team for BB. Just so this post isn’t entirely apologetic verbiage, here’s a closeup snap of a couple of the Bones figures in progress!
The unpainted white troll on the left is the most extensive conversion so far. It’s a Marsh Troll with his club cut off, both arms cut and re-posed, and one leg cut and pulled in to move his feet closer together. He’s on a 40mm base with his toes hanging over both sides, and that’s really as large a base as I want on a BB pitch. Greenstuff shoulder armour disguises the re-posing surgery scars, and since this photo he’s gotten a couple of straps across his chest and some other details here and there.
The orange troll is a Cave Troll. He comes empty handed so his only conversions so far is some elbow and shoulder pads and a cut-down base. 30mm slotta base under him.
The black minotaur isn’t currently slated to join any specific team; I’ll use him as a Star Player proxy for now. Simple conversion, just weapon snips from each hand and a cut-down base.
There’s ten goblin linemen (line-gobs?) on the right, all from either the Bones Pathfinder Warriors or Pathfinder Pyros sets. I also ordered several of the Pathfinder Goblin Warchanter figures for converting but haven’t started on them yet. The line-gobs are all simple conversions, mostly weapon snips and cutting the bases down. Here and there I cut and re-glued an arm or hand, and I cut a few details off some figures to prevent having exact duplicates on the pitch, nicked a few ears, that sort of thing.
The Bones material is really easy to work with, it cuts cleanly and bonds wonderfully with superglue. It can’t really be sanded or filed, though, which makes getting rid of moulding lines and details a bit of a pain sometimes. Still, for the silly cheap prices it can’t be beat, especially if you’re looking for fodder for conversion projects like Blood Bowl teams!
The LED tea light candle I started sculpting into a burning altar piece has been seen in previousrecentposts on my sculpting adventures. Over on one of the Facebook-based gaming groups I frequent someone had asked for closeups of the sculpting of the altar, especially the growing population of skulls decorating the thing.
Most of the skulls have been added as a second layer after the putty forming the stonework is already dry, although some of them have been done right onto the base layer of putty. Given this little project’s orgins as a way to use up leftover putty, some of them are greenstuff but most are terracotta Milliput, which is currently my primary sculpting medium.
I’ll get photos of the treemen and other in-progress sculpting projects up later this week.
I first heard of Impudent Mortal when Richard of TooFatLardies used two of their buildings to build himself a very nice brewery for WW2 gaming. Rich got his through Minibits in the UK but it turns out Impudent Mortal is over on this side of “the Pond” down in the States.
I was interested in the universal brick look of the industrial buildings, which are the sort of Victorian/early-20th C brickwork you can find almost anywhere in the world right up to the present day, so I finally ordered a pair of brick buildings, a 6″x4″ rectangular building and a larger L-shaped building.
I also ordered one of their paint racks, the 66-bottle 3-level Reverse Eyedropper Paint Rack Extra Shelf, as most of my paint collection is Reaper Master Series in the very nice dropper bottles.
Communication from Walt at Impudent Mortal is fantastically quick and shipping is similar; everything arrived while I was away in northern Alberta then had to wait until I got back to the real world before I could do anything with it! Both buildings and the paint rack arrived tightly wrapped in heavy cling-wrap, the industrial version of your standard sandwich wrap, which kept all the components together very nicely inside the box.
I’ll get the buildings covered properly when I assemble them soon, but my first impression from dry-fitting the smaller building and then properly assembling the paint rack is that everything fits together easily and solidly. All the Impudent Mortal stuff is laser-cut from 3mm MDF, which will make for very solid buildings and a very solid paint rack.
Instead of shipping their stuff with instruction sheets IM has both videos and PDFs on their website, which has the advantage of giving you an idea of how everything fits together even before you buy it. The paint rack I bought is 14 pieces: two vertical sides, six shelf pieces, and the rest bracing at the backs of the shelves. Each shelf level has two pieces, the top piece with larger holes to hold the body of the dropper bottle, and the lower piece with smaller holes intended to hold the top of the lid of each dropper bottle.
Each level also has half a dozen smaller holes in each back corner, intended to hold brushes, sculpting tools, pencils or other small tools. That’s a useful way to use up the corners too small to tuck one more bottle into, but the lower pieces have holes in them too, which is odd – it means only the lowest shelf can actually be used to hold most things, because a brush or pencil put in one of the top shelf’s holes will just fall through. Leaving those corners of the lower pieces of each shelf pair solid would make them more usable.
Assembly was easy and quick and the fit was good. Lay one vertical side piece out, add all six shelf pieces with a bit of white glue, then drop the other side piece in and click everything together one shelf piece at a time. The various braces go on and keep everything square, and you’re done. Maybe ten minutes after I started I had the paint rack on my crowded painting bench and was loading paint into it!
Making space for the new rack forced a badly-needed reorganization of my fairly small and very crowded painting bench. The small holes for paint brushes and tools will allow me to downsize the round white tin on the left to some sort of smaller container soon, now that files, pencils and such are tucked into the new rack, and the space-consuming clutter of overflow paint bottles from the homemade rack on the left is now nicely contained in the new rack. The shelves on this particular rack are far enough apart that you can fit GW or Tamiya paint pots between the top and bottom pairs of each shelf level, which is a nice bonus. You even have space to do that with a few pots per level when all the holes have dropper bottles in them – see the right-hand side of the middle shelf in the photo above!
The top shelf of the new rack will eventually hold my collection of acrylic artists inks that I use regularly on figures, but give the weight of those bottles I have had to leave them off until the glue had properly dried on the rack!
The IM racks are available in several different styles to fit different types of bottles; this one is about 12″ wide, 8″ deep and just under 12″ tall. Highly recommended and good value for money.
Hope everyone is having an excellent Canadian Thanksgiving long weekend, if you’re lucky enough to be a Canuck, or a good ordinary weekend if not!