My girlfriend is out of town with friends so I’ve had a bachelor/wargamer weekend and gotten a lot done on my Infinity figures.
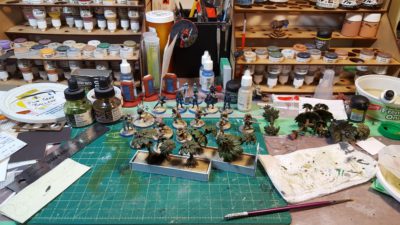
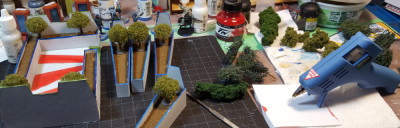
The workbench – planters in the foreground, various Haqqislam figures behind, and the usual clutter around the edges! Click for larger.
The planters are foamed PVC sheet and mat board offcuts, and the trees are from Games Workshop — at one point they produced a rather nice set of modular plastic “tropical trees” that vaguely resemble palm trees and are a lot of fun to put together. Like pretty much everything that GW ever does that’s actually interesting, these seem to have vanished from their website, which is a shame. I picked up most of a set a while ago when I bought a whole mixed batch of wargaming stuff off someone locally who was having to downsize.
Closeup of the planters – done with the old GW palm trees – and CB Haqq figures in progress. Click for larger, as usual.
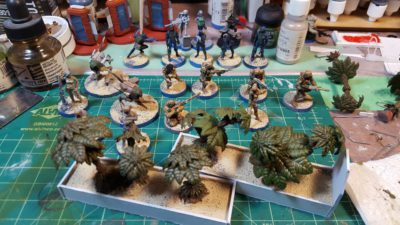
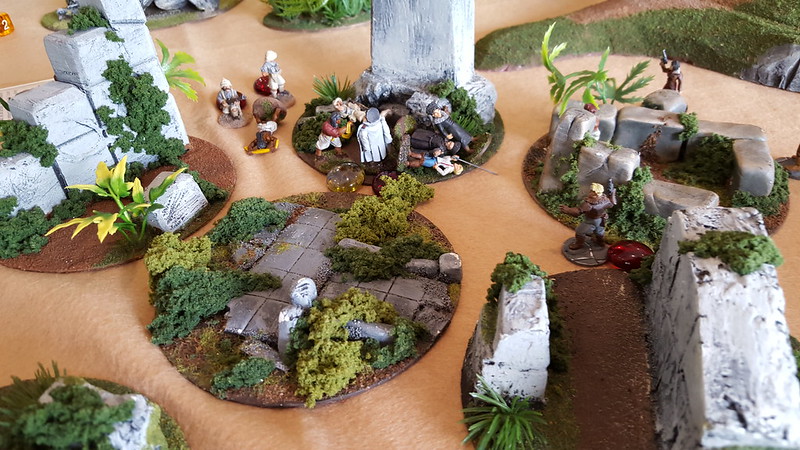
Closeup of the figures and planters. The dark blue figures in the background are various Hassassin Bahram soldiers including three of the infamous Fiday assassins. The figures closer to the camera include a pair of Remotes on the left, an al’Hawwa sniper and al’Hawwa hacker, a pair of Hafza infantry in lower left, and a quintet of Djanzaban medium infantry on the right – two rifles, a sniper, an HMG, and a hacker, all stalwarts of the Qapu Khalqi sectorial force in Haqq.
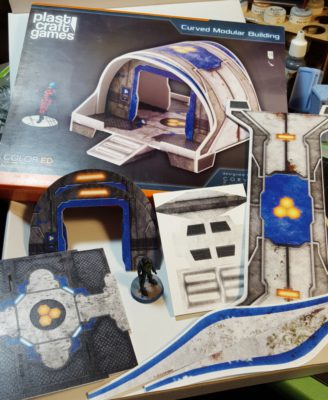
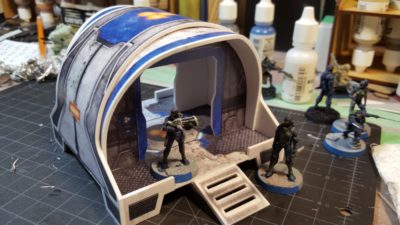
While at Trumpeter Salute I picked up one of PlastCraft’s Designed-For-Infinity plastic pre-coloured buildings, the Curved Modular Building, from the awesome folks at Imperial Hobbies, BC’s greatest wargaming store, and the only reason I do anything in Richmond other than change buses…
Anyway, the Curved Modular Building is a small building, with a footprint about 4″x4″ (not including the ramps) and about 3″ tall. It’s only 16 parts, six of which are for the two ramps off each end of the building.
Curved building parts all laid out. Click for bigger, see text for details.
The material is all 2mm foamed PVC board (Sintra is one common brand name) that’s been colour printed on one side, presumably by computer. The printing seems very solid, certainly enough to handle transport and use on a gaming table, and foamed PVC is good solid material for gaming terrain. My space station walls are built mostly with thicker Sintra (1/8″ or about 3.5mm) that I picked up at our local plastics supply place.
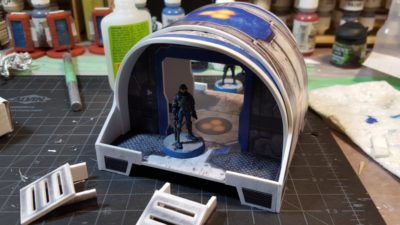
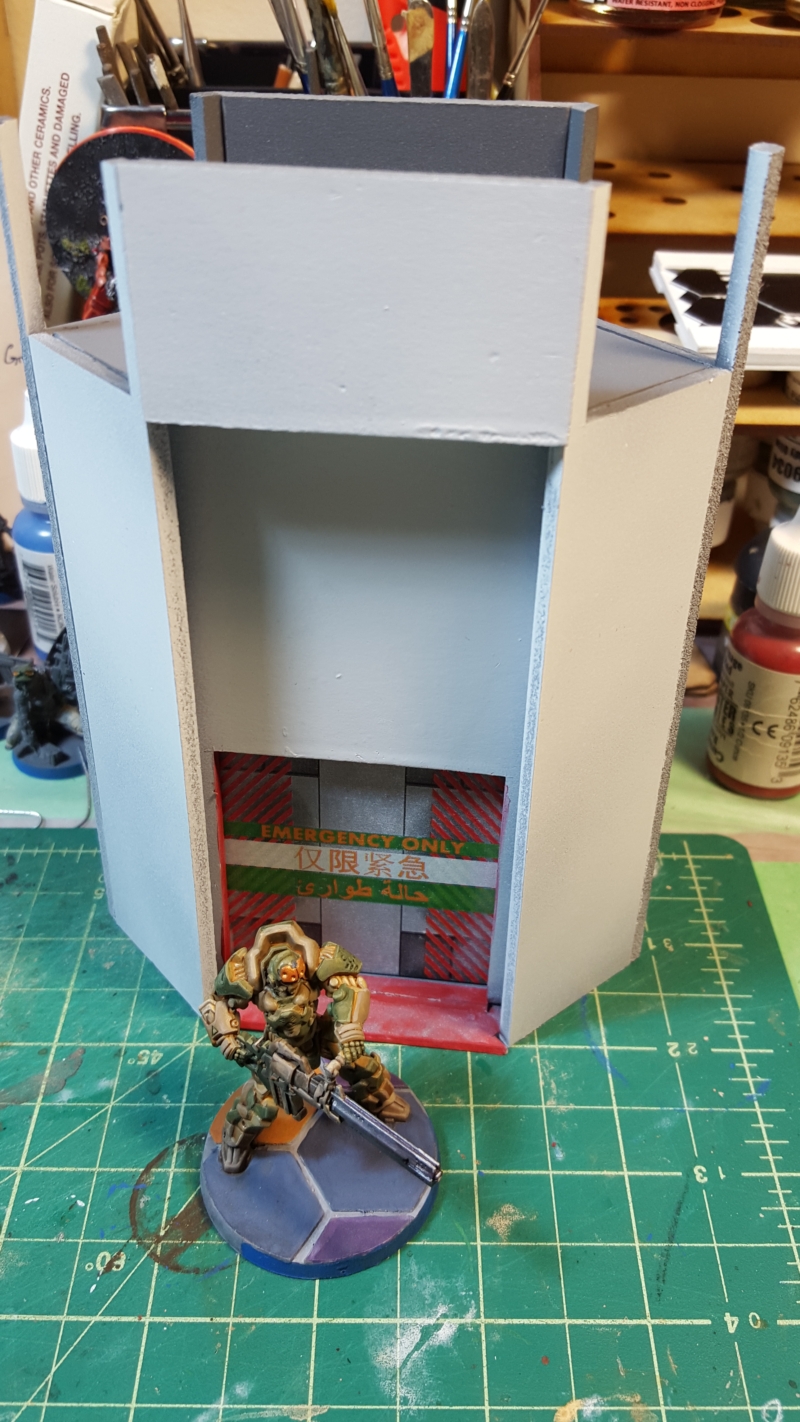
Assembled, with ramps. Infinity (28/30mm) Hassassin Bahram Fiday for scale. Click for larger.
Assembly is pretty straightforward, with the small caveat that you do need to be slightly careful with the curved pieces so you don’t kink them. I glued the two end walls into the floor with superglue, let them cure for a bit, and gently pre-curved the main roof piece with my hands and over the top of one thigh before fitting it in place. Secure one end of the roof with superglue and work patiently around the curve of the piece, adding glue an inch or two at at time along the top edge of the two walls. Once you get the whole roof glued, hold the whole assembly for a minute or two to give the superglue a chance to cure.
Pre-curve and dry fit the two end roof pieces before tacking them into place with superglue, then add the two short end walls on each porch. Glue the two ramp assemblies together and you’re done, one piece of terrain ready to go on the table. I elected to leave the ramps separate from the building to make transportation and storage slightly easier; they tuck nicely into one porch for storage.
End with two CB Infinity figures for scale and the ramp in place. Click for larger, as usual
I like these buildings, they’re super easy to assemble and it’s kind of nice not to have to paint and detail everything yourself. The use of foamed PVC instead of the more usual MDF or cardboard allows the interesting curved roof, and the curved features in some of the other PlastCraft ColorED range. PlastCraft has just announced an expansion of their ColorED Infinity line, and they have a couple of other lines in the same range, some of which could make for fun Infinity tables. They also do most of the range in plain white foamed PVC if you want to paint them yourself.
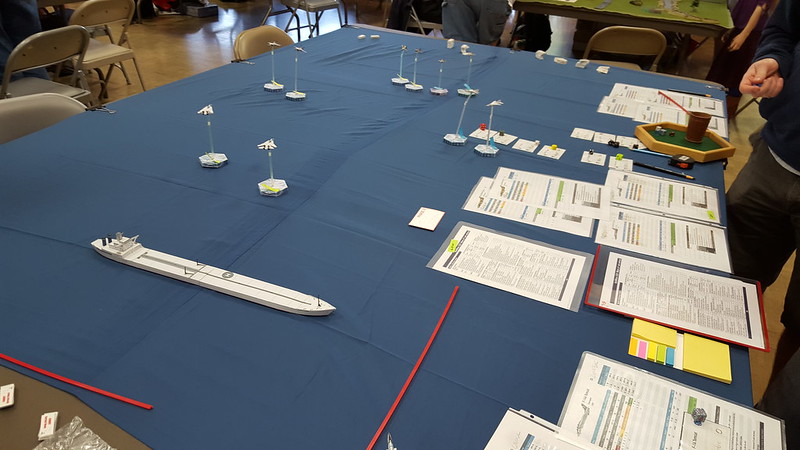
Saturday morning we ran a Libya vs US Navy air war scenario, based on an amped-up version of the real Gulf of Libya incidents in the mid-1980s. The Libyan MiGs humiliated the US Navy Tomcats, shooting down two and barely losing any aircraft, while blowing up the oil tanker they had come to strike!
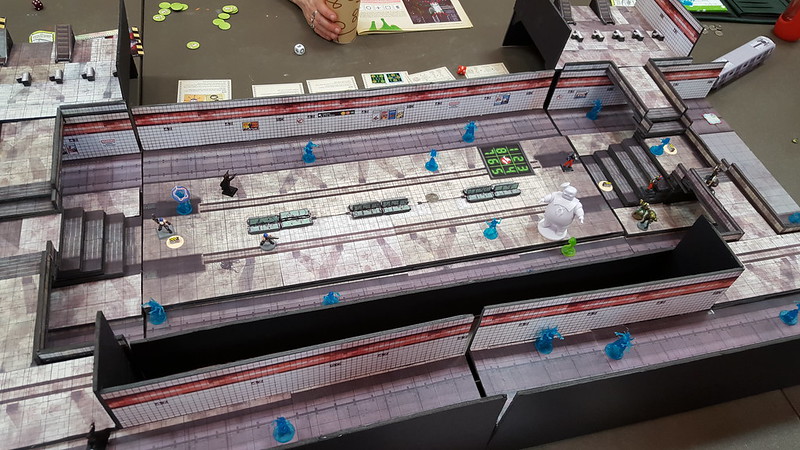
I didn’t play in this one, but it certainly caught my eye. Rival teams of Ghostbusters (they’ve become a franchise, apparently) try to clear a haunted subway station. This was one of Lisa’s games, she always runs awesome creative games that are very welcoming to gamers of all ages!
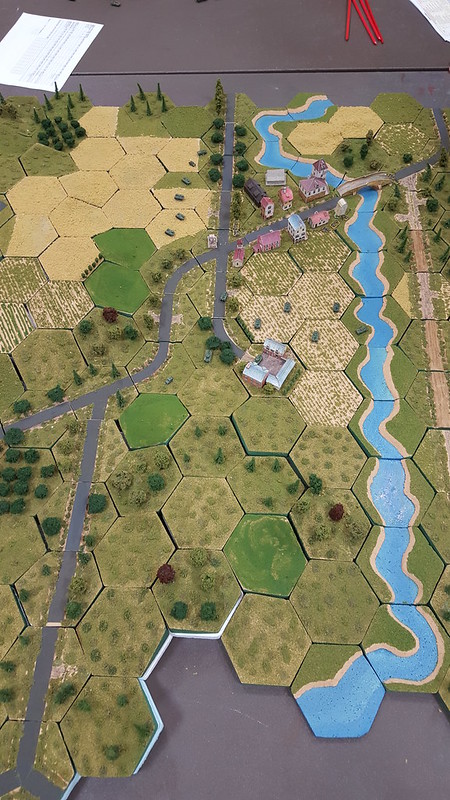
Another 1980s based scenario for Saturday evening, this time using Martin’s awesome 6mm hex terrain to do a complex West German vs Soviet scenario. Soviet air-landing battalion vs West German home guard, then a counterattack by West German armour that runs into a spearhead group of Soviet armour coming to relieve their paratroopers! Great game and a decisive Soviet victory.
Sunday I ran a big Pulp Alley game for six players. It was somewhere in India after the Great War, and we had rival teams of Thugee cultists (the cult wasn’t as extinct as everyone thought…), various interfering foreigners including White Russians and Red Air Pirates, and two rival British Army Lieutenants each out to prove themselves the best! It all ended in a giant brawl in the collapsing cursed temple of Kali, with the Thugee generally being seen as the winners!
As always, a great time in Vancouver. It was good to see most of the regulars there and catch up with them, and see all the great games being put on. Until next year!
Having moved at the start of this year I’ve been sorting and reorganizing gaming stuff, as one does, and working on actually using some of the stockpile of stuff I’ve accumulated.
Part of the stockpile was a much wider array of greenery and model plant type material than I had thought I had. I also had a batch of sci-fi planters I had started back in January 2015, painted, and used a lot during Infinity games without ever putting greenery in.
A few minutes with the hot glue gun has finally fixed that!
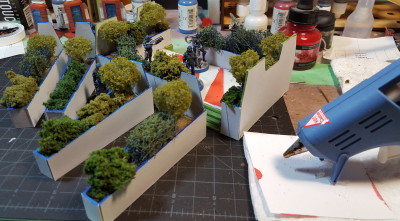
Shrubbery in progress. Click for larger, see text for details!
The little trees are from Woodland Scenics; I won them as a door prize at Trumpeter Salute a couple of weeks ago. Most of the bushes are just various shades of green foliage foam also from Woodland Scenics, while the spiky looking blueish bushes are actually furnace filter material, spraypainted green, and with fine ground foliage foam sprinkled onto them. Many years ago (like, in the early 1990s…) we had a family model train layout and our background trees were made from furnace filter. The stuff I’m using is from a bag of the surviving, salvaged railroad trees, finally back in service after a couple of decades off!
Completed shrubbery, with Infinity Hassassin Bahram figures observing. Click for larger, as usual.
Looking forward to getting these onto our Infinity tables; Infinity has a bunch of cool terrain rules that are often ignored but can really make the game more interesting.
Heading home from Vancouver and an excellent, exhausting weekend at the Trumpeter Salute show! Good to see most of the Trumpeter regulars, many of whom I only ever see once a year at this show.
Great games all weekend, including the six player Pulp Alley game I ran Sunday, “Terror in the Thuggee Temple”, which was a gloriously confused and messy multi-sided mess enjoyed by all.
I got a good crop of photos all weekend, including a bunch of my own pulp game, and I’ll get them edited and posted here soon!
Heading off to Vancouver today for the always excellent Trumpeter Salute wargaming show this weekend.
I’ve finally gotten around to setting up the Android WordPress app on this phone so I’ll update from the field as I remember to, then do my usual photo dump once I’m home.
I’m running a Pulp Alley game sometime this weekend but can’t actually recall when it is. Looking forward to seeing all the Trumpeter regulars this weekend!
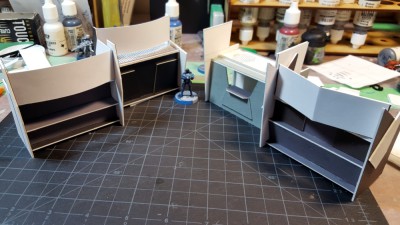
One of the goals with the spacestation terrain set was to make the whole thing look like not just a collection of tactically interesting obstacles but also a (relatively) sensible, lived-in/working facility. Right now the non-cargo bay area is a bit plain, really just the Impudent Mortal walls in my collection arranged in various ways. I did up some lockers recently to add colour and interesting cover, and now I’ve found a really simple way to do food booths or other fairly small terrain pieces.
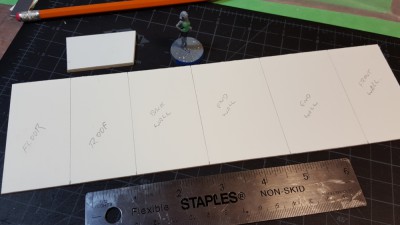
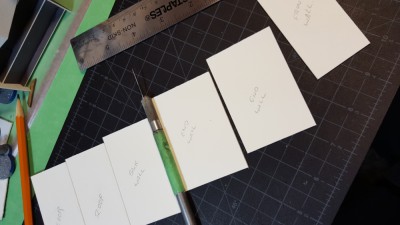
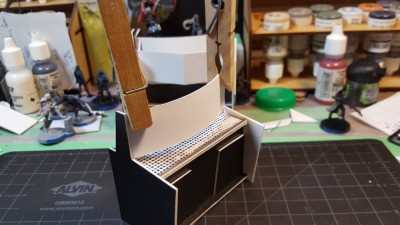
Rough cutting guide for one booth. See text for details, and click for larger.
Start with a strip of card 3″ wide and at least 11″ long, or multiple 3″ wide pieces making up roughly the same length. I use 1/16″ mattboard, the stuff used by picture framers, but for this project you could use just about anything. There’s only one measurement in the whole thing that depends on the thickness of the material being used (the height of the front wall of the booth) and that’s easily adjustable or even avoidable if you tweak the design a bit.
You’re cutting as follows:
1″ wide for the under-floor brace/foot. Cut this piece in half again.
1 1/2″ floor
1 1/2″ roof
1 3/4″ back wall
1 9/16″ front wall (NOTE)
2″ end wall
2″ end wall
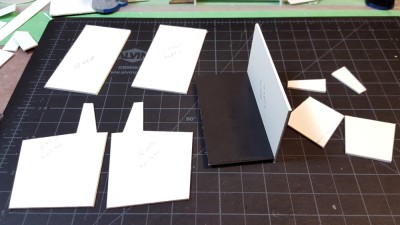
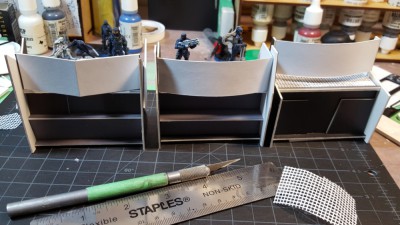
One booth’s worth of pieces. See text for details, and click for larger.
Start by gluing the two foot pieces to the underside of the floor. Centre it under the floor — exact placement isn’t important, they just exist to lift the front edge of the booth above ground level and add a bit of visual interest. Note that in the layout photo below, I forgot to allow for the foot pieces, as I’m using that scrap of 1/8″ foamed PVC plastic above the card strip instead.
While that dries a bit, cut the two end walls some more to make them interesting. They stand vertically, and you can see from the photos that I’ve cut each in a different way to add variety and provide support for the booth’s large overhead sign(s). You don’t need to get fancy, just a couple of angled cuts can do nicely, especially if you re-use the offcut pieces again as I’ve done on several of the roofs in my set.
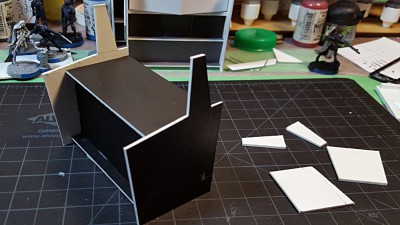
Glue the back wall to the back of the floor, with the bottom edge of it resting on the ground. Use the end walls to make sure the back wall is vertical and square, then glue them on, again with the bottom edges resting on the ground.
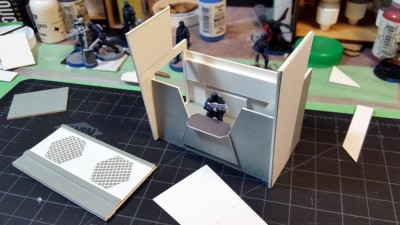
Floor on it’s foot and back wall in place, side walls cut. See text for details, and click for larger.
Fit the front wall in between the end walls, again making sure it’s square and vertical. Exact placement isn’t important and will depend on how you intend to detail the front wall. I’ve recessed all my front walls and used various offcuts of card to add a few bits of detail. I figure these are automated booths using various machinery to process FoodGoop9000 (or possibly Soylent Green…) into various forms of fast “food” by adding flavour, so there’s no order window or anything specific on the thing.
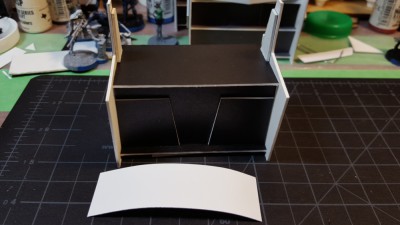
Basic assembly done, front wall and roof in place. See text for details, and click for larger.
I’ll probably eventually do some graphics to add to the fronts and signs of these booths, including various fast food brands we all know and love like Ariadna Fried Chickenoid and such! They’ll get posted here to the blog when they happen!
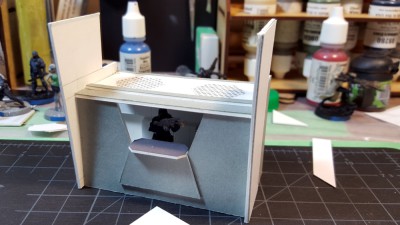
Details on front wall and inside the sign supports on the roof, first layer of the sign in front. See text for details, and click for larger.
Glue the roof on last, and put the resulting box aside for the glue to dry a bit. Time to move on to the overhead sign.
This could be as simple as a single strip of the same 3″ wide card you’ve used for the rest of the thing, or any number of more elaborate constructions. If you want a really, really striking sign, there’s H-Archive’s awesome how-to on making “holographic” displays, which I want to follow myself sometime soon!
Extra layers of the sign being held while the glue dries a bit. See text for details, and click for larger.
The curved sign is simply three layers of light card (65lbs, I think it is) cut 1″ high and 3 1/8″ long, just slightly longer than the gap between the vertical bits of the end walls, so that it curves. I glued one strip in place, let it cure for a bit, then gently pushed the second and third strips into place and held them with clothspins until the glue dried. Pre-curving the strips by running them over the edge of my workbench helps.
All three autobooth designs together, with various Hassassin Bahram troopers posing for scale. Click for larger.
The grid on the roofs of my booths is some sort of embroidery/craft mesh stuff that I got a leftover chunk of from my girlfriend. It adds interesting texture if you can get some, or something similar like the plastic mesh used in window and door screens.
The Manned Booth
The fourth and final booth is a variant design that is actually run by a person (or humanoid robot, you never know in Infinity) with a door in one end wall and an open order window/bar in one side wall.
Manned booth assembled, roof off. Click for larger.
Design is identical to the autobooths above except I cut two of the “back walls” and instead of cutting the roof 1.5″ I cut it 1 5/8ths” wide so it would go over the top edges of the walls properly.
Manned booth, roof on. Click for larger.
The inside is outfitted with various bits of card for the bar counter, a side bar/prep table, and a whole bunch of cupboards along the walls.
The outside end walls will eventually be painted and decorated to look like drinks glasses, and there will be a sign of some sort on the roof, although of slightly different design than the autobooths because this roof actually comes off.
Any comments or suggestions please leave them below, I do read and reply to comments but due to the spam filters it might be a while before I approve your comment!
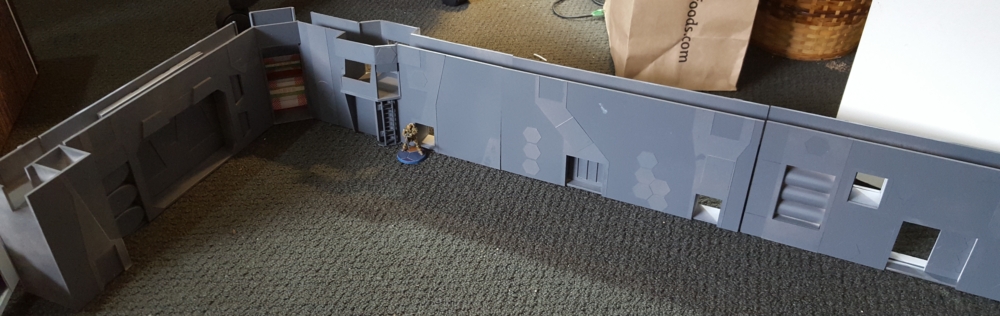
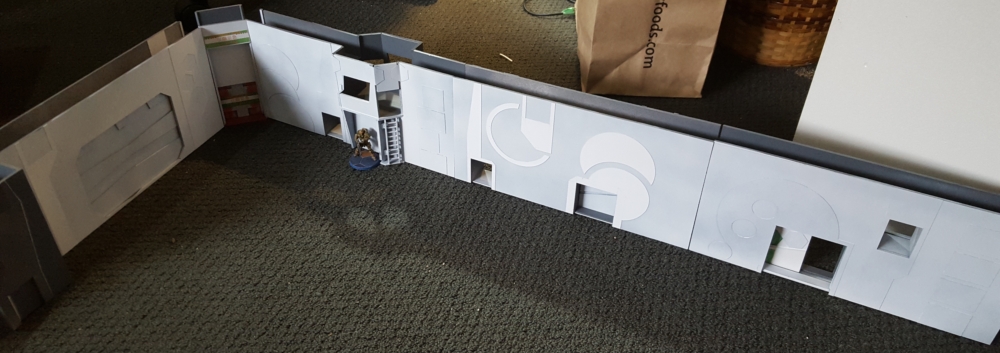
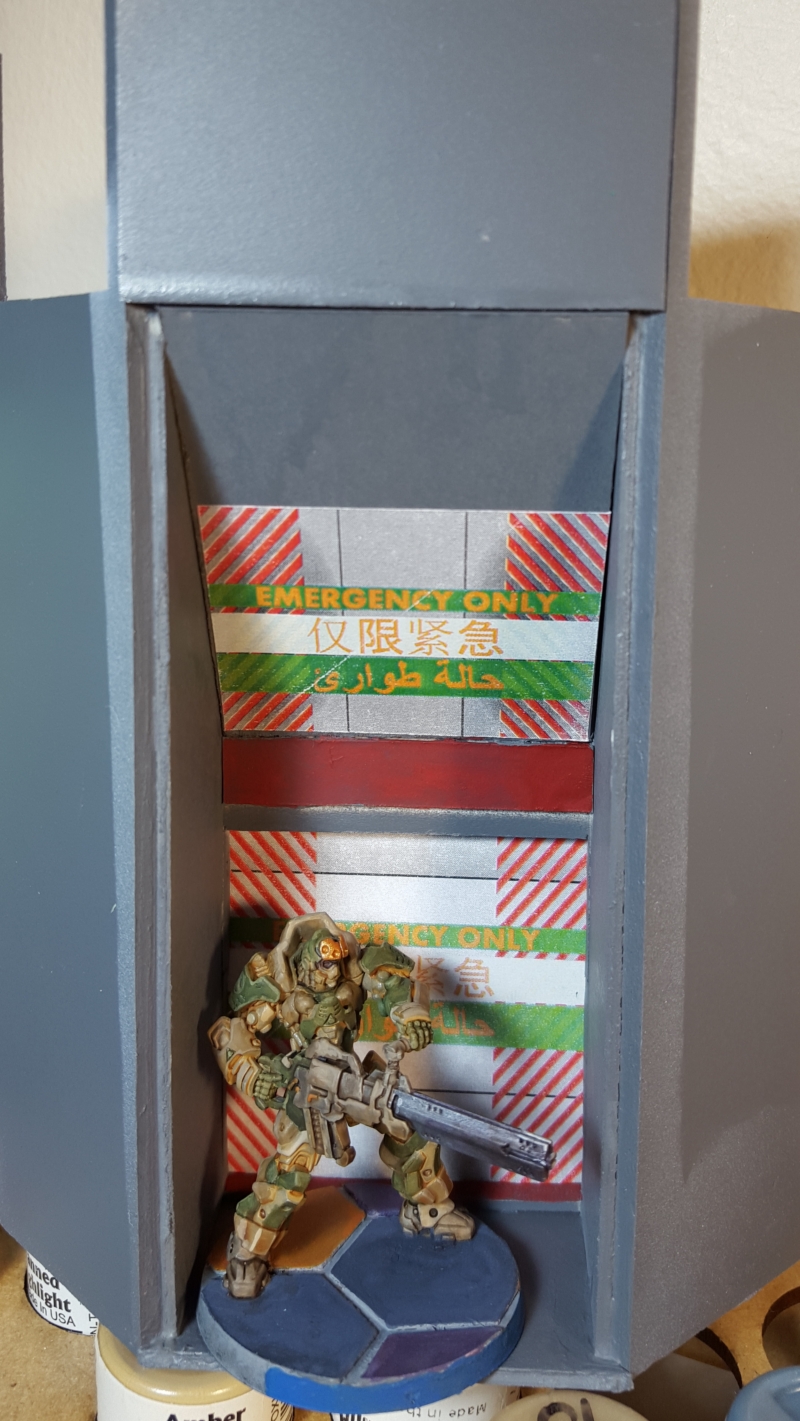
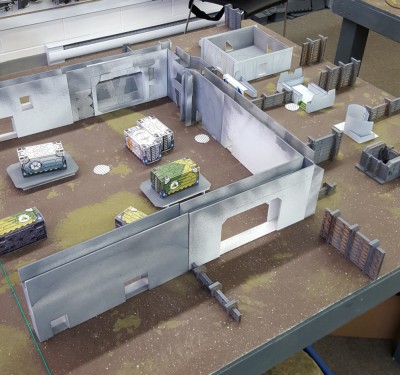
Finally have all six of the big space station wall sections basically complete and primed. All the doors are installed (several sections have sliding doors), the basic layer of surface detail is down, and one side of each is primed dark grey and the other is white.
I’ll gradually add more coloured graphics like the corner piece has, both warning and info labels and ads. There’s also going to be more paint colour on various bits eventually, but for now white and grey is enough.
The control room module has ladders on either side from Warsenal, which they listed and sold separately as recently as late last year but don’t seem to have listed for separate sale anymore. Pity, because they’re nice little lasercut acrylic pieces and dress up the control room nicely – much easier than attempting to make my own damn ladders!
I’m really please with the new corner piece. It can be used both as a corner, as in two of the photos above, and as an angled offset to create more LOS breaks in long runs of the wall modules. It’s also the same footprint (3″x3″) as the elevator tower I’ve built for this set, so the two of them can offset each other. Fewer odd little gaps in the wall setups!
The only major pieces left to do are one or two more regular corner modules and a few more pillar pieces, but with major work done on the full set of big modules I can get to the extra bits and details in a slightly more relaxed way!
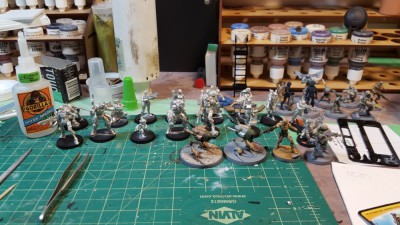
A vast pile of bare pewter Haqqislam figures for Infinity, and a few in progress… Click for larger, as usual.
It’s been a quiet month here on the Warbard, but things have been ticking along in real life. The space station scenery for Infinity is taking shape, and today I sat down and cranked through assembling every single Infinity figure I owned. There were far too many boxes and blisters hanging around, so now there’s a long line of bare pewter figures waiting for putty and then primer before actual painting can start!
I’ll try and get some space station photos up later this week; I like how it’s coming along.
We’re also getting into the convention season locally, with the new LANtasy taking place in mid-March and Trumpeter Salute 2016 over in Vancouver on the first weekend of April. All I’m doing at LANtasy is playing Blood Bowl, probably with my existing Skaven (rat) team, so prep for that is minimal. For Trumpeter I’m running a Pulp Alley game set in the jungles of British India between the wars; I have enough figures for that and enough scenery, but might try and get a few extra figures finished and one or two bits of scenery. I also need to run a game or two of Pulp Alley to remind myself how the rules work, as it’s been ages (probably over a year?) since we last played it!
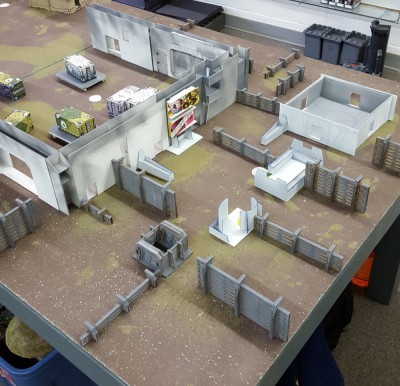
Got my in-progress space station setup for Infinity games out on the table today, as one of two tables set up for a very small (four players!) local Infinity tournament.
Space station setup first outing at Everything Games. Click for larger.
Space station setup from a different corner. Click for larger.
It was well received and the other folks had some good ideas for finishing it – breaking up the line of sight down the access tunnels and making it clearer where the ladders are, for example, as well as an idea for a smaller module to offset some of the lines and make it less strongly linear, which I might incorporate.
I’ve got some grey felt that I’m probably going to cut a 4’x4′ mat out of, and I want to do a whole lot more painting and surface detailing of the big hangar wall modules. Need to get more grey spraypaint first, as my current can ran dry while I was putting a base coat on these pieces last night!