First of all, Happy New Year, everyone! Hope your 2017 is full of excellent gaming, good friends, and completed projects!
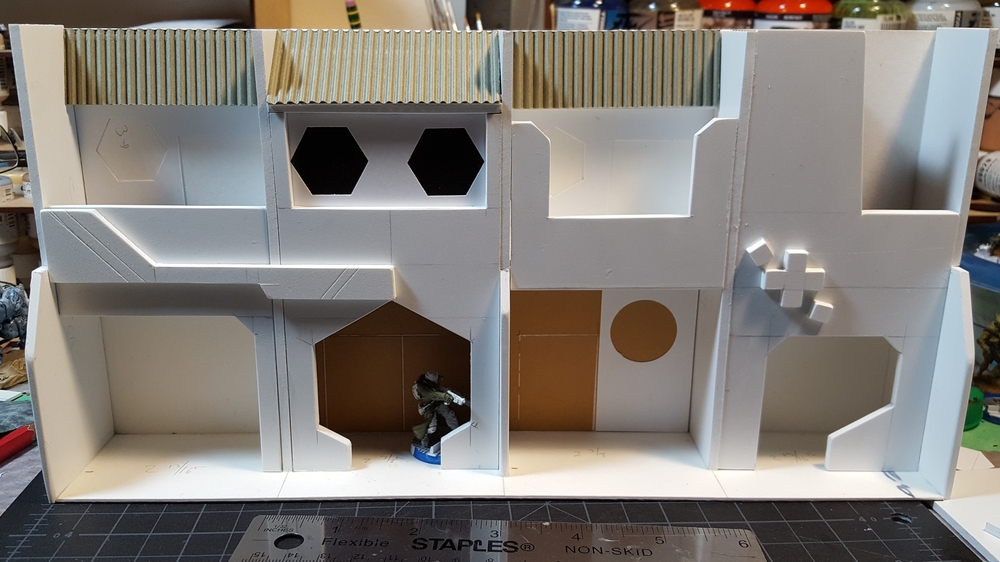
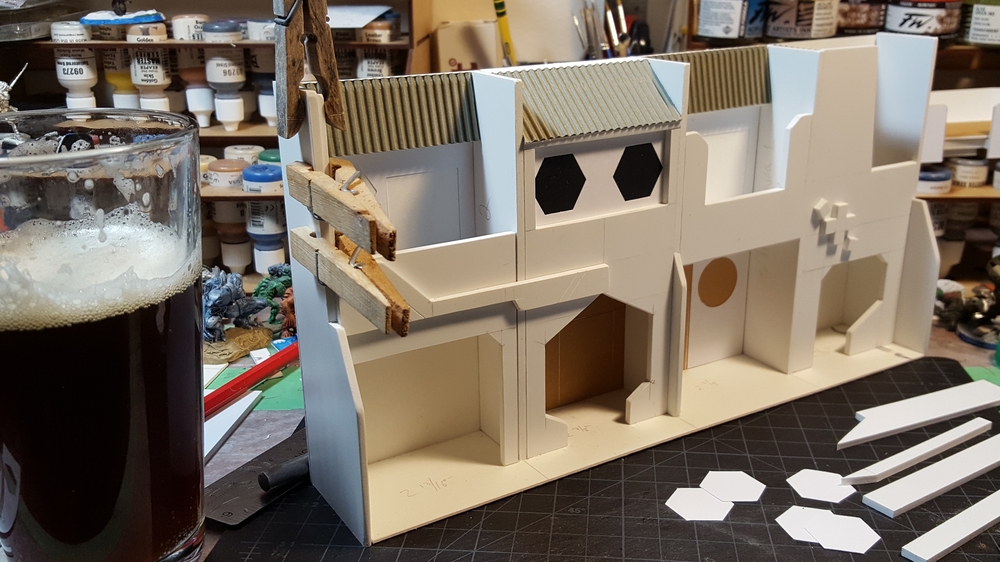
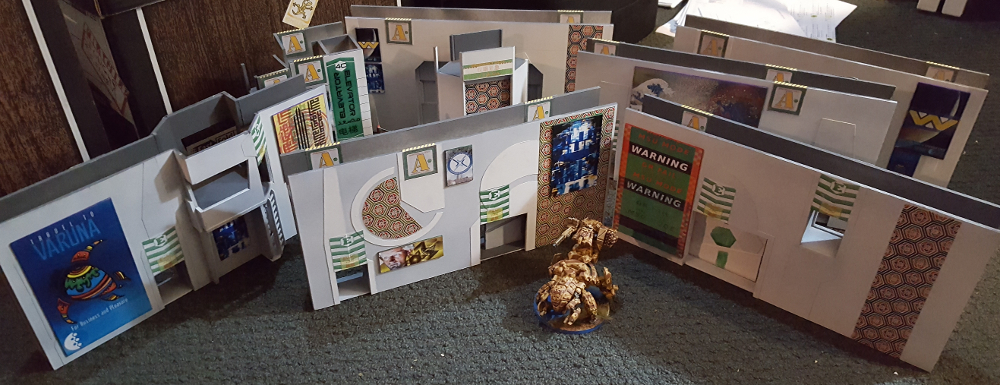
On the “completed projects” note, I get to move my first completed project of 2017 off my bench and into my scenery boxes. I’ve finished painting and adding signs to the habitat module facade I started in November.
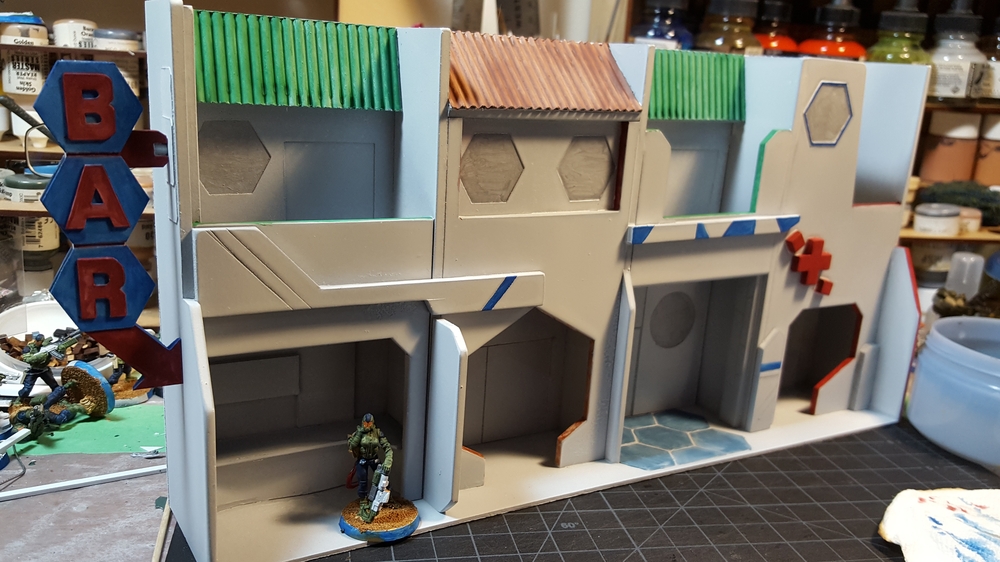
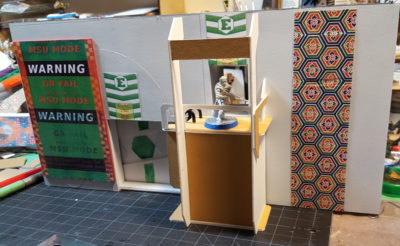
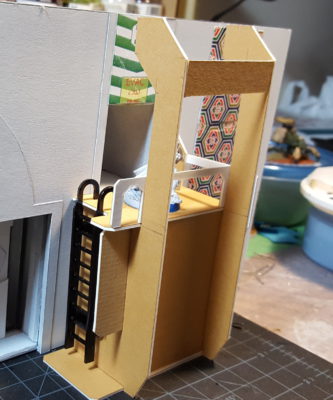
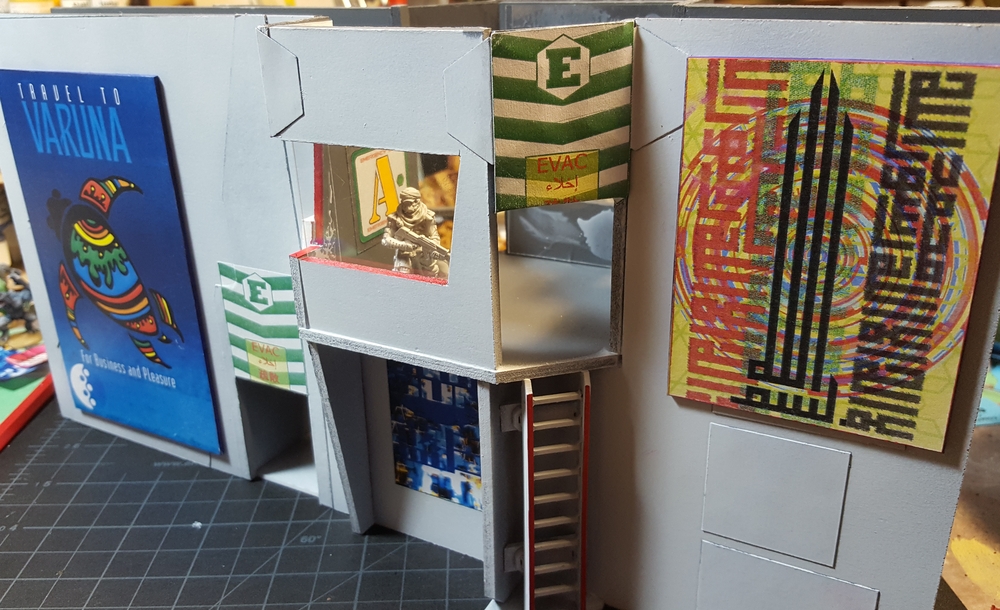
I added various spot colours of paint here and there, some hex floor tiles in front of one of the doors and a small auto-bar setup to one module, and a few window frames and other small details. Almost all of this detail was done with scrap card or plastic offcuts.
The “BAR” sign on the left is held on by a rare earth magnet embedded in the wall and another built into the frame. I printed the letters off on my computer, glued them to thin plastic card, and cut them out carefully by hand, using sandpaper and files for cleanup. The hexes are from a 1″ hex punch I bought at a craft store; the frame behind them is an offcut of 1/8″ foamed PVC plastic board. It’s double sided; the other side is identical.
After painting it was off to the computer and Inkscape to create a set of signs for the three commercial modules on the ground floor of the unit. The bar is “Unida Drink”; there’s a legal firm, and then the Ceres Clinic on the far right. Signs identifying this as Hab LV4-26 are on either end and above the main entrance with the hexagonal outer wall.
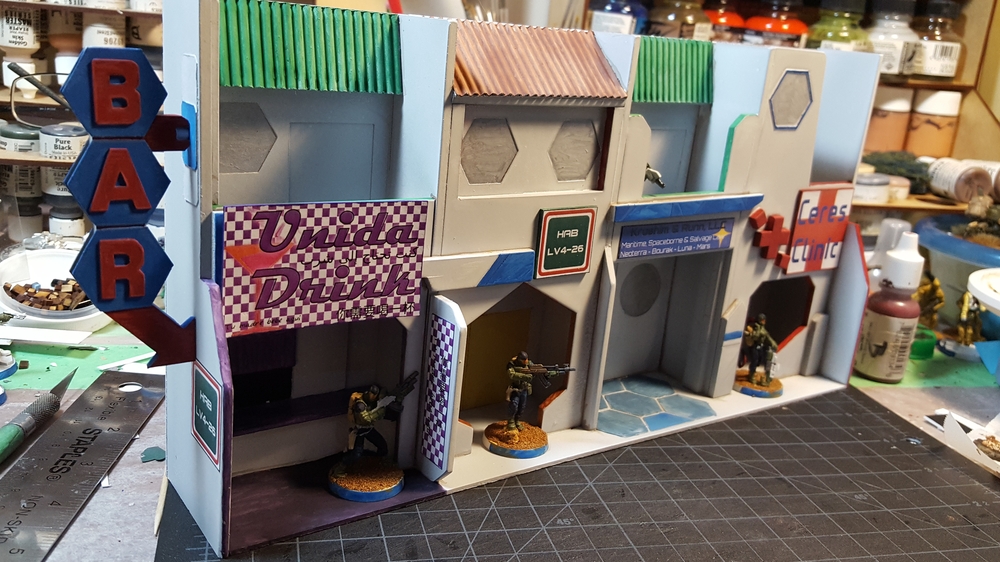
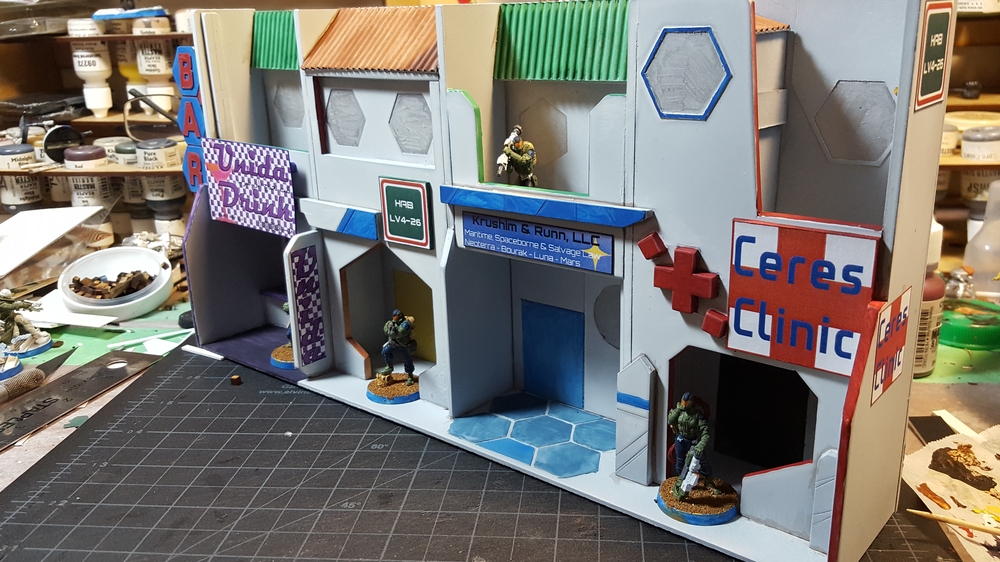
I’ve included (Google Translated!) Arabic and Simplified Chinese text on quite a lot of the signage I’ve created for Infinity; the Arabic and Chinese text on the Unida Drink sign reads, “You require a drink”, ie a literal translation of the English-language pun in the bar name. There’s some Spanish on there too, for fun, which reads, “Your mom drinks here”.
I might yet create a second hab module (LV4-28, perhaps?) as this one was fun to do, should be tactically interesting on the Infinity table with the balconies and doorways, and they’re an awesome source of colour and a lived-in look for a table. Need to come up with some more weird/interesting/cyberpunk-ish names for businesses!
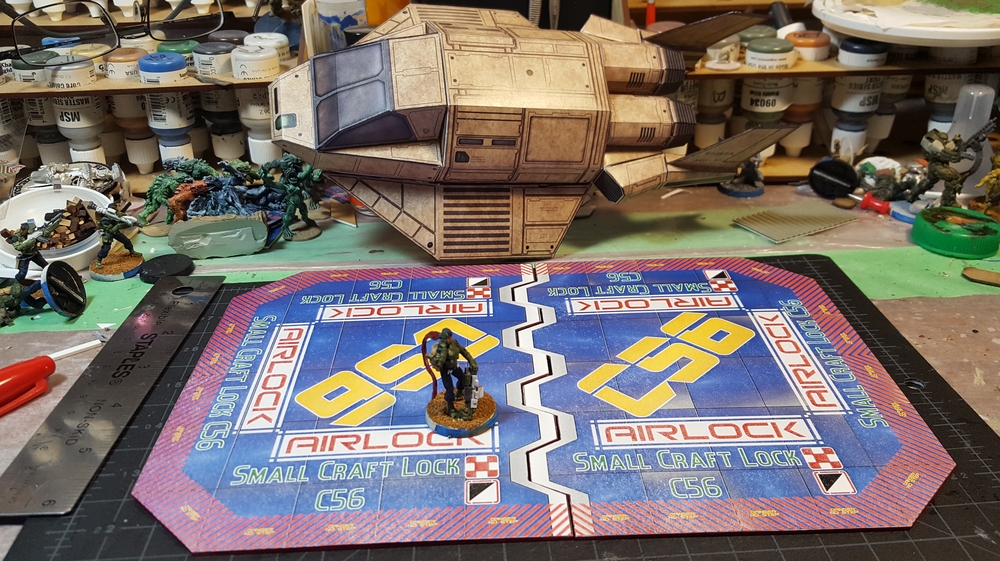
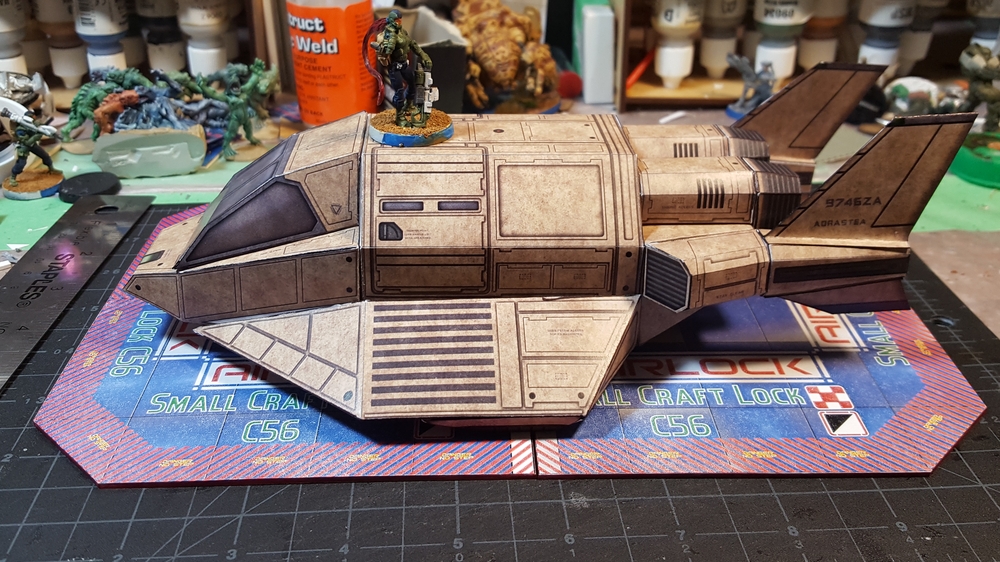
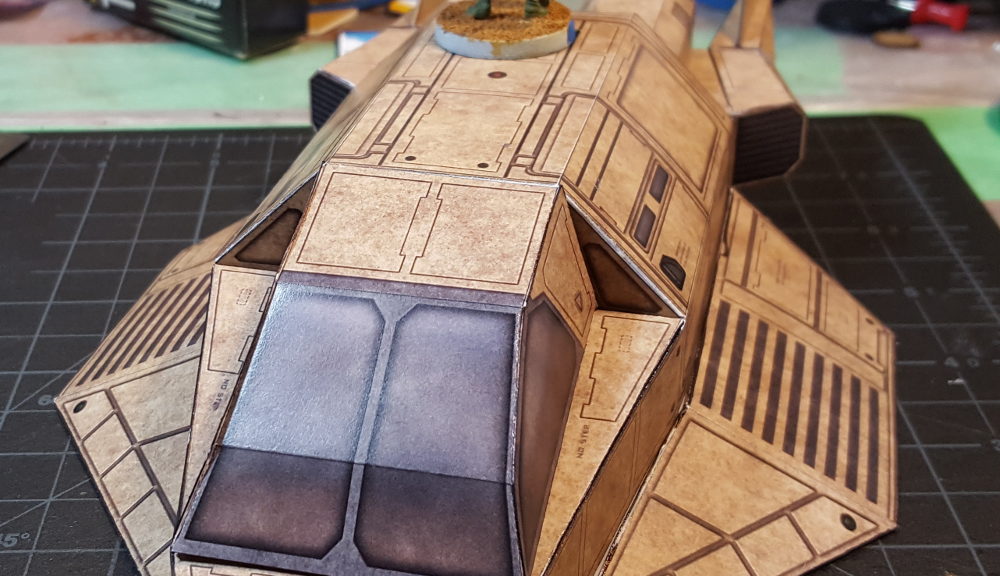
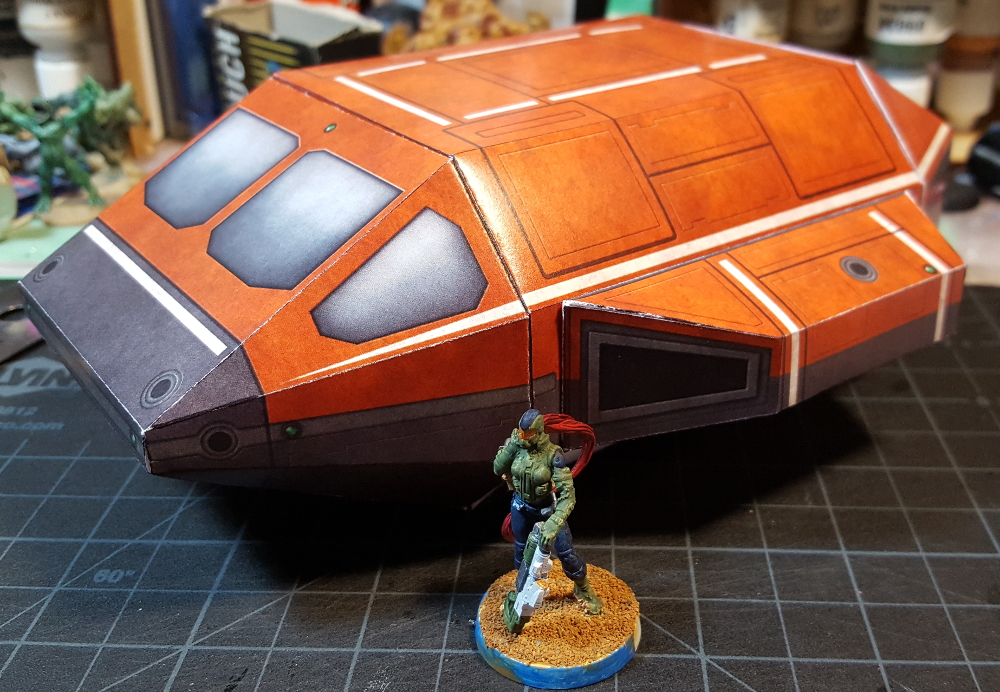
In the next couple of days I’ll be publishing a PDF so anyone can build a small craft airlock for their science fiction gaming, and then it’s off to other projects, including getting back into some pulp scenery building in advance of 2017’s local wargaming convention season!