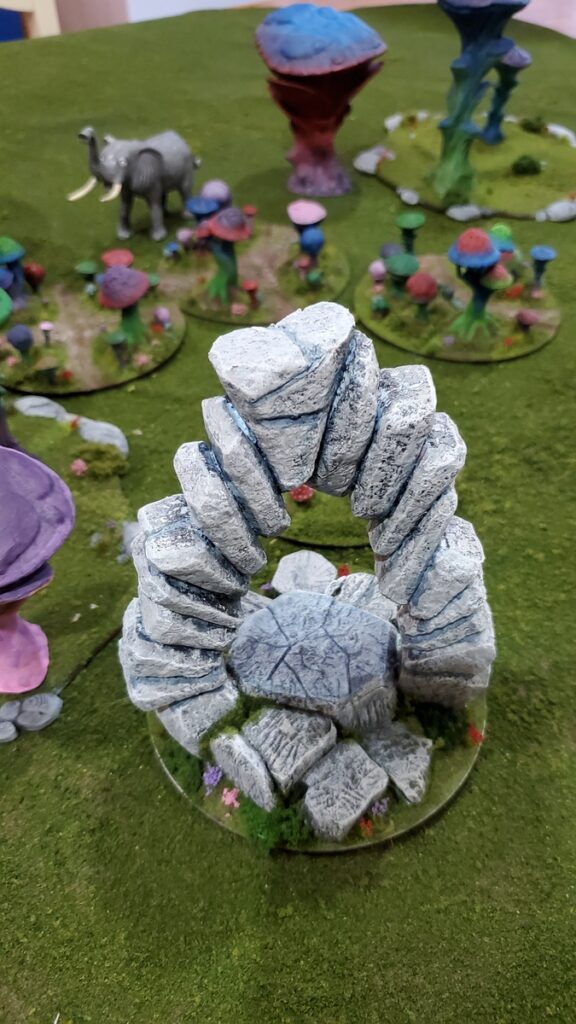
Back in June, roughly 20,000 years ago in the Early COVID Summer Era, I built a stone portal/archway/summoning gate thing, showed off photos of it all unpainted and pink, and then never got another photo of it up on the blog! The paintjob was pretty similar to the standing stone I’d done a week or so prior, in any case.
This week I pulled both those pieces out and finally did the base detailing so they fit better with the rest of my fantasy terrain, which has a wild, fecund, lush Summer Realm feel to it, even before you start noticing the giant mushrooms!
Weird stone arch all painted up. Click for larger.
I’ve just ordered a top up of flowers and grasses from Rain City Hobbies over in Vancouver; they do a bunch of different grasses and flower tufts in a nice variety of colours and I always like having a relatively-local source for this stuff! One of these days I might need to put an order in for some of the really weird alien grass colours Bad Squiddo stocks to add that extra touch of strange to my fantasy table!
As for the stuff in the background of the photo above, stay tuned, I have more weird fantasy terrain posts coming soon!
If you’re going to do fantasy battles, why restrict yourself to normal-looking trees and such? If you want to fight a battle in a pine forest, go do Romans vs Germanics or WW2 Ardennes or something. For fantasy, we should have properly fantastical terrain!
I don’t have a 3d printer but Corey does, so I pay him in beer and snark and (when his tempermental 3d printer cooperates) get 3d printed nifty things back from him.
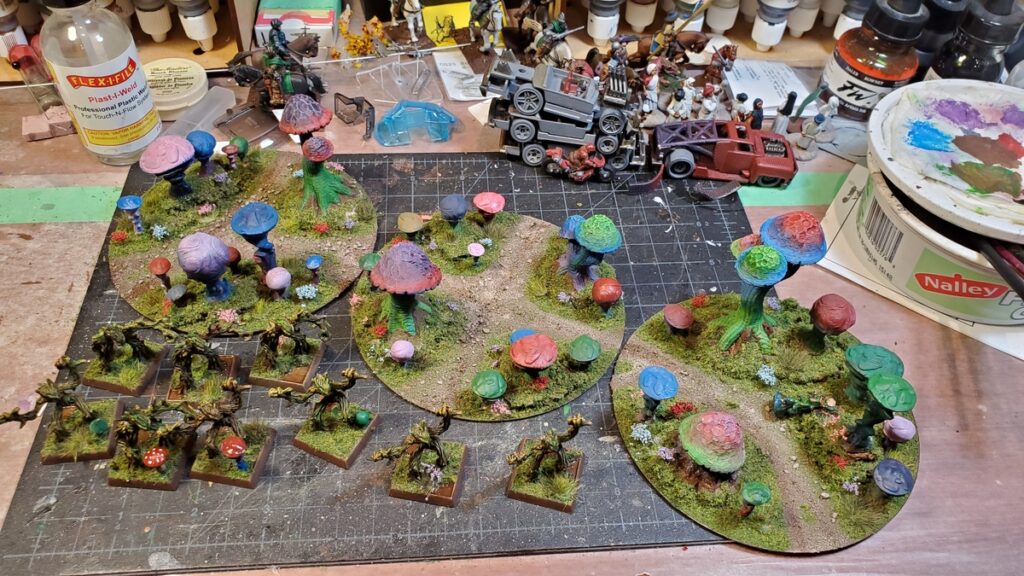
Using a couple of junk CDs (best scenery bases ever!) I put together this trio of fungal thickets to add proper fantastical flavour to our fantasty skirmish games.
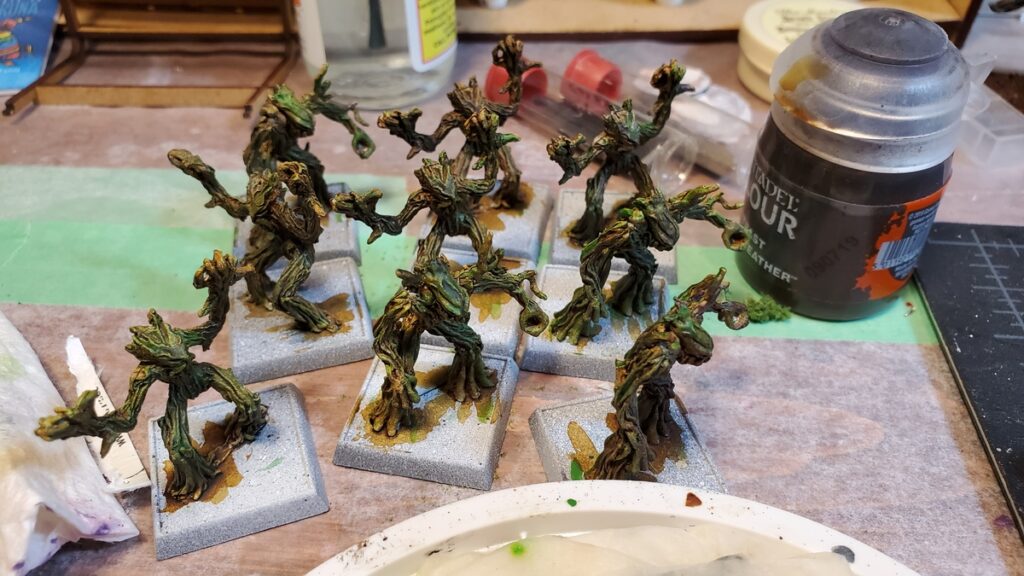
All three mushroom thicket bases together, plus nine Reaper tree-kin to lurk in the thickets! Click for larger.
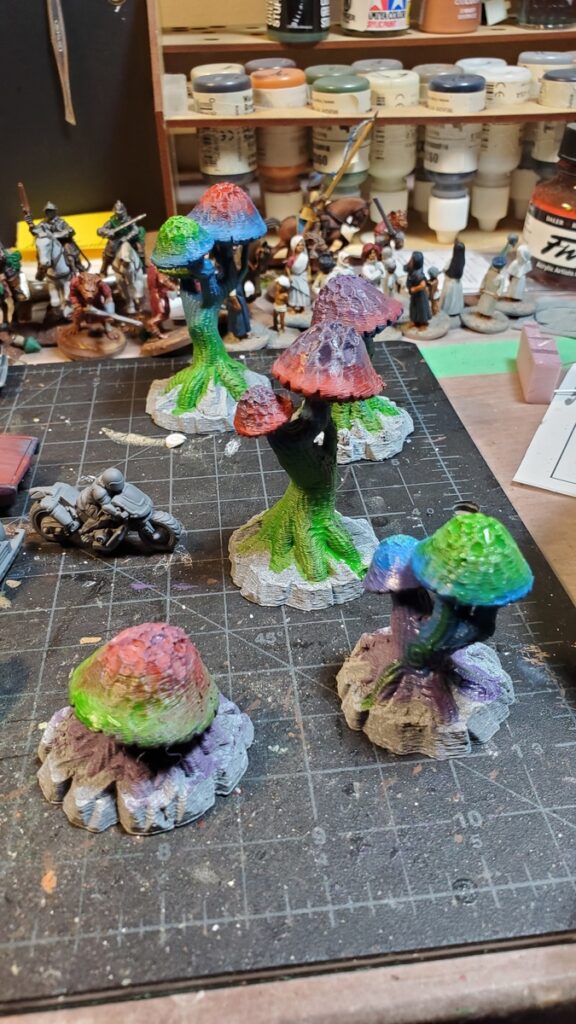
These thickets use half a dozen big 3d printed mushrooms from the FR&P KS and a bunch of resin and 3d printed smaller mushrooms from Dark Fantastic. Scraps of cork board about 1/4″ thick add some height here and there, and sand, flock, and lots and lots of flower tufts finish them off.
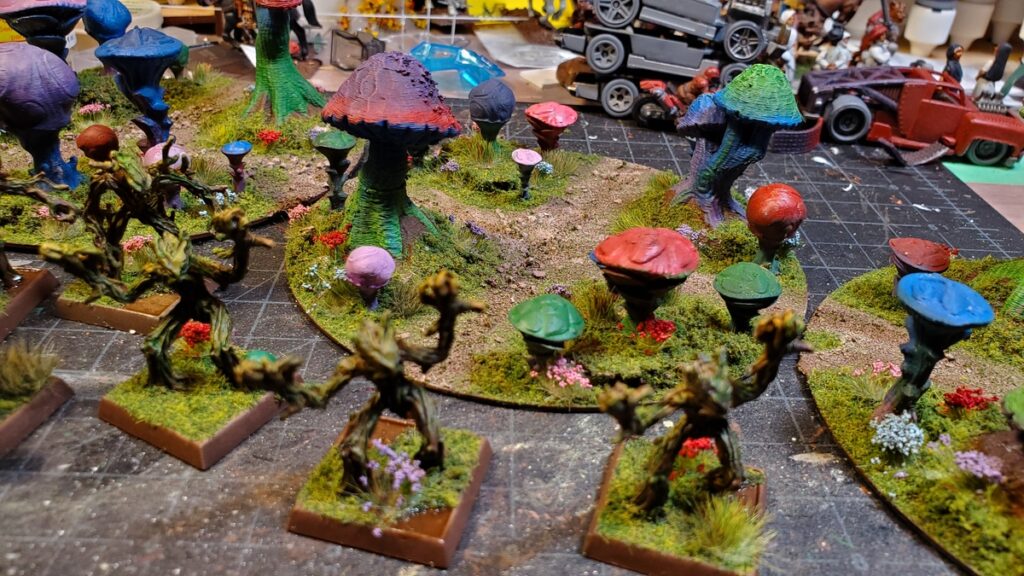
More mushroom madness. The tree-critters in the foreground are Reaper Miniatures saporlings. Click for larger.
The tree-dudes are Reaper Saporlings, available in a batch of nine, as a single, or in Bones plastic. They’re about human sized and great figures. They’re going to star as zombie stand-ins in a fantasy pulp game sometime soon, and will no doubt find other roles to play in future games.
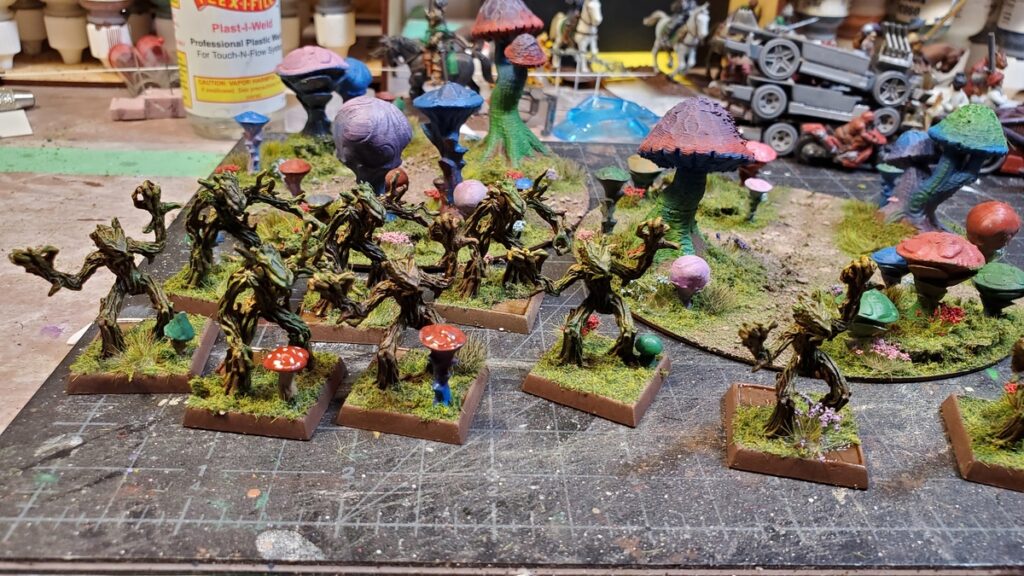
More Saporlings, and two of the mushroom thicket bases. Click for larger.
I have the Doomcap Deeps bundle from Dark Fantastic all painted up in the same bright colour blending scheme as these mushrooms, and I’ll get some decent photos of them soon for that longer review post I hinted at at the start of this post.
Stay well in our second wave of COVID world, stay safe, and try to get some gaming in if you are able. If we isolate now, it is so that there isn’t a gap on the other side of the gaming table when we do gather again in safety.
No posts for a month? Sorry! The irony is that I’ve been gaming more regularly than ever, as our little COVID-compliant pod of gamers are now meeting every Monday daytime (all three of us are on reduced work hours, again due to COVID…) and on Thursday evenings due to my lovely wife’s heartfelt desire to kick me out of the house every so often.
We have gotten into Gaslands, and been running through the Perilous Island campaign for Pulp Alley with a fantasy flavour to it instead of the classic early 20th C pulp we’ve done in the past.
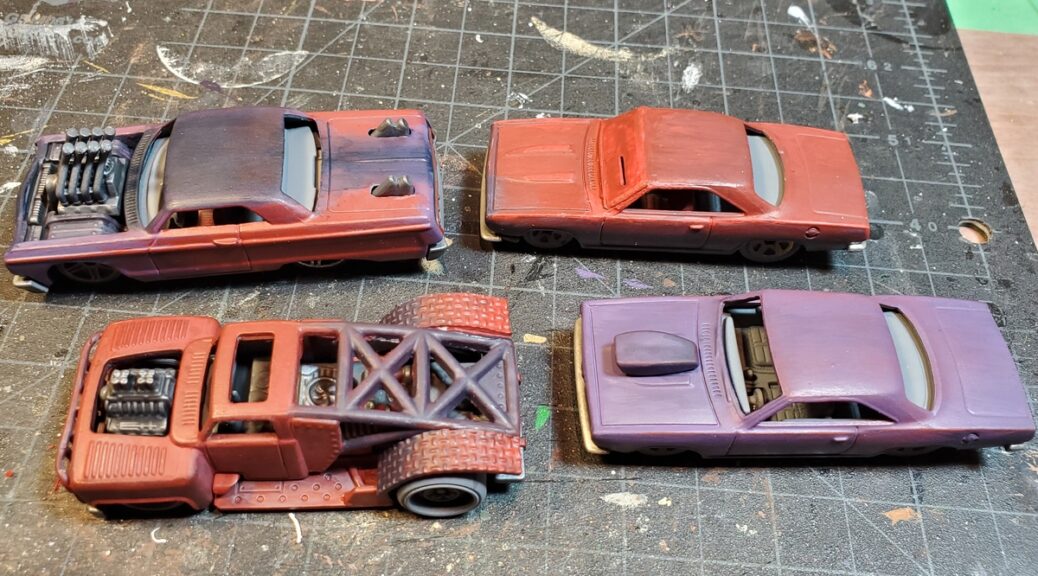
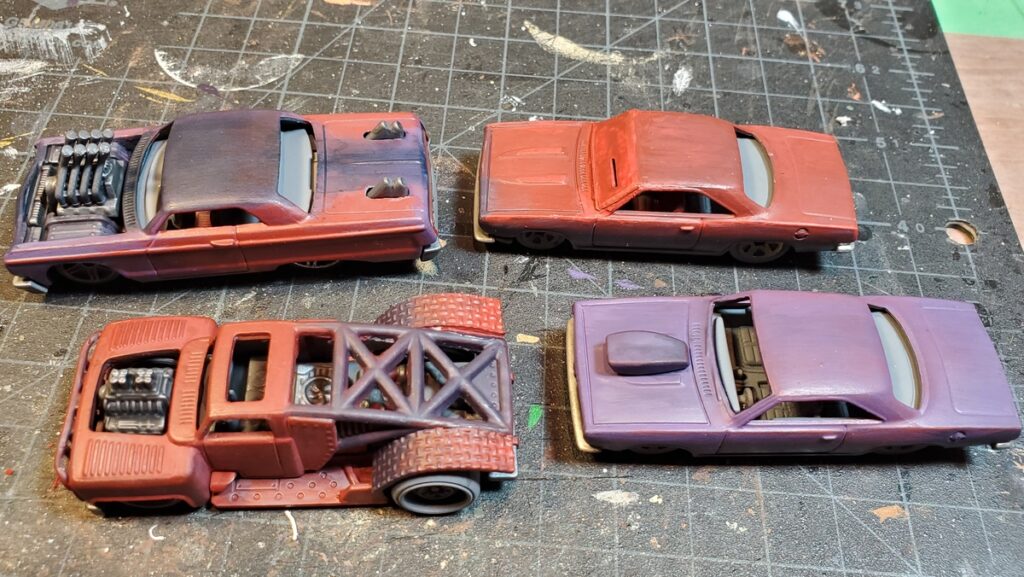
Gaslands cars in progress. Mostly stock and no weapons for now. Click for larger.28mm Saproling from Reaper Minatures. Really neat figures, roughly human sized. Click for larger.Giant weird mushrooms for fantasy scenery. From a recent Kickstarter. I’ll do a review of that KS sometime soon, I promise. Click for larger.
Anyway, I’m going to try to get back to August’s regular blogging schedule, or something like it. I spent September and most of October gaming but hardly doing any painting or scenery building, and have now painted or built more stuff in the past week than in the previous two months!
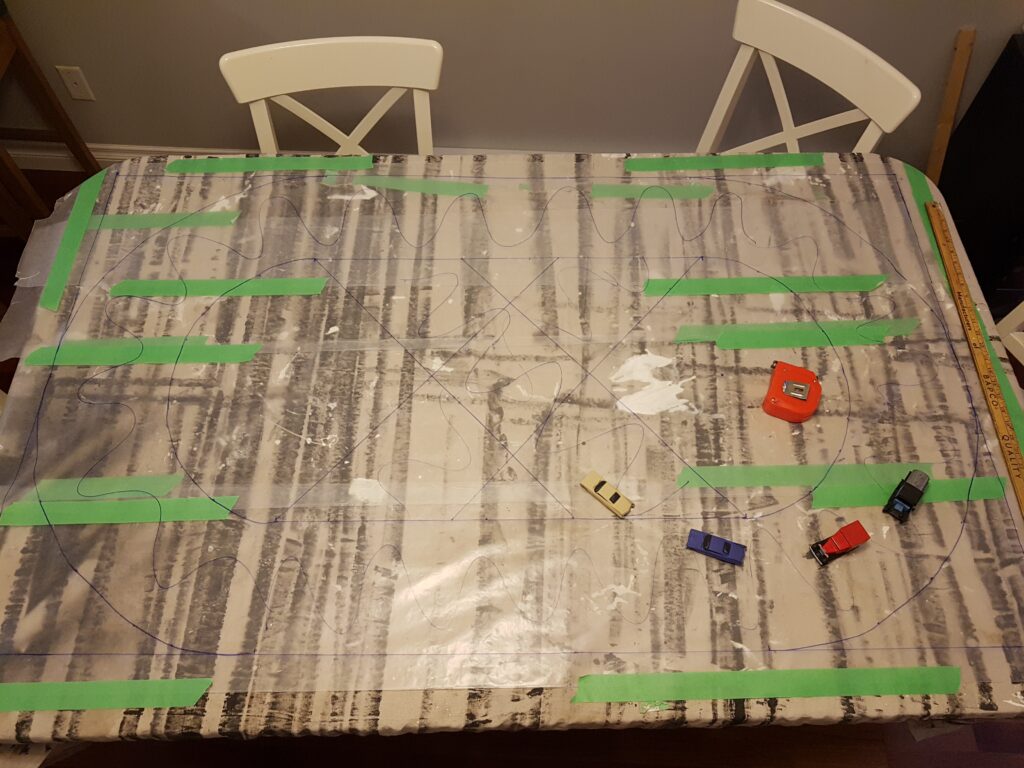
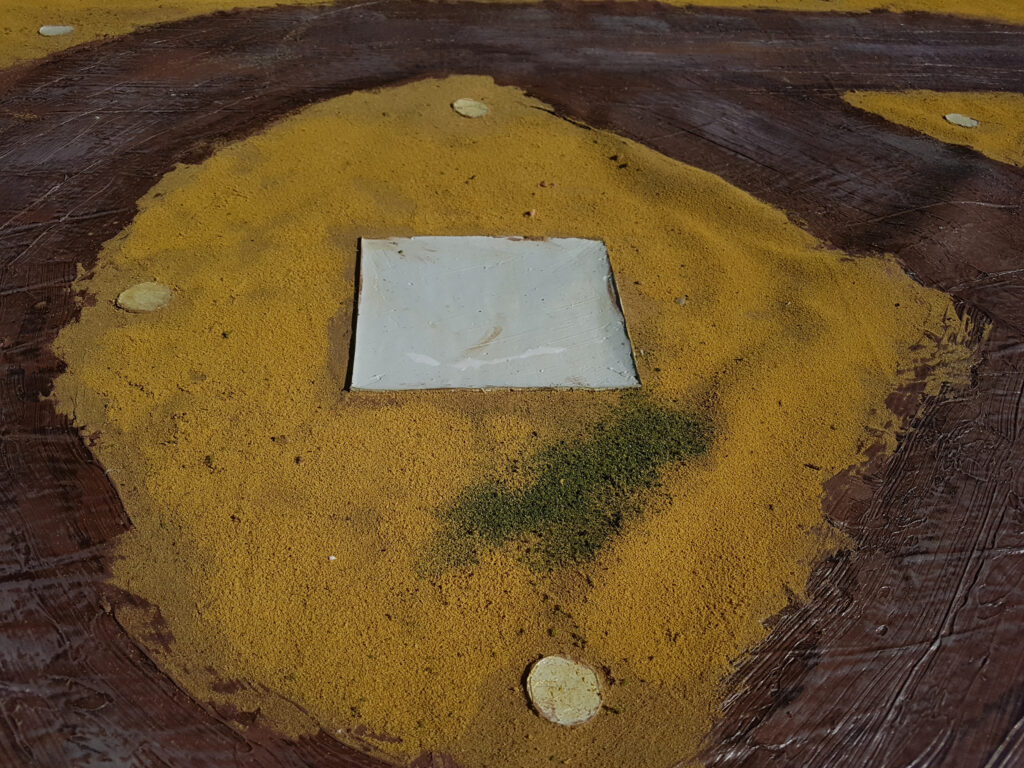
I love a big terrain project and a few of us here got into Gaslands recently. So I decided to create a racetrack. A big one, at 5′ by 3′. So off I set to do that.
Initially, I wanted it to be portable, so I did some experiments and found that acrylic caulk will peel off of wax paper. I ended up regretting this decision, but I am going to use the technique for a future project.
Racetrack laid out on wax paper
The track is 36′ wide and 60′ long, with the track itself being 8′ wide. All of these widths are approximate. The cars on the track are either older Hot Wheels or Lledo.
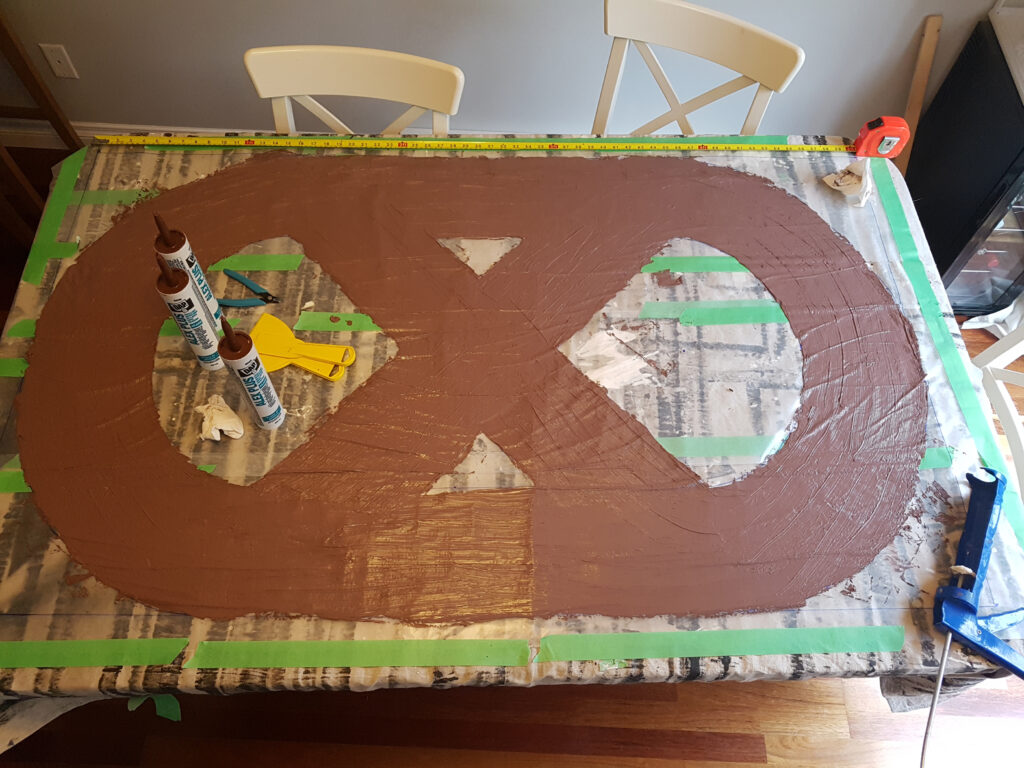
Once the caulk was added, I added quite a bit of texture with a rough caulk knife that I had roughed up on a previous project (oops). Here was another error I made – the wax paper was not fully taped in the middle, I ended up with ridges.
Fresh caulk on the racetrack
One note about drying acrylic – it loses a lot of water, so you’ll want something underneath your mat like another drop cloth to catch that water.
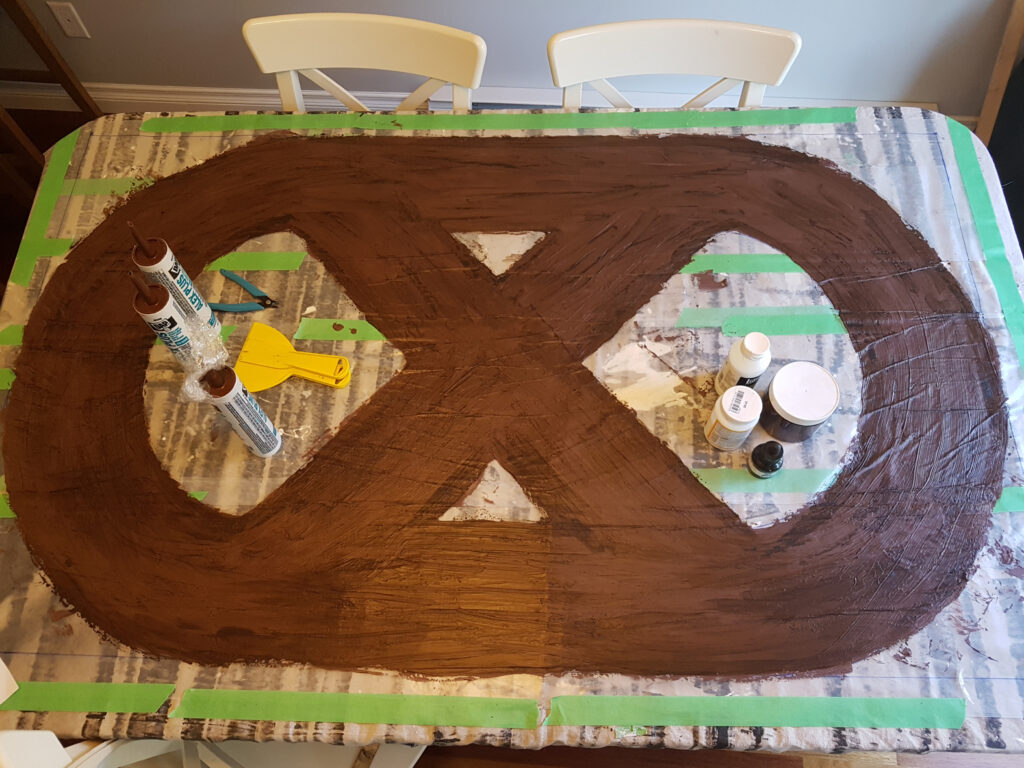
Once dry, I inked it using and then heavily dry brushed it with a variety of browns. Overall it works, but I was aiming for a slightly different brown than what I ended up with.
Painted race track
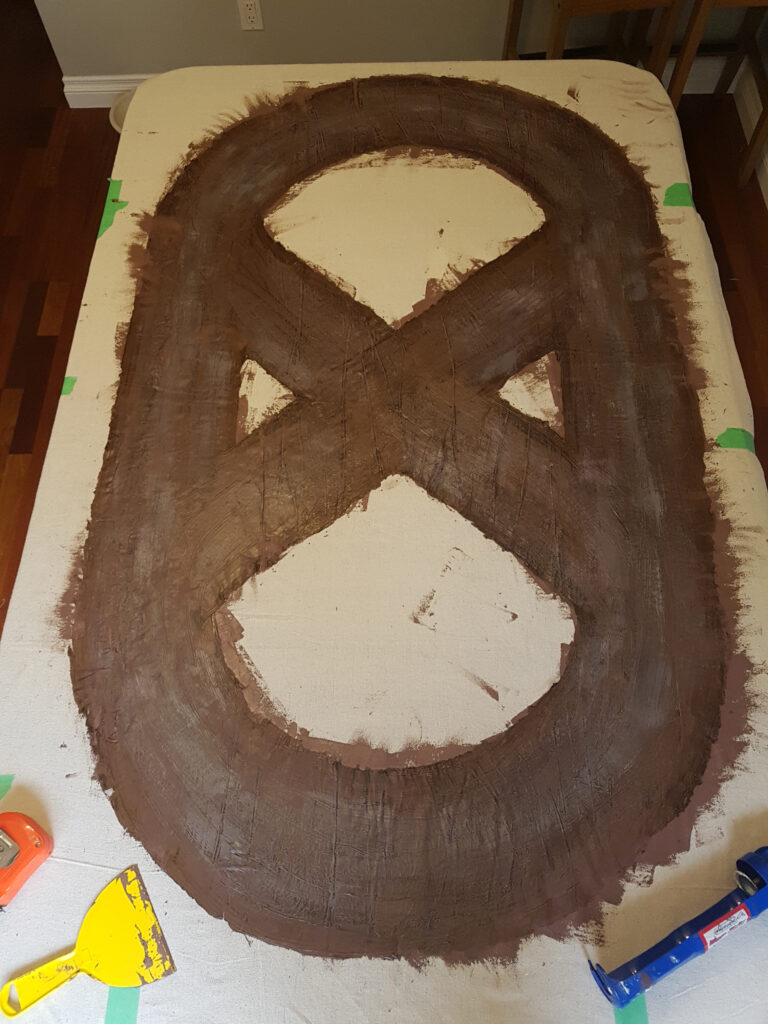
We used it a few times like this, but it really didn’t work that well. The edges of the mat were thin and a tear started developing in one curve. So onto a canvas mat it went, with more acrylic caulk to stick it down. Should have done that first…
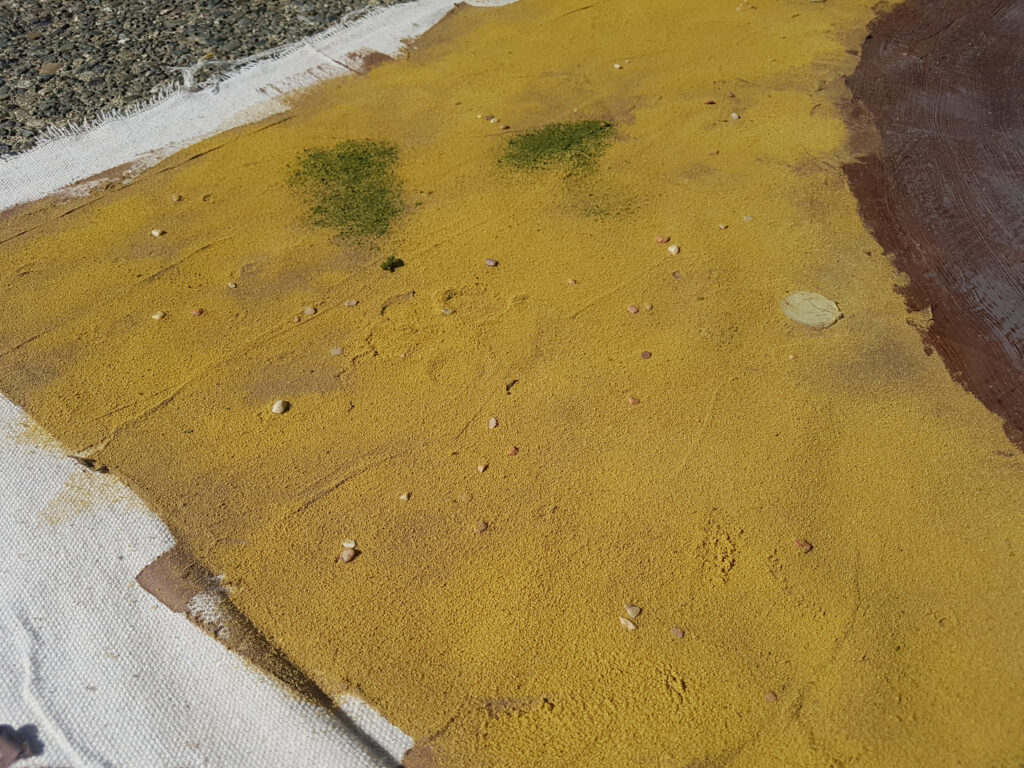
Now that it had a permanent home, I decided to add some concrete pads with thicker grey caulk, mostly as an experiment. It worked well, I would do this again.
Large concrete pad, using styrene as a mold
Dry caulk, showing the thickness
Small circular concrete pads, using 3D printed circles I designed
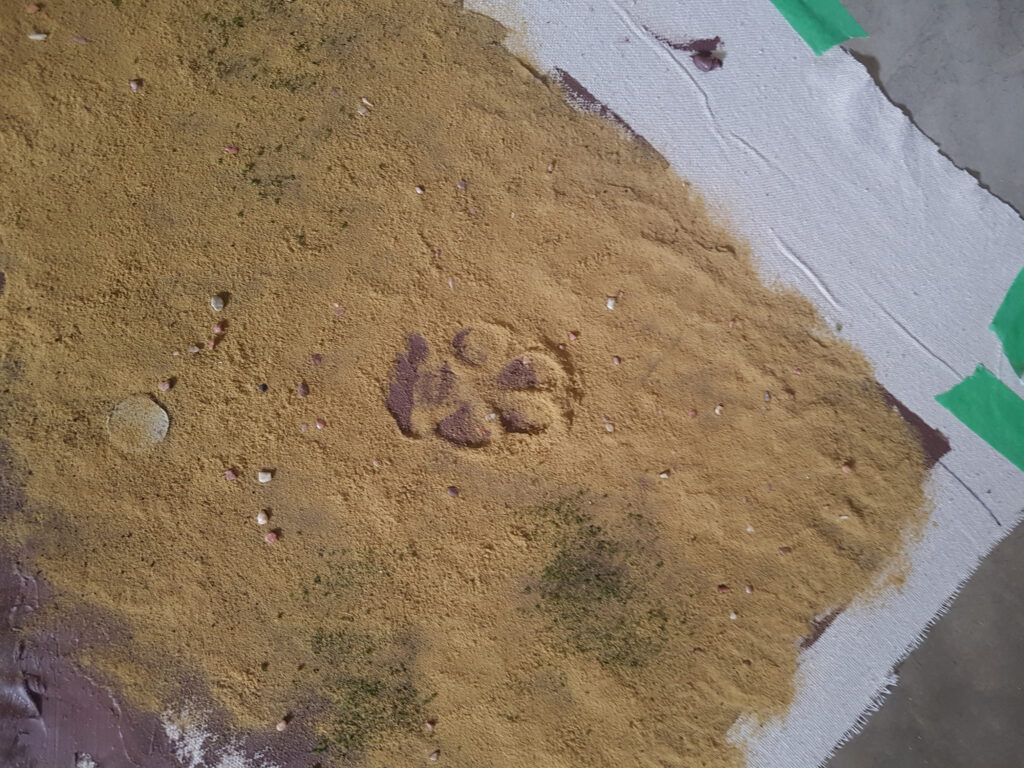
Then it was time to flock the rest of the mat. I decided a dead grass theme fit the post-apocalyptic Gaslands well. The dog decided to come and leave his mark on the mat (good thing acrylic caulk is non toxic, as it ended up on his pads too). And thus Crater Dog Paw 1 came to be.
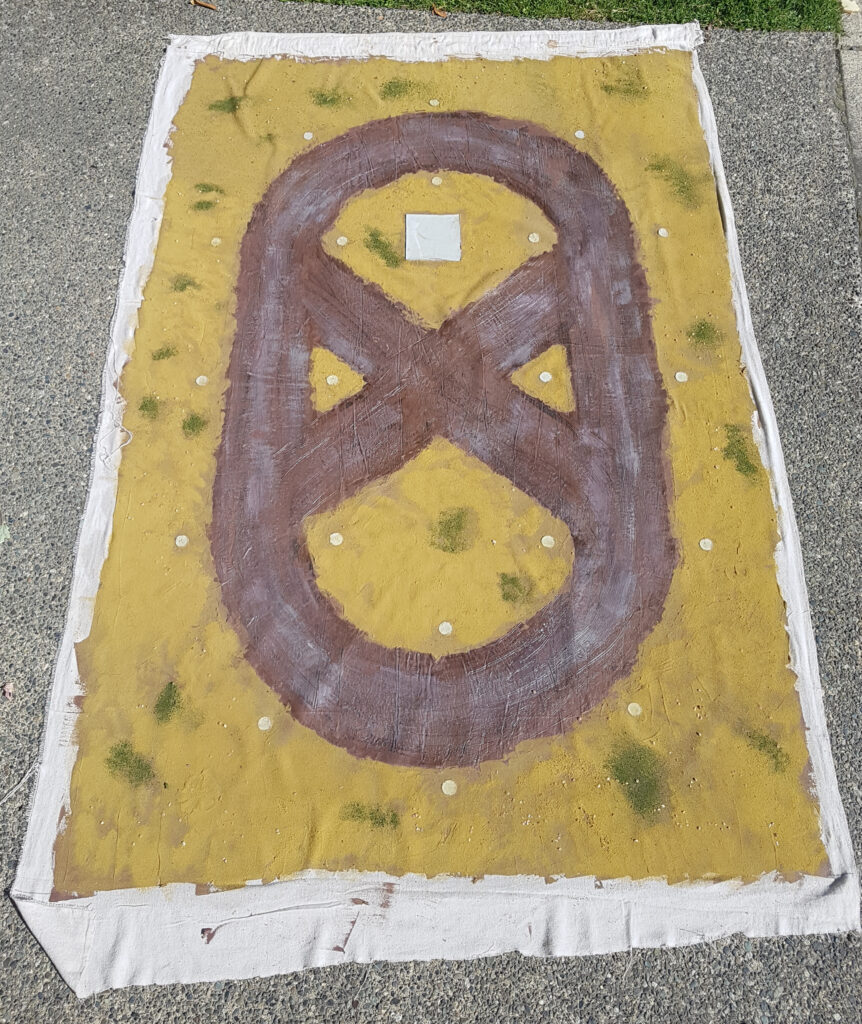
Once the mat was fully flocked, it looks pretty good. This is the 85% stage done project – I need to cut the mat down to size and paint the concrete pads. I may also add some more bushes or other flock.
Final mat, showing the whole caulked area
Close up of the concrete pad
Crater Dog Paw 1, after the grass has grown into it
I’ve got a bunch of fantasy terrain on the go I want to get finished, photographed, and posted this weekend, so hopefully October will be a bit busier around here than September wound up being!
Quiet around here for the last couple weeks on account of me being busy getting married and going off on a short honeymoon, as well as various wedding planning/bachelor party type stuff before the actual wedding!
Back now, working on various things that I’ll show off here in due course.
I’ve also just received my first ever order from Shapeways of a mix of stuff, including a bunch of incredibly detailed 1/1200 or 1/1250 detail items for our naval games. That Shapeways link above goes to my public lists, so you can see some of what I ordered. I’ll do up a review of those sometime soon too.
Speaking of YouTube, Dr Alexander Clarke has an interesting channel with WW2 and interwar naval stuff, mostly British. Similarly, Drachinifel does mostly WW2 naval history videos as well, more American navy but some others.
Boom & Zoom Graphics have a set of really approachable, humourous, but (far as I can tell) complete introductions to WW2 aircraft markings, painting, and camo, with entries for each of the major combatants. Superb reference for WW2 air if that’s largely a new field to you as it is to me!
There aren’t a lot of small scale scenery tutorials out there, either as videos or traditional blog post writeups. Viv on RubbishInRubbishOut, though, did some YouTube videos of Dystopian Wars scenery a few years ago, and it turns out that DW is in something approximating 1/1200 scale, more or less.
Also, Dispatches from the Front has been working on some fantasy naval scenery for Man’O’War using the Brigade Models buildings and it looks fantastic. Fantasy microscale terrain has a definite appeal, you can get grandiose epic terrain on the table that wouldn’t work at all in any larger scale!
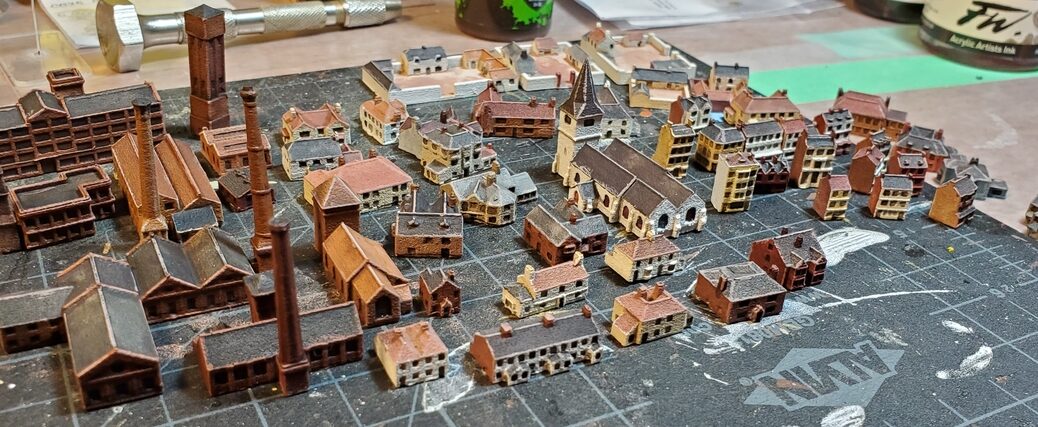
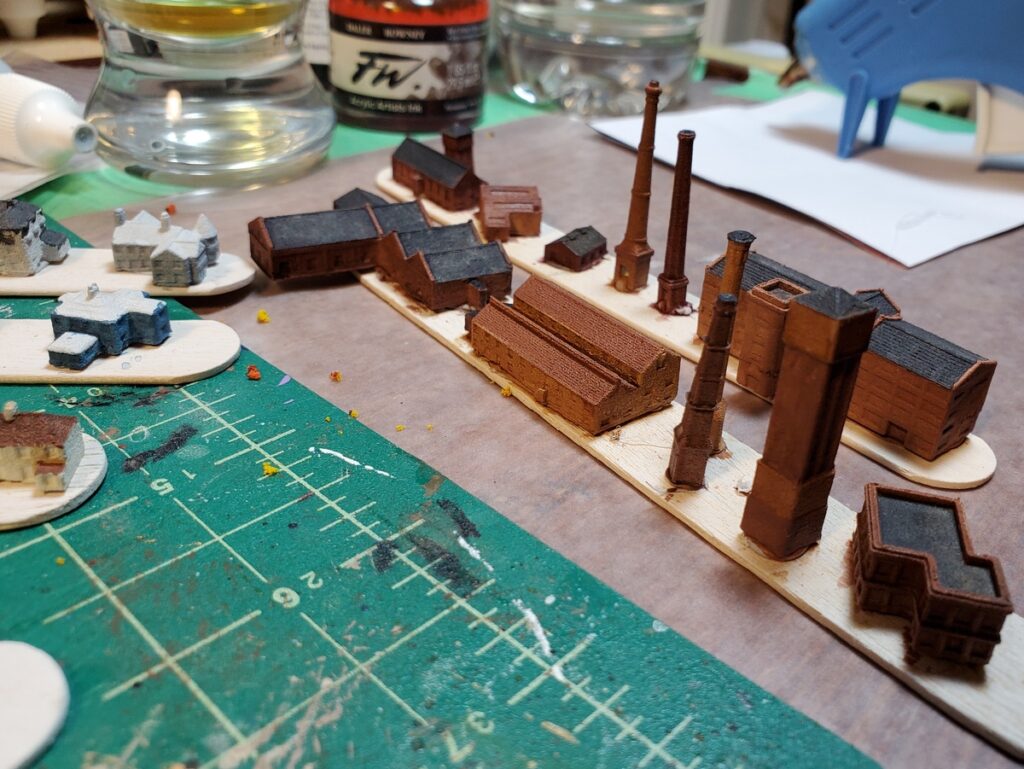
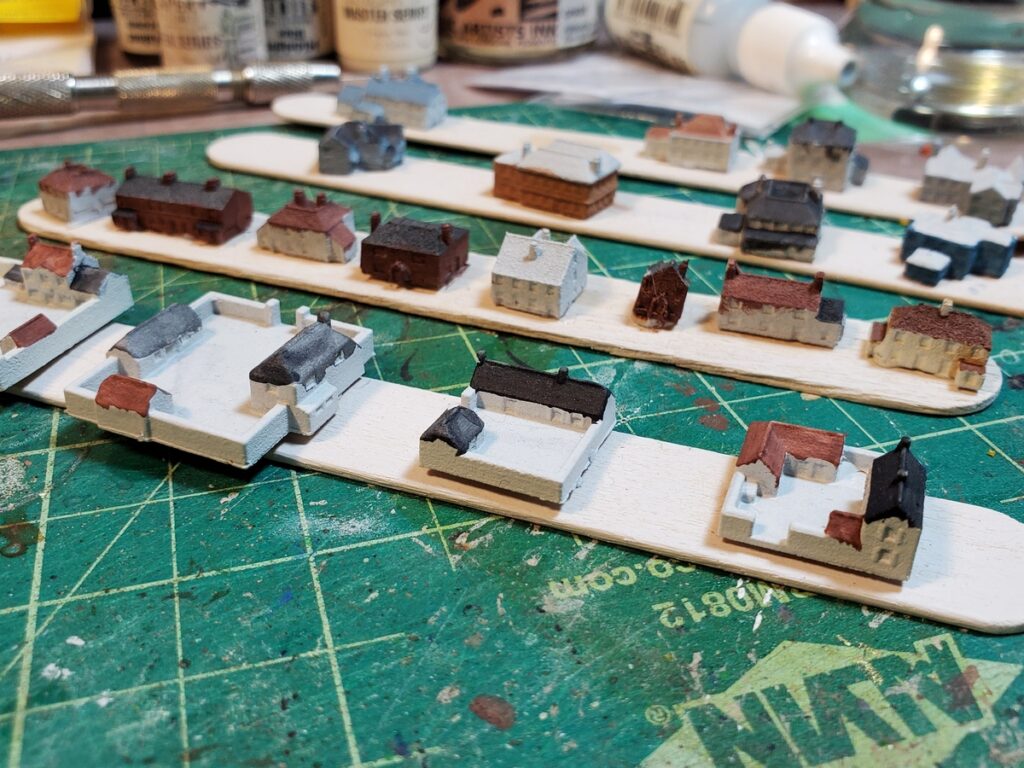
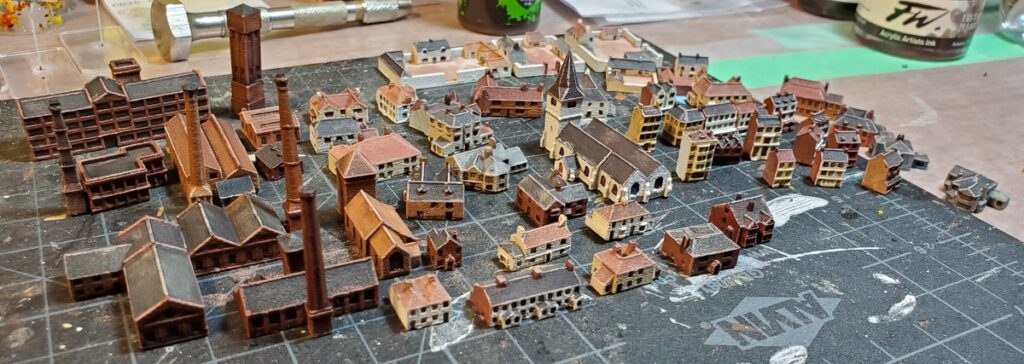
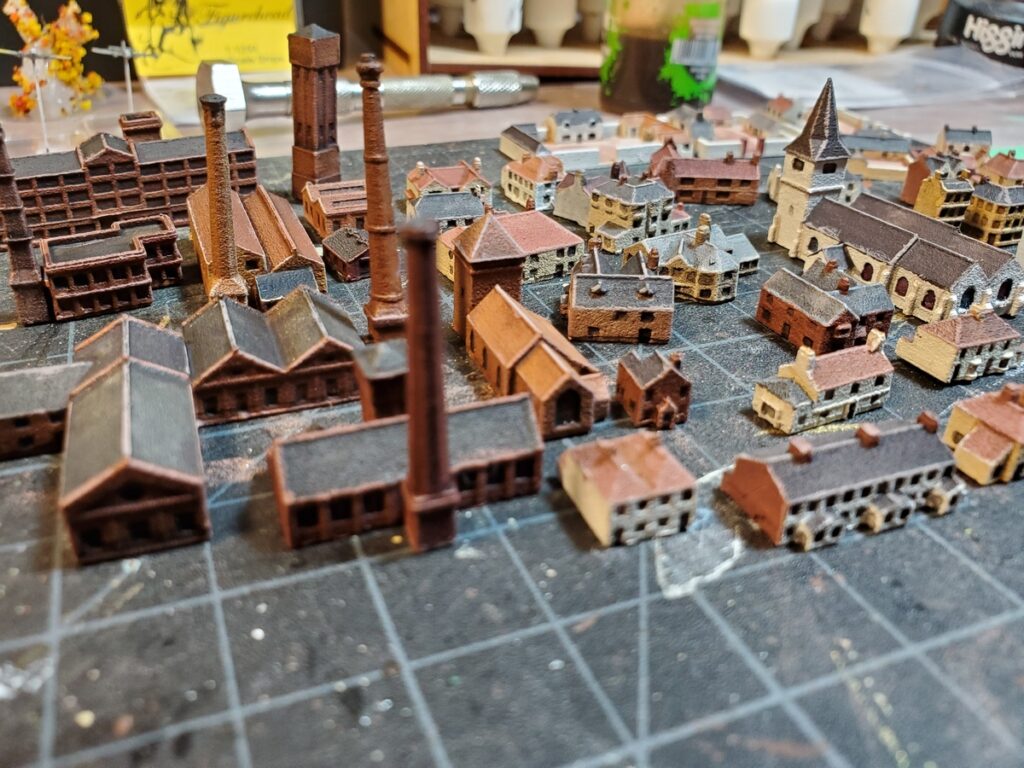
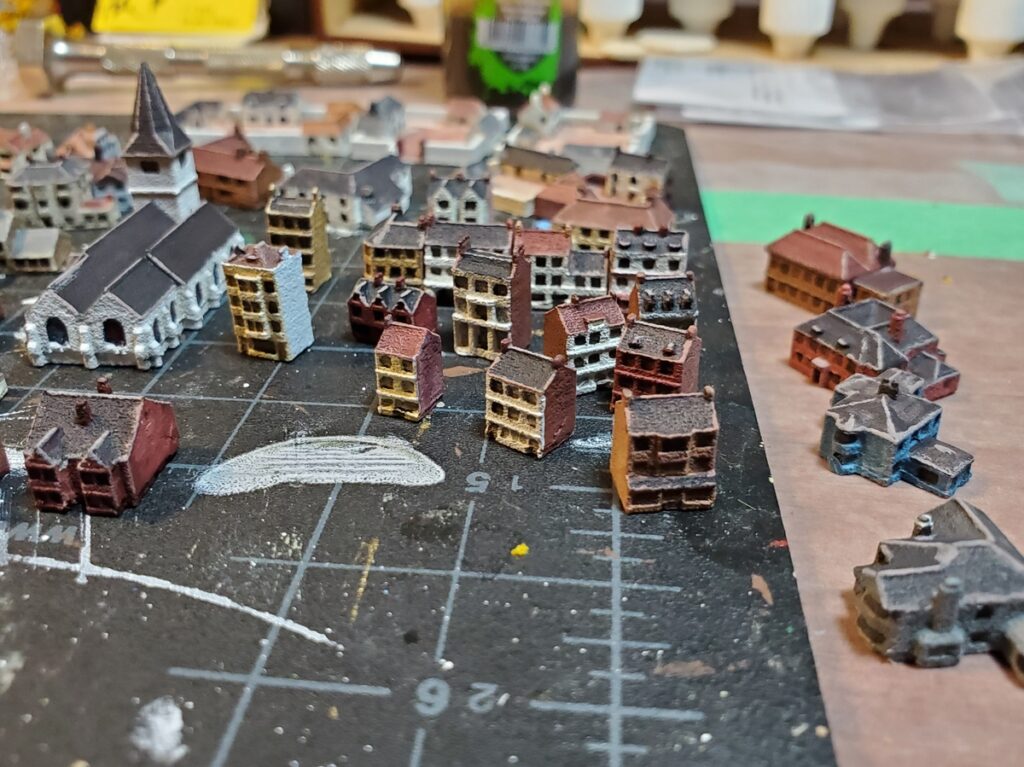
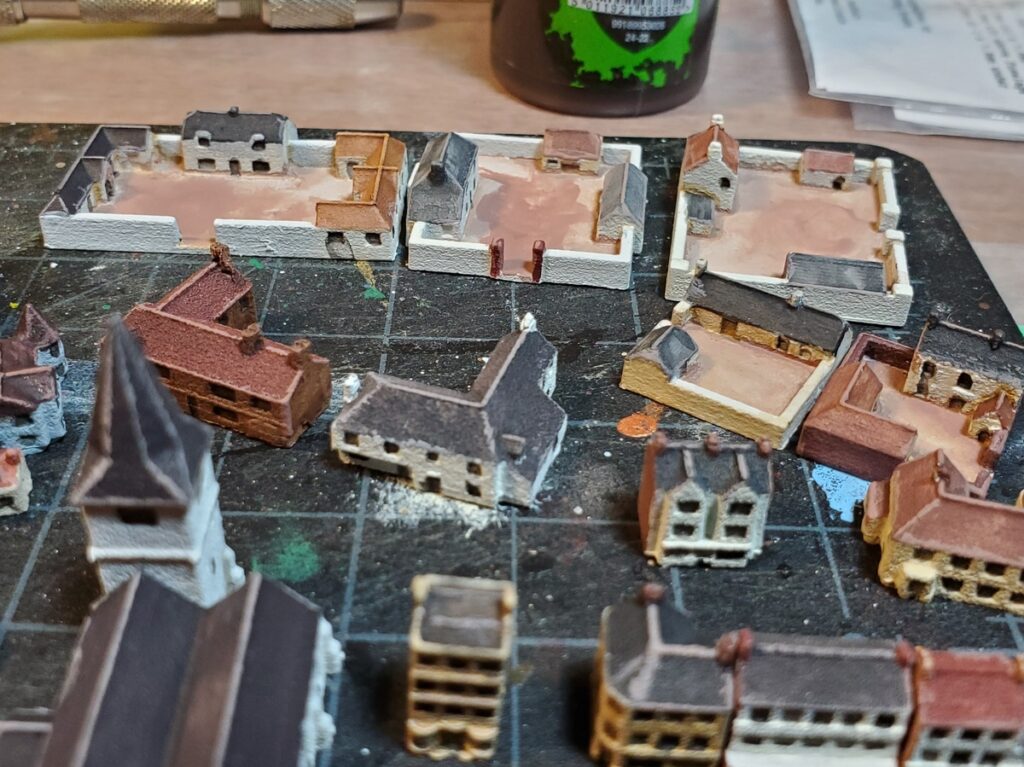
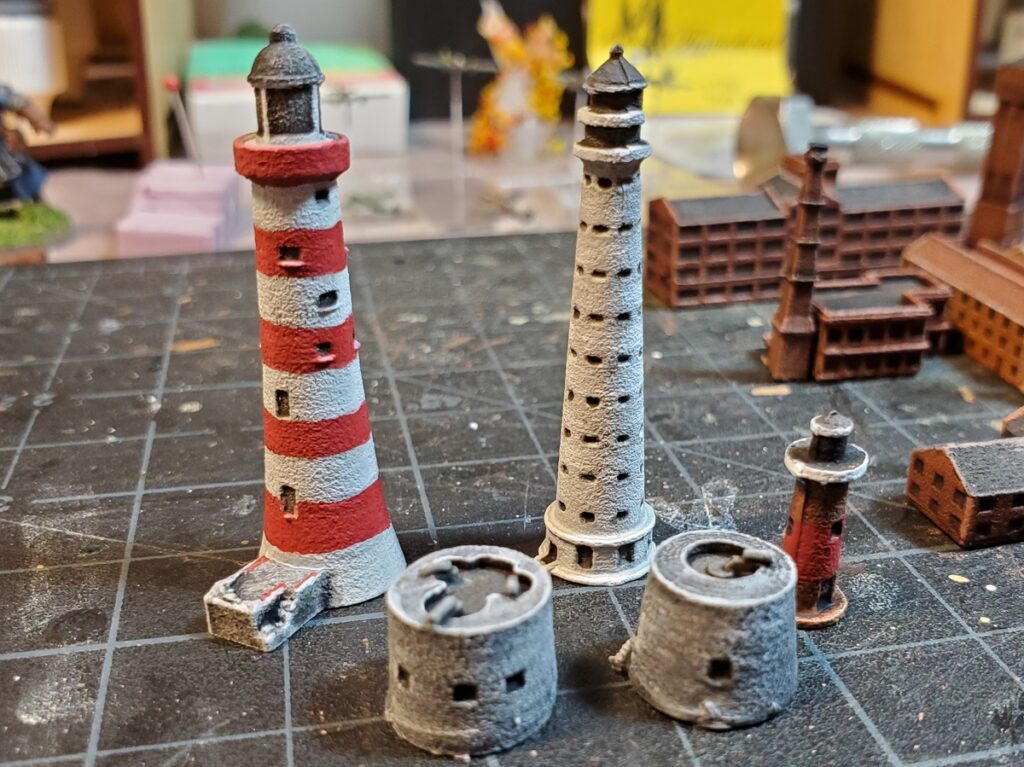
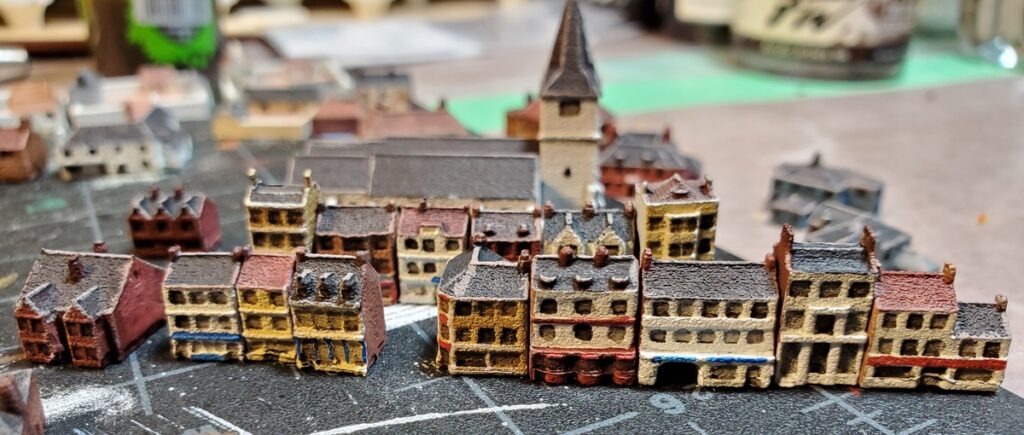
I’ve finished painting the last buildings of my first Brigade Models Small Scale Scenics order, before I start in on painting the buildings and scenic bits I got in my second Brigade order. This batch has the British town, village, and suburban buildings I didn’t use previously, a bunch of industrial buildings, and a couple of lighthouses.
The cutting mat in all of these photos is a one inch/half inch grid, for scale. The largest of these buildings is less than two inches long, and the smokestacks are all between an inch and an inch and a quarter tall.
In progress industrial buildings, in various shades of grubby brick. Click for larger.Walled farmyards and various houses and such behind. Click for larger.Everything all finished and off the painting sticks. Industrial buildings over on the left, two churches and a variety of detached houses centre, various town/village buildings on the right. Farms in the background. Click for larger.The industrial buildings, churches, and a variety of houses. Click for larger.Town and village buildings, and some more large detached houses on the right. Click for larger.The farmyards, still with some work to do on the actual yards but the buildings complete at least. Click for larger.Lighthouses and Martello towers. Click for larger.A streetscape of sorts, most of the village/town buildings pushed together roughly with the larger church behind. Keep in mind most of these buildings are about 1/4 inch wide! Click for larger.
Now that these are all done they’re getting varnished and then put back into storage for now, so that I can move on and finish some more partially finished projects before I come back to building more coastal modules and starting on the buildings from my second Brigade order.
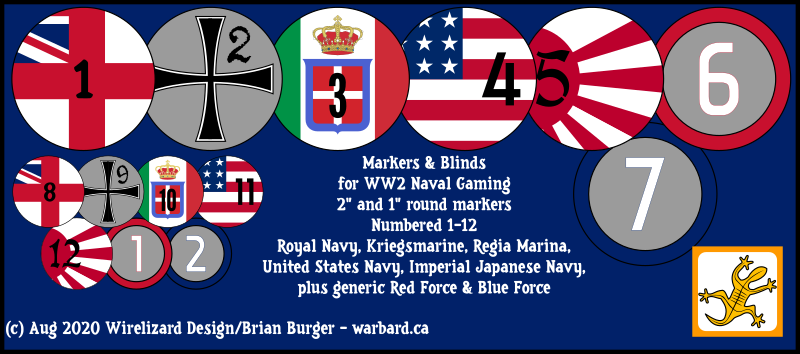
Most naval rules have spotting and target ID rules of some sort or another, often with various stages of “we think something’s out there” through “there’s probably a ship over there” to “It’s a German S-boat and it has started shooting at us!” or similar.
For example, Coastal Patrol published by TwoFatLardies uses both Blinds (for small groups of ships or dummies) and Markers (for possible individual ships, or dummies) so I’ve done up both 2″ and 1″ numbered tokens, designed to be printed on light card and then punched out or cut out for tabletop use.
The current PDF covers all the major combatants – the British Royal Navy, German Kriegsmarine, Italian Regia Marina, United States Navy, and Imperial Japanese Navy, and also includes generic Red Force & Blue Force markers, all numbered 1 through 12 in both 2″ and 1″ sizes. It’s available in both Letter (for those of us in North America) and A4 (for the rest of the world) for easy printing.
I might do up a second set of extra markers numbered 13 through 24 for larger scenarios; that would be straightforward enough.
Earlier this year I also did up a simple set of printable Star Shell & Moon Markers for naval gaming that you might also find useful.
If there’s any other combatants you’d like to see added to a future set, please let me know in the comments. Some of the larger Commonwealth navies, the Soviets, the smaller European nations?