The last of this project’s posts until I can show off the painting work in progress photos and all the extra finished photos I didn’t use for the Lead Adventure Forum Build Something Contest 2025!
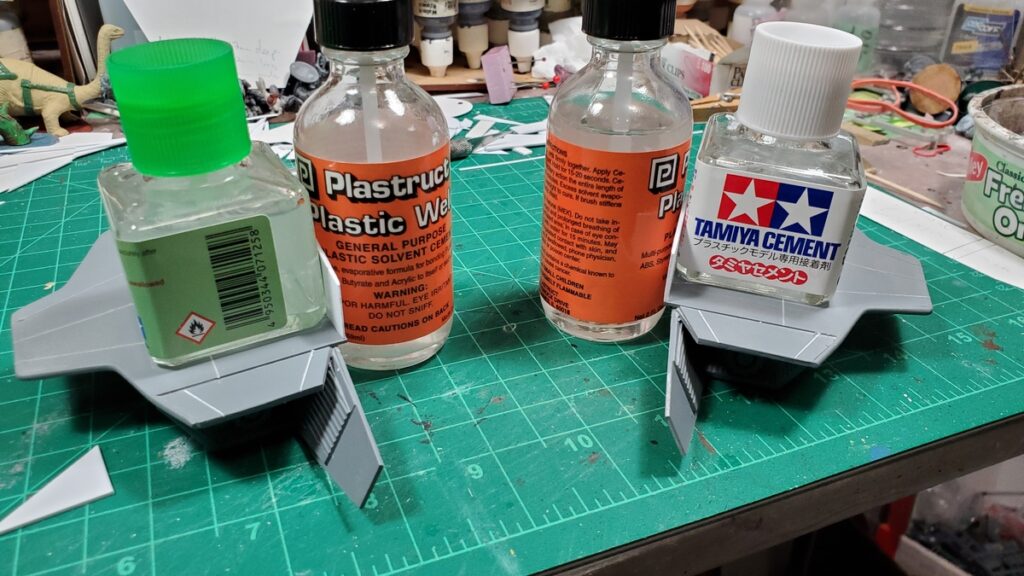
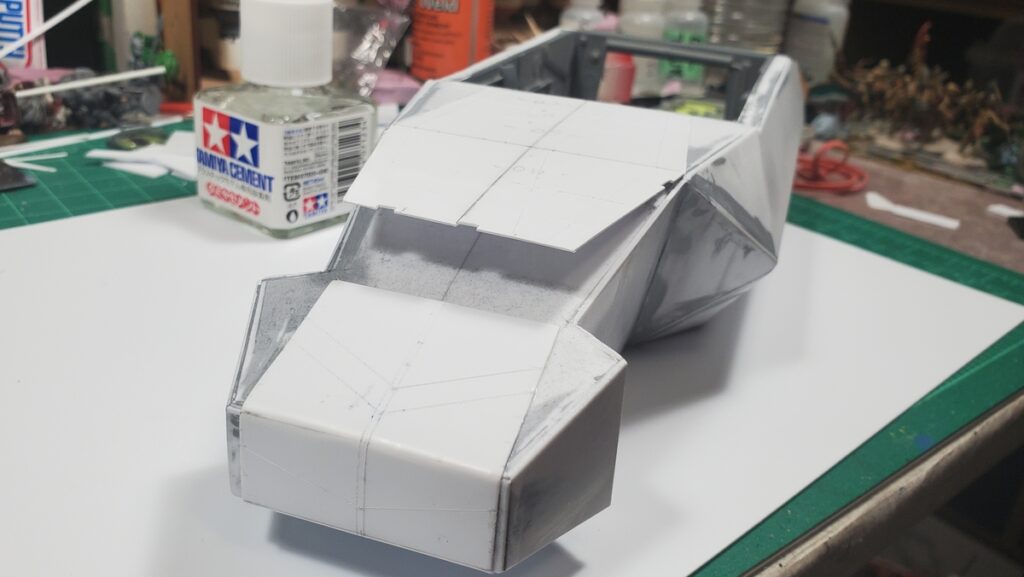
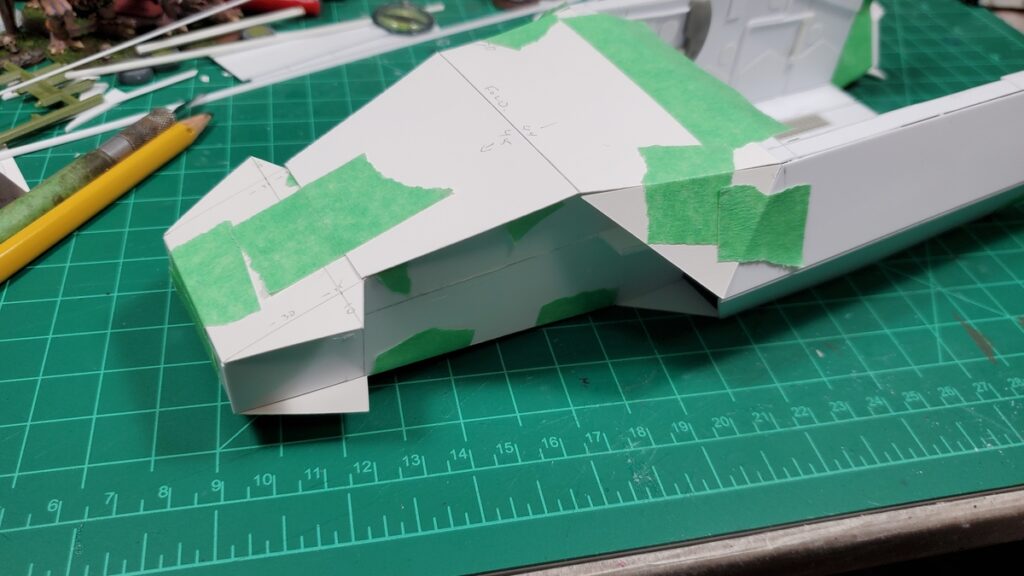
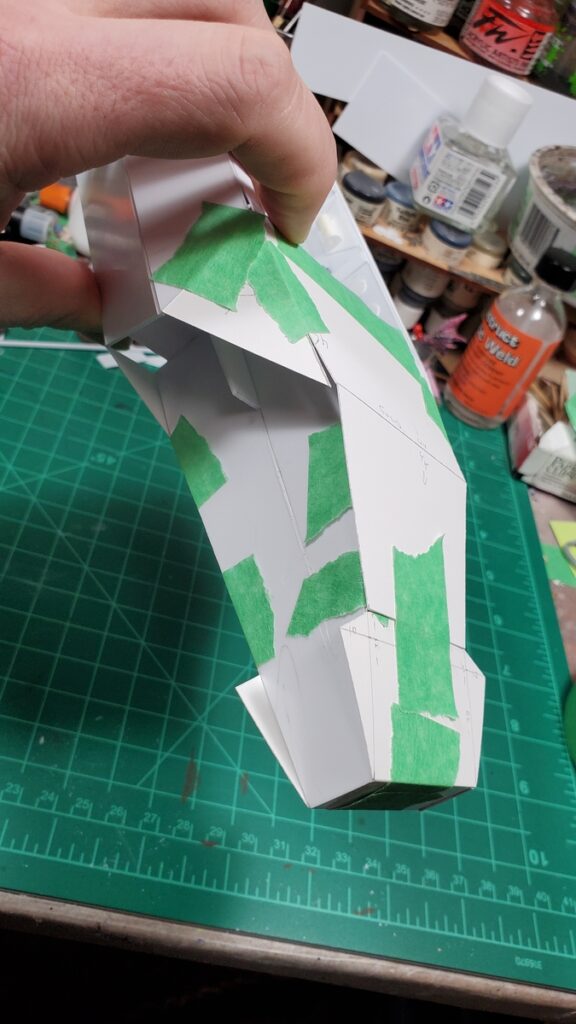
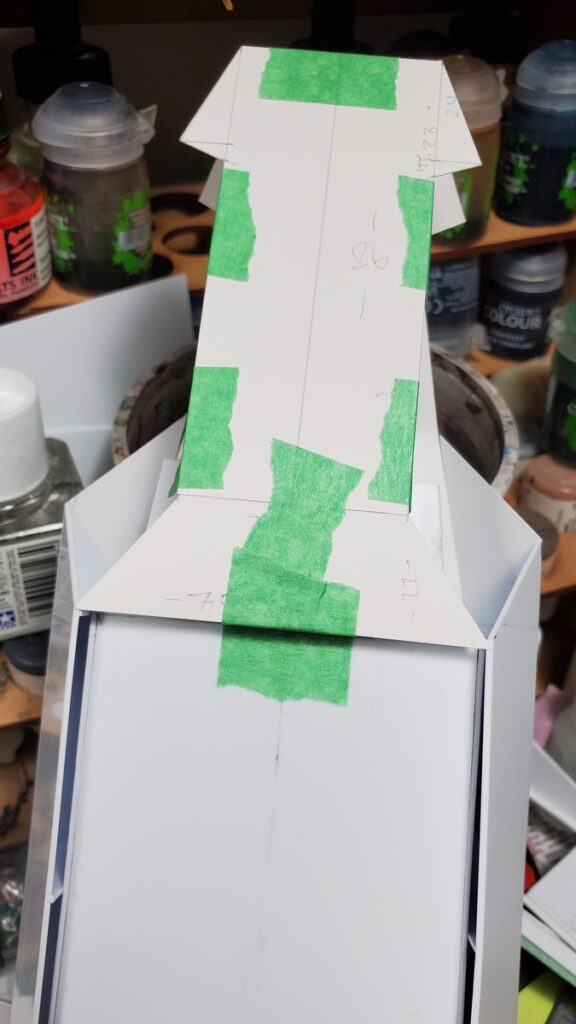
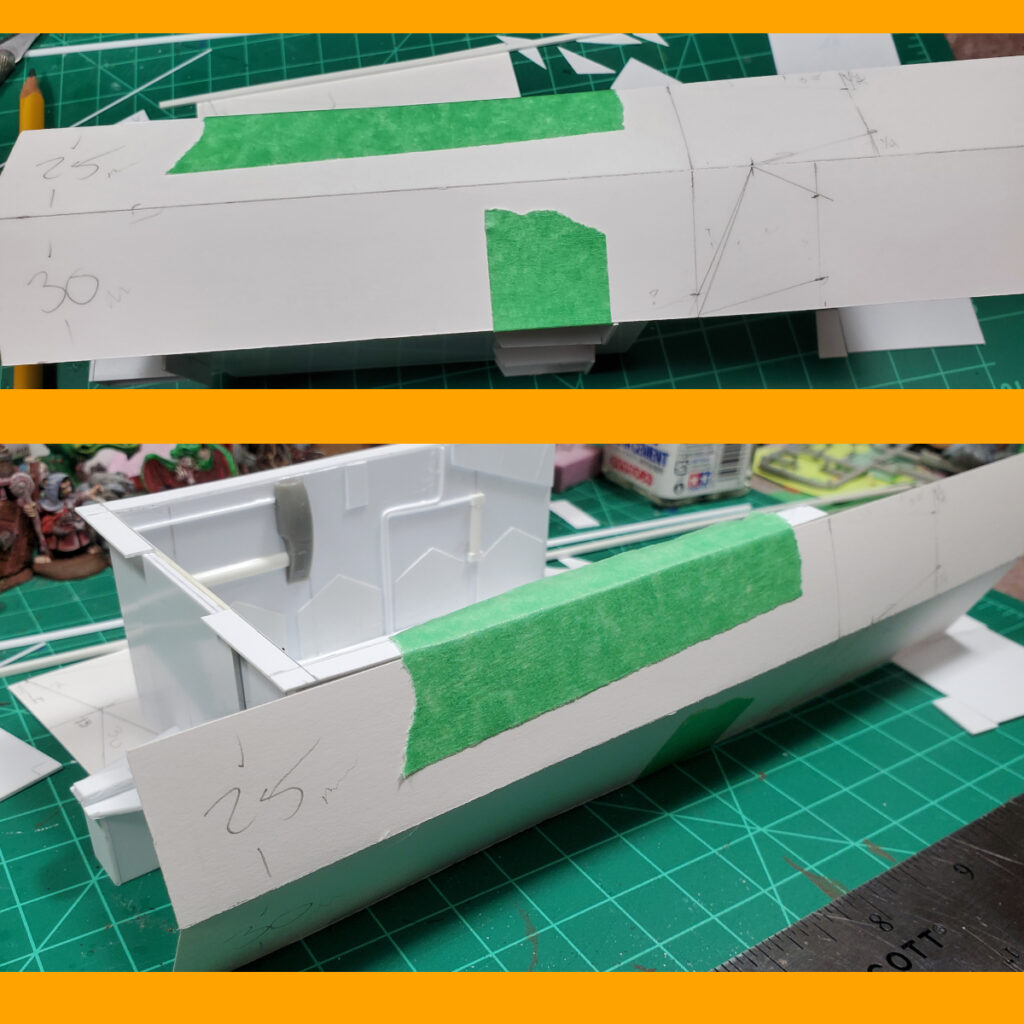
There was a bunch of pre-priming sanding, puttying and fiddling. The side walls of the fuselage pulled slightly skew during construction somehow, so the side rails that hold the roof panel in place had to be custom-fitted on each side.
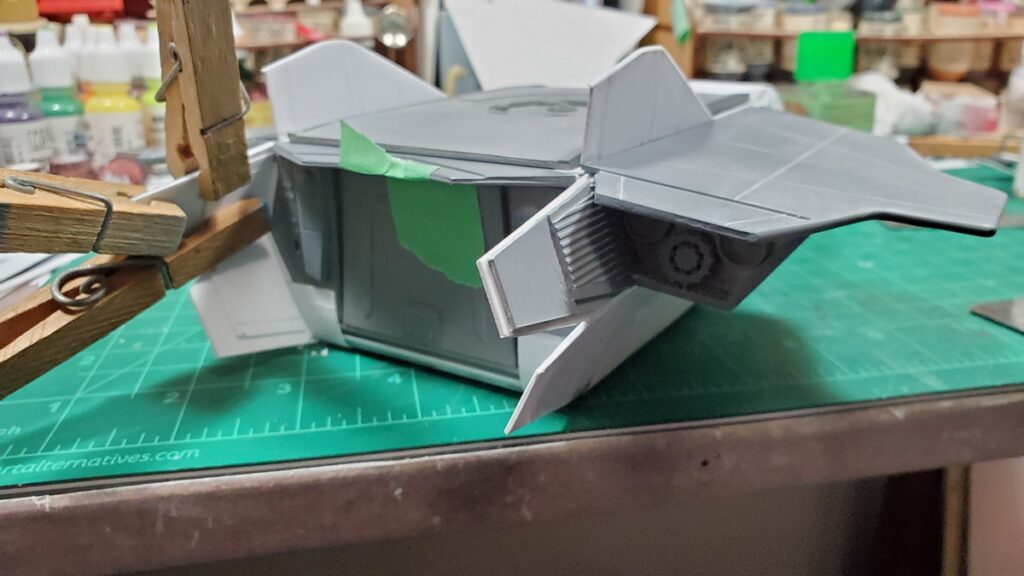
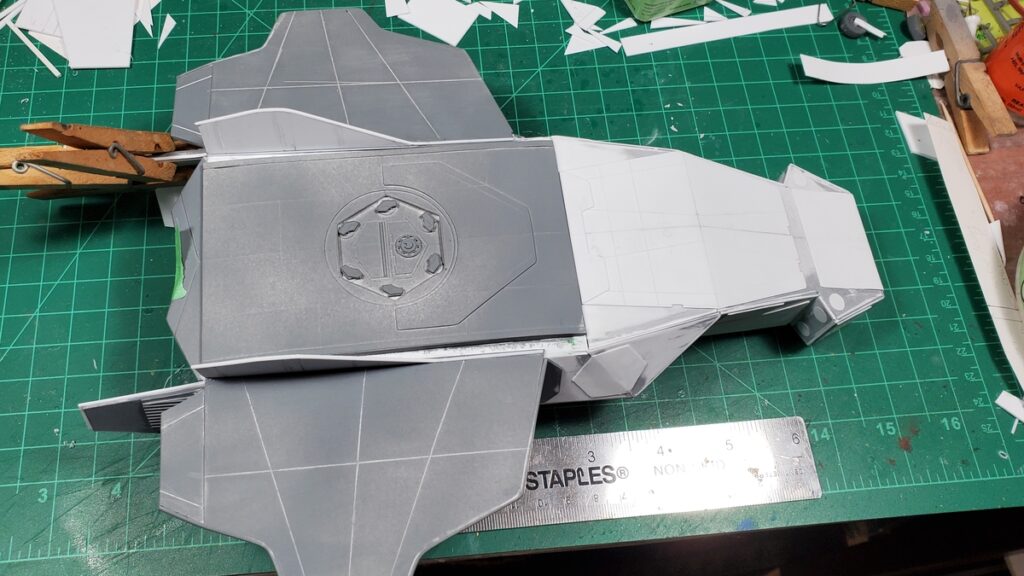
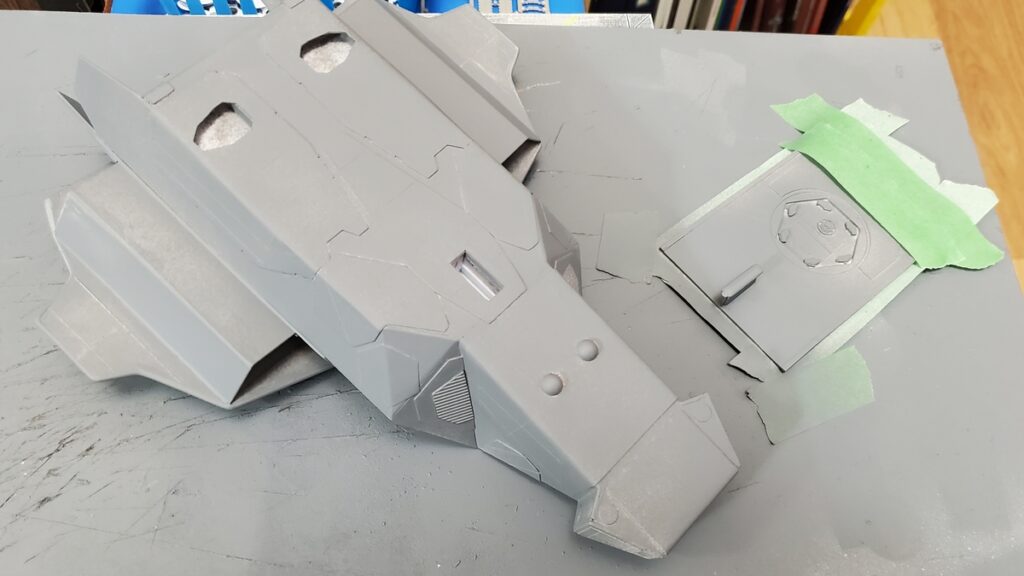
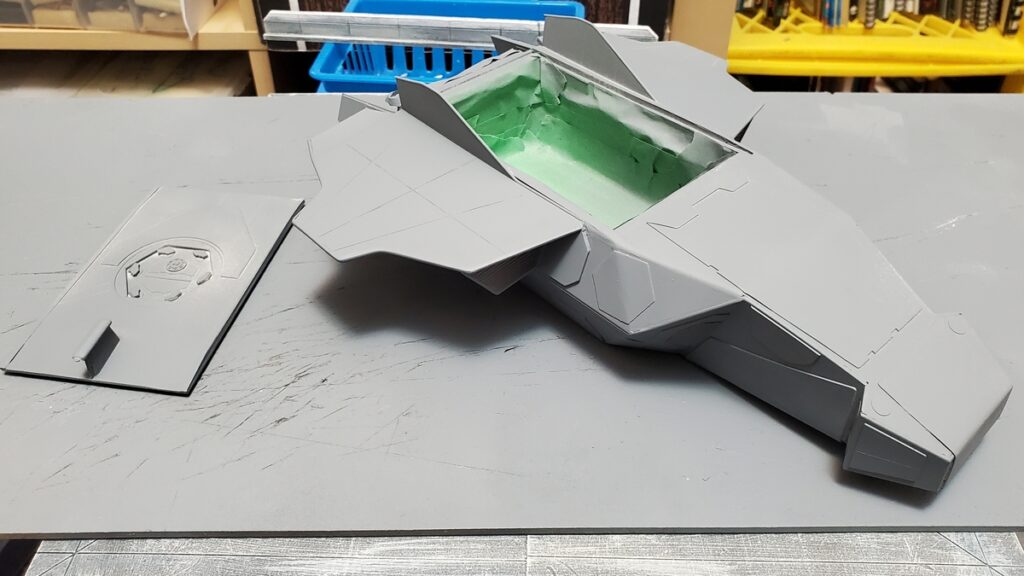
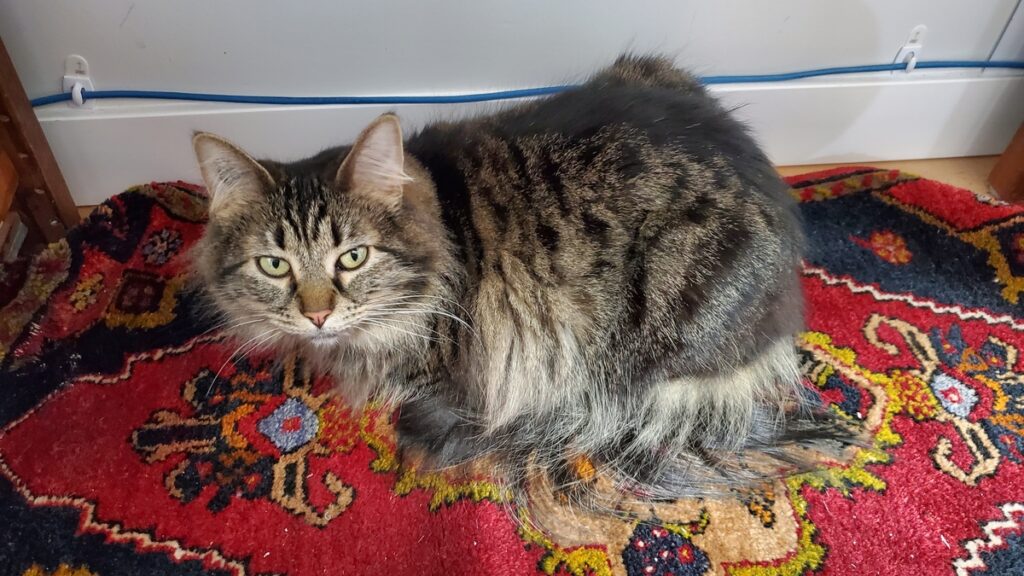
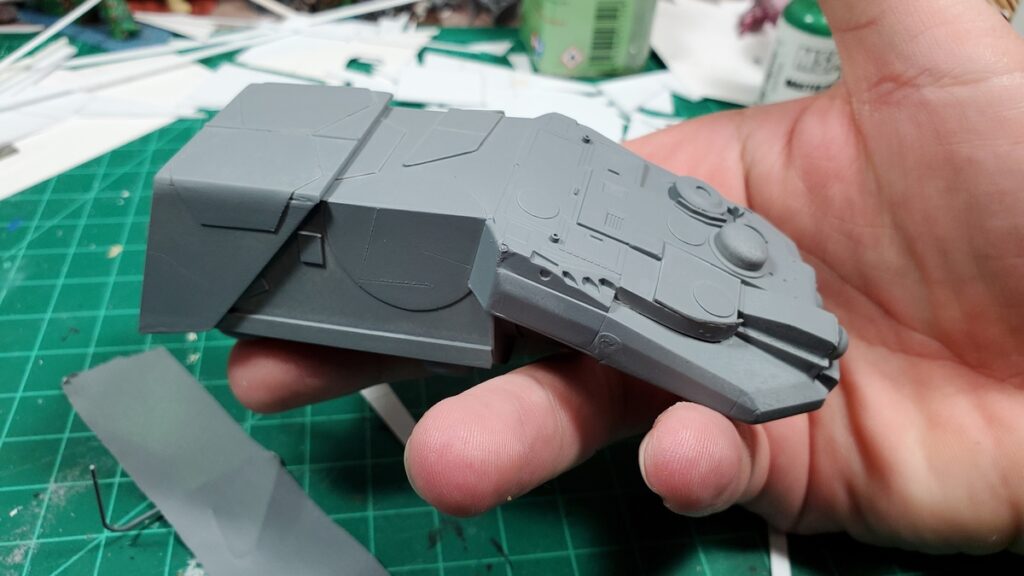
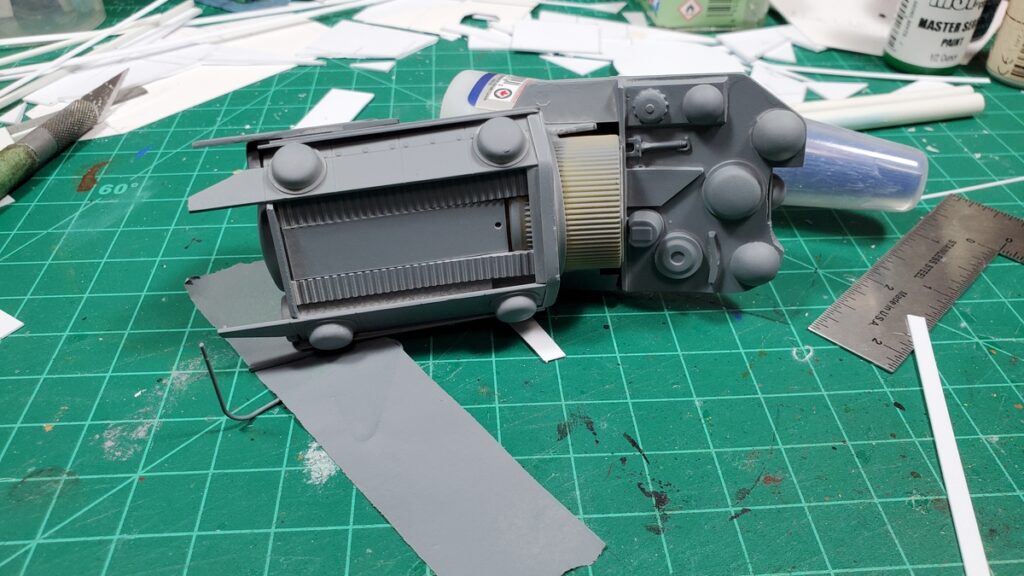
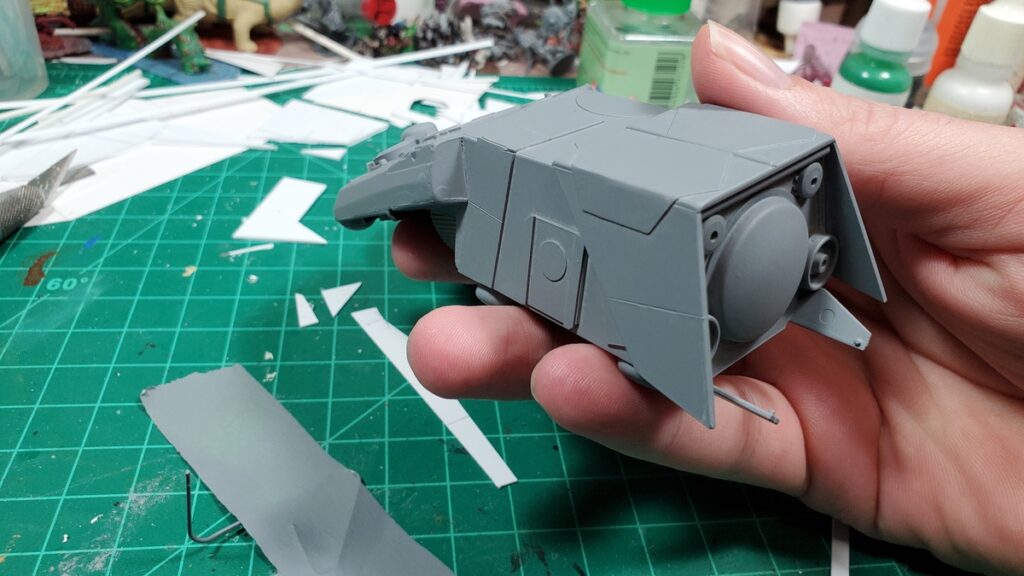
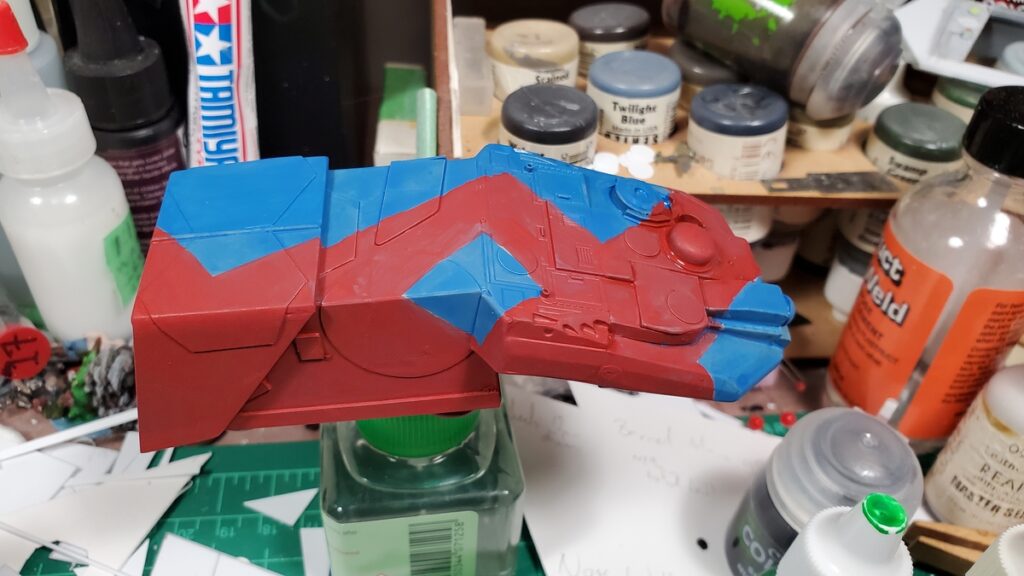
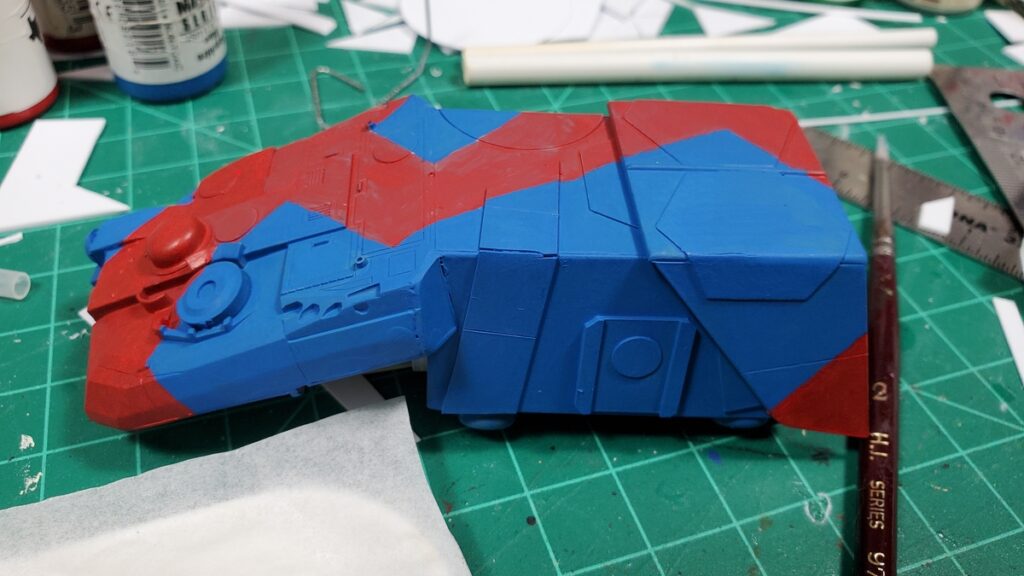
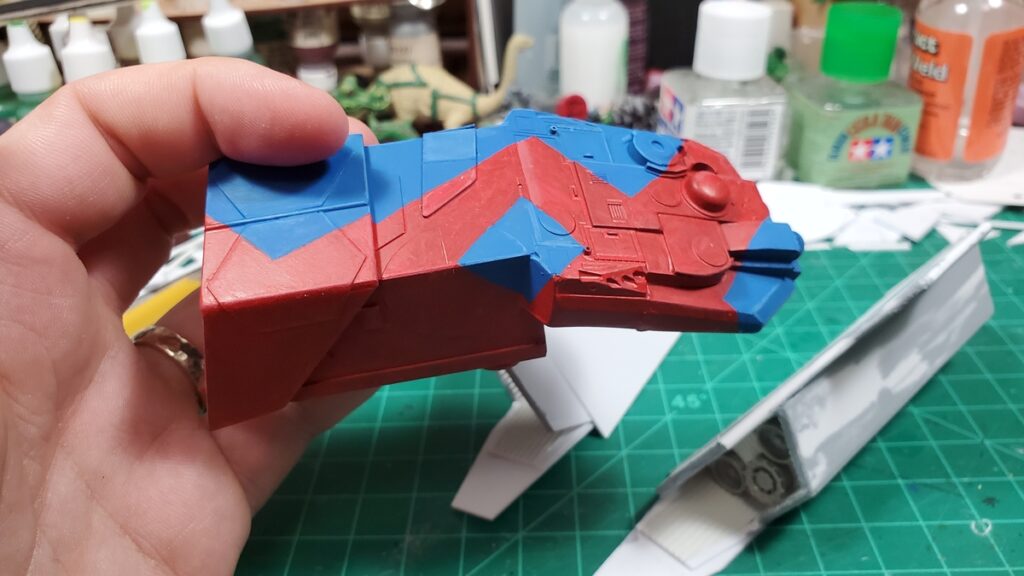
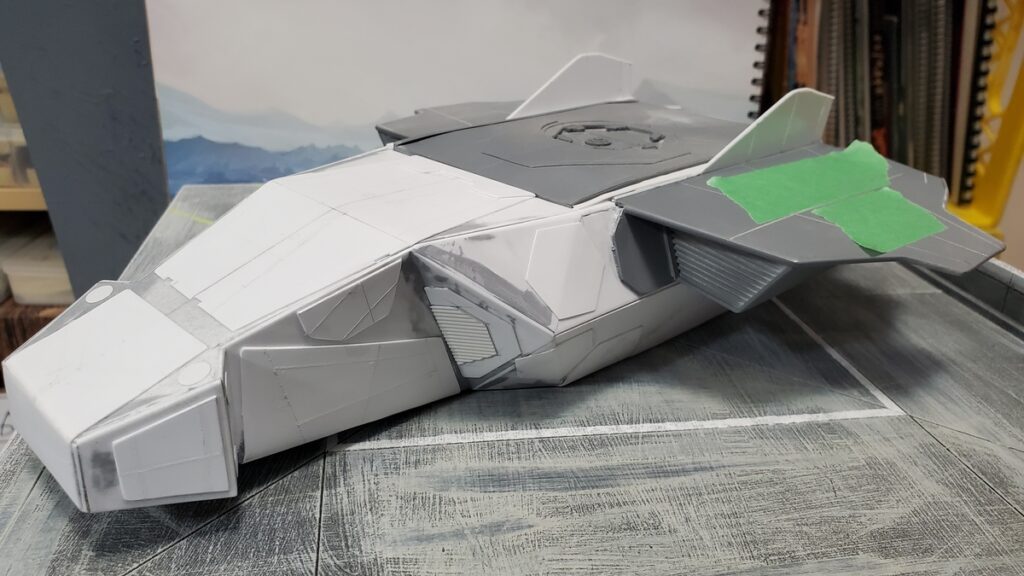
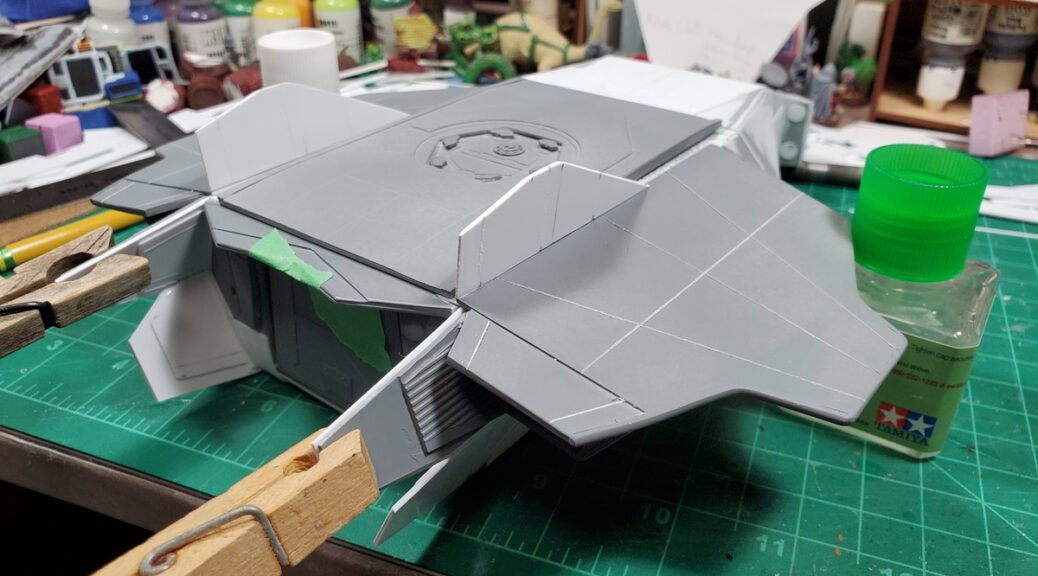
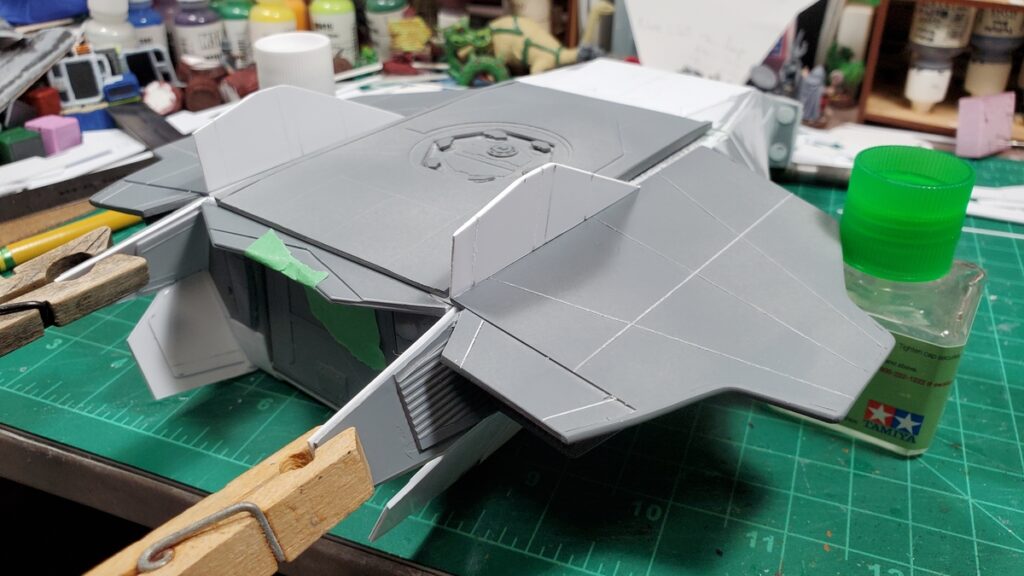
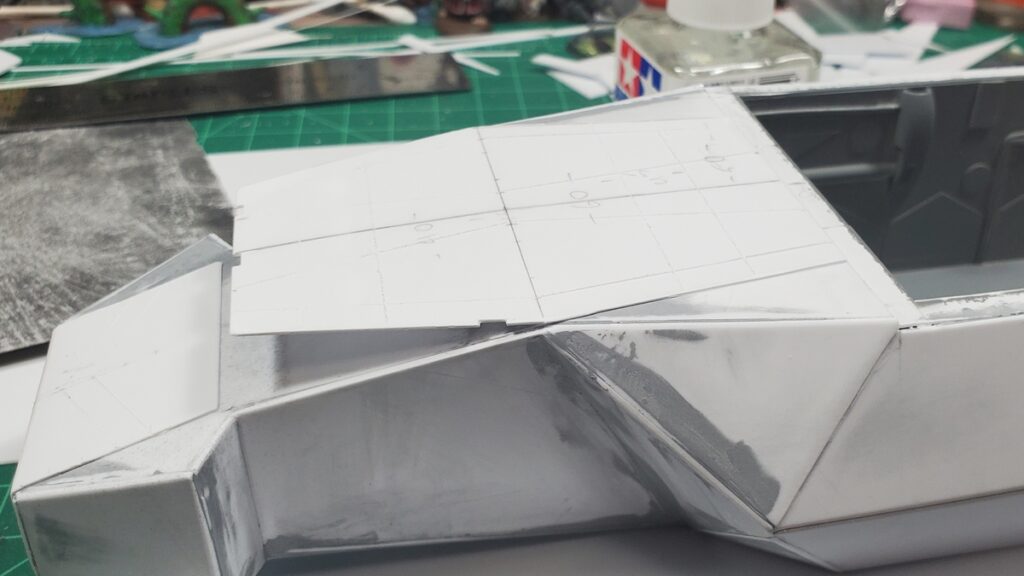
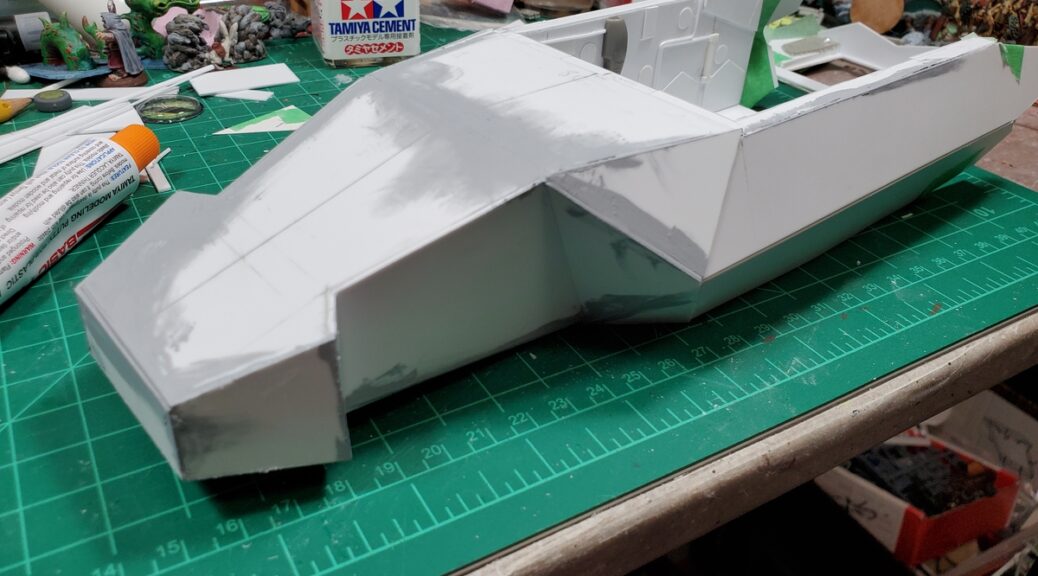
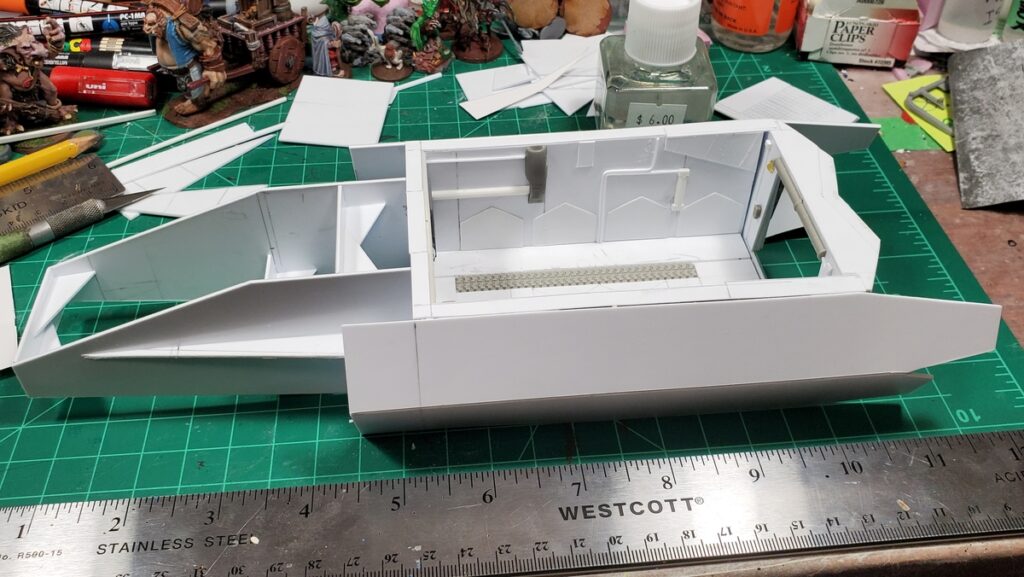
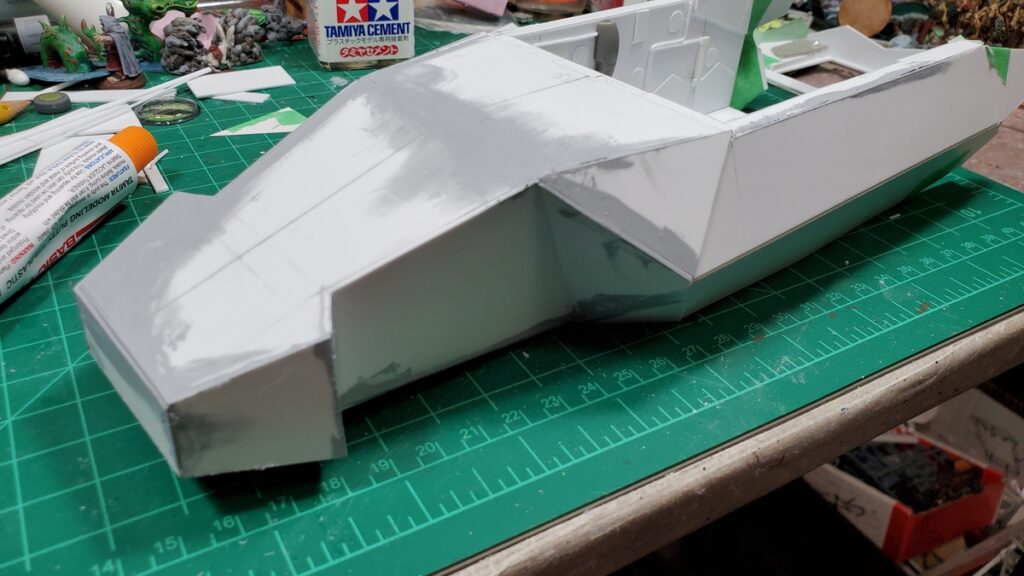
The shuttle, complete except for landing gear and roof rails, front quarter view.Rear view of the shuttle, with some final glueup of one of the rear baffle panels in progress.Top view, showing the engraved panel lines in the wings nicely.PRIMER! Here’s the underside, complete except for landing gear, all primered.Primer, top view, with the already finished, painted, and decaled cargo bay masked off.Proper supervision is essential to all well run projects. Sophie la Floof spent quite a bit of time on the rug under my project bench making sure things went smoothly.
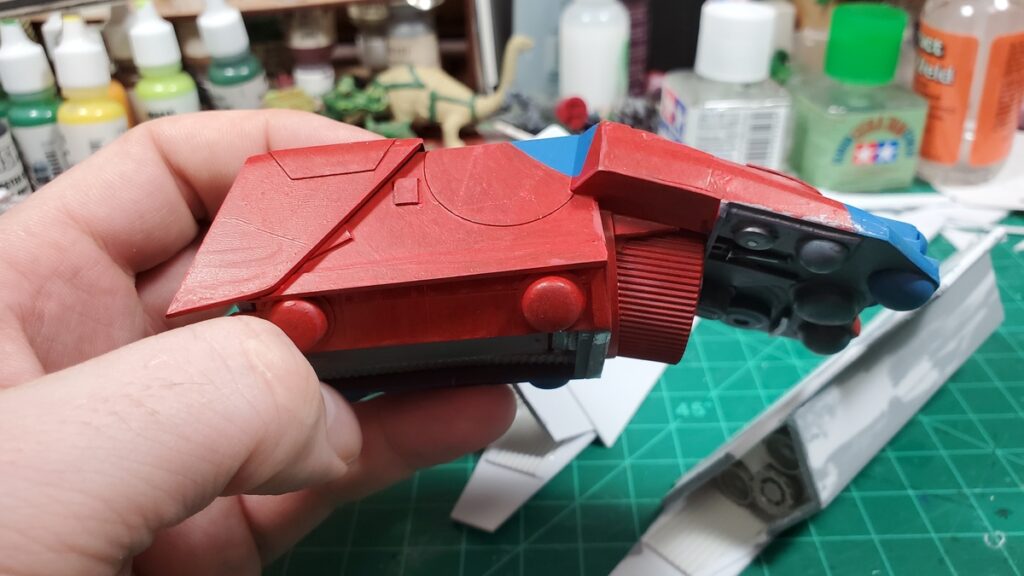
The landing gear only went on after painting, decals, and weathering were all done, so I don’t have any photos of that to show off yet.
By the time this posts audience voting on Build Something Contest 2025 should have started over on Lead Adventure! Go check out all the great entries! BSC rules say no sharing WIP or finished painted pictures until either the contest is over or you’re eliminated from it, so there will be a bit of a pause in shuttle pix here, but I do have a gallery fully of painting photos to show eventually.
If you want something done, give it to a busy person to do is a saying that floats around. It’s often true that when you’re in a certain creative groove, you can spin off other projects much faster than you might otherwise get to them!
I had extra plastic kits parts around from the 1/72 LeClerc MBT kit I bought to pillage for kitbashing parts, I had some rather cool pieces of offcut styrene around, and I wanted a landing pad to stage photos of the shuttle on, so it all came together in a trio of related projects.
The Drone
This started life with the top of the LeClerc turret, the cap off an Angosturna bitters bottle rescued from the recycle bin, some googly eyes and other bits from the dollar store, and various styrene bits.
The angosGMBH Distraction-class Autonomous Sensor Drone is set up for planetary and space surveying and exploration, with various sensor loadouts depending on mission. No crew space is available, although the tiny cargo/sample bay on the port side could accommodate a human-sized sophont in a space suit for a very short, very uncomfortable ride, if it hasn’t been adapted into a drone bay for auxiliary sub-drones. Some Distraction-class are themselves autonomous intelligent citizen-drones, although most have only limited-ML minds, and some platforms are old-fashioned remotely operated vehicles.
The drone went together in a single evening and was primed and painted the next day. I got zero photos of it in raw styrene.
Drone primed, side/top view.Primed, underside view.Primed, rear quarter view.Paint in progress.Paint in progress.Paint finished, no decals or weathering yet.Side profile with paint finished.
The Distraction-class has since been decaled and weathered; I’ll try to remember to get some proper finished photos of it soon and post them.
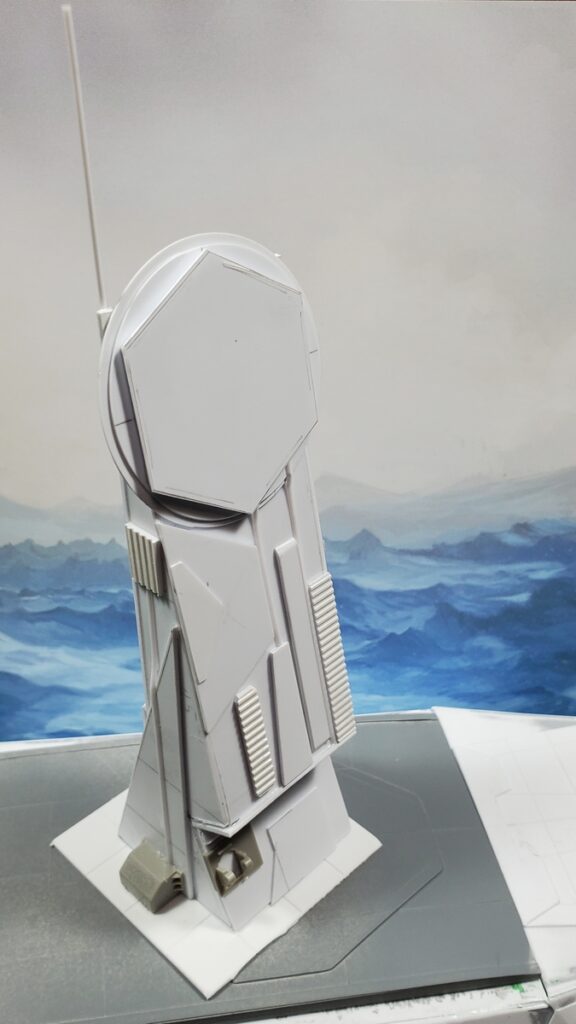
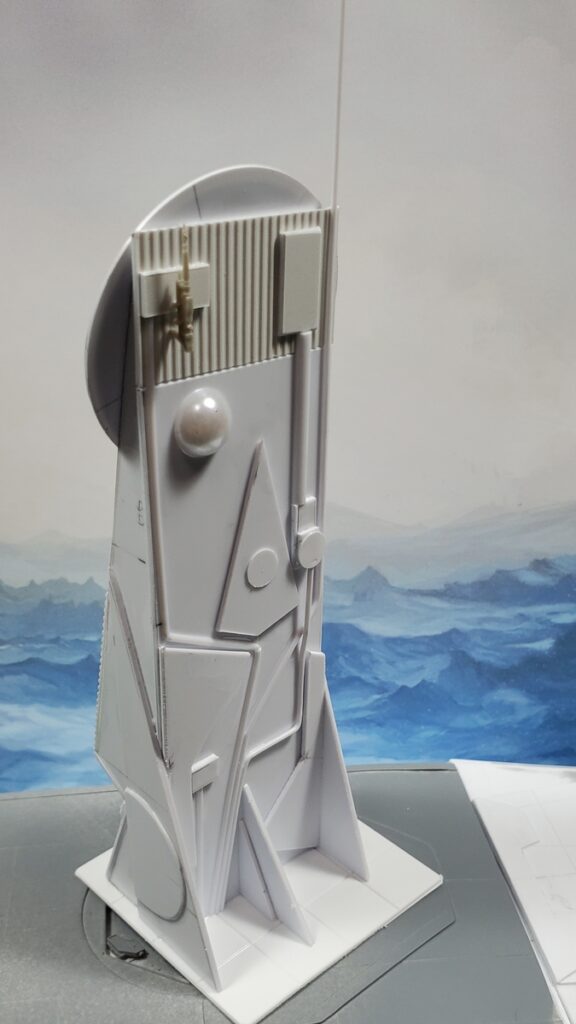
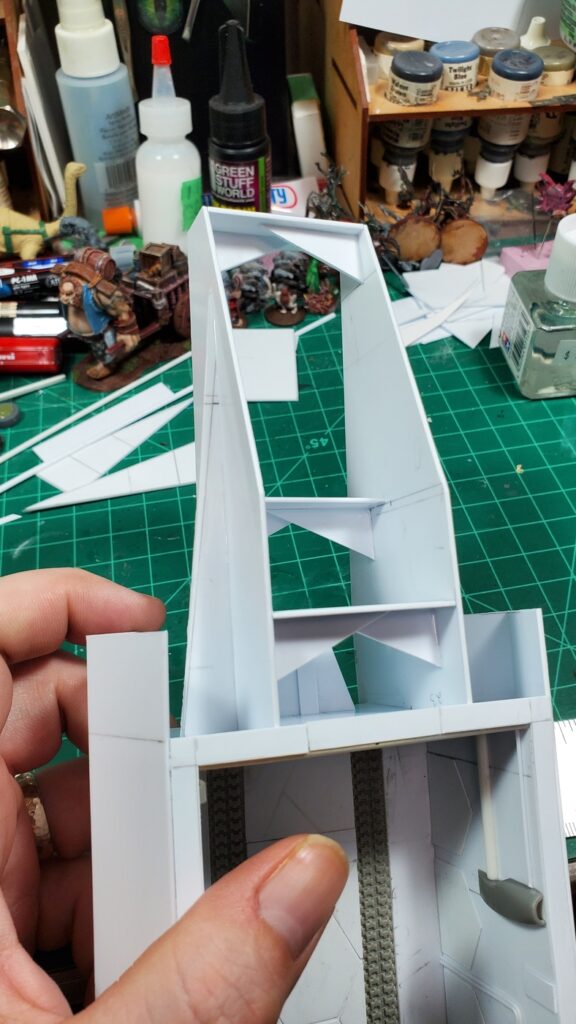
The Sensor/Comms Tower
This started with the increasing amount of styrene offcuts piling up around the edges of my workbench. Many of them were too large and too interesting in shape to just throw away, so I started fiddling around while waiting for solvent cement to cure on the shuttle and built this little tower in a couple of evenings.
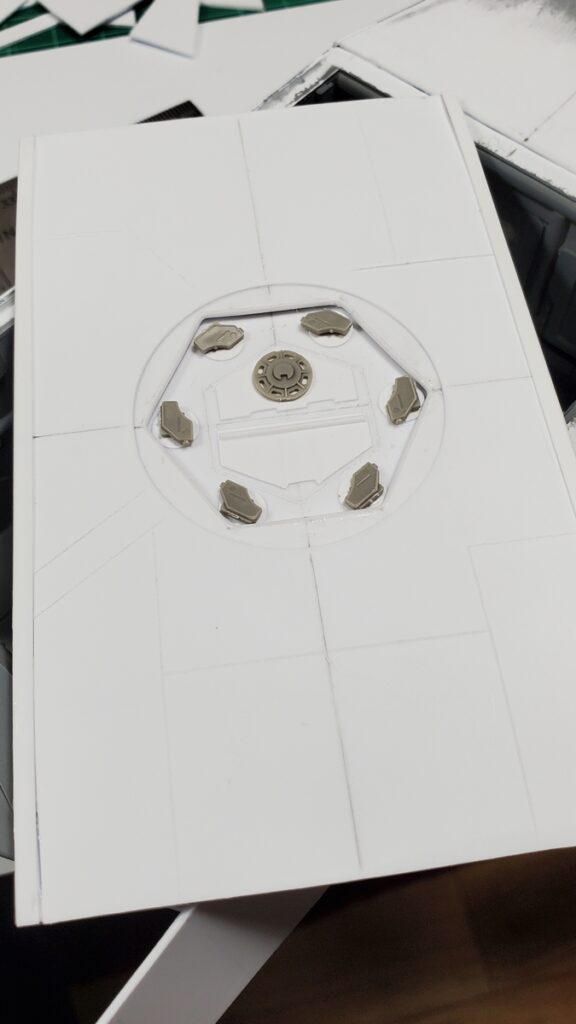
It’s about 5″ tall to the top of the actual tower. The side profile is the offcuts from the nose skin of the shuttle, the various circles and hexagons are from building the docking port in the roof of the shuttle. The rest of the thing are either random offcuts from shuttle building or just stuff from my raw materials stash.
The tower, front view, bare styrene.The tower, rear view, in bare styrene.
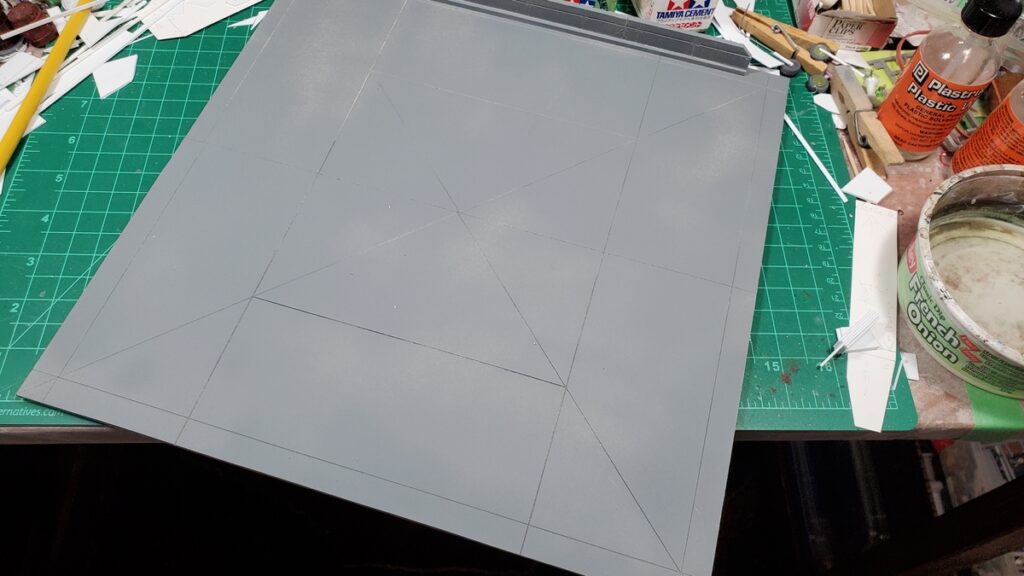
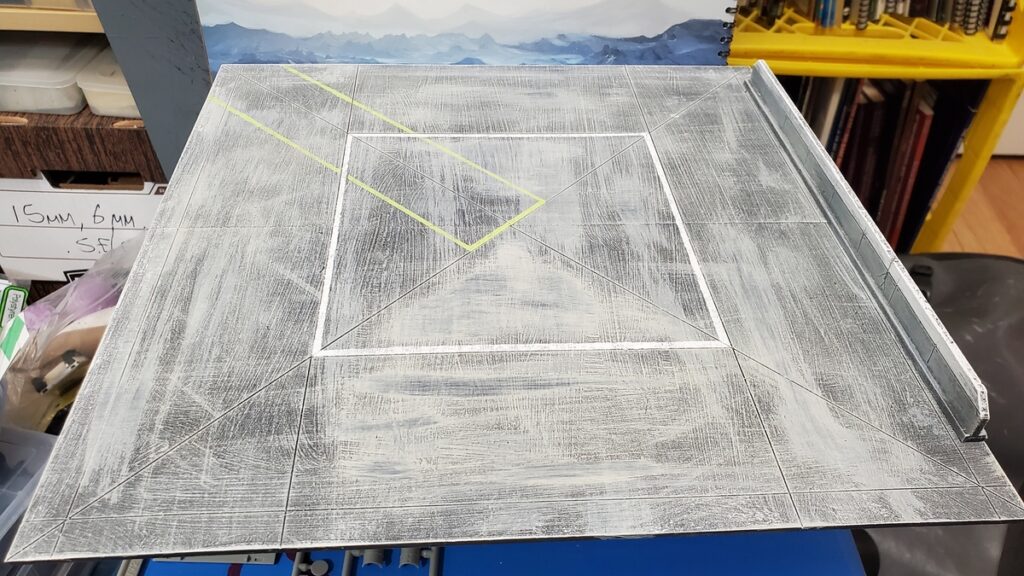
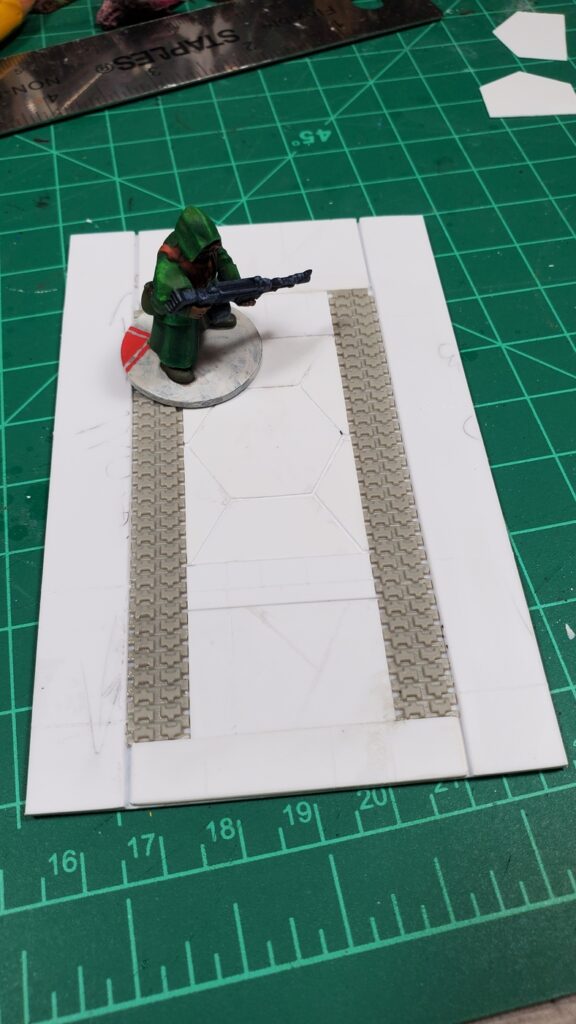
The Landing Pad
This is from the last big piece of 1/8″ foamed PVC in my stash; I’m going to have to go get more from our local signmaking/plastic supply shop because it’s wonderful to work with. Stronger, cleaner, and easier to cut than foamcore, it can be embossed and engraved easily and cleanly, and it’s less murderous on knives too.
The whole thing is 12 inches by 12 inches, assembled from two 12×6 pieces with some connection strips underneath. It got grey primered, then a messy dampbrush/drybrush combo of various tans and greys over that, followed by a few washes in black, grey, and dark blue. There’s expansion cracks engraved right into the PVC, and after the main paint had dried I did a couple of marking lines with tape and a stippling brush in white and bright yellow-green. (Reaper’s Dungeon Slime paint. Highly recommended if you want an obnoxiously bright hazard warning colour!)
I also did a low wall piece with PVC offcuts. It’s 10″ long and about half an inch high. It got the same paint as the pad, with the top third or so painted white when I did the pavement markings on the pad.
Primed and waiting for paint.Painted and marking lines done. Nice and simple, just a few minutes work over a couple of days. Painted wall piece off to the right.The mostly-complete shuttle posing on the finished landing pad.
I’ve got a few final complete primered shuttle photos to show off soon, and after the Build Something Contest rules allow, I have a bunch of painting progress photos to post. The shuttle was a big painting project and painting took most of March and the first week of April!
The long-overdue fifth installment of my Build Something Contest blog posts! This one takes us from the end of Part Four, where we had the start of detail panels, no wings yet, and the cargo bay just primed.
Per BSC rules I can’t share WIP or finished painted photos yet, so there’s still going to be gaps in this build log. I have a bunch of WIP paint photos taken and will share them when the contest has begun.
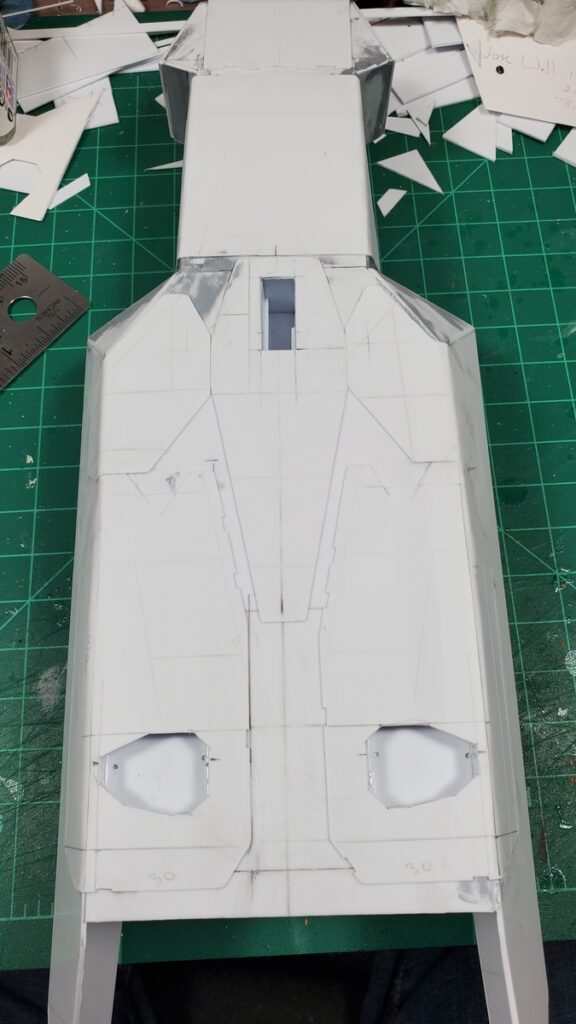
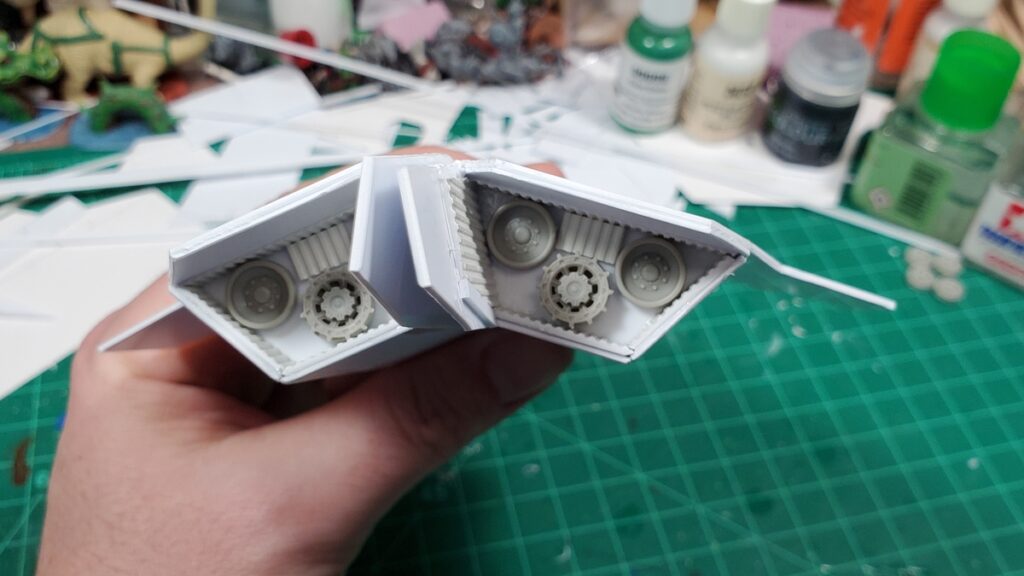
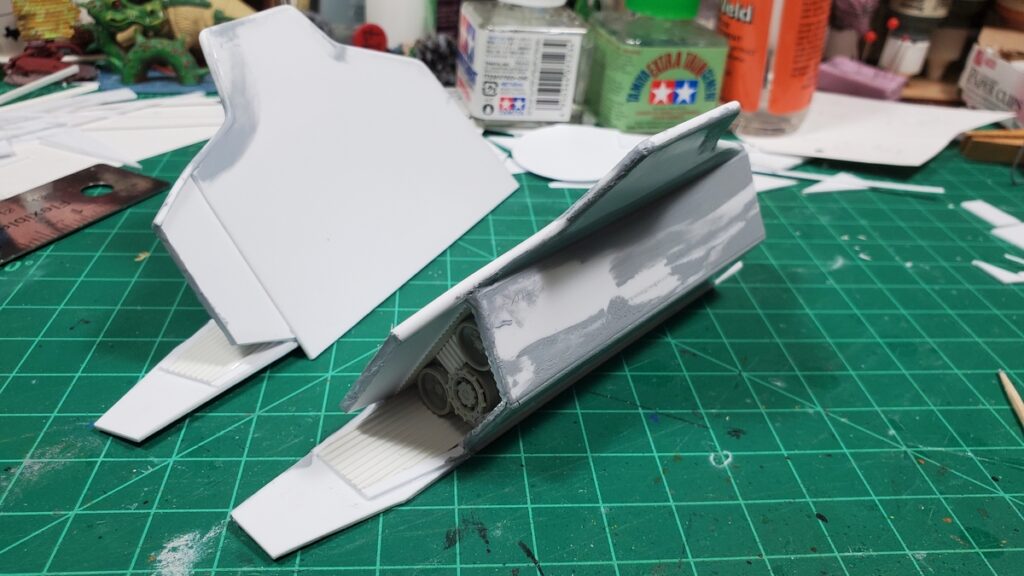
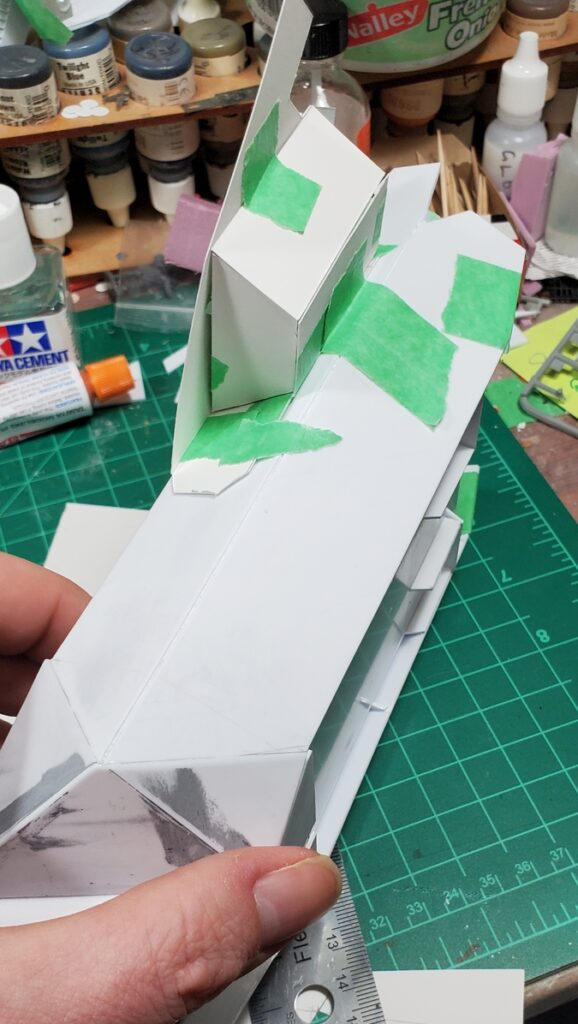
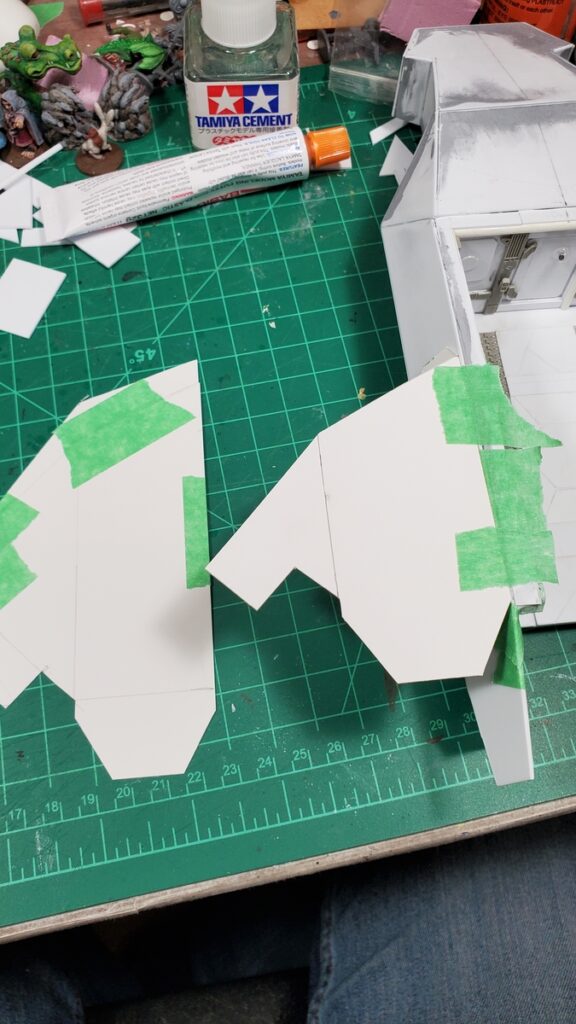
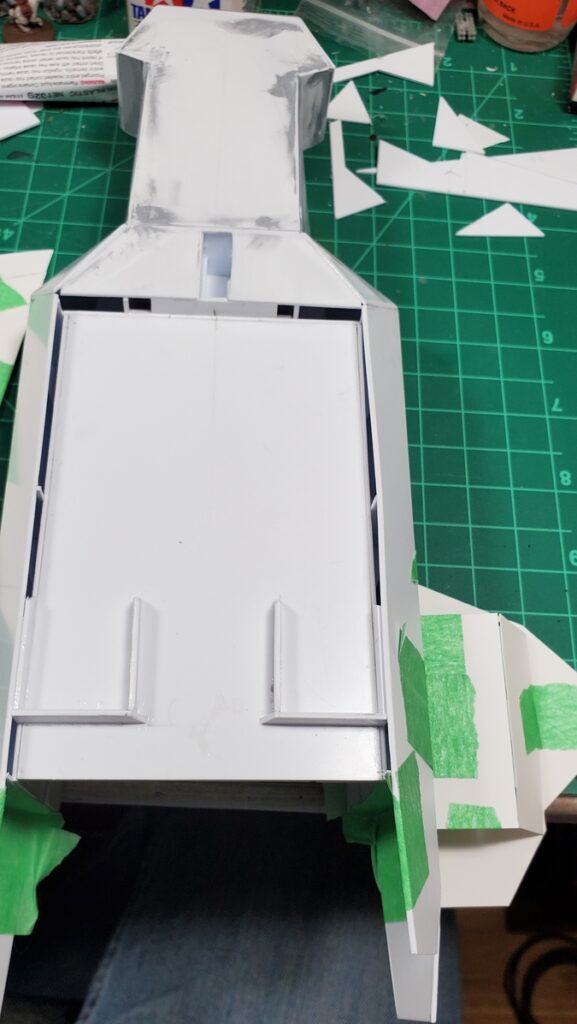
Feb 22 – the underside gets detail panels.Feb 22 – underside detail panels, looking aft.22 Feb – the engine pod assembly begins.22 Feb – layout of the two wings on 1mm styrene sheet.22 Feb – engine and wing subassembly taped in place on the fuselage.22 Feb – wings taped to fuselage.22 Feb – wings temporarily mounted to fuselage, overhead view.24 Feb – wings and engine pod details.. Front view, showing the intake grilles.24 Feb – wing and engine subassembly, rear view with jet/rocket nozzles.24 Feb – another view of the rear of the engine pods.2 March – putty work on the engines and wings.3 March – putty and test fit of roof and wings on the fuselage.3 March – decal sheets assembled. There are almost three dozen decals in the cargo bay and another twenty or so on the outside of the finished shuttle.9 March – final test fit of the wing/engine subassemblies9 March – the wings get the vertical stabilizers added.9 March – rear ramp view with detail panels on the insides of the rear fuselage extensions.9 March – the wings finally get glued on! Major construction is finished, on to priming and painting!
Along the way while finishing the shuttle, I built a 12″x12″ landing pad as a photo prop and gaming scenery, a small ‘drone’ using some of the LeClerc MBT parts that hadn’t be used in the shuttle build, and a 6″ tall sensor tower that used up a bunch of the offcut styrene from the shuttle that was too interesting to just throw away. I’ll share photos of them in another post.
Another photo dump of the last ten days or so progress on my Build Something Contest 2025 entry. My LAF project thread is getting much more regular updates (new photos every other day or so at this point) if you want to follow along!
As of the last blog post the nose had been skinned but not much else. Since then I’ve tried several designs for the wings, disliked every single one of them, built and detailed the removable roof for the cargo bay, and started doing detail panels on the nose.
Check the captions of the photos below for more details.
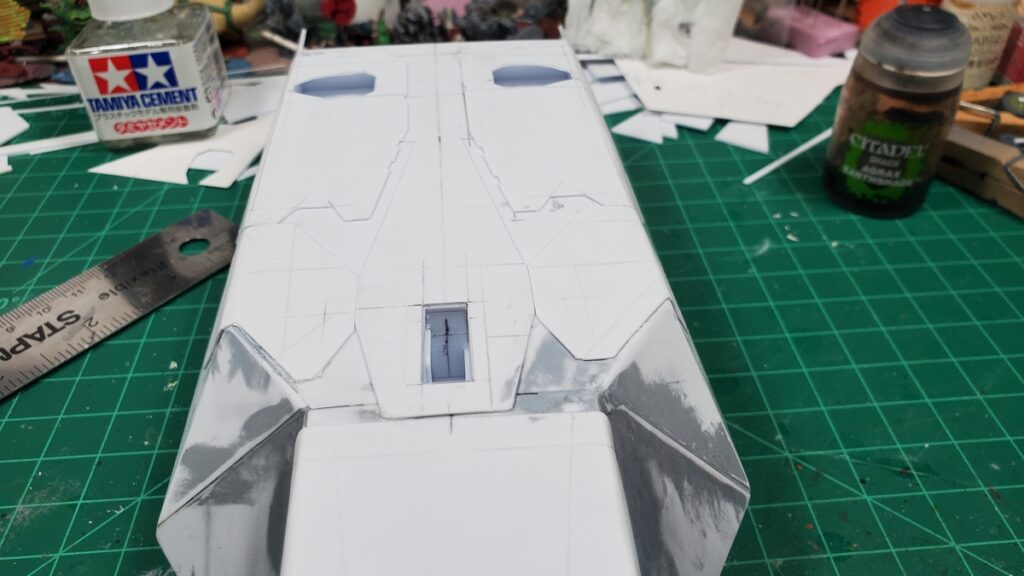
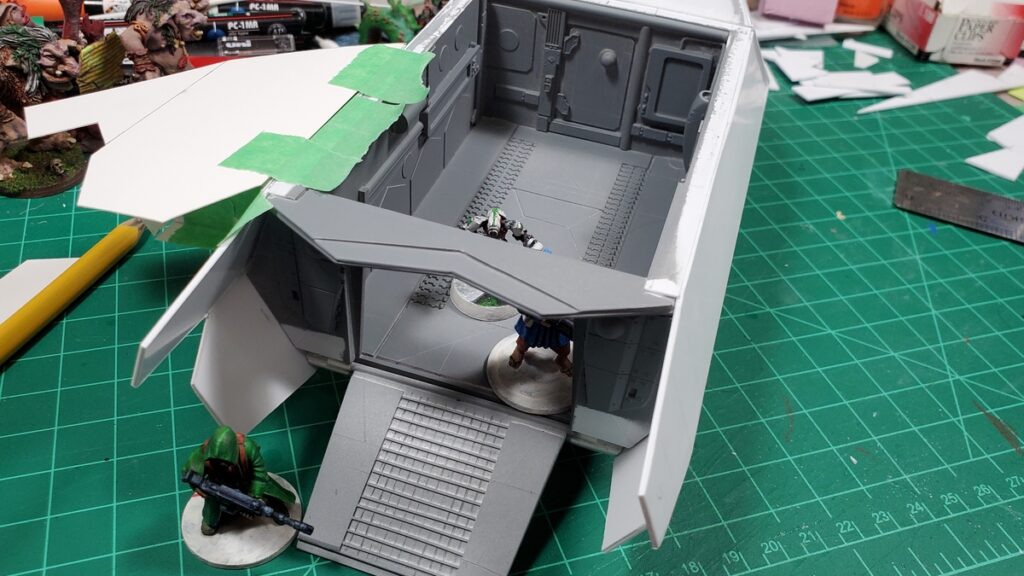
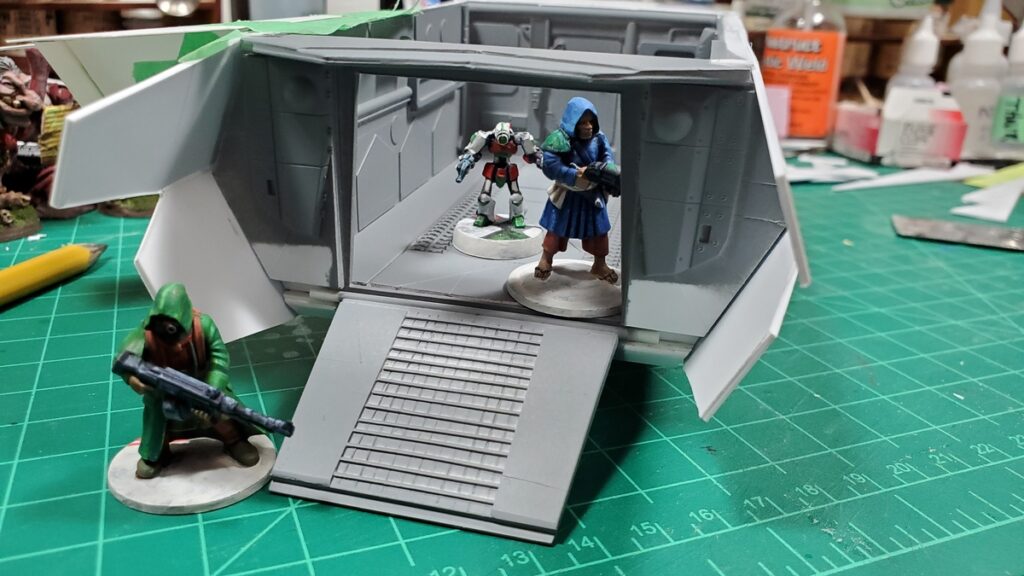
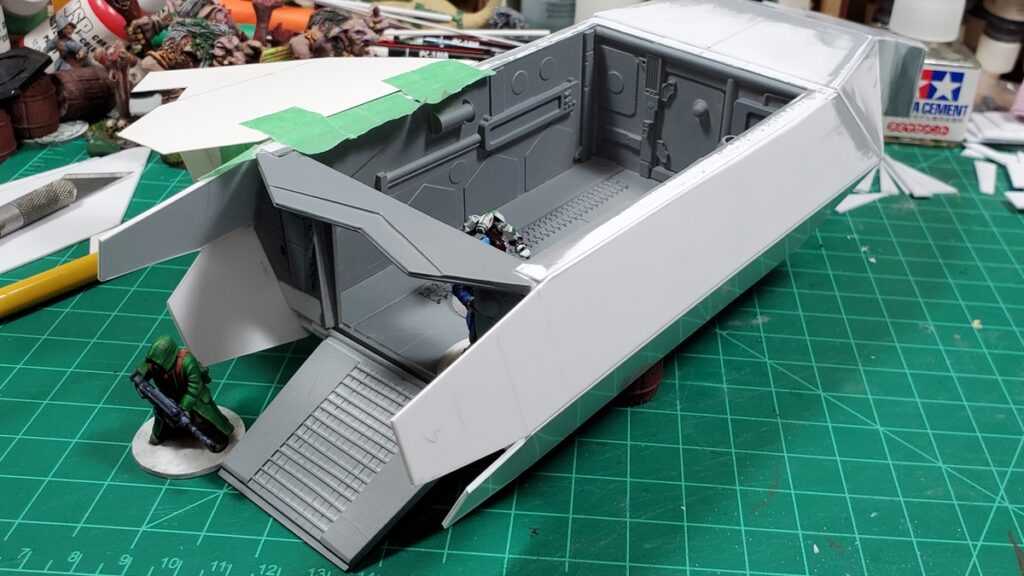
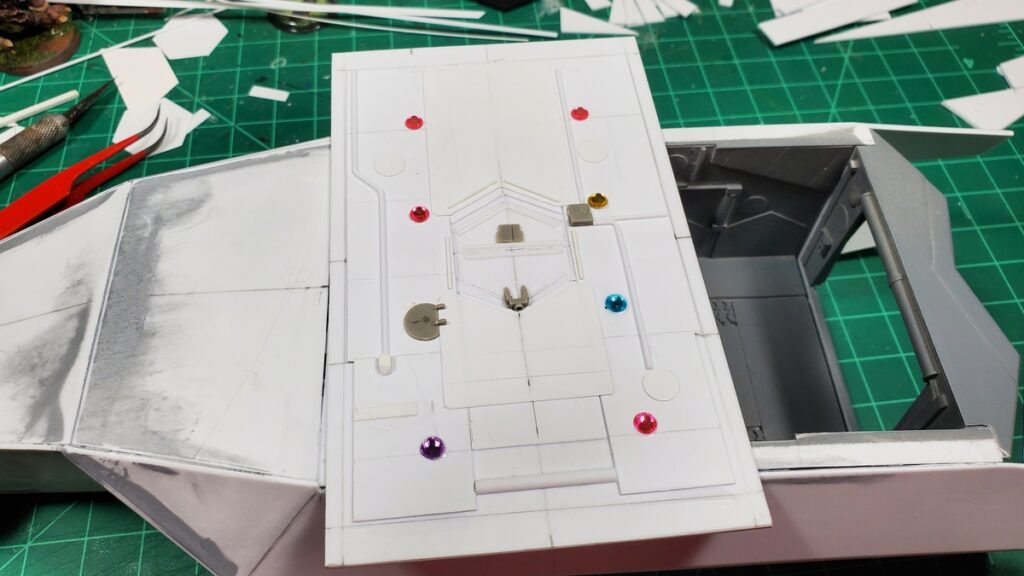
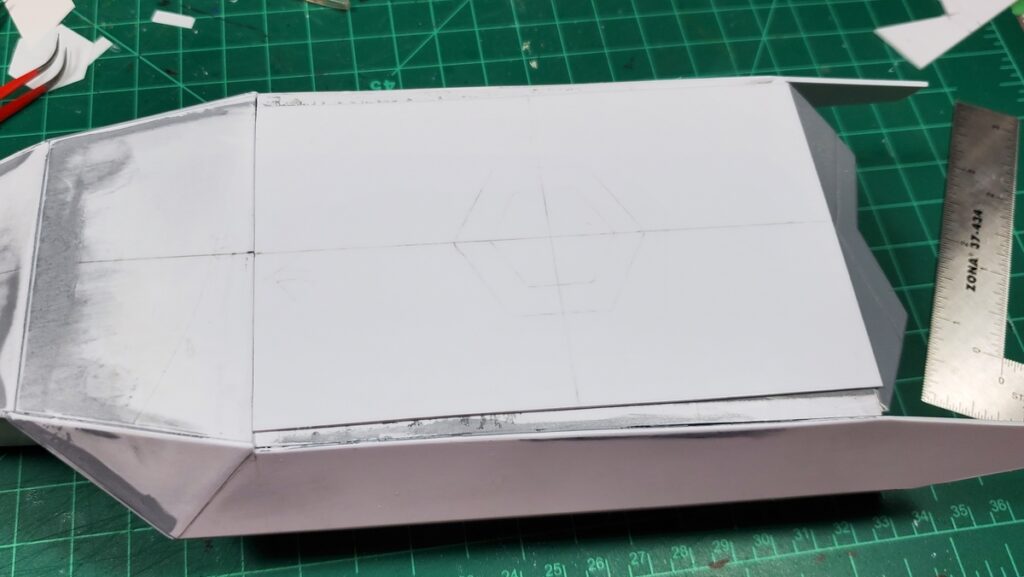
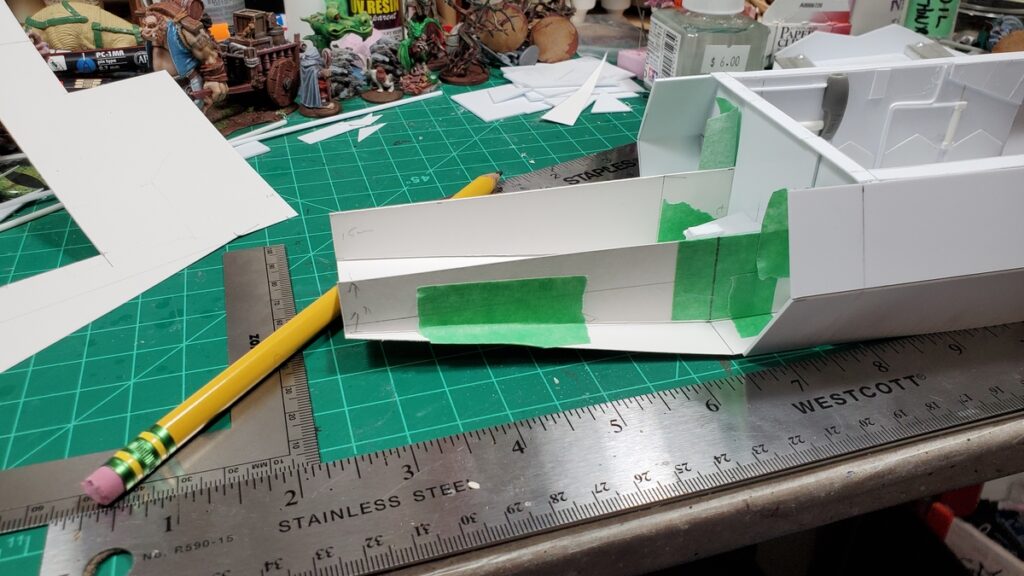
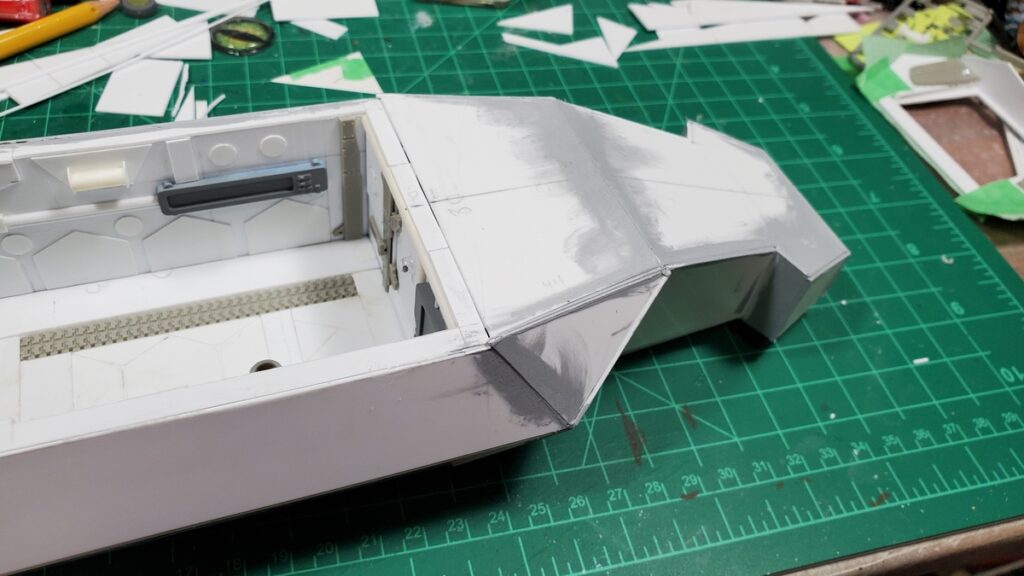
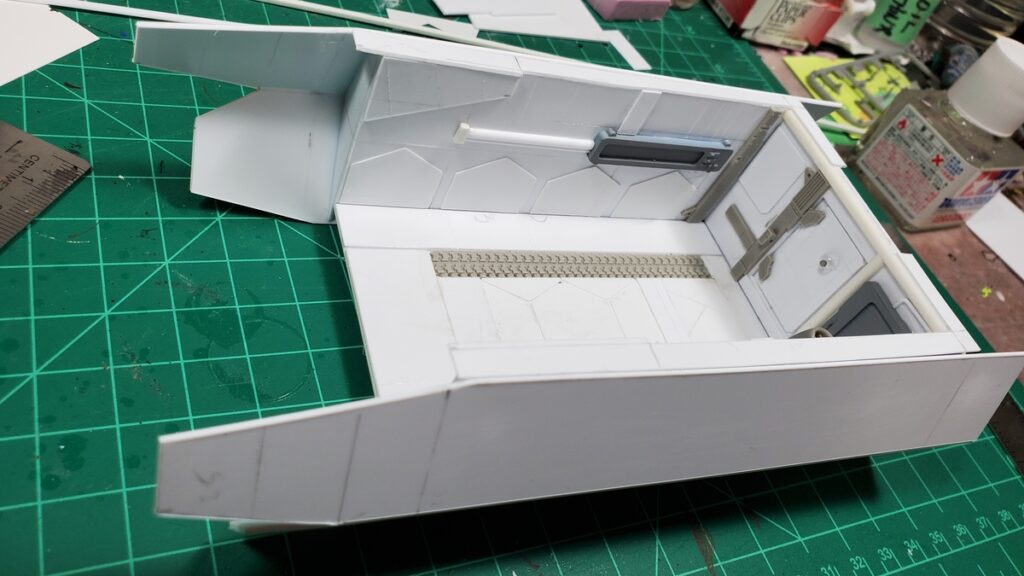
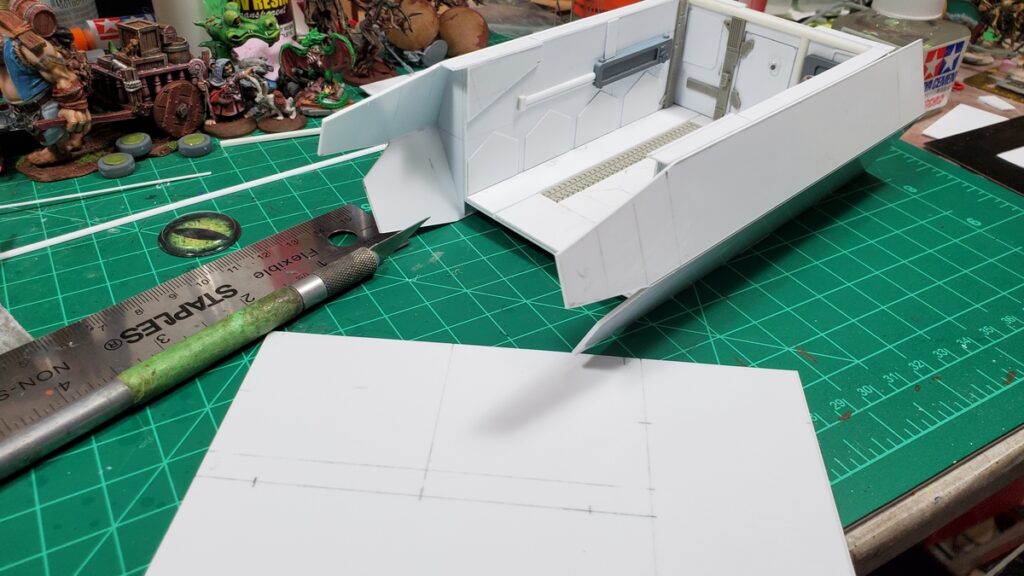
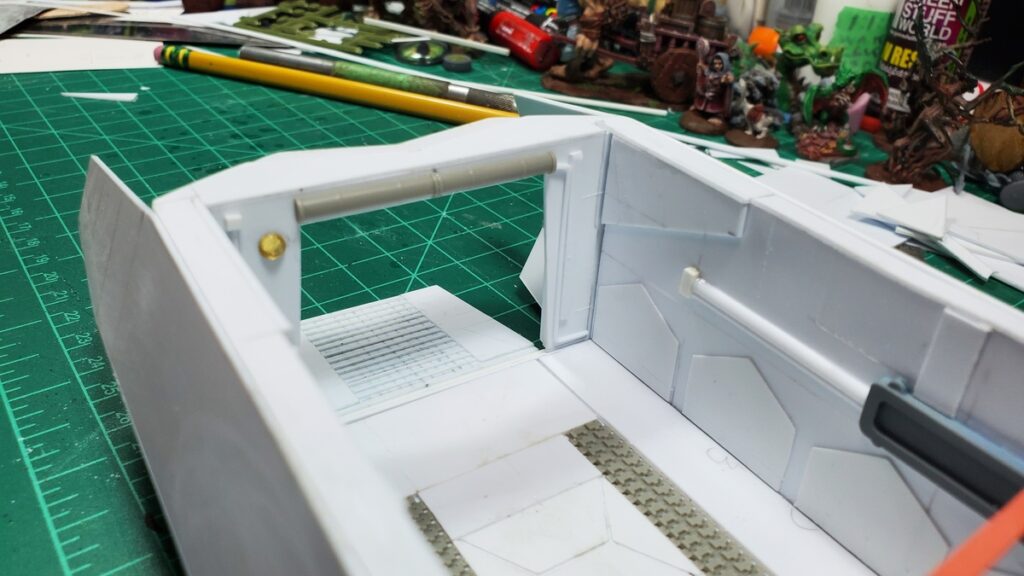
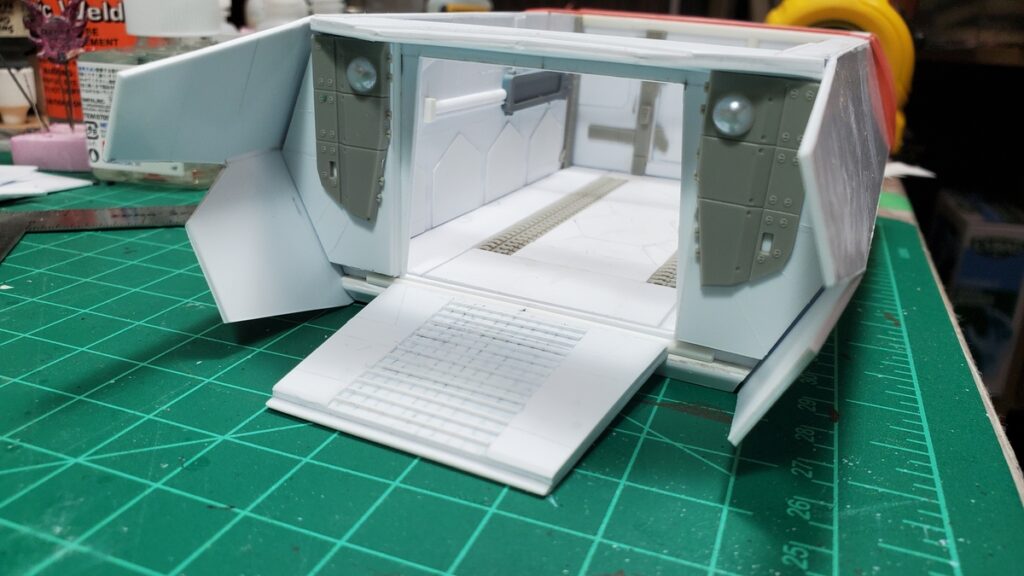
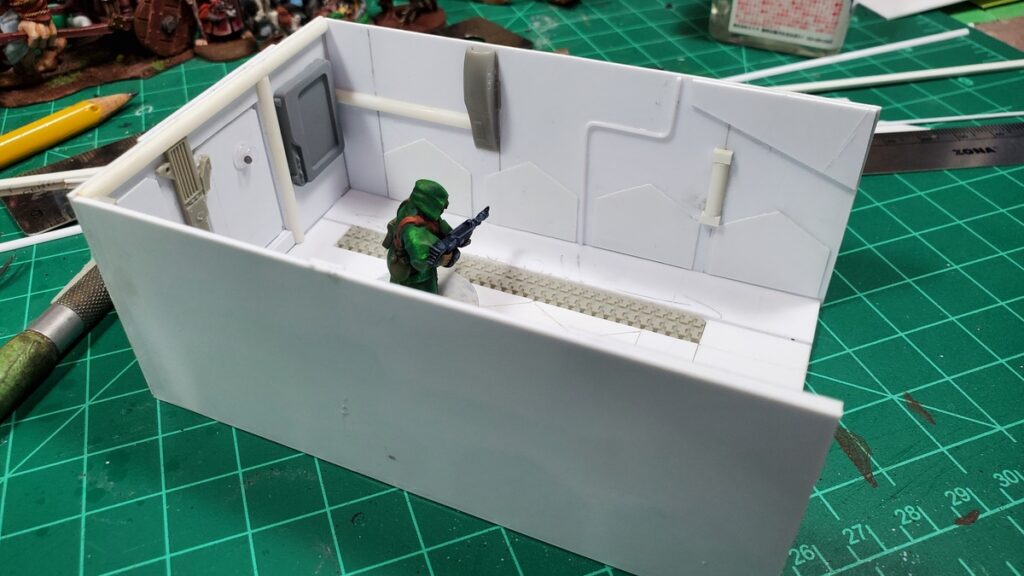
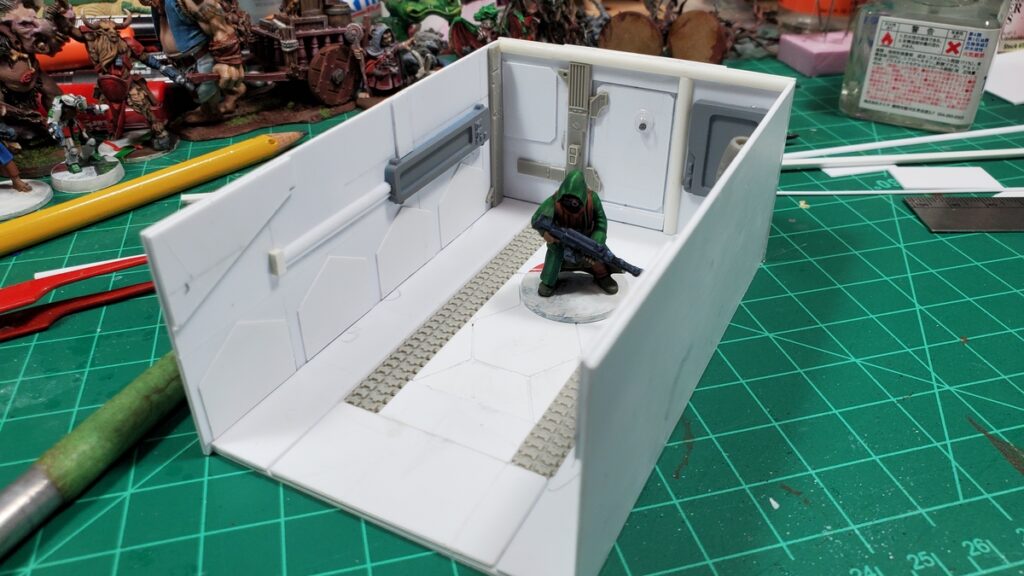
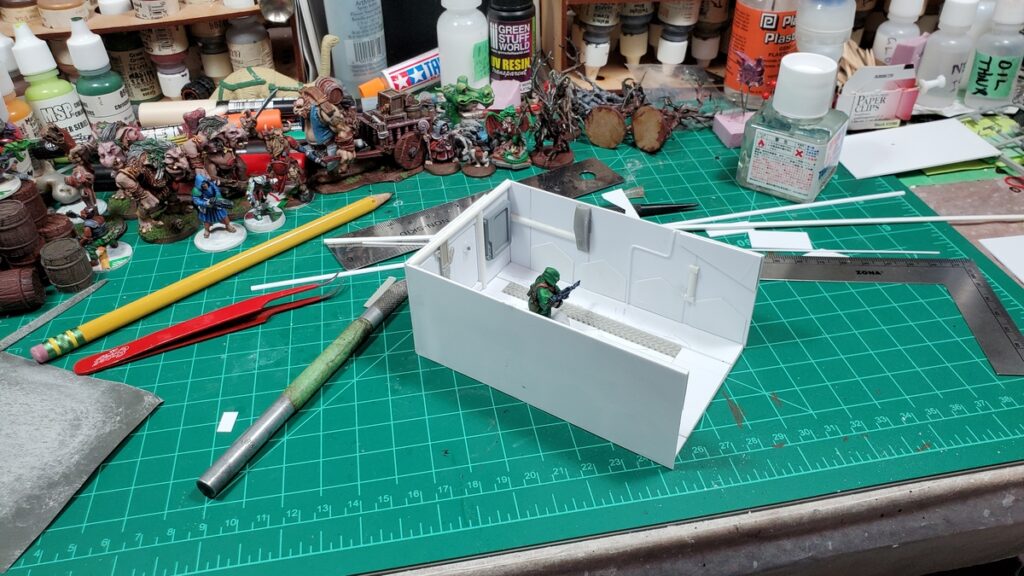
Engine/wing mockup in cardstock. This is the second, smaller, angular wing.Second wing in place, with the first bigger slab-like wing on the cutting mat. Still not happy with either design, so I left the wings alone to do other stuff for a bit!One of the wing mockups taped in place alongside the open cargo bay.The underside, showing the three landing gear bays and the un-skinned belly.Primer! I’m going to be painting the cargo bay before gluing the rear bulkhead & ramp in place, so it got primed.Rear ramp deployed, couple of 28mm figures hanging out for scale.Wider view of the rear bulkhead & ramp with the whole shuttle propped up to about the height it’ll sit on it’s landing gear.The ceiling of the cargo bay all detailed.Roof! The start of the removable roof of the cargo bay.The top of the roof, with the docking port/escape hatch detailed. It’s recessed into the roof.The roof in place, looking foward toward the nose of the shuttle.Detail panels in 0.5mm styrene being installed. When installing across a bend like this, much easier to glue one side down, let the solvent glue cure, then do the other side across the bend!Second detail panel installation, side view.
The belly skin will be installed today, and then I’ll be able to carry the detail panels aft from the nose, down the belly, and around the landing gear bays.
I’ve also (finally) started building the actual landing gear, because I need to set the height of that before I can make some detailing decisions for the underside of the beast.
Then it’ll be back to the engine & wing subassemblies, where I have a third wing planoform I want to try out that I think will work better than attempts 1 and 2!
Decided to go with the nose next instead of the wings and engines, and as predicted in my last post, it required a lot of mockup work, in two stages.
First, I did an internal frame to establish the basic proportions of the nose and give me a nice solid frame to hang the skin from.
I redid parts of the skin mockup three times, including scrapping round three for part of the sides and going back to round two’s ideas. The advantage of all of the fiddling with cardstock and masking tape, of course, is that I knew what I was doing (mostly) when I switched to 1mm sheet styrene and started the real thing.
I also cut back the outer (top/bottom) corners of the sides where they extended forward, and that was the right call, it made integrating the nose and sides easier.
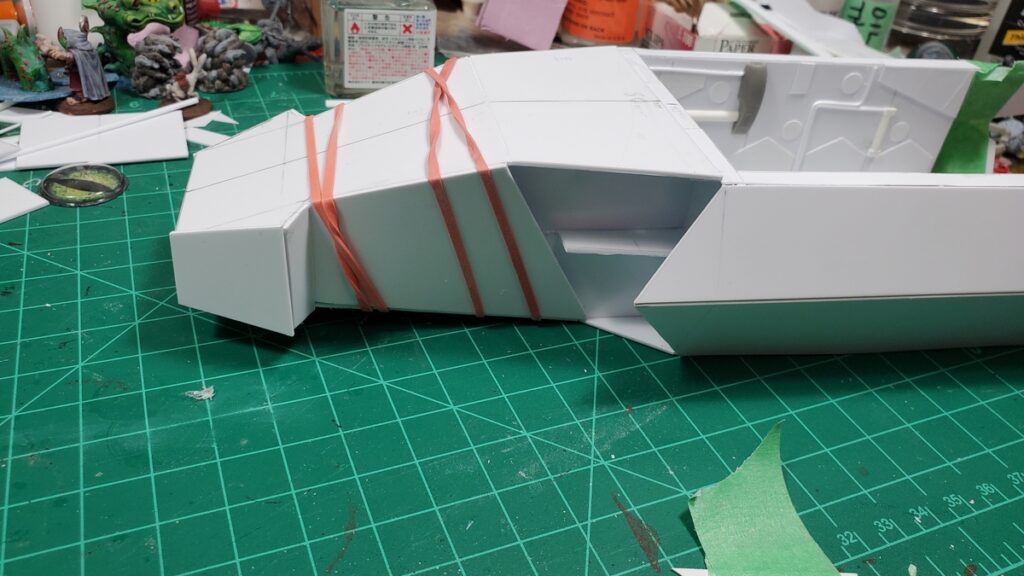
The hammerhead nose was a spur of the moment idea while planning the first mockup piece and I really like how it’s come together; the hammerhead let me play with the angles and bulk of the nose area more than a more straightforward taper would have.
Mockup for the nose frame.Nose frame finished in 1mm styrene. I wound up cutting most of the long thin brace on the outer side off, but all the internal bracing gave me a nice solid, trouble-free start to doing the skin.Finished nose frame. The whole beast is just under 11 inches long, nose to back end, which is perfect.Closeup of the top left with skin mockups in progress.Nose skin mockup in progress, figuring out what to do between the hammerheads and the start of the body/sides.The underside of the nose, mockups in progress.Finally cutting styrene! The big panel behind the hammerheads has a twist to it, so it got anchored down with elastic bands and left for the plastic cement to cure for a bit.Styrene skin in place, sanding and puttying cleanup started. There is going to be a LOT of sanding.Current state of the nose, with putty smeared around a lot of the seams and sanding in progress.
I really like how the whole thing is shaping up, it has a good bulky angular look to it. There’s going to be a round of detail panels over this initial skin, after the endless sanding and puttying is done – some of the seams didn’t come out quite as well fitted as I’d like, so there’s going to be some remediation before detailing can start!
Still to do, in rough order of size/complexity of the subassembly: the engine pods and wings; the roof for the cargo bay; landing gear and landing gear bay doors; skin on the belly.
I’m away this coming long weekend and have some things to get organized before we go away for the long weekend, and as mentioned, the next while is likely to be mostly sanding, so it might be ten days or so before there’s another blog-worthy update to this project!
My Build Something Contest 2025 thread on LAF is here; the rest of the contest has some very cool entries – there’s another couple of shuttles or dropships, some neat magical walking constructs, and a bunch of other cool concepts among the other contestants! Entries just closed on February 8th so everyone who’s in for this year is in!
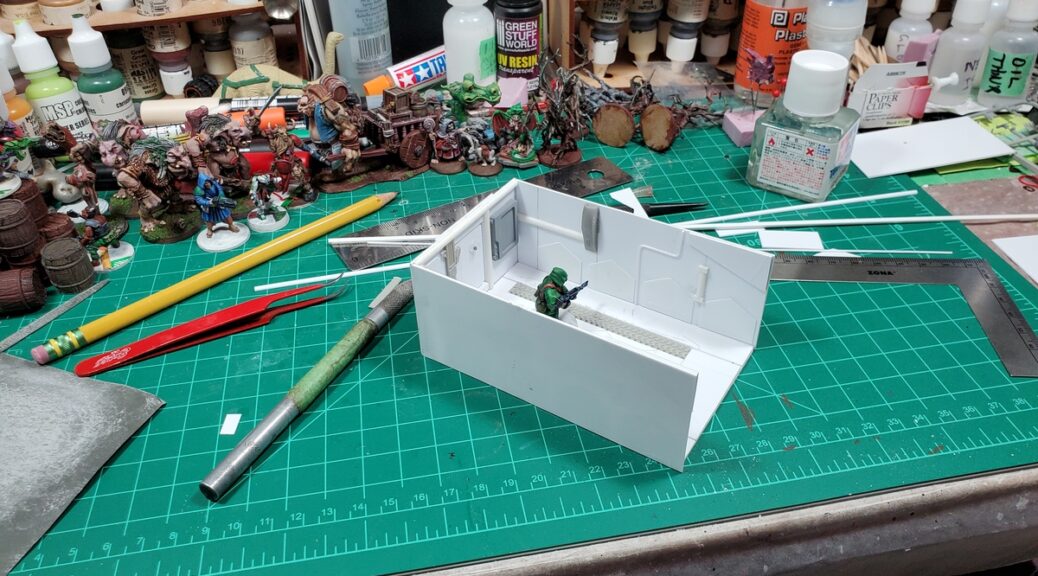
Mocking up the sides with light card. I didn’t get a photo but there’s three pieces under each of the big side panels to give strength.Mockup stage showing the in-progress underside of the shuttle.Local supervisor hard at work.Styrene sides cut and installed, with the angular extensions at the back.Designing the initial panel of the rear bulkhead.Never enough clamps. Or clothes pins in this case. Adding bulk to the underside of the extension on top of the rear bulkhead.Rear bulkhead and ramp complete and detailed, outside view.Rear bulkhead and ramp, inside view.Rear bulkhead and ramp dry fitted to the body. I won’t be gluing the subassembly in until quite late to make painting the interior easier.Rear subassembly dry fitted, outside view. There will be small panels in each lower corner to cover the groove the ramp hinge pin rides in, and detail panels on the insides of the fuselage extensions.
Very pleased with progress so far. Up next will be either the engine/wing subassemblies on either side, or the nose, depending on my mood. Both are going to require more cardstock mockups, especially figuring out how the nose is going to join up to the front of the current body assembly…
As mentioned last post, I’m in the Lead Adventure Forum’s Build Something Contest 2025. I’ve entered a few over the decades, finished my entries in even fewer, and ever gotten out of the first round of voting, so we shall see, but it’s always a great contest to watch even if you aren’t participating.
Photos to date below – today (Sat 1 Feb) I got the floor and three main walls of the cargo bay built and assembled. Engines and landing gear next, then figuring out how the actual skin of the shuttle is going to cover all this stuff!
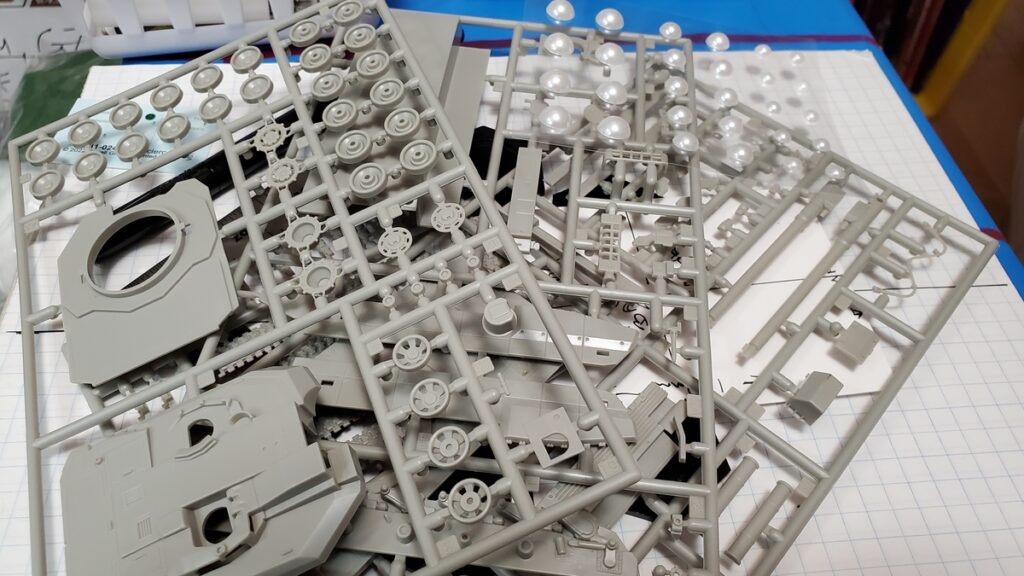
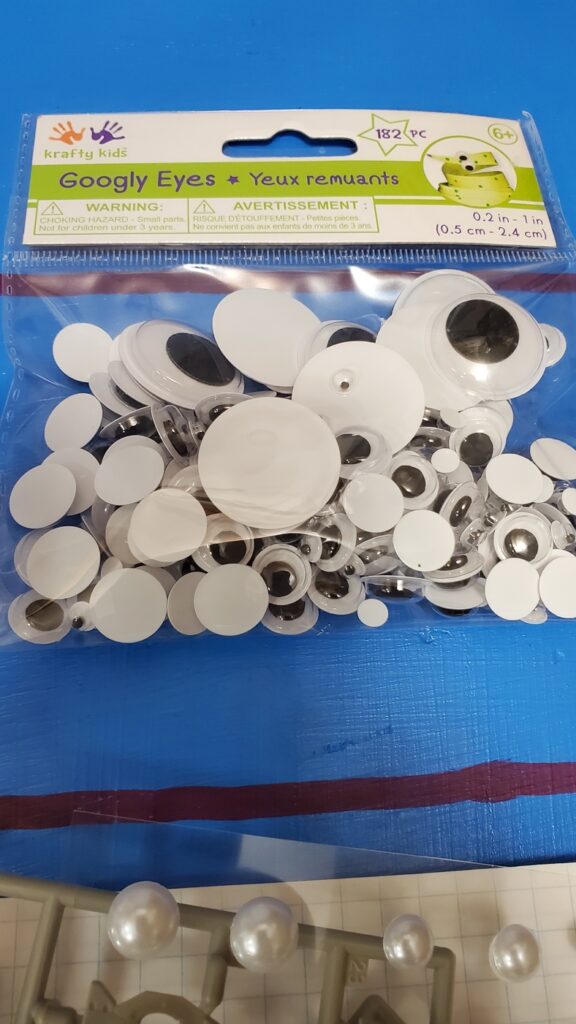
One of the classic sources of kitbashing/scratchbuilding detail parts – a 1/72 MBT, in this case a Tamiya LeClerc. Also at the top of the photo, half-round pearls from the dollar store, because you can never have enough dome shapes for sci-fi building!Also from the dollar store, an entire baggie of googly eyes. Some of these might well wind up as actual eyes in silly places, but a bunch of them are just going to be interesting shapes for kitbashing.Cargo bay floor. LeClerc track pieces for detail.The assembled cargo bay. The side walls need at least one more round of detailing!Cargo bay, showing the other side wall.Wider workbench shot.
The main thing now is going to be maintaining momentum and not getting bogged down in overthinking this damn thing. Onward!
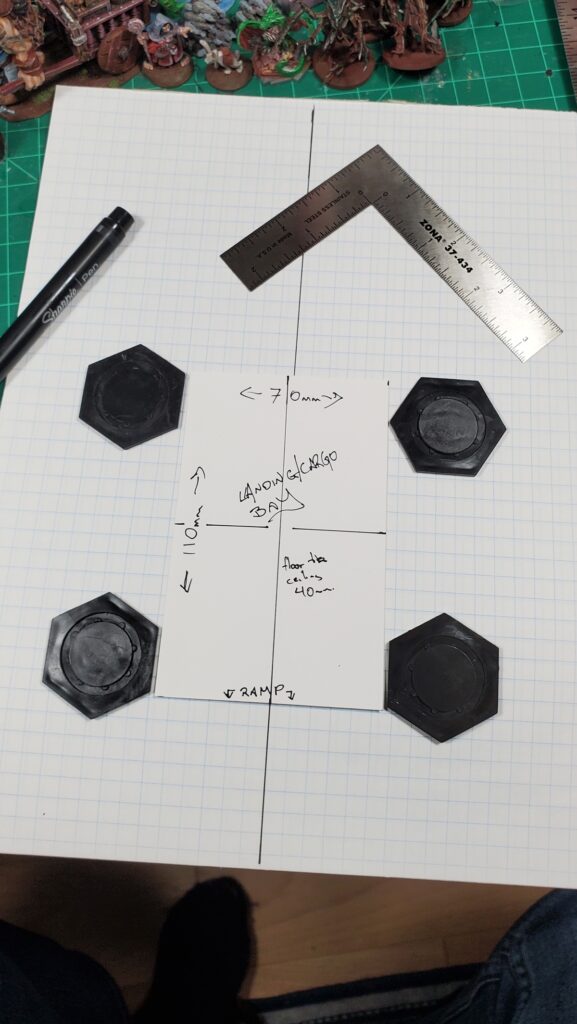
Planning a 28mm (32mm? whatever…) small shuttle suitable to get high priority cargo or a group of heavily armed ruffians/operatives/etc on and off the planet of their choice. Basically keeping it to about the footprint of a Letter/A4 sized sheet of paper, definitely inside 12″ nose to tail so it fits width-wise in a banker’s box for storage.
I laid a handful of figures on graph paper and figured that for the six-or-so figures I wanted the cargo bay to handle it needed to be somewhere around 70mm wide and 110mm long (and about 40mm tall internally, but that’s for later) so I cut up a few bits of card, grabbed the graph paper, raided the bits box and started laying things out.
Very early shuttle planning. The cargo bay is a separate piece of card so I can move it around. Click for larger.
The current plan is to build the box of the cargo bay first, then use the four hexagons as internal frames for two engines, then do wings under/around the engines for a stubby vaguely aerodynamic shape. Planning extended sides to protect the landing ramp from engine thrust, and a long vaguely streamlined nose at the other end.
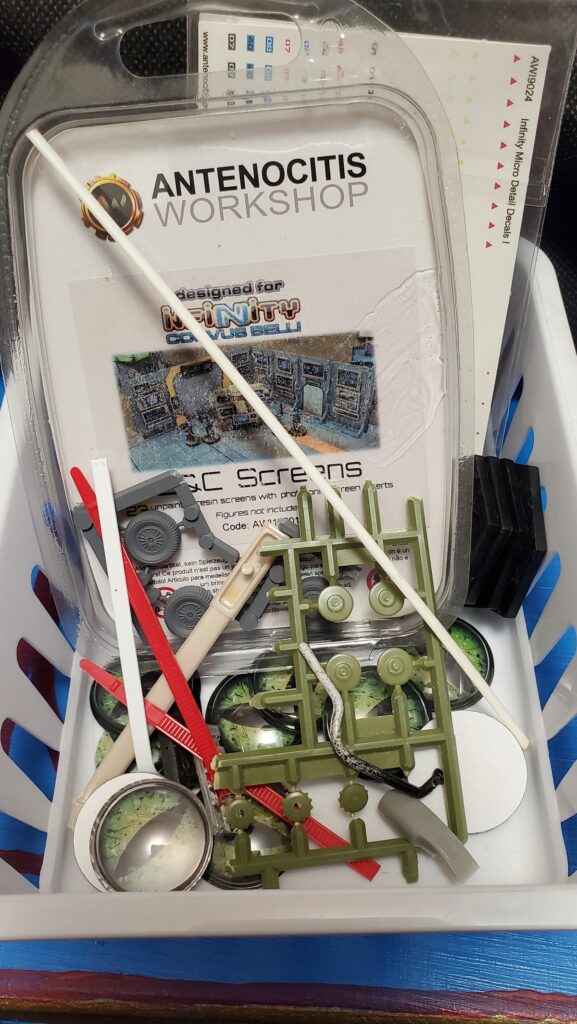
Other details very, very much To Be Determined as I start building! I have raided and sorted the Bits Mountain and in addition to the plastic hex bases seen above there’s a few other things I’ve put aside.
Stuff! Wheels from Gaslands plastics for landing gear, various other scrap or leftover plastic bits for details, a blister of resin computer screens from the late, lamented Antenociti, a couple of which will probably show up in the cargo bay.
The weird eyes are from the local dollar store, there’s various leftover plastic scrap and kit pieces, an old blister of Antenociti comm screens that’ll provide cool details inside the cargo bay, and some other bits and pieces for decades of hording/collecting this sort of stuff.
Actual building is supposed to start Feb 1st, so stay tuned!
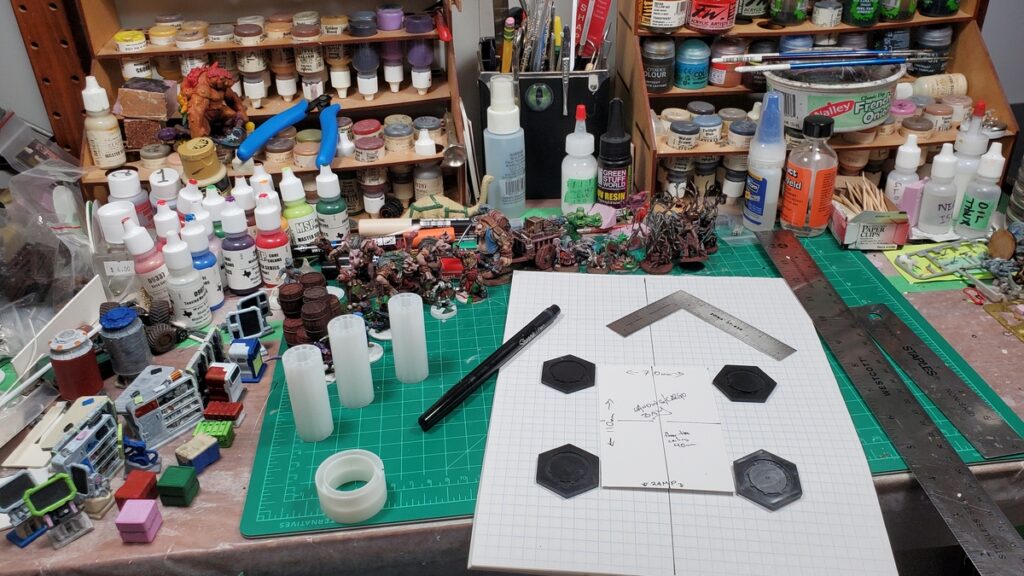
To finish up, the traditional workbench shot. Lots of painted figures I need to move into storage to clear the decks for this shuttle build!
The workbench, with shuttle planning underway. Some Mantic Terrain Crate SF fixtures on the left, a whole clutter of mostly-painted figures at the back that need to move to storage solutions, and lots of other clutter…
Best of luck to the other BSC 2025 participants, looking forward to seeing what they do!
Right at the ragged end of the year, one last blog update!
Been getting a bunch of painting done this month, including the hatted bug guy seen in the last post. There’s also some Footsore Trolls mostly done and a scattering of other stuff on the painting bench!
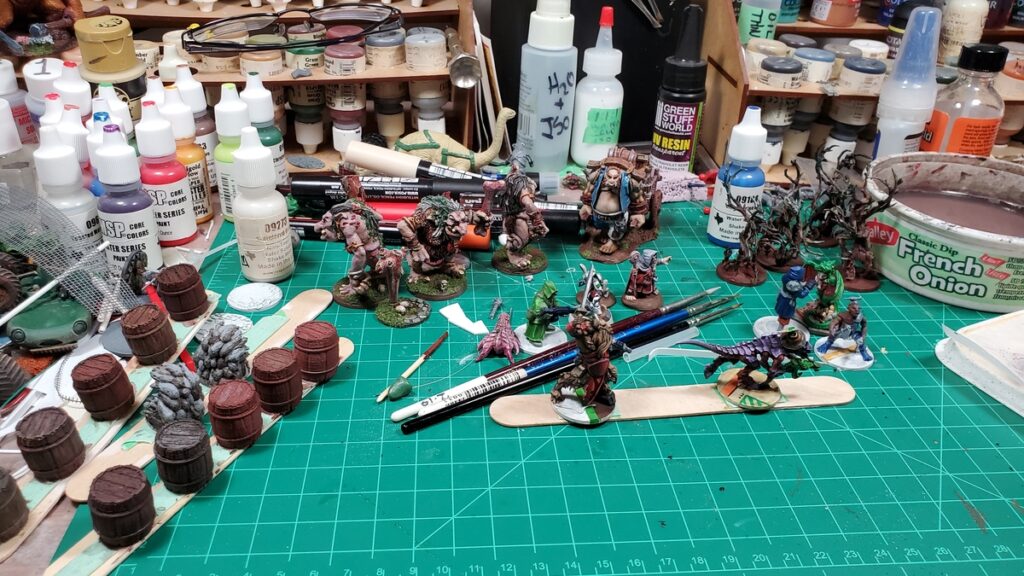
The workbench at the very end of 2024. A small crew of WIP science fiction figures, three lovely Footsore trolls mostly finished, a whole batch of 3d printed barrels, and a scattering of other random stuff being gradually worked on.
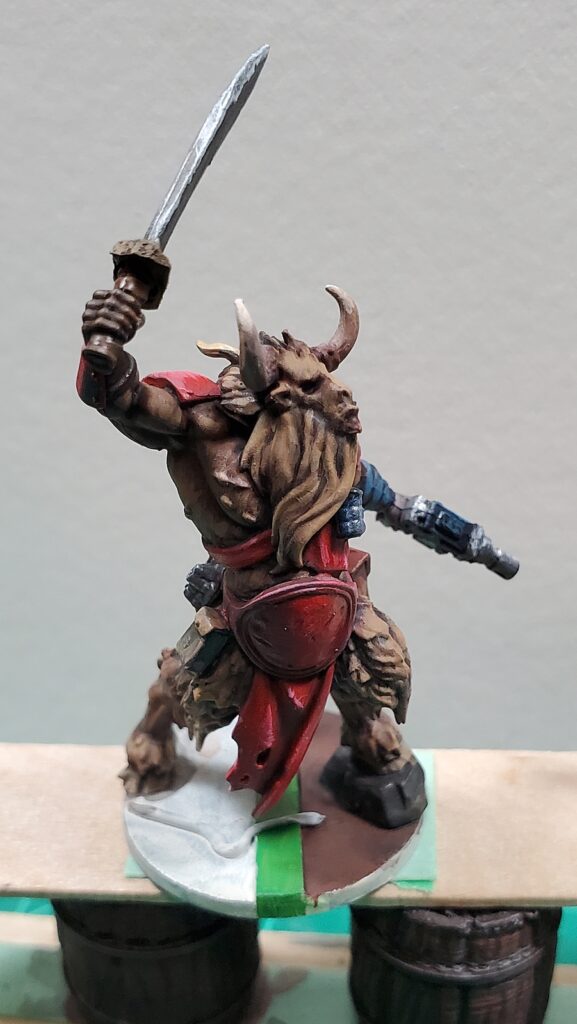
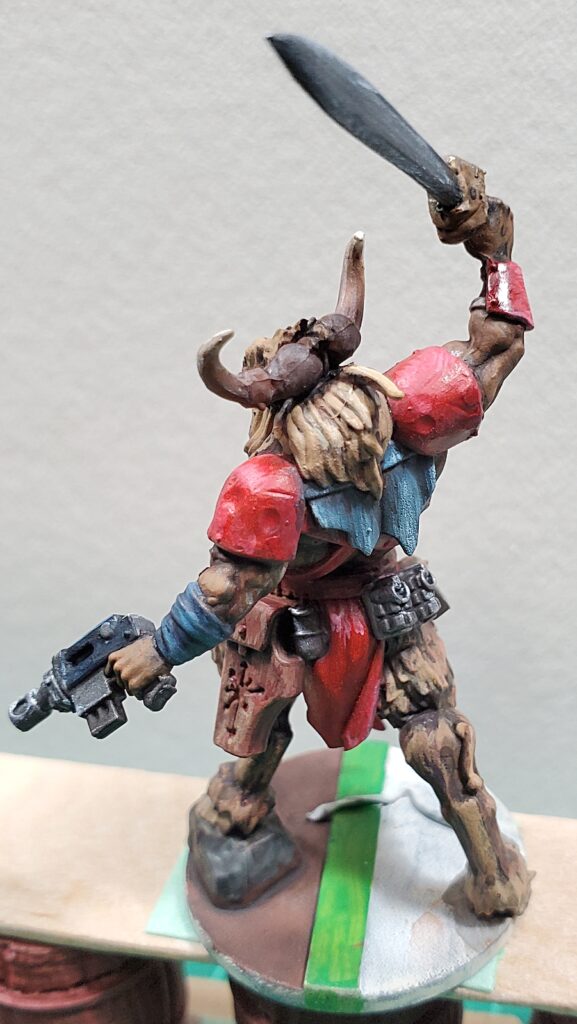
They’re not great pictures, but here’s a couple of closeups of the most recent finished-except-for-the-base figure. This is some sort of Games Workshop Chaos Beastperson minotaur, I think, snagged earlier in 2024 as GW’s free in-store figure of the month. They had a silly spiked club/mace thing that I chopped off and converted into a big choppy sword, but are otherwise stock.
Captain Spacecow front view.Captain Spacecow rear view.
I’m trying to push my highlighting and edges more than I usually do, and have also been trying to add texture with paint more. It’s most obvious on Captain Spacecow’s horns and the blue piece of cloth/armour/whatever on their back, but there’s also fur texture on the torso and lower legs that isn’t really obvious in either of these photos.
The painted fur texture was directly inspired by this video from Vince Venturella. His entire YouTube channel is worth a look, he’s got loads of great videos that I’ve been watching a bunch of the last month or two.
Happy New Year and Happy Holidays. Hope 2025 is good for you and yours!
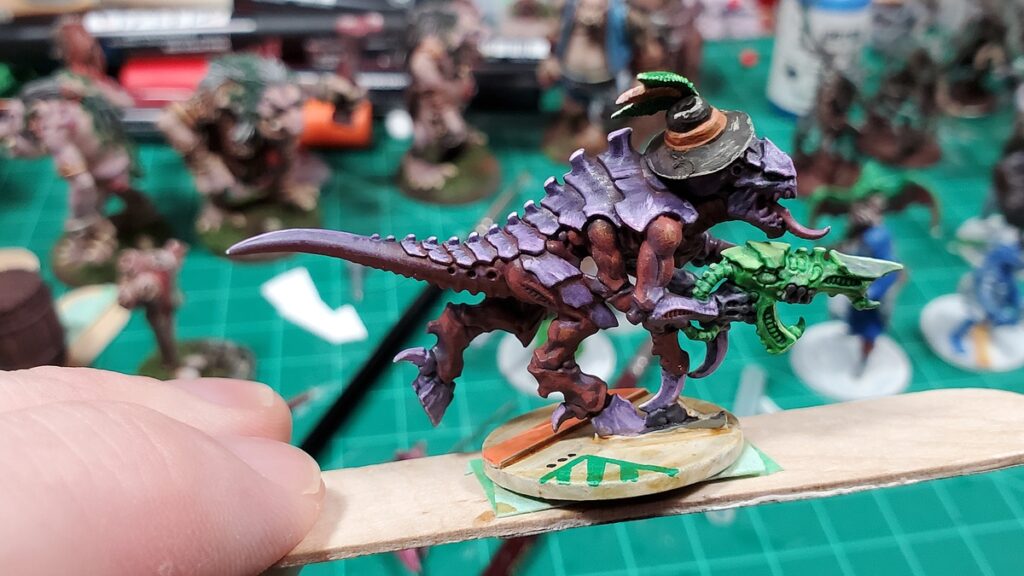
A while ago our local GW store was giving away a single Tyranid bug-warrior figure for free. Of course I snagged one, who doesn’t want free stuff? I’m never going to bother playing 40k, but a random free figure? Sure!
I glued the critter together (GW makes some… interesting engineering choices in how their figures fit together, some of the parts are weird AF…) and then it lurked on the corner of my painting bench for months and months.
Then I realized that in Corey’s in-development Under Alien Suns rules you could run damn near anything as a crew, so I kitbashed together half a dozen figures a couple months ago and decided, for the hell of it, to grab a hat with big feathers on it from my 17th Century plastic stash and glued it to bug-guy’s head.
Then in the doldrums of the year I finally primered the whole motley crew and starting painting them. Bug-guy caught my attention and he got finished today, right from primer to done (barring some cleanup on the base) just today.
Not-a-Tyranid. That’s Specialist Ghar under a dashing hat (they never explain the hat) loping through the scruffy weird universe of Under Alien Suns, or whatever other oddball SF skirmish we get up to!
I went purple for the exoskeletal bits, dark red/black for the flesh bits, and bright green for the rifle that may or may not be grown right out of bug-guy. I’m really pleased with the highlighting, especially of the purple and the gun.
Specialist Ghar’s other side. Click, as usual, for larger.
I’ll be getting paint on the rest of his crewmates in the next few days; I don’t go back to work until Jan 6 of 2025 so probably have time to finish all of them!