Category Archives: Reviews

Reviews of books, miniatures, possibly other websites, and anything else we think needs reviewing!

Sarissa CityBlock Buildings, Part The Third

Progress continues on my seven Sarissa Precision buildings, albeit at a slower pace than I’d intended!

Basecoat and drybrushing is done on all seven buildings, gravel roof details likewise in place on all seven, most of the doors and windowframes are painted, and I’ve started cleanup and finishing.

I’ve always liked the looks of the big hand-painted signs and advertisements on the sides of older buildings, so given the wide blank side walls of the Sasrissa CityBlock buildings, it seemed natural to break out the smaller paintbrushes and go to it!

hotel_at
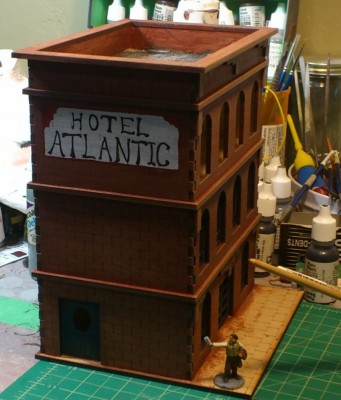
Newly-painted Hotel Atlantic sign on the side of the three-storey Sarissa Precision CityBlock building. Click for larger, as usual!

Still some cleanup to be done on the basic lettering, and I might yet redo the red ornamenting in both top corners, but the basics are done and I like how it turned out. This was all done freehand with a brush over some light pencil lines for guides, after I used Inkscape on the computer initially to play with letter sizes and spacing and figure out some basic guides. The “Hotel Atlantic” seemed like a good generic name, likely to occur anywhere in the English-speaking world, or even in non-English-speaking areas as the hotel set up to cater to English-speaking travellers.

One of the other buildings has a blank white square on it currently; later this week I’ll figure out what sort of sign or ad I want on it, too.

Sarissa CityBlock Buildings, Part The Second

Having assembled my new Sarrisa Precision lasercut buildings, it was time to consider adding some extra details to really make these buildings “pop” and bring them to life. One of the things I wanted to do was add detail to the fronts of the buildings, especially the cornices at the roofline, which are often quite elaborate on brick or stone urban buildings built in the late 19th or early 20th Century.

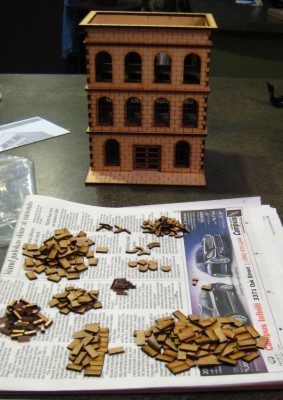
As I’d assembled these buildings I’d reflexively kept the bits of MDF from inside the windows and other openings in the models, and looking at the little pile of lasercut leftovers, I realized they’d be perfect for basic detailing and adding some relief to the fronts of my new buildings.

sarissa2
The three-storey Sarissa Precision building, and the sorted offcut bits of MDF. Click for larger, as usual.

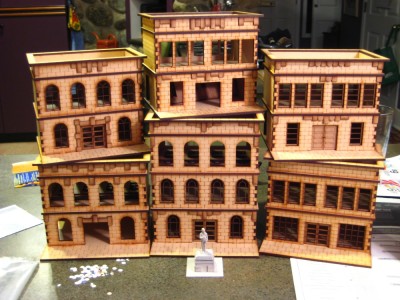
There were more than enough bits and pieces to do the fronts of five of the seven buildings, with leftovers to keep going on the remaining two if I decide, although I’d like to use some light card in layers for a slightly different look on the last CityBlock building and the Gaslamp Alley townhouse.

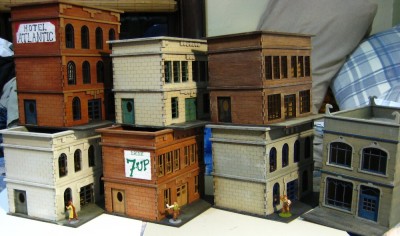
Here’s all six of the CityBlock buildings stacked up, five of them with basic ornamentation added with “scrap” MDF.

sarissa3
All six CityBlock buildings stacked up, five of them with front details added. The statue is roughly 28mm tall, just for scale. Click for larger.

Next step is chimmneys and other rooftop detail. I’ll use basswood and plastic tubing for chimmneys, and create roof hatches, vents and roofwalks from basswood and card. Masking tape for tarpaper or paint and fine gravel will complete the roofs, then there’s painting to be done!

Sarissa CityBlock Buildings, Part The First

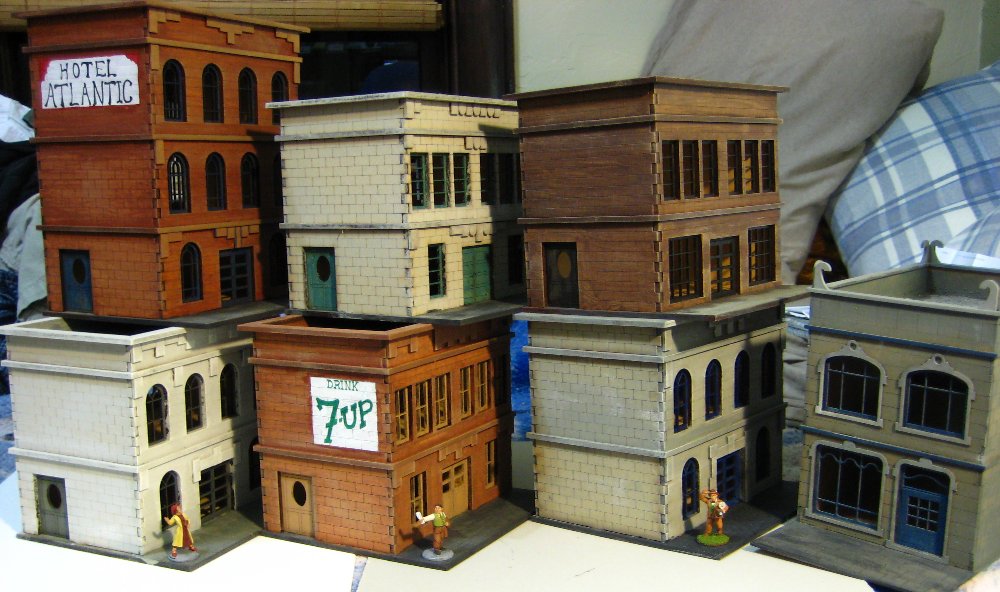
In my last post (two+ weeks ago!) I mentioned I’d bought a bundle of Sarissa Precision’s lasercut 28mm CityBlock buildings to bring our pulp gaming into an urban realm. I’ve finally got all seven buildings assembled; here they are on the counter.

sarissa1
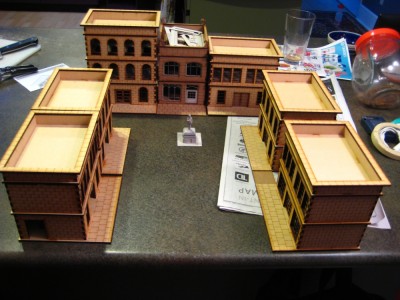
All seven Sarissa Precision 28mm lasercut buildings. Click for larger, as usual.

The six similar buildings are from Sarissa’s CityBlock bundle, with one extra floor purchased to give me five two-storey buildings and one three-storey building. The seventh building is the Narrow Townhouse from Sarissa’s Gaslamp Alley Victoria SF line.

The CityBlock buildings go together quickly and easily; the walls and floors are 3mm MDF, and the window frames are seperate sheets of 2mm MDF designed to slot in behind the walls. The first several buildings I put together with more enthusiasm than consideration and glued the windows in right away; for the ones I’ve finished more recently have had the windows left out for now to make them easier to paint.

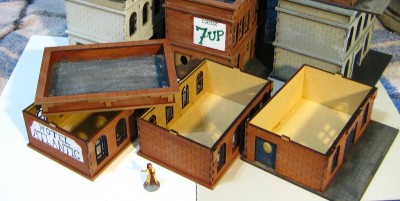
The floors and roof all come apart to allow access to the interiors of the buildings during games, and the simple tab-and-slot system should survive many games with no issues. The buildings all feel very solid once assembled.

The Narrow Townhouse from the Gaslamp Alley range is one of Sarissa’s most recent releases, and there’s a number of tweaks, refinements, and added details compared to the older CityBlock buildings. The interior floors have wood planking engraved on them, some of the etched and cut detail is a bit finer, and instead of 3mm & 2mm MDF, the Gaslamp buildings use 2mm MDF and laser-cut light cardstock, called “greyboard” on Sarissa’s website. This makes the Gaslamp buildings lighter than the CityBlock ones (although just as solid) and somewhat more detailed. The windows have both inner and outer frames lasercut from cardstock, for example.

Having assembled the basic buildings, I’m now turning toward detailing them before painting. I want to add some details and bits on the front facades and cornices of the buildings, and to the roofs. I’ll use fine modelling gravel on some roofs for a tar-and-gravel roof, and narrow masking tape on others for tarpaper roofs, and add details like chimmneys, roof walks and possibly even rooftop signs.

After that it’ll be time for paint. The engraving on the CityBlock walls is too large to “realistically” be brick, but I’ll likely paint several of them up in traditional red bricks anyway, as well as some as stone.

Detailing photos and writeup in the next couple of days!

Wagons from Frikkin’ Lasers

Got a nice box from J&M Miniatures earlier this week, and even before I cut the tape on the box I could smell the future… oddly enough, the future (of wargaming scenery) smells like scorched MDF. Laser-scorched MDF.

Specifically, a whole whack of 4Ground’s wagons. Corey had ordered approximately enough wagons to provide logistics for an invasion of Russia (well, OK, six…), which he might get around to showing off here at some point, and I’d tagged a single extra General Purpose wagon onto his order. I’ve previously reviewed 4Ground’s Generic Horse Cart, so it was nice to get my paws on the cart’s larger relative, the GP Wagon.

In the ziplock, you get a single 8″x5.25″ sheet of 3mm MDF full of laser-cut wagon parts and a single double-sided sheet of illustrated instructions. That and a dab or three of white glue are all you need to turn out a very nice wagon.

wagon1
4Ground’s General Purpose wagon, still in MDF sheet form.
wagon2
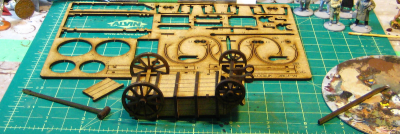
Wagon mostly finished, upside down so I can get the wheels in place.

The GP Wagon is a bit more involved than the Horse Cart, but everything is very precisely cut and well engineered. I’ve built injection moulded plastic kits that fit a LOT less precisely than this MDF wagon does! The only time I found the photograph-illustrated instructions less than clear was when beginning assembly of the front axle/steering assembly, but a bit of dry fitting reveals that the pieces really only go together one way, which makes it hard to really screw up.

wagon3
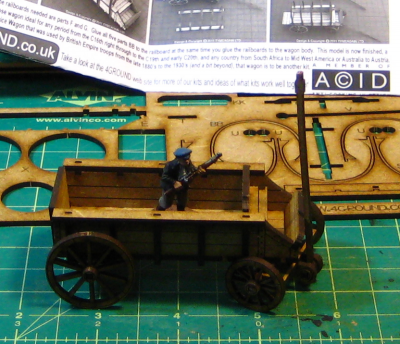
Finished, with the wagon pole pivoted vertical and a 28mm Copplestone Bolshevik militiaman for scale.

You have the option of adding canopy hoops over the bed of the wagon for the classic covered wagon look, but I elected to leave them off this one. The next will probably have hoops, just because! The finished wagon is just over 3″ long (6″ including the pole), about 1.75″ wide across the hubs, and about 1.5″ tall. You can fit three figures on 20mm bases into the back, two if you use oversized 1″ bases. I’ll probably paint both this one and the Horse Cart eventually, but even in bare MDF they look pretty good, with the dark laser-burned cut marks providing nice contrast to the normal honey-brown MDF.

28mm Pulp Baggage Review

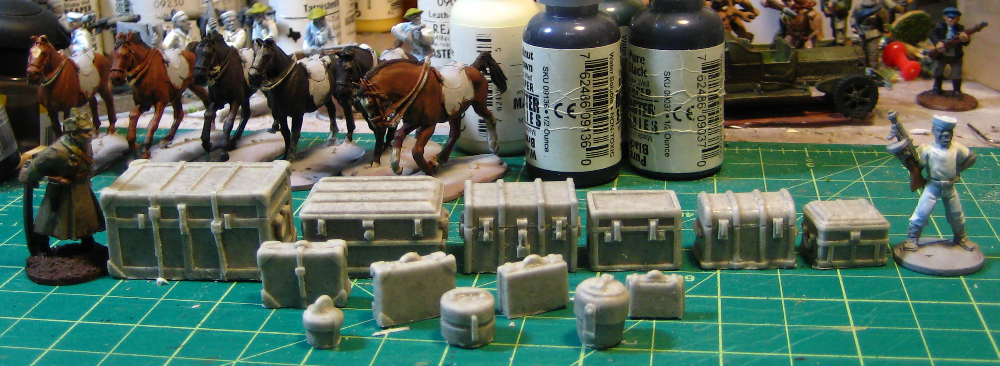
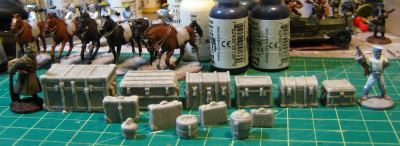
Phil of Slug Industries (and Adventures in Wargaming, his personal blog) has recently released a set of 28mm pulp luggage. Cast in resin, you get six steamer trunks, four suitcases and three hatboxes, a nice selection to dress up any pulpish scene, provide objectives for your skulking players to try to locate, or just provide cover on a dock or train station platform!

This plethora of options is especially broad when you decide, as I did, to order three full sets of this luggage! Counting the three miscasts Phil threw into my order, I now have 42 individual pieces of baggage. Douglas Adams would have approved of this number, and so do I.

baggage
Thirteen pieces of baggage from 6mmPhil/Slug Industries. Scale provided by a Copplestone Bolshevik on the left and a Pulp Figures US Navy sailor on the right. The grid on the cutting mat is half-inch. Click for larger.

The baggage pieces are all cleanly cast in a light grey resin, and I didn’t see a single air bubble or miscast on my sets. The largest of the steamer trunks is just over waist high on a 28mm figure; the smallest hat box just slightly bigger than a typical 28mm figure’s head. Most of the flash rubbed off with my thumbnail; a couple of the smaller pieces had a bit of more solid flash around the bottom edge that needed a moment’s work with knife and sandpaper to deal with. Even two of the three “miscasts” I got with my order are perfectly usable, with just a bubble or two around the handles on the sides marking them as “miscasts” – I’ve paid full price for resin pieces with bigger casting flaws in the past!

The largest of the steamer trunks is 1.5″ long, 7/8″ wide and 3/4″ tall (37mm x 23mm x20mm); the smallest trunk on the far right of the photo above is 5/8″ x 1/2″ x 7/16″ (16mm x 12mm x 12mm).

I’m busy getting ready for the Trumpeter Salute convention in two weeks and contemplating a run at LAF’s Lead Painter’s League 7 which starts just after that, so I can’t promise I’ll have painted examples of this baggage to show off terribly soon, but I will get some of it done after Trumpeter and post pictures here. It should be fun to paint, the details are nice and crisp. Metal steamer trunks can come in a wide variety of colours, and battered, worn leather for most of the suitcases is also easy and fun to paint.

I should add, in closing, that Phil doesn’t currently have the luggage listed on his Slug Industries website, but purchase details can be found at this thread on LAF’s Bazaar forum. Everyone needs more baggage to haul around!

Wargamers With Frickin’ Lasers, Part II

Exactly seven days after I ordered some Orthodox crosses and a few other laser-cut bits from Archeotech, a small padded envelope arrived from the UK. Tucked into a pipe-tobacco tin were 20 of the Orthodox crosses and a pair of small rowboat kits. Amusingly, the tin still smells strongly of pipe tobacco, which combines with the faint burnt-wood smell common to laser-cut MDF in an odd but not unpleasant way.

pewpewpew
Orthodox crosses and such from Archeotech. Click for larger, as usual

Andy of Archeotech designed them in pairs out of 1mm MDF, so you glue them back-to-back to get a squarer, cleaner edge than you’d get with a single piece of 2mm MDF. This means that you get a mixed batch of fronts and backs. It’s fairly obvious which is the front and which the back with the MDF Andy uses; one side is noticeably shinier and smoother than the other.

I’ve assembled two of the crosses already, and tacked one of them onto a penny just to get it upright. Scale is provided by a Pulp Figures 28mm U.S. Navy gunboat sailor, also on a penny base.

The other part of my small Archeotech order was a pair of their little rowboat kits. The laser-cut 1mm MDF bits here provide the frame and detail bits (oars and oarlocks) for a small 2″ long rowboat; you provide a strip of light card or heavy paper about 7mm wide for the sides of the boat, as detailed in the well-illustrated instructions on Archeotech’s website. This isn’t a serious figure-carrying vessel, more a small detail piece to appear alongside a dock or as a tender, to provide nautical flavour. It’s a well-designed little kit, though, and the basic idea could easily be scaled up to make a small launch or powerboat that was capable of carrying three or four 28mm figures on small bases.

As I mentioned in my first “Frickin’ Lasers” post, Archeotech is set up to do custom/semi-custom lasercutting specifically for wargamers, and to work with wargamers on designs. I’ve certainly got some things I’ll be approaching Andy about in the future!

4Ground Cart Review

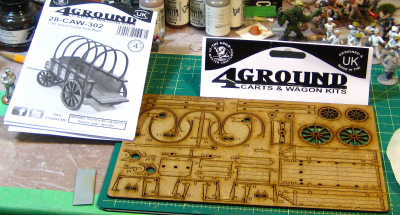
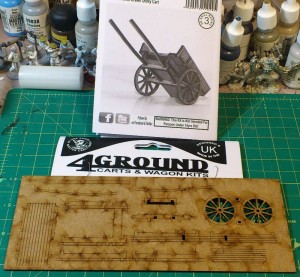
As part of an order that arrived this week from Brigade Games I picked up one of 4Ground’s neat looking laser-cut carts. This one is “28-CAW-303 C19th C Horse Drawn Utility Cart”, known on 4Ground’s own site simply as “Horse Cart”! I’ve been meaning to get some of these 4Ground carts & wagons for ages, as carts and wagons are nearly universal scenery and the pewter & resin ones out there tend to go for larger sums than I usually want to spend on waht i

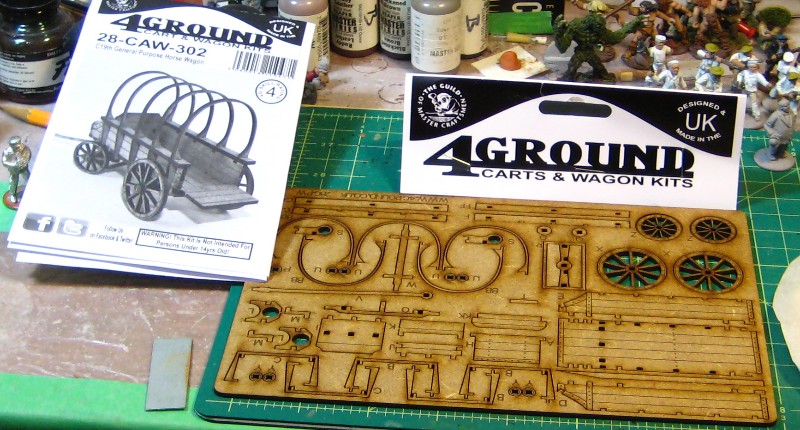
It comes as a 8’x3′ sheet of 2mm MDF, laser-engraved on both sides, with the parts laser-cut except for very tiny sprues holding them into the sheet. There’s an A4 sheet that is both package label and (black and white) instruction sheet. The instructions are all photo illustrated, over a dozen small but clear B&W photos taking you through the assembly.

cart01
Straight from the ziplock bag- instructions at top, cart on it’s MDF sheet below. Bag topper card in the middle, just because. Click for Larger.

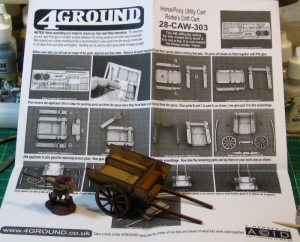
The parts are all marked by clearly engraved letters on the sheet, and the photos and text are more than clear enough to take you through the step-by-step assembly. I should note that there is a typo in the last sentence of the written instructions, though, where the letters identifying two parts are duplicated. The photos are clear enough, and by that point you’re down to so few parts it’s reasonably obvious where things are supposed to slot in.

cart02
Finished, with a 28mm Copplestone caveman for scale. Click for Larger.

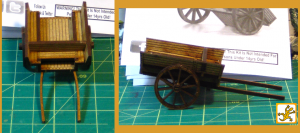
The finished cart is actually fairly substantial. The body is about 2″ long and 1.5″ wide; the whole cart from tailgate to front of the arms that hold the draft horse is 3.5″ long, 2″ wide across the wheel hubs and 1″ high when sitting level. Resting forward on the arms (what are these pieces actually called? I’m sure they have a name in a real cart…) the back end of the cart is about 1.25″ tall.

cart03
Front & side views of the cart. Click for Larger.

I’ve not yet decided how I’m going to, or even if I’m going to, paint this up. I think I’ll experiment this weekend on the offcut pieces of MDF and see how it reacts to washes and other paint. A grey wash and a bit of off-white drybrush might be all it needs to weather the wood a bit and give it a well-used appearance.

Book Review: Trench by Stephen Bull

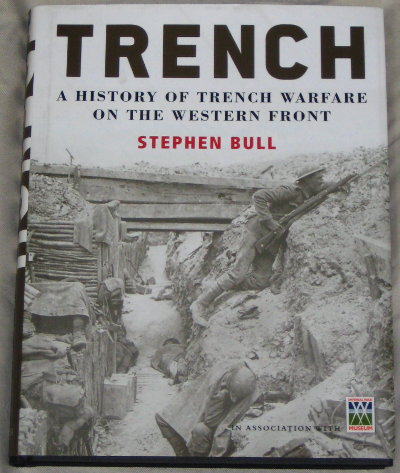
Trench: A History of Trench Warfare on the Western Front by Stephen Bull. This is a joint publication by Osprey Publishing and the Imperial War Museum, so in addition to being well written it’s lavishly illustrated, with period photographs on every page (the Imperial War Museum being famous for it’s photograph archives), map reproductions, and Osprey’s well known illustrations where needed as well.

trench_cover
The cover of Trench.

Trench is a big coffee-table style book, full colour throughout. The 270-some pages are broken up into ten chapters; the first few are a roughly chronological look at the evolution of trenches in the early part of WW1. The rest are focused on one particular aspect of trench warfare — gas, patrolling, sniping, tanks and armoured vehicles, new weaponry, trench and bunker construction, the evolution of tactics, and so on.

Stephen Bull is well known, and he does well in Trench, with a mix of his own writing, some excerpts from Osprey publications, and frequent bits of period writing, often letters or diary entries from actual front-line soldiers, including translations of French and German material. There are also frequent short articles inside the book focusing on a specific battle or engagement, with discussion of the strategic and tactical significance of this particular engagement and maps, photographs or period writing specific to that engagement.

If you’re interested in the Western Front at all, especially as a subject for wargamers, get yourself a copy of Trench. It’s an excellent mix of written and visual resources; the captions to the various photographs and other visuals are especially well done, instead of being just an afterthought.

Trench: A History of Trench Warfare on the Western Front by Stephen Bull, © 2010 Osprey Publication, in association with the Imperial War Museum.

The Shortest Possible Review: A good introduction to the Western Front of WW1, especially strong on photographs and other visuals

Incidentally, as I write this (Jan. 2013) the Imperial War Museum London is in the middle of a massive renovation/rebuilding effort, which will (among other things) give them a completely rebuilt World War One exhibit before the 100th anniversary of the start of WW1 in 2014. They have a fascinating Transforming IWM London blog with lots of articles on what’s involved in renovating a large museum.

Renedra Generics Scenery Bits

A few weeks ago, I took advantage of J & M Miniatures’ offer of free shipping for all of December to order a few bits and pieces of Renedra’s injection-molded plastic bits and pieces.

Before I move on to my quick review of the Renedra stuff, I just have to give a quick shout-out to James of J & M. I was already following his great wargaming blog Rabbits In My Basement, so when he announced he and a friend were launching a web/mail-order wargaming business I checked the site out. He’s got all sorts of good stuff from Perry, Renedra, 4Ground, Plastic Soldier Company and other companies, and is (as far as I can tell) the sole Canadian seller of some of these ranges. Given that domestic shipping is cheaper and skips the expense and irritation of occasionally being dinged by the nice folks at Canada Customs, as well as the great customer service I’ve gotten so far from James, I think it’s safe to say that a reasonable portion of my hobby budget will be heading toward Ontario in the future!

Moving on to the Renedra bits, I ordered two packs of their Mixed Tents, two packs of Barrels, and one pack of Gravestones.

renedra-jan2013
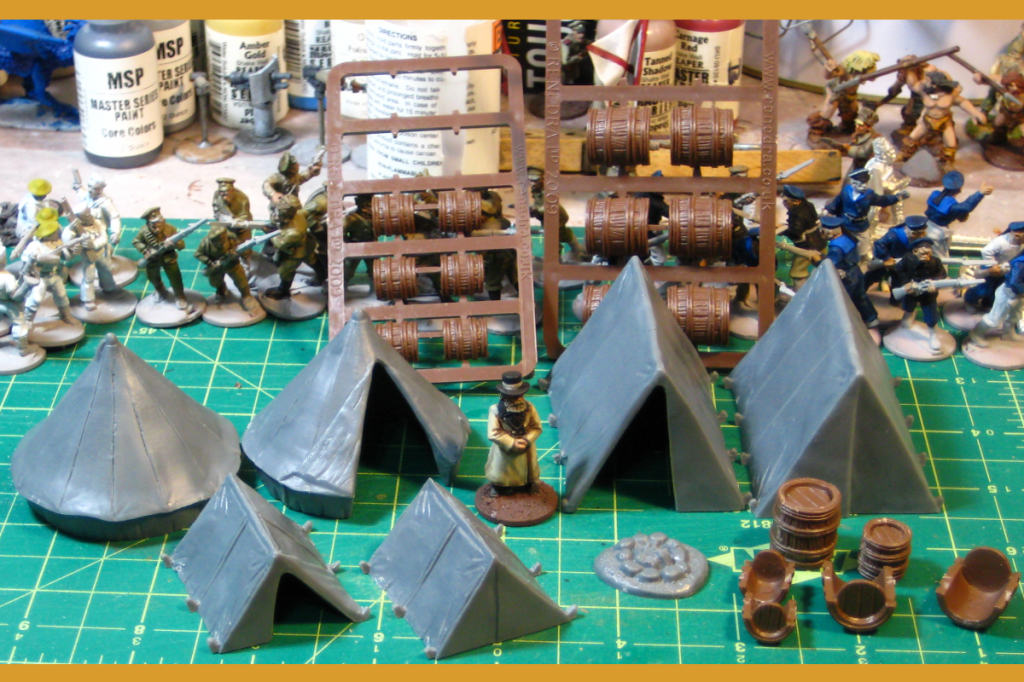
Tents and barrels – all six tents from one of the Renedra sprues, the barrels assembled and unassembled. In the background, barrel sprues, figures and clutter! The cutting matt has a one inch/half inch grid, the figure is a 28mm Brigade Games White Russian priest.

The Mixed Tent sprue has two bell tents, two large ridge tents, and two small ones, each done with one open door and one closed tent. The bell tents are 2″ diameter (55mm) and 1 5/8th” tall (40mm); the ridge tents are 2 3/8ths long (60mm), 1 3/4″ wide (45mm) and 1 1/2″ tall (37mm), while the small ridge tents are 1 1/2″ long (37mm), 1 3/8″ wide (35mm) and 7/8″ high (20mm). They’re done in a medium grey plastic, and very solid – even the tents with open doors don’t flex much if you squeeze them a bit. These are nearly universal tents; you could put them (especially the two types of ridge tent) in nearly any historical setting and they’d fit right in. The bell tent is a bit more specific to the 19th and early 20th Century, but iconic in it’s time and place, up to World War Two or so, maybe later in some areas.

Filling the gaps between the tents on these sprues you get a nice campfire piece about 3/4″ across and two camp beds or stretchers with legs to hold them off the ground. Nice little bits of camp clutter to add detail and life to a camp scene on the tabletop, although the beds are going to need bases of some sort if they’re going to survive transport and use on the table.

I don’t generally base buildings, but I’ll likely base these tents. The ones with open doors especially will look better with a base, with a bit of canvas groundsheet visible in the door – the bell tent especially will have an especially visible interior when on the table, because of it’s design.

The Renedra barrel set has two sprues in brown plastic, one with five large barrels, the other with five small ones. As you can see from the photo above, each barrel half has one round end, which minimizes the visible seams on the completed barrels. Unfortunately, the side hoops don’t quite seem to perfectly align when you glue the halves together, but the tiny mismatch is really only visible when you’re handling the barrels and will be totally invisible on the table! These are an older style of barrel, with thin doubled hoops (wood, maybe?) instead of flatter metal hoops, so they’re more suitable for pre-modern gaming, but will work OK as clutter and freight on most pre-WW2 tables.

Finally, the Gravestone set has two identical sprues in grey plastic. Each has a variety of monument stones, all about 1″ tall and 1/2″ wide. You get 16 slab stones (one broken into two pieces), 4 crosses, a small column, a slab/vault topping, five bases that can fit a variety of the slabs and crosses, and finally a raven. These are all done in the same solid, strong grey plastic the tents are made from, more than strong enough for tabletop use. Two minor things bug me about this sprue, one being that only a few of the stones have any texture or detail on the backs; the rest are just smooth plastic without even a basic stone texture. Fixable with a bit of sandpaper, but still a detail that could easily have been fixed. The other is even more minor – after getting the excellent Ainsty gravestones with their readable, laser-engraved lettering and details the stylus-pushed-through-putty squiggles of these Renedra stones lettering and details does feel like a minor step backward. This is still a great set of grave markers, enough in one set for quite a large graveyard, and the raven is a neat, whimsical (or possibly gothic and ominous) touch!

The last thing in my J & M order wasn’t scenery, and wasn’t something I’d even ordered, but was (I assume) thrown in as a thank you gift from J & M – a very nice large suede dice bag, about 7″ wide and 9″ tall and bright red. My own dice are in a bag I hand-sewed myself nearly twenty years ago in junior high, but I think I’ll press the new bag into service to carry the collection of card decks, markers, tape measures and random gaming accessories that normally slops around loose in my backpack. It’s large enough for a couple of pencils, too.

An Ainsty Resin Order

In some ways, this smallish order of Ainsty resin scenery bits has been a decade in the making; I discovered Ainsty sometime in the very late 1990s or early 2000s, and even though I didn’t (at that point) do much in the way of skirmish gaming in 25/28mm, the huge variety of neat stuff Ainsty made stuck with me! So back in November I finally got around to throwing a bit of money Ainsty’s way, on a mix of scenic details that will see service in various pulp skirmish adventures, Russian Civil War battles, and who knows where else.

Here’s a quick late-night snapshot of what I got:

Ainsty resin order, Dec. 2012
Ainsty resin laid out for review. Click for full size.

General sculpting and casting quality is good and clean, although a number of the pieces have a slightly slick, greasy feel to the touch, almost certainly from the mold release used. A good scrub with dish soap and warm water should take care of that, and it should also help get rid of the last of the faint but definite smell of outgassing resin I got when I first unpacked the pieces from the small plastic bags each set was carefully packed in.

Clockwise from top left, here’s a quick review of what I got.

Top left is Trade Goods J Stacked Sacks, three each of four different roughly square sets of stacked sacks. They’re all about 1″ a side at the base, and the tallest stacks are just over 1″ tall. They’ll provide useful cover for docks and warehouses, although a bit more fabric texture on the sacks would have been nice.

Moving clockwise, I got two sets of Trade Goods B Tea Chests. This is described as 18 chests, but it’s really four stacks and three single tea chests. Again, useful cover, and like sacks, the sort of terrain bit that you could build yourself, but which can be fiddly and frustrating to mass-produce at home. I could definitely see throwing another set or two of these into any future Ainsty order; you can never have enough crates cluttering up warehouses in pulp games, especially if they’re in precarious, badly stacked piles just waiting to topple onto someone!

Bottom right we have Trade Goods L Mixed Piles x 4, which is a neat little set of crates, bales, barrels and sacks, up to about 3/4″ tall. This is pretty close to “universal cargo” for anytime from the early-mid 20th Century back at least four or five centuries. Each of the four piles is different, with two of mixed crates, sacks and other baggage, one pile of three canvas bales and one of three small-to-medium wooden barrels.

Moving clockwise once more to bottom centre, we have Mixed Memorials x4, which is a nice mix-and-match set of four bases and four tops for memorials or possibly fancy gateposts. The four base pieces are each different, with two of them having very fine (probably laser-etched?) lettering on the molded plaques on one face. The four top pieces are also each different, with two slightly different obelisk toppers and two lower pieces. One of the bases arrived with a minor chip off one corner, but given that full size monuments out in the real world get dings and chips too, I’m not going to worry about it. The tops of all the bases are finished, so you could even leave the toppers off for further variety. One of the low toppers has been sanded at a bit of a rakish angle on it’s bottom suface, but a few passes on sandpaper will correct that enough to be invisible.

At the centre of the group we have Upright Headstones x8, which are by far the most detailed pieces in my order. Each of the eight headstones is unique, and I’m almost certain they’ve been laser etched, as the lettering is actually completely readable despite being under 2mm tall. The headstones commemorate Kurt Cobain, Bella Lugosi, Gandhi, and others, including two with “A Soldier of the Great War/Known Unto God” on them, which is the wording used for unidentified soldiers buried in the Commonwealth Wargraves Commission’s cemeteries from World War One. My only minor complaint is the massive size of these headstones; the tallest is a full inch tall, or nearly shoulder height on a standing 28mm figure. There certainly are headstones this massive in real life, but memorial stones about 2/3rds this size seem a lot more common in most cemeteries I’ve seen. One of the stones had a tiny casting flaw in each side, but those will be easy to file into minor damage to the stone and won’t be an issue.

Finally, bottom left we have Trade Goods K Rifle Cases x5, with two closed and three open wooden crates holding rifles. One of the seperate crate lids has a rifle resting on it; the open crates show one or two rifles each and the greased cloth that would have been used as packing to preserve and secure the rifles. Everyone always needs more guns (well, in games, anyway), so I suspect these are going to get a lot of use in all sorts of scenarios, as loot or as objective markers of sorts. The detail is very nice on this set, with good wood grain in the crates and enough detail in the rifles to make it obvious what they are. These crates would be suitable from about the mid-19th Century up to modern day, depending on where your adventure was set.

I will definitely put another order in to Ainsty at least once in 2013, after I get this current order all painted up. Shipping time from the UK to Canada was fast, although Ainsty obviously does a lot of it’s casting to order, as there was a delay of about three weeks (November 17th to December 10th) between placement and shipping of my order. The usual fast Royal Mail-Canada Post connection worked nicely in my favour, as it usually does, though, so overall order time was entirely reasonable.

More (with better photos!) as I paint up and finish all the various bits I’ve just acquired!

(oh, and in honour of this being published on December 21st 2012: If you can read this, congratulations, the Mayan Apocalypse never happened. What a surprise…)