Category Archives: Painting

Posts, articles and links mostly concerning the painting of miniatures. Lead Painters League posts, links to resources and inspiration elsewhere, and such.

A SPAD for the Whites, Part Two

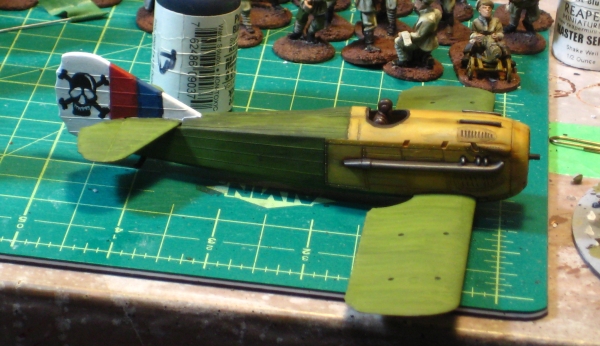
Inspired by this image from Wings Palette, I decided to give a bit of freehand a try.

Via Wings Palette, a Russian SPAD 7 with a nifty skull-and-bones squadron insignia on the rudder.

My version:

spad4
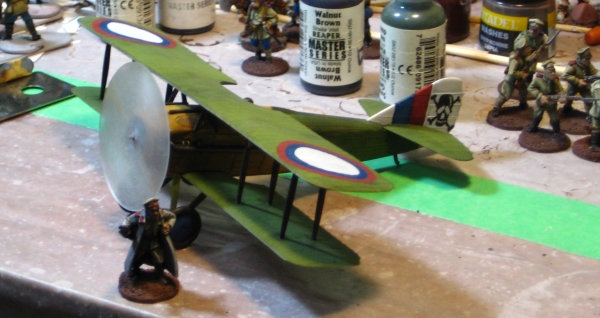
Skull and crossbones insignia on the rudder, and weathering on the fuselage.

There’s a (nearly) matching skull on the other side of the rudder, of course, although this one turned out better so I’ll have to always remember to photograph this plane heading right! I also used thinned paint and washes to dirty up the fuselage, especially around the nose where the engine and guns make a mess.

I’ve also put a half-inch wood screw up into the belly of the plane, right behind the main landing gear, to serve as an attachment point for a flying stand. There’s two layers of plastic there, from the wing and the body, and the screw seems solid so far, especially with a drop of superglue to lock it in place. I had thought about using a block of wood or blob of milliput inside the fuselage before I assembled it to provide a solid attachment point, but got impatient to assemble the plane! Hopefully the screw will be solid enough as-is, worst case scenario I can always carve a hole in the belly of the plane, stuff the hole with milliput and sculpt a patch.

Up next, one last touchup of the roundels and other paint, then final assembly: cursing the upper wing into place, adding the landing gear and prop disc. That’ll be it, then it’s back to my neglected horde of White & Red infantry who need painting up!

A SPAD for the Whites, Part One

I should be working on finishing White Russian infantry, but I’ve allowed myself to become distracted by aircraft, specifically the SPAD 13 I wrote about a few days ago, earmarked to support my White Russian forces.

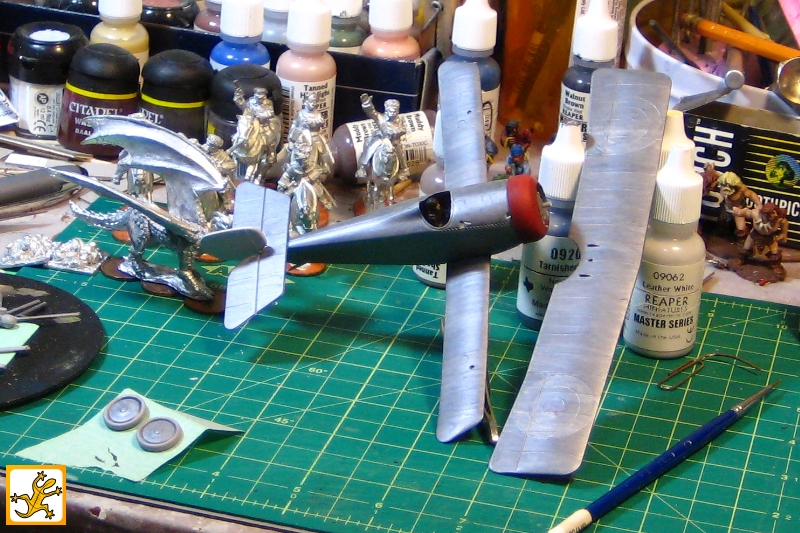
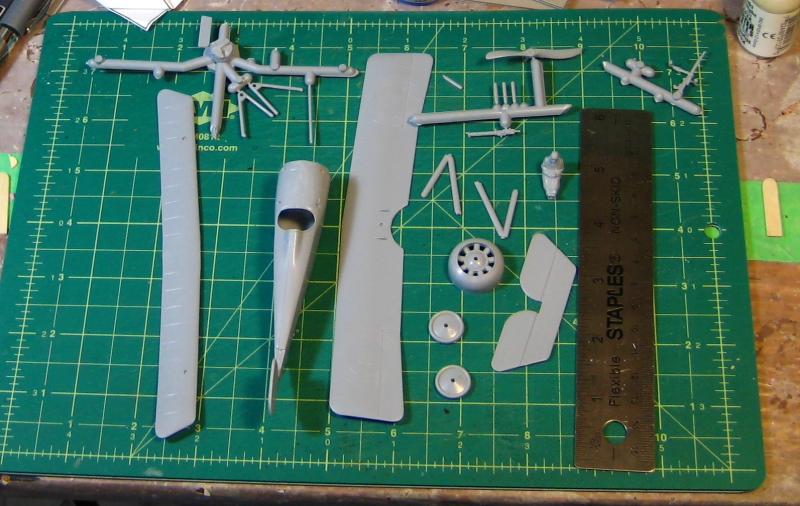
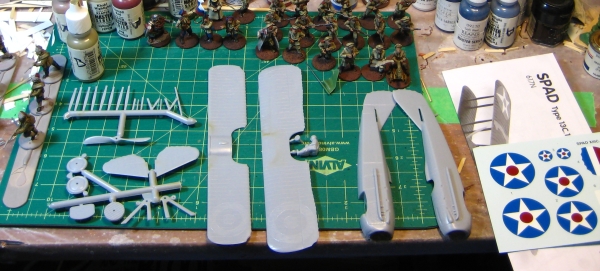
Here’s the SPAD all laid out on my workbench. As I mentioned in the first post, these are incredibly basic kits. The SPAD has 26 parts, at least one third of which are wing struts!

spad1
The Testors Classics SPAD 13 kit laid out. The grid on the cutting mat is quarter inch.

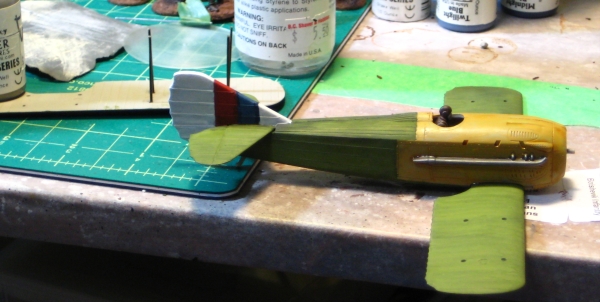
The kit needed minimal cleanup as far as flash, molding gates and such went, so after a quick shot of grey primer it was off to the paint racks. I used multiple coats of well-thinned Reaper Master Series acrylics, and always brushed the same way, from the front of the plane toward the back. This gave the body and especially the wings a nice weathered, mottled appearance without having to do a lot of actual weathering. The wings are Swamp Green; the front of the fuselage is Tanned Leather with a wash of GW Gryphonne Sepia; the undersides of both wings are Polished Bone, with a drop of Khaki Shadow in the base coat. The white is Leather White highlighted with Pure White; the red Clotted Red highlighted with Carnage Red and washed with GW Baal Red; the blue is Old Navy highlighted with Heather Blue.

spad2
The SPAD with basic colours completed.

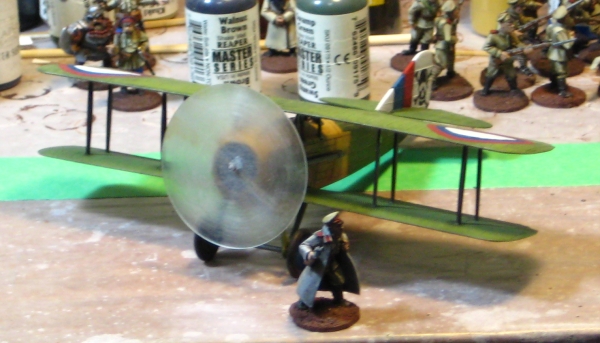
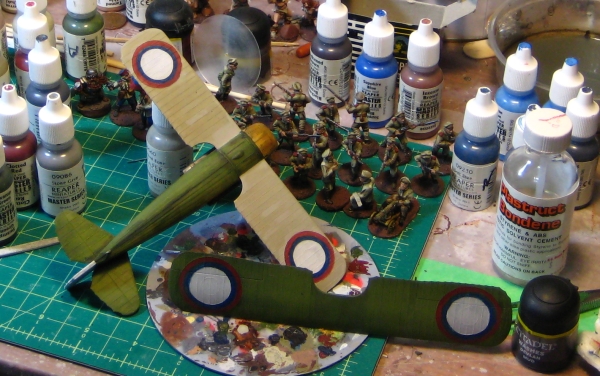
This kit actually has roundels (RAF or French) molded right into the skin of the wings, so doing Russian roundels as used by the Imperial Russian Air Service pre-Revolution and the Whites after was easier than I’d thought it would be. The photo below is the roundels after only the first coat of paint, minimal cleanup and no highlighting.

spad3
The Russian roundels – bottom of the lower wing, top of the upper wing.

In the background of the last photo, you can see the clear plastic disc I cut to replace the kit’s prop with a “spinning” prop. I put the disc down on a sheet of 600 grit finishing paper and rotated it around a few times by hand, so it has fairly convincing rotating look to it. It’ll also be a lot stronger than the kit prop.

More to come, I’ve done some freehand insignia on the rudder of the SPAD and of course there’s final assembly of the beast!

Flags & Banners from Greenstuff

This is not really a new idea, but it’s one that I only twigged to in mid-2011, so it’s fairly new to me. The idea of using greenstuff for flags and banners came to me one evening as I was experimenting with a small blob of greenstuff putty. I sculpt about as well as whales fly, and I find the rubbery used-bubble-gum consistency of greenstuff quite frustrating to actually do anything with (the clay-like feel of Milliputt is far more agreeable) so I was messing around wondering what I could do with the 36″ roll of greenstuff lurking in one corner of my desk.

Pressed out very thin, I discovered greenstuff is actually strong enough to hold itself up even before it cures. Once it’s cured it’s still moderately flexible, with a springiness to it. You can actually gently press folds flat to paint them, which is a bonus. It takes three dimensional folds and ripples better than paper, and unlike lead foil it won’t crease easily. A quick shot of primer and it paints up nicely.

The excellent Brushthralls website has a great Greenstuff Gizmos article with more detail, including the use of light vegetable oil to keep greenstuff from sticking to things, which I must admit I hadn’t heard of before. (link dead, alas, the entire Brushthralls site is no more – Sept 2020)

gs_flags
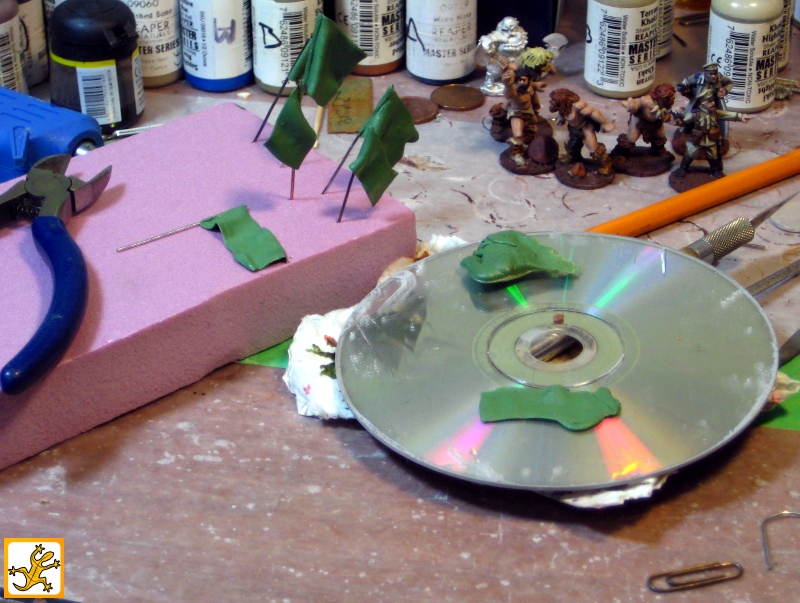
Greenstuff flags in progress. Click for full size.

Above, my greenstuff flags in progress. Squash greenstuff into thin sheets on the back of a CD, cut flag-shapes with a knife, wrap around lengths of wire donated by paperclips, gently prod some folds and ripples in with a sculpting tool or just a fingertip, stab into a scrap of foam to cure. Done, pretty much.

Incidentally, I love big paperclips as a source of wire. Not as strong as piano wire, true, but far, far easier to work with and more than strong enough for most modelling purposes.

So, there you have it, flexible, good looking flags from greenstuff, and a use for greenstuff even a non-sculptor like me can manage!

Minimal Maxim Basing

I’ve long been a fan of putting figures on the smallest bases they’ll fit on and that’ll keep them upright, when you’re doing individual bases for skirmish gaming.

Almost all of my 28mm pulp and historical figures are based on Canadian pennies, which are about 18mm across. You can’t beat the cost, they’re big enough for nearly any human-sized figure provided you don’t mind the occasional toe or heel sticking over the edge a few millimetres, and the small size makes it far, far easier to get your figures into scenery, especially buildings and larger vehicles like ships.

But what of guns, and larger-than-human figures?

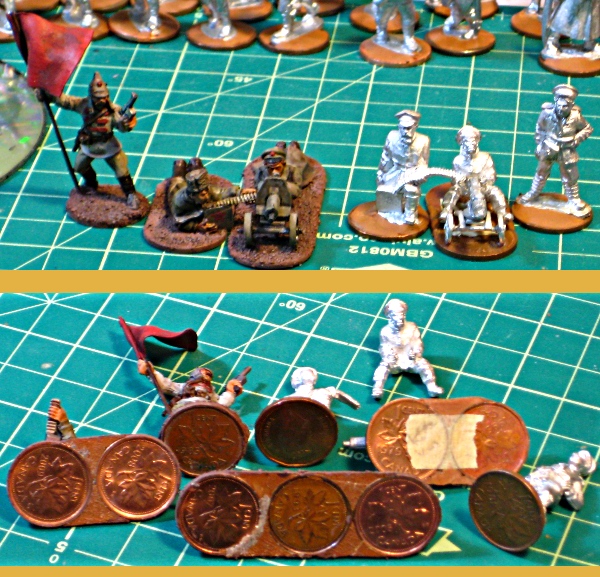
Pennies and Milliput epoxy putty again there too. Why change what works? I’ve used that method before for monsters (werewolves and Yeti, just for two examples) and decided to stick with it when basing up the Bolshevik Maxim HMG from Copplestone. With the gunner prone behind the weapon, the whole thing would have required a base of about 60mm diameter to get him to fit — see above about wanting minimal footprint bases!

Pictures being worth a thousand words and such, see below for the Bolshevik and White Russian Maxim guns.

Minimal Maxim bases – pennies and Milliput.

The Copplestone Bolshie Maxim (on the left) has the gunner and gun on three pennies in line; the prone loader takes up two and is arranged on one edge of his base so he can reach the gun. On the right, the Brigade Games White Russian Maxim with seated gunner only needs two pennies; the kneeling loader is on one, again arranged to one side so he can reach his gun. Having the loaders and other crew on separate bases also makes casualty marking dead simple, as a bonus.

Incidentally, Copplestone and Brigade Games RCW figures work perfectly together, no size mismatch at all. I have a longer post comparing the two lines in the works — stay tuned.

A Few Painting Tutorials

Just a pair of painting tutorials today, linked to mostly so I can find them again when I need to refer to them!

Coll Mini Or Not (CMON) has a huge list of tutorials, contributed by users so they’re of variable quality and usefulness. One of the best is this well-illustrated look at ethnic skintones. Painting skin is something I’ve never found easy to do well, and even those I don’t use the Vallejo paints referred to in this article I still found it valuable. The index to their Articles section is here, a whole mix of stuff well worth checking out.

Games Workshop have a great horse painting tutorial, with a good primer on horse anatomy and colours as well as painting tips. I’m no fan of GW’s business practices, nor of most of their sculpts, but their technique has always been top-notch and they write a good tutorial, so credit where due. They also completely rebuild their own website every year or so, so this link might not be as stable as it ought to be…

The Reds Are Coming!

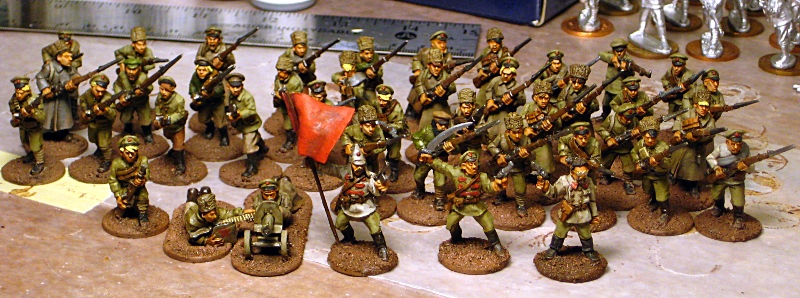
There’s 43 Bolsheviks off my painting table and ready for action, finally! One Maxim MG crew, some officers and NCOs and a whole lot of ragged, barely uniformed riflemen. Almost entirely Copplestone figures, and I mixed freely from the regular rifles, greatcoated rifles and the partisan packs to get a suitable ragged look. I had just started painting (and thinking about organization) when this marvelous Lead Adventure thread opened, with all sorts of great contemporary photographs of both Red and White uniforms.

Red Horde!
A Russian Civil War Bolshevik infantry force, finally marching off the painting table

24 more Bolshies to finish basing and then paint, at which point it’s on to the 60-some White Russians that are in the mail to me as I write this. All that painting will give me the core of two good-sized RCW infantry forces, nominally configured as platoon-sized forces for Through the Mud and the Blood but obviously configurable for other games as needed.

The Russian Civil War has well and truly taken over my painting schedule, and starting in November I should even be able to get some games in again, as a screwy work schedule settles somewhat and once again frees up my Sundays for gaming, which is of course the best possible use of that day. I’ll probably try to push hard to get enough Whites finished for a first Mud & Blood RCW outing by the last Sunday in November… we shall see!

(More photos of the Reds in the next few days, as daylight and weather allows…)

Pulpy Painting & Prep

I generally do figure prep (taking off moldlines and flash) and basic basing in fairly large batches, prime the whole batch, then tuck most of them away and bring them back out 5-10 at a time for painting.

It’s a good system for me; it gets the gruntwork of cleaning and prepping done efficiently, but avoids the “Primered Legions” paralysis I get from having hordes of unpainted figures staring at me from the corners of my painting bench. Instead they’re out of sight in in a spare figure case, to be brought out in small enough batches to actually paint.

This evening’s batch is pretty close to typical, and an amusing snapshot of the breadth of my current interests. Continue reading Pulpy Painting & Prep

LPL5 Week 10: Gunga Din (1939)

The final round of LAF’s Lead Painters League 5 was another bonus round, this one “A Scene From The Movies”, with bonus points for two teams and a vehicle or scenery piece representing a scene from a well-known movie.

I thought about doing The Sand Pebbles with American sailors and Chinese mobs, but didn’t get around to ordering Chinese figures in time (I already have appropriate American sailors in the lead mountain), then Bob Murch of Pulp Figures showed up at Trumpeter Salute back at the beginning of April with some unreleased Thugee strangler figures, and I knew I had to do Gunga Din, an old black and white movie I’ve see a few times and enjoyed!

Even better, I planned on painting up another few WW1/Interwar British riflemen and running them as opponents; the actual movie is set in the late 1800s but I figured I could get away with using slightly later pulp-era Brits!

In the event, both the opponents and the new bonus scenery piece never got done, but I did get the very nice Thugee stranglers painted and shown, and they quite handily won their Round 10 outing against some Roman gladiators inspired by the movie Maximus.

lpl5r10
My Lead Painters League 5 Round 10 entry, inspired by the 1939 movie Gunga Din. Figures by Pulp Figures. As always, click for full size.

I have to wonder how much sheer novelty factor added to my vote count — there are a grand total, to my knowledge, of perhaps 4 packs of these Thugee stranglers out in the wild, and Pulp Figures is a well-known enough company that most of the time Mr. Murch’s figures are ubiquitous. Being able to show off brand-new figures that have literally never been seen elsewhere (not even the Pulp Figures website has the full set of 5!) has to have been worth a few votes!

The original Gunga Din theatrical trailer from 1939 is up on Youtube:

Round 10 brings LPL5 to an end! I managed 8 new teams over 10 rounds, 3 wins, and a final placing of 55th out of 72nd, which is roughly where I figured I’d end up and roughly where I placed compared to the overall field back in LPL3 last time I entered. More importantly, I have a whole bunch of freshly painted figures crowding the edges of my painting desk now, quite a few more than I’d have had without the prodding of LPL5 driving my brush!

I’ll do a proper LPL5 wrapup gallery post later this week.

LPL5 Week 9: The Horse Again, I’m Afraid

Week 9? There was no Week 9. Well, OK, there was, but it involved me running my ECW Parliamentarian Horse again, and them getting beaten. Again.

However, I still like the models and the paintjob I managed on them, so here they are again for everyone to admire:

lpl5r8
For God And Parliament! 28mm English Civil War horse charge down a country lane. As always, click for full size.

In better news, LPL5’s final, ultimate round, Round 10, with the bonus theme of “A Scene from the Movies” is running right now. All sorts of great stuff, including a bonus-worthy set of miniatures from me that I really like, and that other people do too, judging by the voting!