All posts by Brian Burger

Started this site way, way back in November 1998, when the web was young. It's still here, and so am I.

Off to Trumpeter Salute 2012!

Off to Vancouver Friday morning for two and a half days of miniature gaming goodness at Trumpeter Salute 2012!

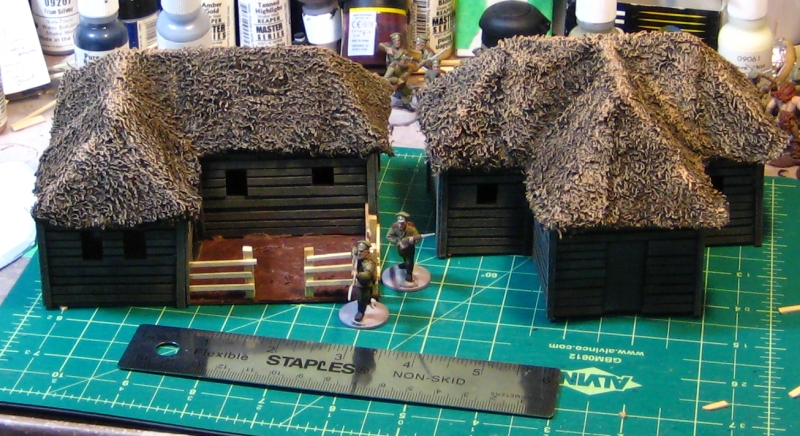
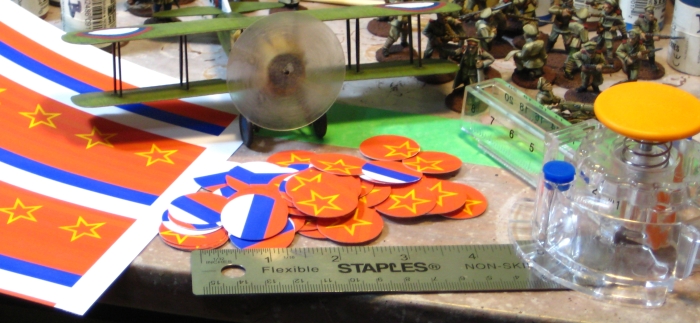
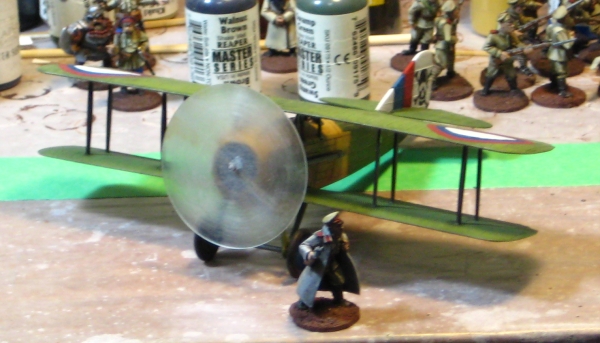
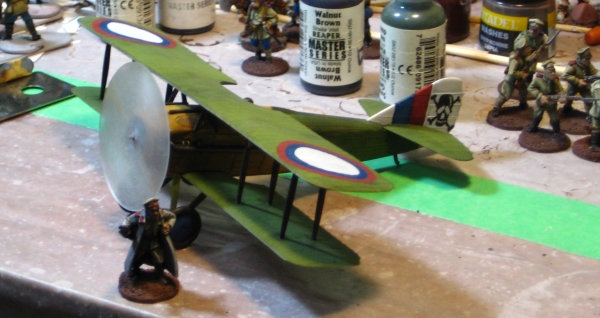
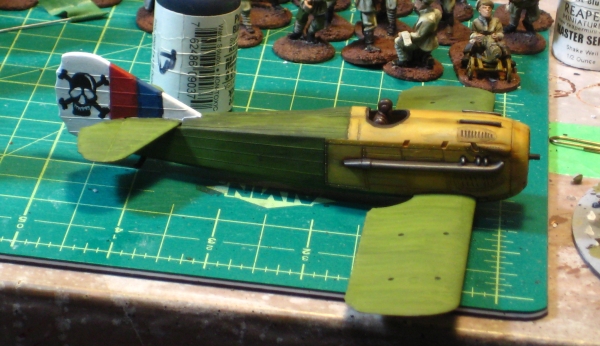
The Russian Civil War figures and scenery I needed for the game I’m running Saturday have all come together nicely, and I’ve got everything packed away for transport. Clothes, toothbrush, all that boring stuff too, with luck…

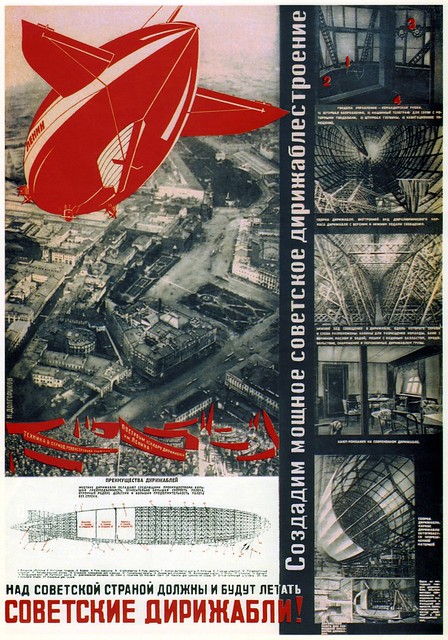
I’ve had a quick look at the convention schedule, but except for my own game, I don’t plan ahead too far at Trumpeter. There’s always good stuff running, with some reliable standbys like the near-constant 1:72nd Canvas Eagles WW1 air games to fall back on if nothing else grabs my eye. That said, I always go to conventions looking to try new gaming systems, new rules, new eras, new genres and to play with different people than the usual crowd I game with all the time!

I’ve got the WordPress Mobile app installed on my Android smartphone, so there might even be some short updates here over the weekend before the big post-Trumpeter posts sometime early next week. Hopefully I remember to take photos, even.

If you’re going to be at Trumpeter, say hi if you see me. I usually scribble “Wirelizard” on my nametag these days, because that’s become my default username online, and I even remembered to make a sticker version of my orange lizard logo (see the right-hand side of the banner up above this post) to stick to one edge of my nametag. Or just look for the Russian Civil War game in the Saturday afternoon slot and come join in! 2PM (1400) on Saturday afternoon!

Red Airships!

I am, as mentioned in the last post, neck-deep in prep for my Russian Civil War game less than a week away at Trumpeter Salute 2012. Nevertheless, something near and dear to the very core of the Warbard’s raison d’etre needs to be linked to…

Via the excellent Dieselpunk, who in turn got it from kitchener.lord’s spectacular Flickr stream, this Red Airships photomontage poster:

Nikolai Dolgorukov. Soviet Airships. 1932

I’ve long been a fan of pre-WW2 Russian design; there were some very talented people doing great stuff even in terrible conditions.

Anyway, back to final drafts of initiative cards, then painting the last 16 White Russian infantry for the game!

New Russian Buildings

I’ve been house- and cat-sitting for a relative in town the last ten days, so not a lot of action here on the blog, but I did take advantage of having extra space available to get a bunch of wargaming scenery built.

The most interesting pieces are a pair of houses for my growing Russian hamlet. The first is T-shaped, the second L-shaped with a fenced garden/yard area. Both have thatch roofs from towel; building and covering the more complex roof shapes was an interesting challenge. I even got some step-by-step photographs of the roof-building and thatching process, so expect an illustrated tutorial at some point in April here on the Warbard!

rusbldg_22Mar
A pair of new, larger Russian-style buildings for our 28mm RCW games. Click for larger.

Both buildings have a 5″x4″ footprint and are about 3.5″ to the peaks of the double-hipped roofs. Unlike my earlier church, these two have doors or windows on all sides, so they’re potentially tactically useful instead of just being a line-of-sight blocker like the church.

In addition to the two buildings, I built two large hills (which can butt against each other to form one long ridge) and a smaller hill. I’ve needed more hills for ages, so it was nice to get these made finally. No photos of them, I’m afraid, as they’re buried in the bottom of one of my scenery boxes at present.

I”e also got about about ten new pieces of scatter terrain in progress, not all of which will be ready for my Trumpeter Salute RCW game in ten days, but I hope some of it will be. Photos of that as time allows in the countdown to Trumpeter!

Reds, Squirrels, Whites and Others

We had an excellent Russian Civil War game using the TFL Mud & Blood rules Sunday afternoon. More people than I’ve seen in a while up at our gaming club’s Sunday meet but for a lot of folks it was a day to socialize, do a bit of painting or figure prep or similar – the RCW game would up being the only full game running.

Red defending the village at the start

I acted as referee/gamemaster, and three of the four players had never played Mud & Blood before. We still finished the game in under three hours of play and everyone apparently had a good time, so that was all good.

Whites advance
Whites advance

The scenario was fairly straightforward, with a disorganized Red force defending the outskirts of a small village from a slightly larger but much better led force of White Russians. Continue reading Reds, Squirrels, Whites and Others

Spectacular Zeppelin Model

Bit of a quiet week here on the Warbard. I’ve been burning up all my available hobby time painting Russian Civil War figures. There’s two dozen Cossack infantry finished, another three dozen regular White riflemen nearly finished, twenty Red infantry in progress, and a new unit of ten Red sailors well underway. Yes, if you total that up, it’s nearly 100 figures, all 28mm. I’ve been a busy chap. There’s six or eight half-written articles in the Drafts queue here on the Warbard, but I haven’t touched any of them in days!

Nevertheless, a short Saturday evening diversion from the painting table… we are well known to love zeppelins here. We have to bow down to the gentleman featured in this Popular Science article, though. (via Bayou Renaissance Man, who has more photos)

Even better? By my quick admittedly rough calculations, a 20ft-long model of the USS Macon is roughly 1:56th scale, ie 28mm… the gentleman in California has created a wargaming model, possibly without knowing it!

Tomorrow we game the Russian Civil War again using the Mud & Blood rules, photos and a game report tomorrow evening!

Zeppelins From Foam

This has minimal bearing on the 28mm pulp gaming we usually do that might involve a zeppelin, but it’s such a cool and masterful technique I have to share: Creating Zeppelin bodies with foam insulation.

Basically, take long billets of foam, run a hot wire knife across a profile, and rotate the billet to create that distinctive “faceted” look of a Zepp body. Very cool.

Of course, I once calculated a 1/56 (28mm) scale of Graf Zeppelin would be about 19 feet long (nearly six metres!), so doing the gondola and a bit of the body in 28mm is (marginally!) saner. Only marginally, mind you. The small-scale foam zepps in the first link are a lot smaller and saner; they’re still about 3ft long, though.

If you are minded to do some zeppelin construction, in whatever scale, you could do worse than following the useful links from this Propnomicon posting called “Zeppelin Goldmine“, which has links to high-quality scans of a book of speculative 1920s designs for a Graf Zepp-sized trans-Atlantic zeppelin. The gondolas of those look fairly buildable as 28mm skirmish terrain, actually. One of these days…

Autogyros, Pulptastic Cars and Such

Via the excellent x planes tumbblog, this rare cabin-equipped autogyro, the Pitcairn PA-19:

The PA-19 Autogyro, early 1930s. Most autogyros were open cockpit, so this cabin-class 'gyro is a rarity.

… and via the equally excellent Dieselpunk, this awesomely pulpy 1938 one-off Hispano Suiza Dubonnet Xenia 1.

1938 Hispano Suiza Dubonnet Xenia 1

(Dieselpunk had in turn snagged it from kitchener.lord’s Flickr stream – click the image above to go there, lots more great period images there!)

A few things to brighten your Sunday!

Fiskars Circle Cutter Review, and Markers for M&B

Back one of the before-Christmas sales, I picked up a Fiskars circle cutter on deep discount from one of the local art supply stores. It’s been on my toys-I-want list for ages, and a chance to get it at 40% was too good to pass up.

It’s proven to be a useful gadget, although with some limitations. It will cut paper, light card and styrene up to about .020″ or .030″ thickness no problem; anything heavier than that it’ll score but not cut. With thicker styrene you can score then clean up with a file or sandpaper later, but this obviously means cutting heavier card is out.

Exact alignment of the circle to be cut out can be a bit tricky, but the central rubber “foot” does pull off to reveal a more compass-like needle foot which makes alignment easier. Of course, I only realized the needle foot option existed a few days ago, when I finally got around to reading the “Instructions and Tips” PDF from Fiskar’s site. Amazing what you learn when you read the instructions, isn’t it?

The other work-around for imprecise cutting is to design graphics that don’t have to be cut terribly precisely, of course. That’s what I did when I laid out the graphics for a batch of 1″ circular markers for use in our Russian Civil War games.

fiskarcutter
On the right, the Fiskars Circle Cutter. Central, the prop disc and M&B markers cut with it. On the left, the sheet of markers I made in Inkscape.

The markers will mostly be used for showing which Big Men & units have activated in any given turn, as we noticed it can be easy to loose track of which units have been activated with multiple Big Men running around in Through The Mud & The Blood. They can also be used to mark things like sustained fire lanes for machine guns or similar, of course.

On the left of the photo, notice the sheet I laid out in Inkscape for the markers; except for the star the solid colours are fairly forgiving of cutter placement. A few of the Red star markers have had their tips clipped by the cutter, but they’re still obviously Red Army stars, so I’m not fussed. Now that I’ve discovered the cutter’s needle foot option, I should be able to cut out the remaining marker discs perfectly.

The SPAD’s prop disc was cut from leftover heavy clear plastic from a blister pack, then put down on a sheet of 600 grit sandpaper and spun by hand to get the hint of motion blur in it. I wound up taping the piece of plastic to my cutting mat, then the cutter worked nicely on it.

So, the Fiskars Circle Cutter. A useful piece of kit, within it’s limits. I’m sure I’ll get years of use out of it — but wait until you find one on sale before getting it!

A SPAD for the Whites, Part Three

Finally swore the upper wing into place this evening. It’s been years since I built a biplane model, I’d forgotten what a total bugger the struts and upper wing can be. The SPAD 13 as 12 struts, only two of which are especially solidly mounted when it comes to getting the upper wing positioned, the rest of which wobble entertainingly.

Even now the upper wing is very slightly skew and I have doubts about it’s long-term stability when the plane is in wargaming use, but we shall see. After getting the upper wing fixed, the landing gear and prop disc were painless.

spad5
The White Russian SPAD completely assembled, needing only some touchup painting here and there.

Major Vodcanovitch of the White Russian army provides scale; he’s a 28mm Brigade Games officer.

spad6
The White Russian SPAD from the front.

That’s the SPAD largely finished, except for a bit of touchup painting and two struts I need to reinforce to help solidify the upper wing.

Now, back to finishing that crowd of White Russian riflemen and officers you see cluttering the background of the SPAD photos!

A SPAD for the Whites, Part Two

Inspired by this image from Wings Palette, I decided to give a bit of freehand a try.

Via Wings Palette, a Russian SPAD 7 with a nifty skull-and-bones squadron insignia on the rudder.

My version:

spad4
Skull and crossbones insignia on the rudder, and weathering on the fuselage.

There’s a (nearly) matching skull on the other side of the rudder, of course, although this one turned out better so I’ll have to always remember to photograph this plane heading right! I also used thinned paint and washes to dirty up the fuselage, especially around the nose where the engine and guns make a mess.

I’ve also put a half-inch wood screw up into the belly of the plane, right behind the main landing gear, to serve as an attachment point for a flying stand. There’s two layers of plastic there, from the wing and the body, and the screw seems solid so far, especially with a drop of superglue to lock it in place. I had thought about using a block of wood or blob of milliput inside the fuselage before I assembled it to provide a solid attachment point, but got impatient to assemble the plane! Hopefully the screw will be solid enough as-is, worst case scenario I can always carve a hole in the belly of the plane, stuff the hole with milliput and sculpt a patch.

Up next, one last touchup of the roundels and other paint, then final assembly: cursing the upper wing into place, adding the landing gear and prop disc. That’ll be it, then it’s back to my neglected horde of White & Red infantry who need painting up!